Leaderboard


Popular Content
Showing content with the highest reputation on 11/24/18 in all areas
-
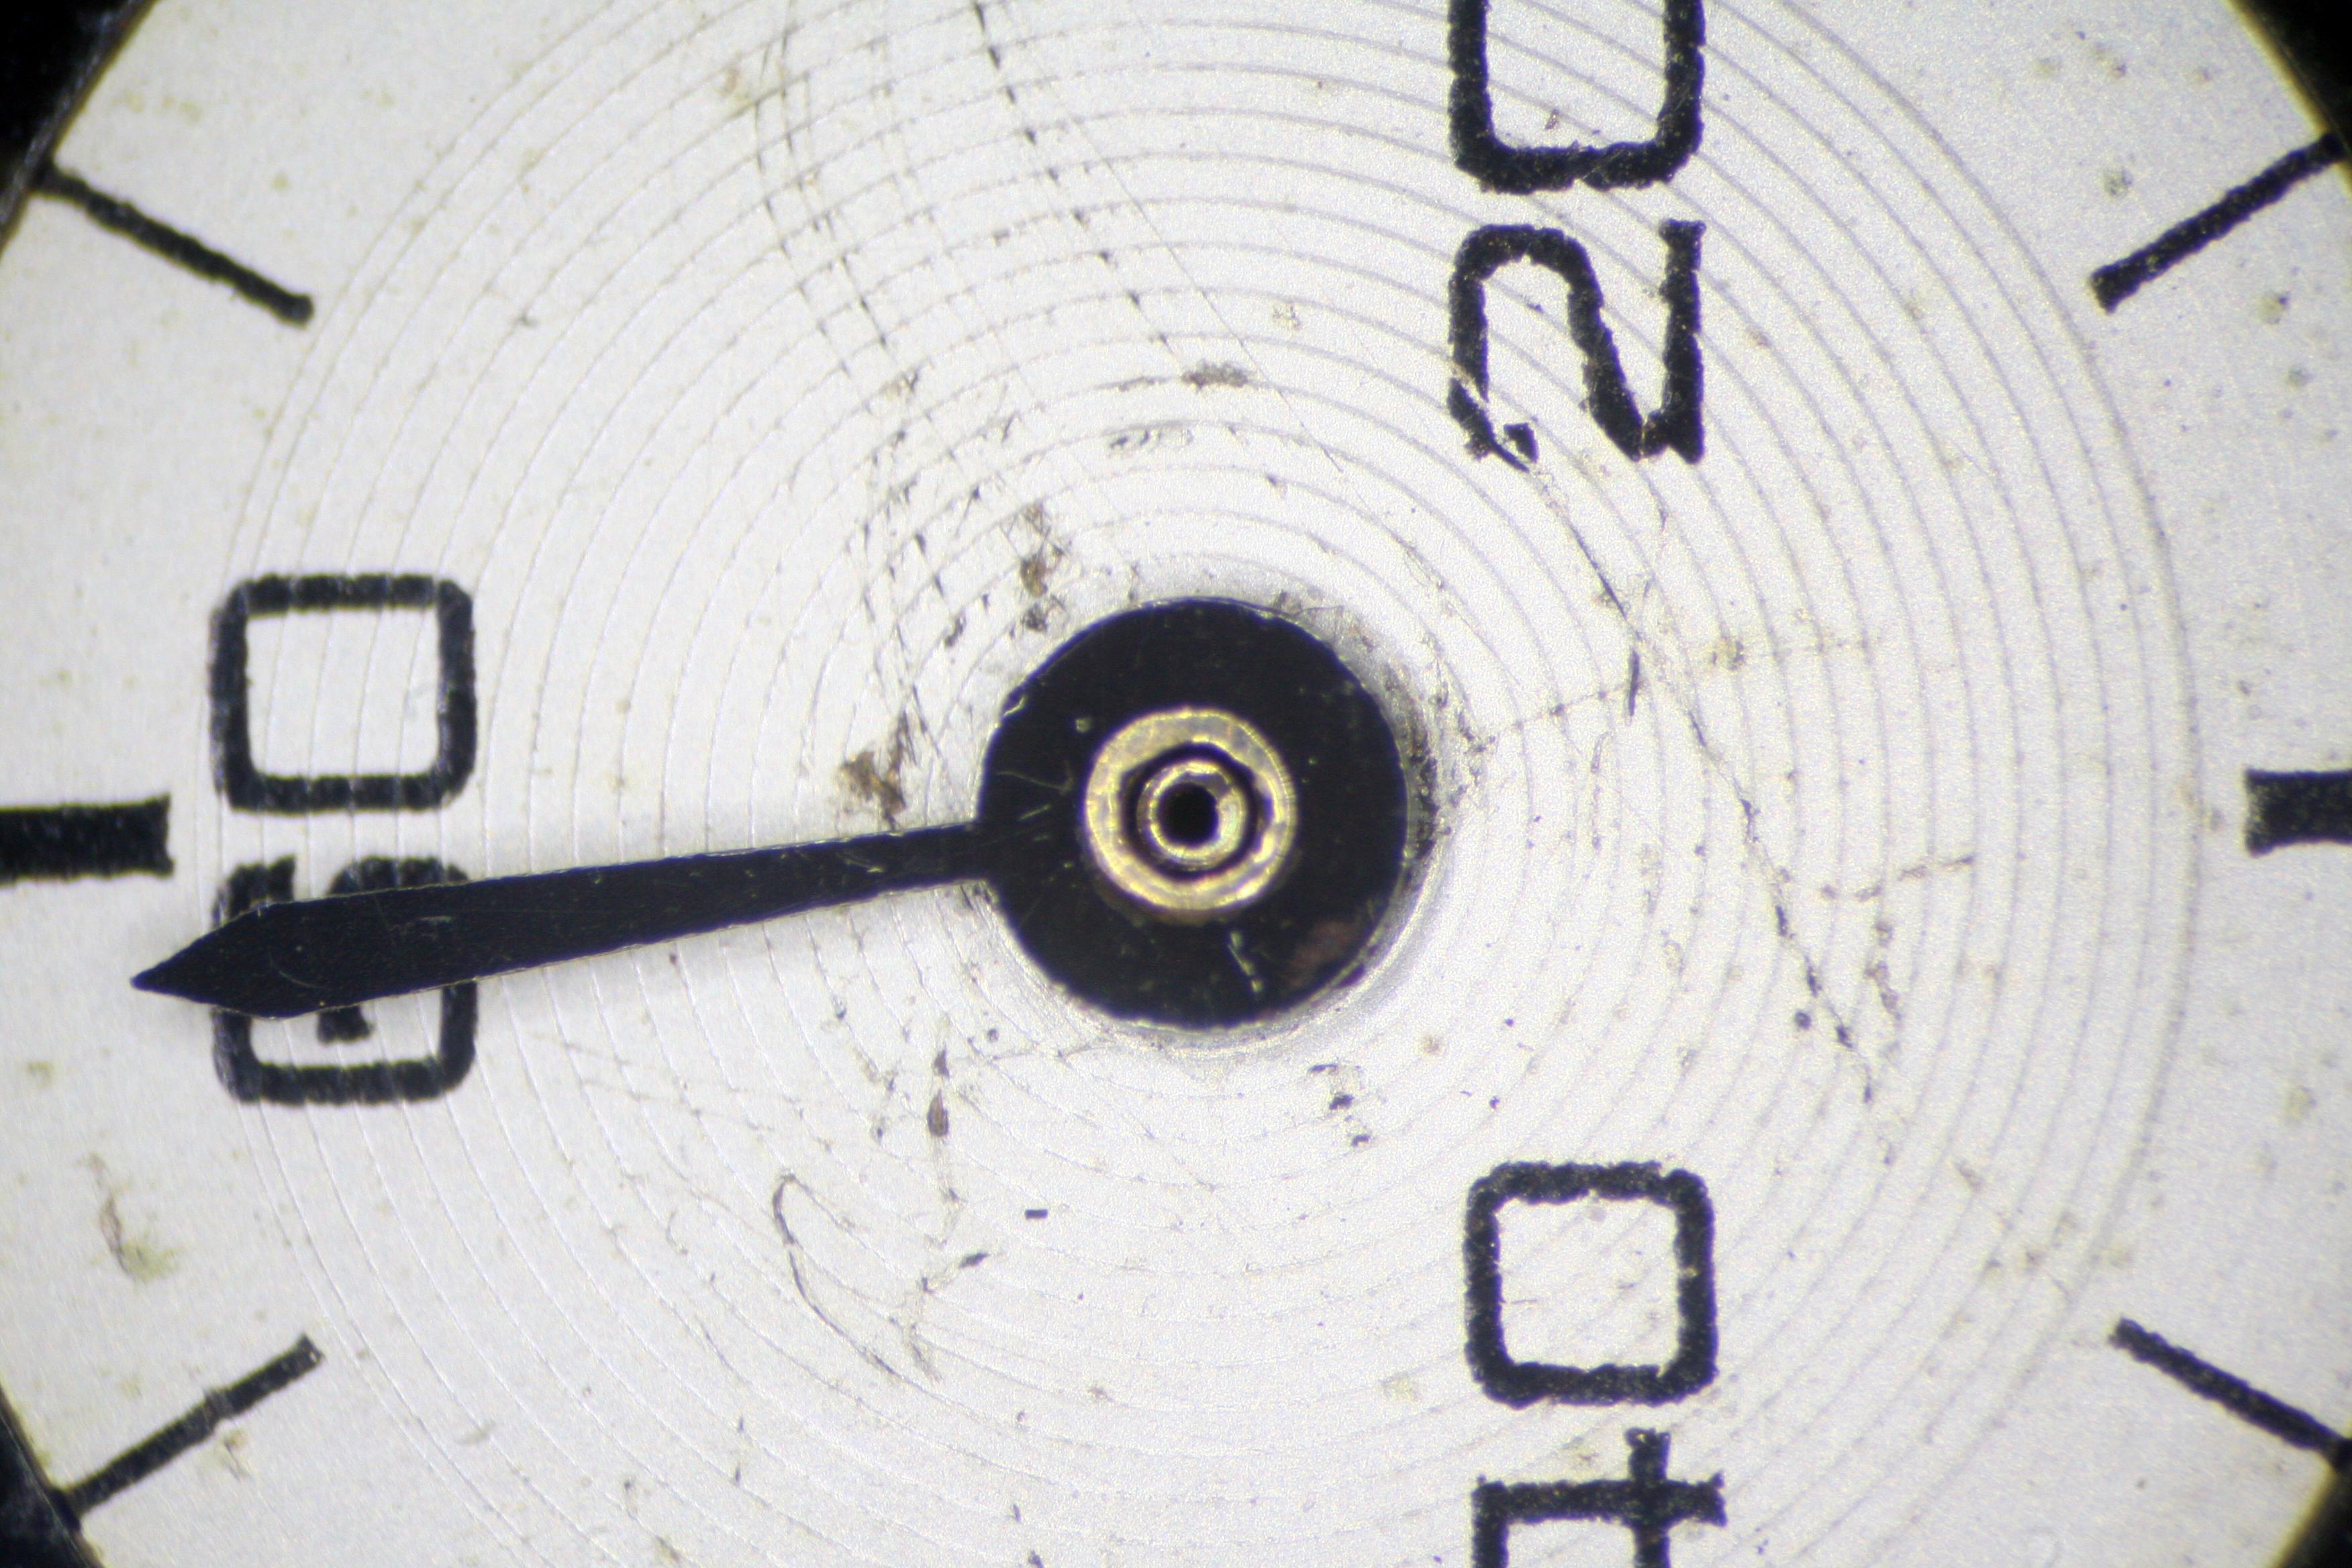
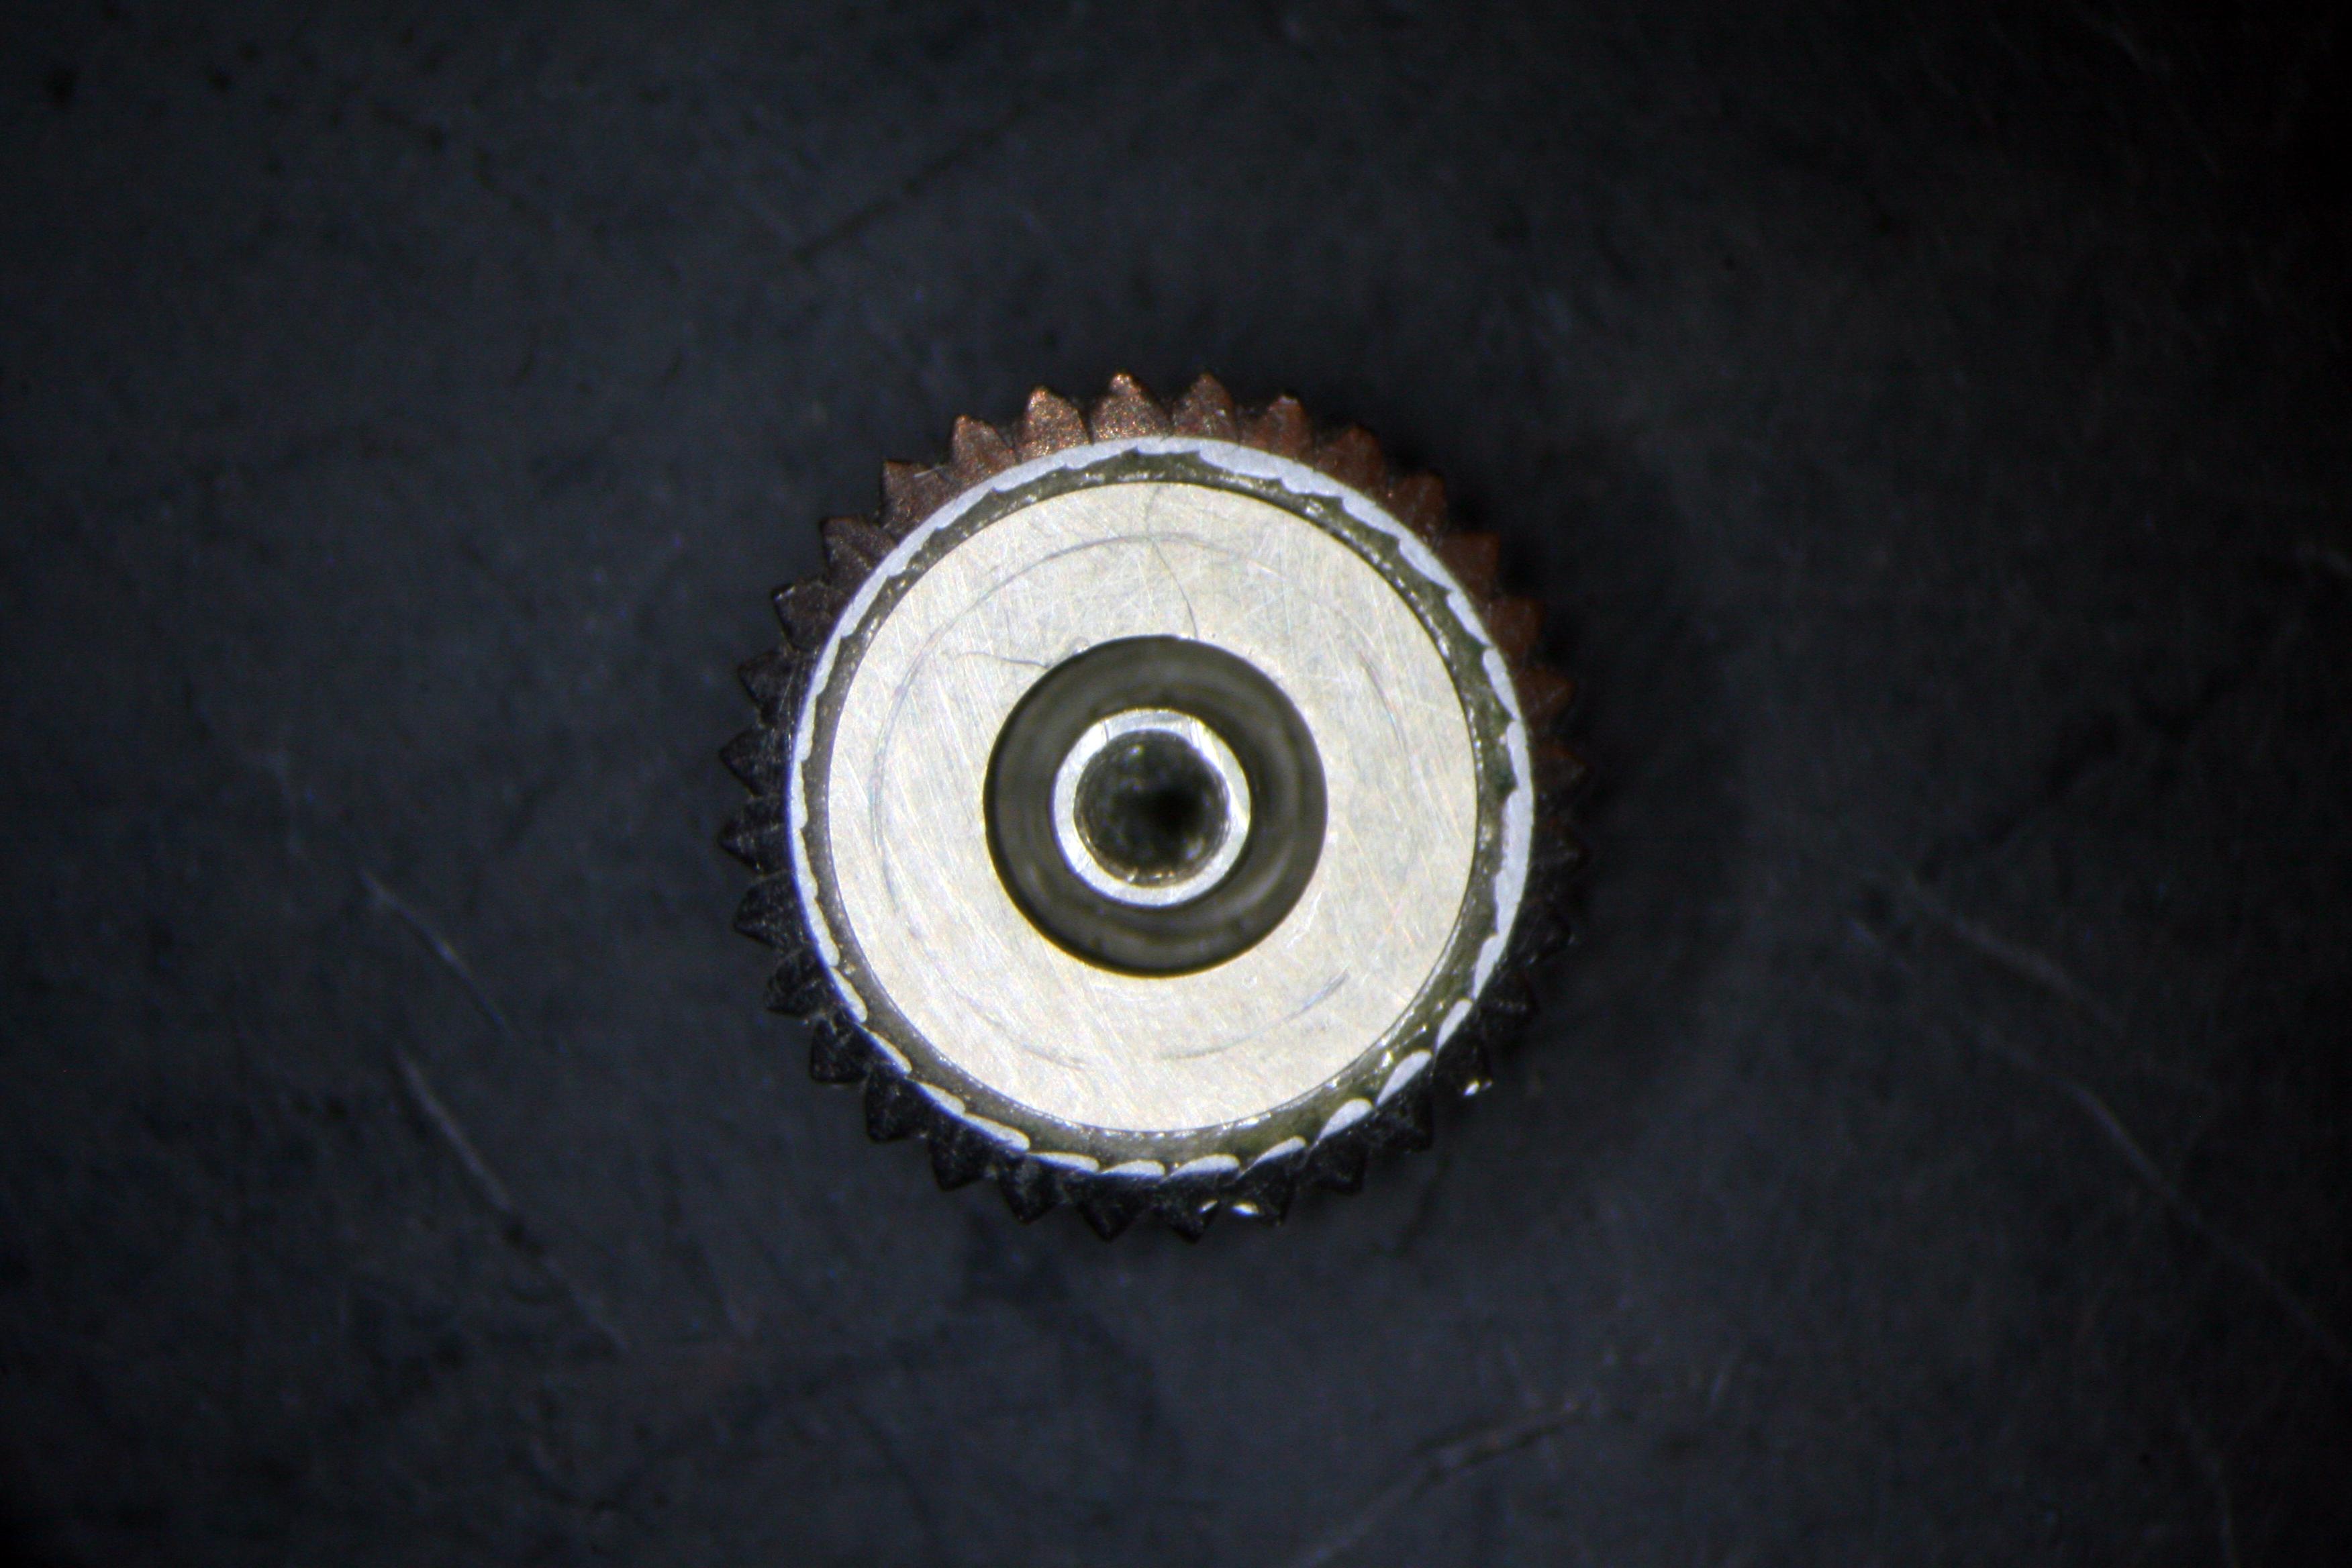
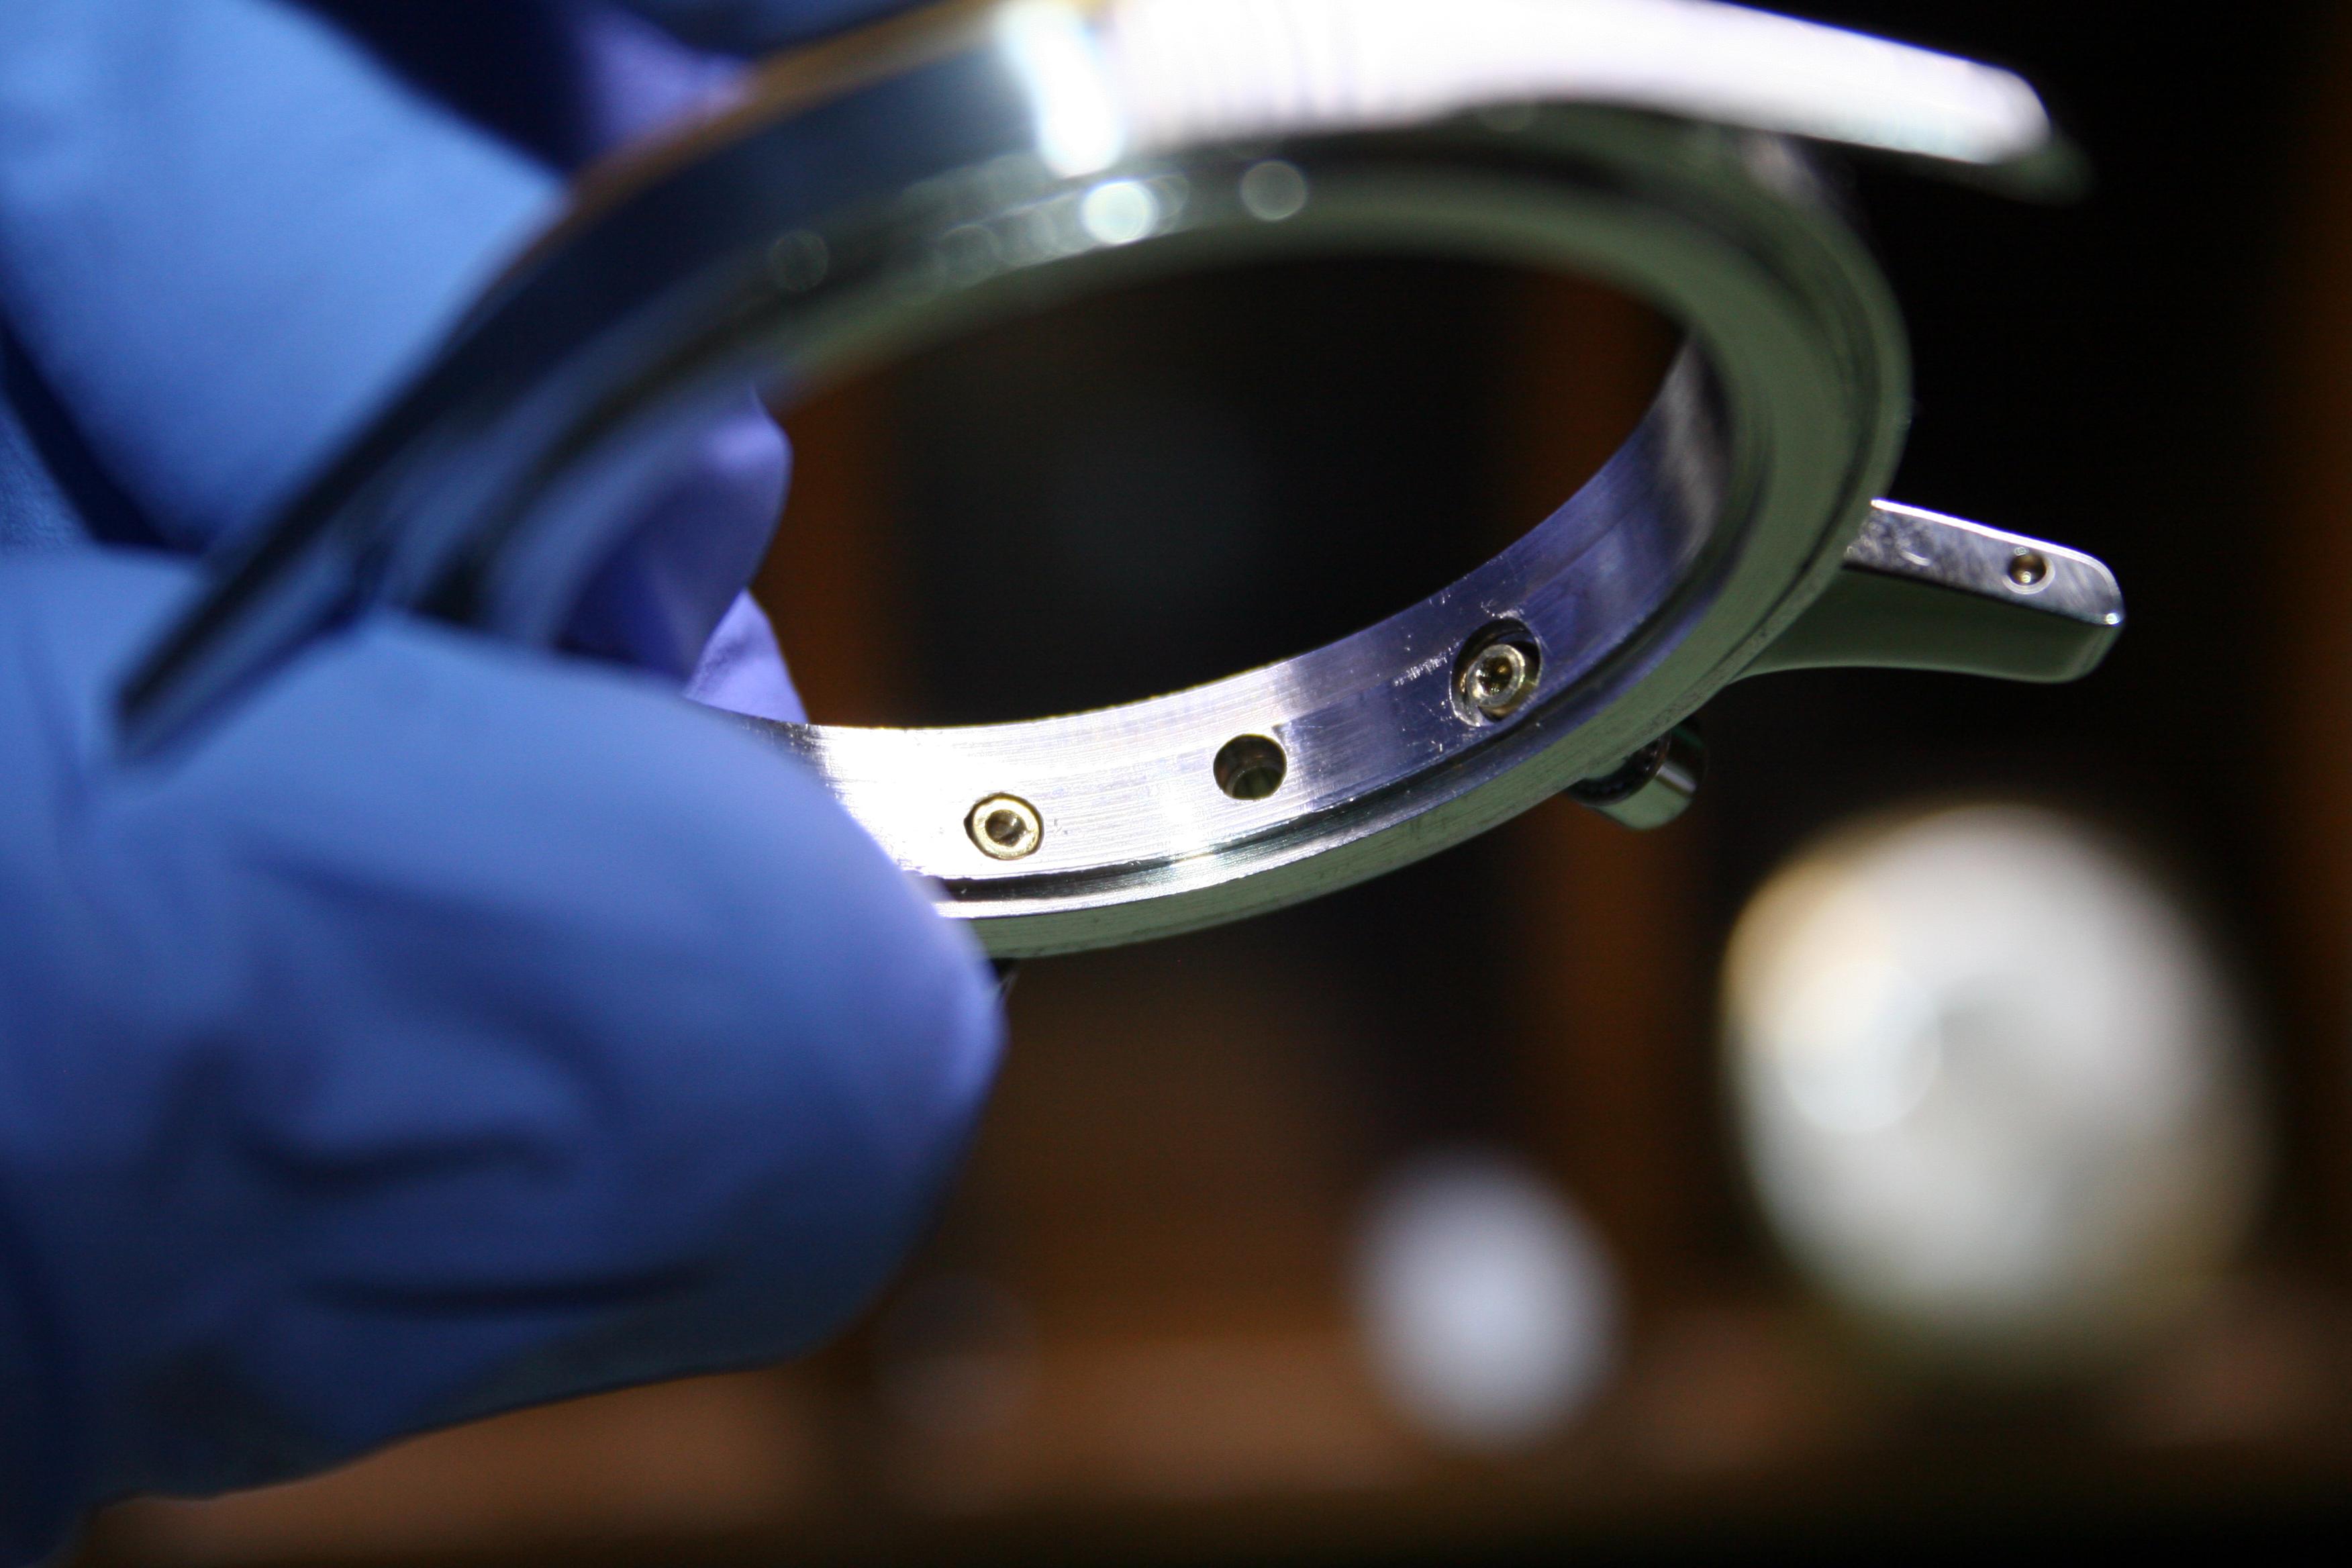
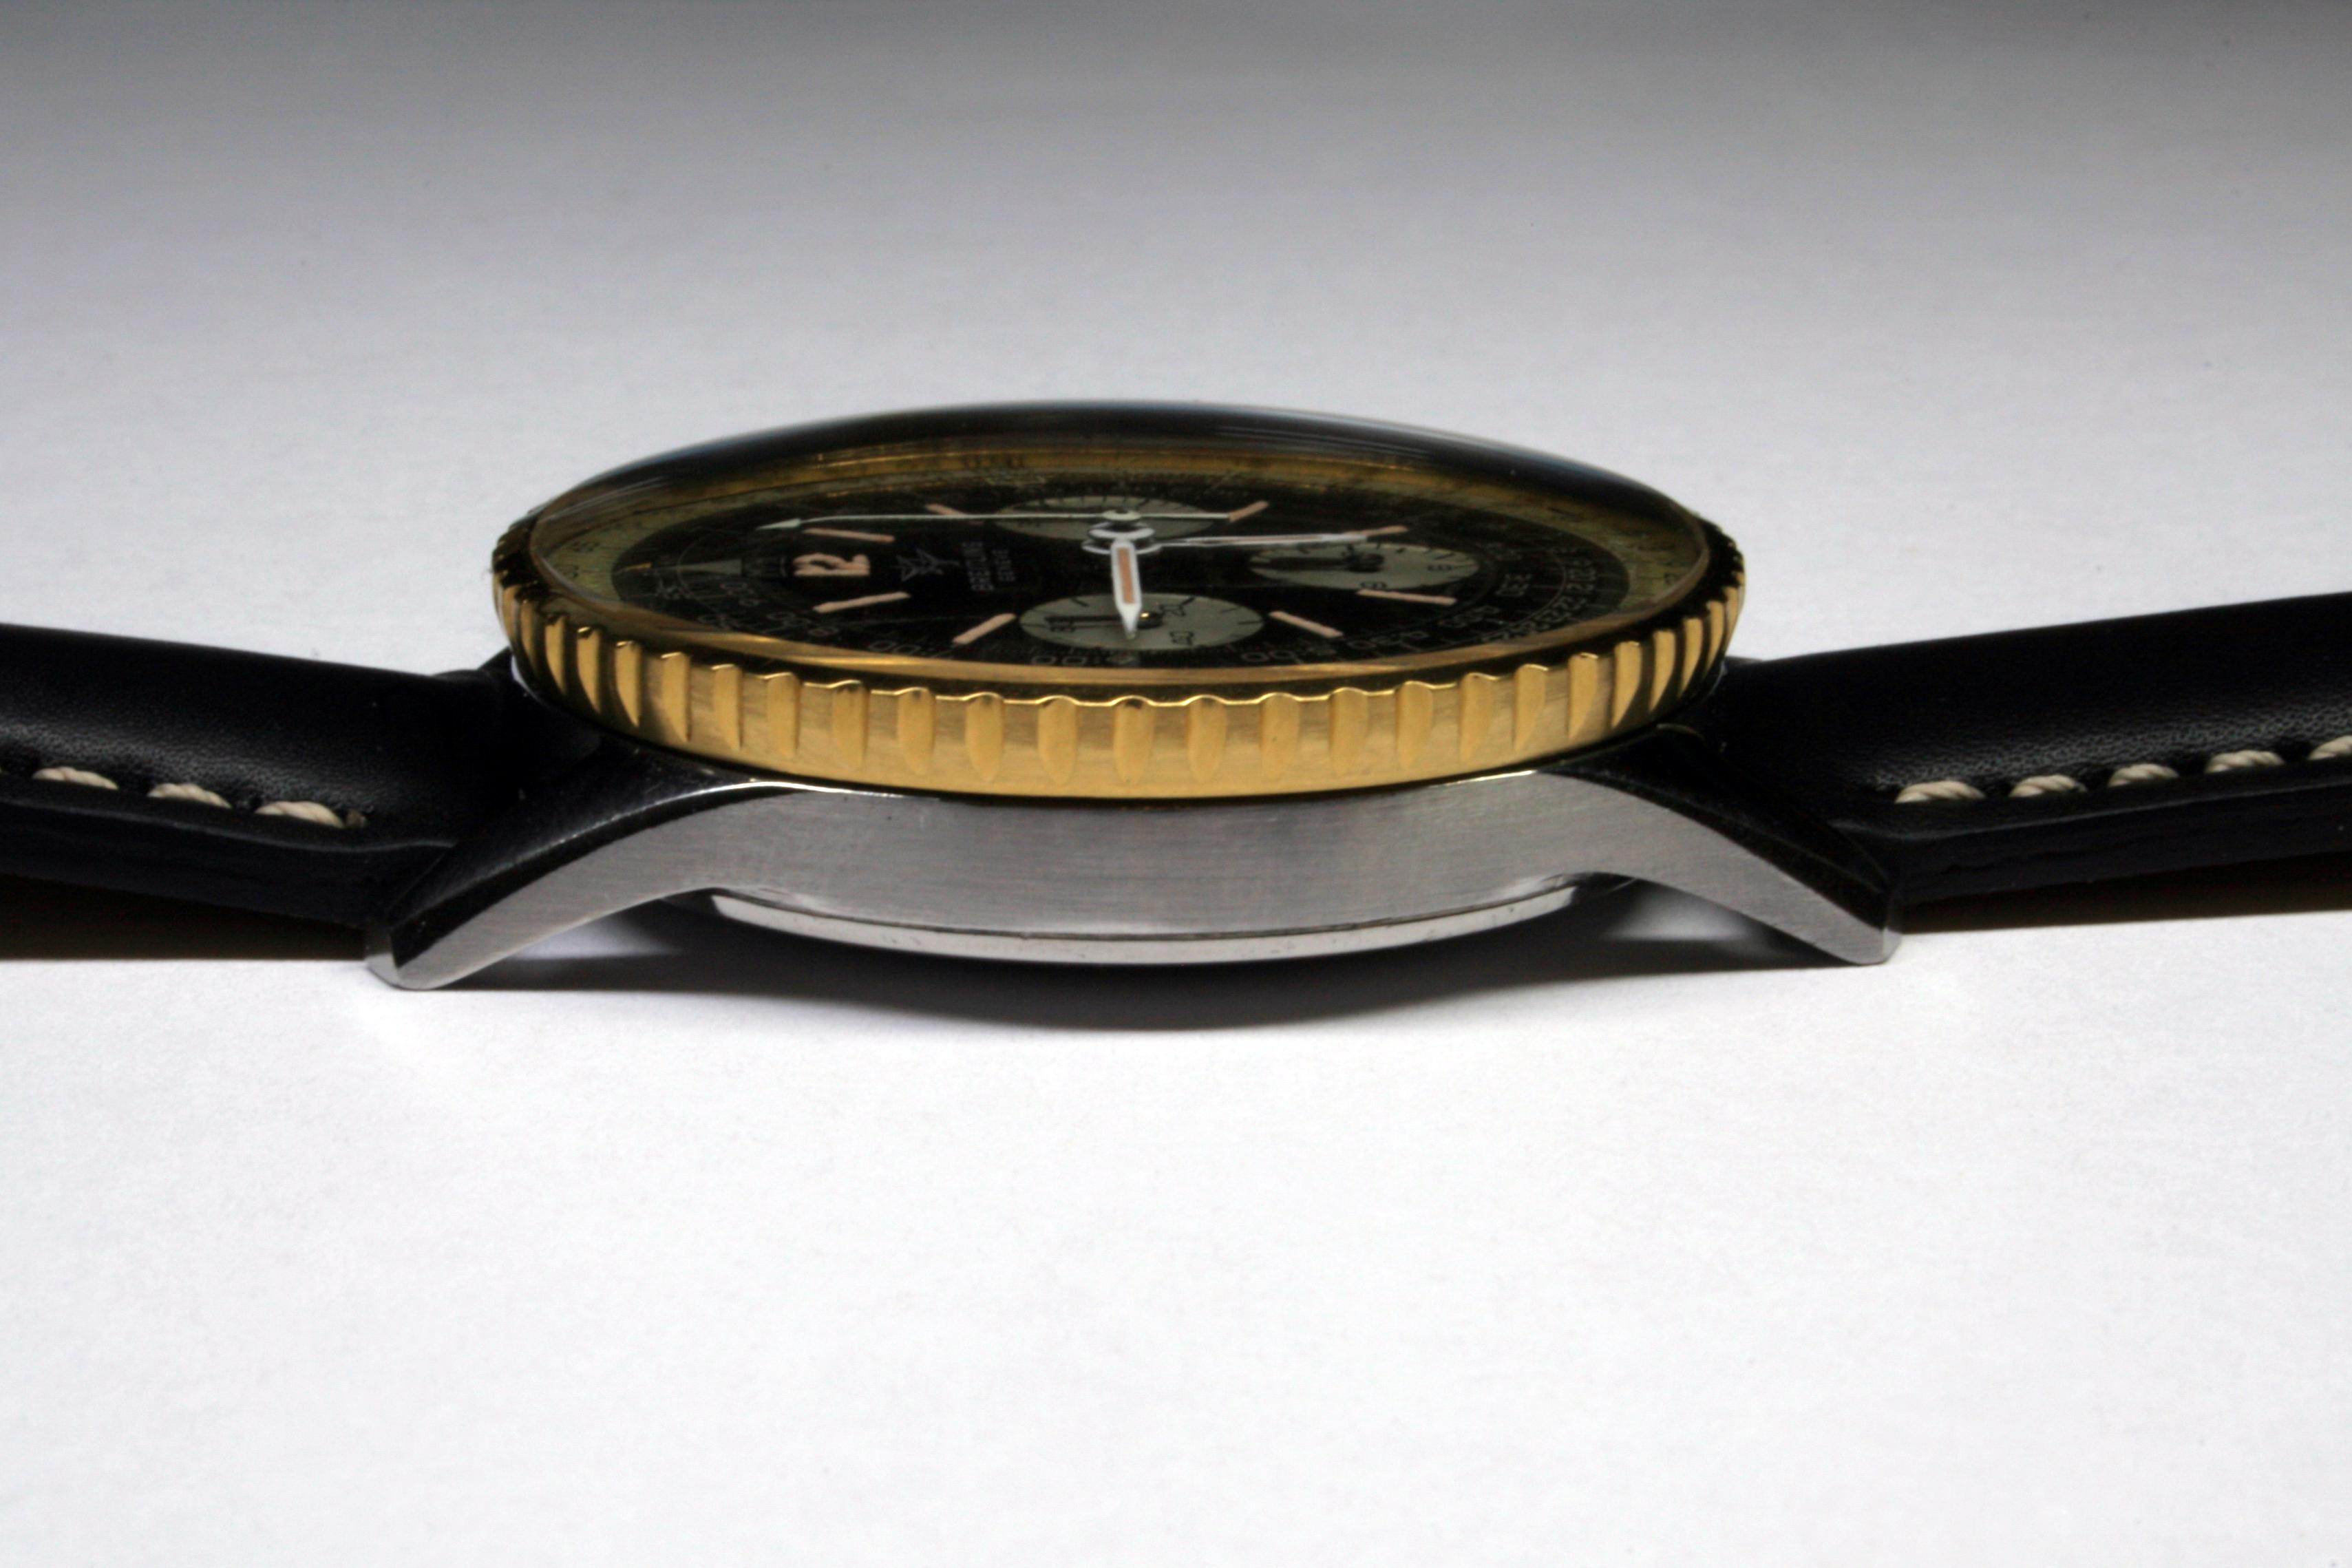
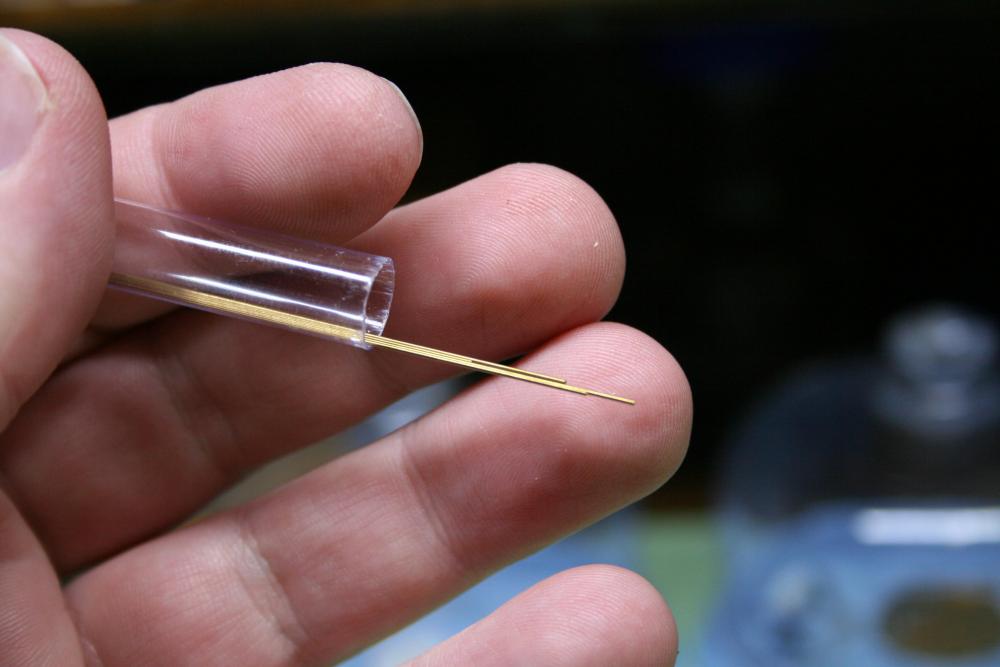
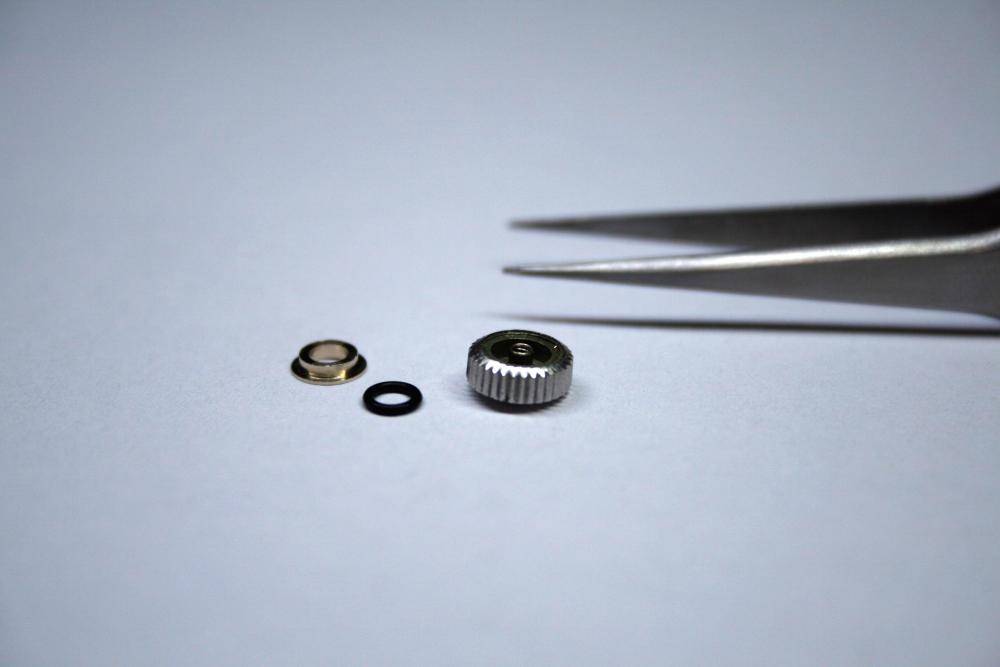
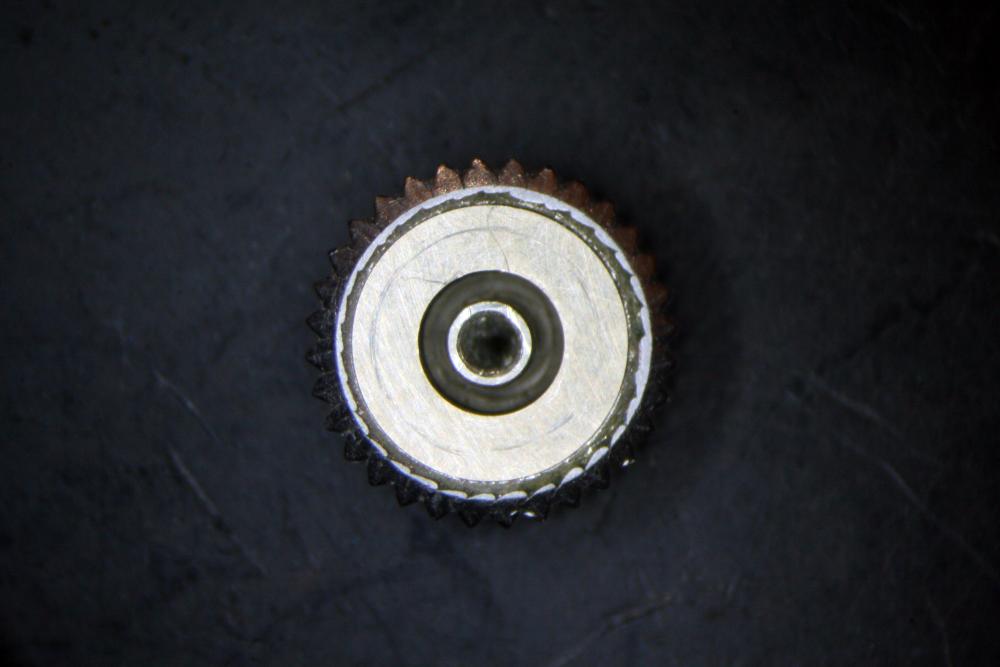
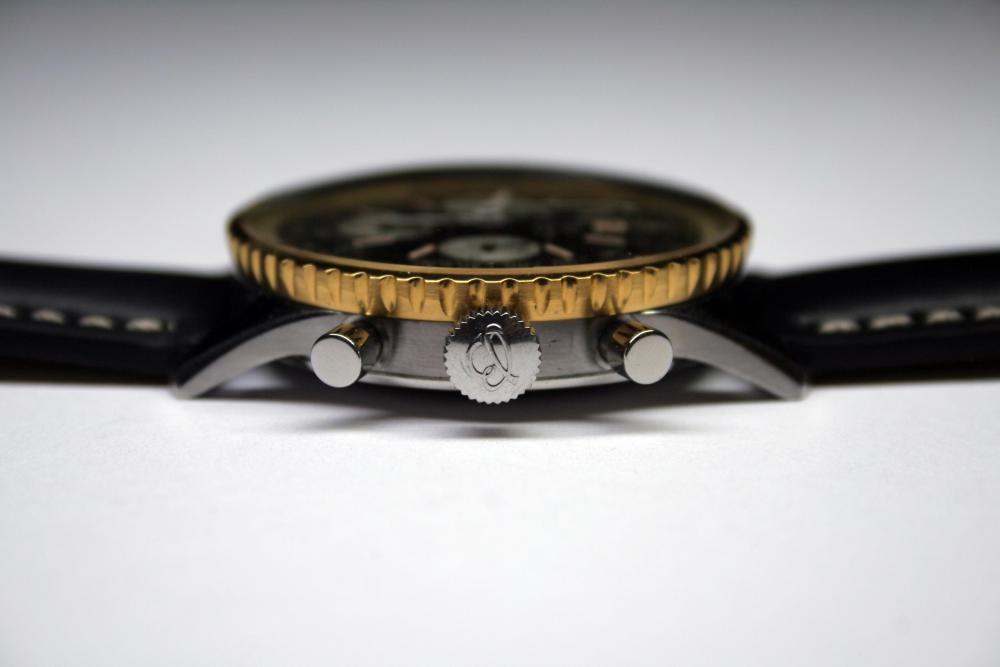
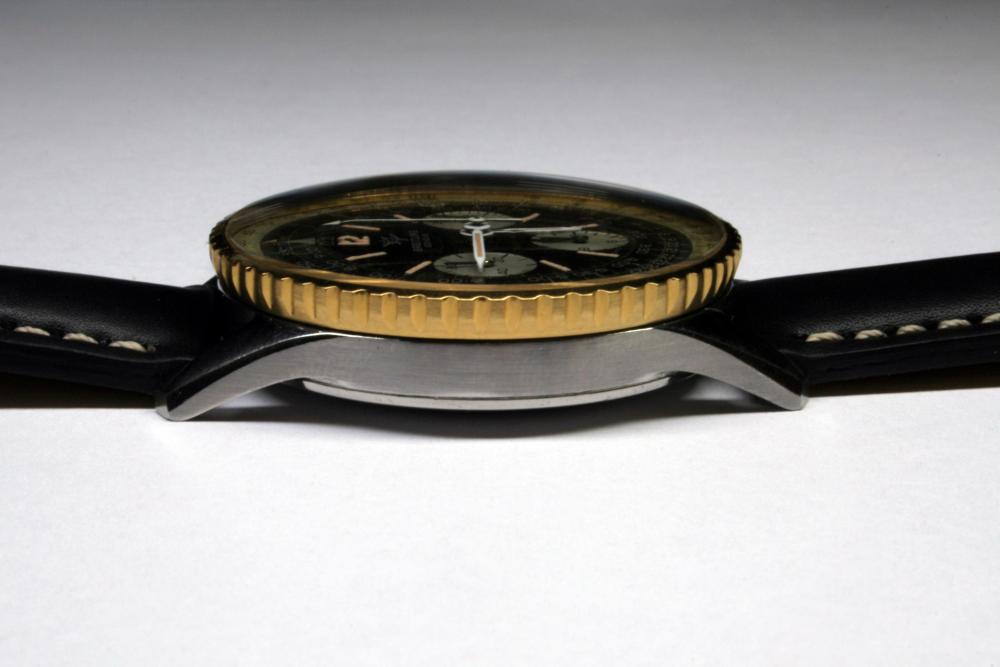
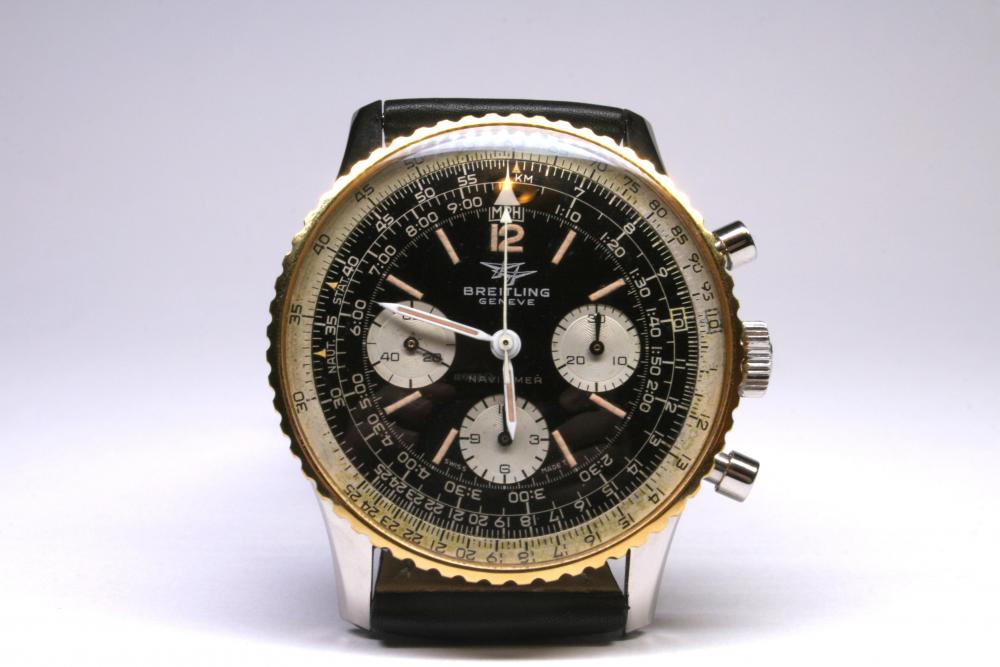
Well I finally completed this project yesterday. There were a few challenges even after solving the bezel issue which took a bit of time to put to bed. First, I discovered the pipe on the running seconds hand was both too short and too wide (the extended pinion on the fourth wheel has a diameter of 0.18mm and the pipe on the hand was around 0.25mm). I had thought the fourth wheel was incorrect but that turned out to not be the case. Now I have two extra fourth wheels (I'm not a quick learner apparently) but I'm sure they'll come in handy down the road! To fix the pipe I used a bit of brass tubing I grabbed off eBay which had an ID of 0.18mm and OD of 0.50mm. A broach was run through the pipe on the hand to widen the inside diameter then the tubing I purchased was tapered and cut on the lathe to fit inside. Originally I was going to remove the pipe from the hand but settled on pushing a sleeve inside when I realized the tubing I had was too narrow to rivet to the hand. Next I needed to address the watch crown which was damaged and lost its rubber o-ring. The o-ring is secured place by a riveted cap but on my crown the cap was missing. Naturally, I first searched for a replacement crown but when one was not readily available I opted to fix the one in hand. A replacement o-ring was ordered and a new cap turned on the lathe. With the o-ring set in the crown, the cap was secured via a hammer and stake. It seems odd that these old Navitimers have rubber gaskets on the crown, pushers, and caseback but there's nothing to stop water from entering under the bezel. Lastly I noted the new chronograph pushers I ordered were too short. I turned a pair of boots on the lathe to increase the length of each pusher rod. Neither boot is fitted too tightly so removal should not be an issue down the road. Then it was time to assemble... It was certainly worth all the time and effort but I must say, I'm looking forward to some really straightforward services in the future.


 3 points
 -
Let someone do it for you that has the right tools. Removing material is not a way to do it. And will just end up with lots of trouble.2 points
-
I'm sure that is a Russian movement. Have you looked under the balance? The other thing to help us, take the dial side plate off and take a photo of the keyless work and upload it. That is the way to id a watch movement that has no markings.2 points
-
Waist of money. Find one of these Sent from my iPhone using Tapatalk Pro1 point
-
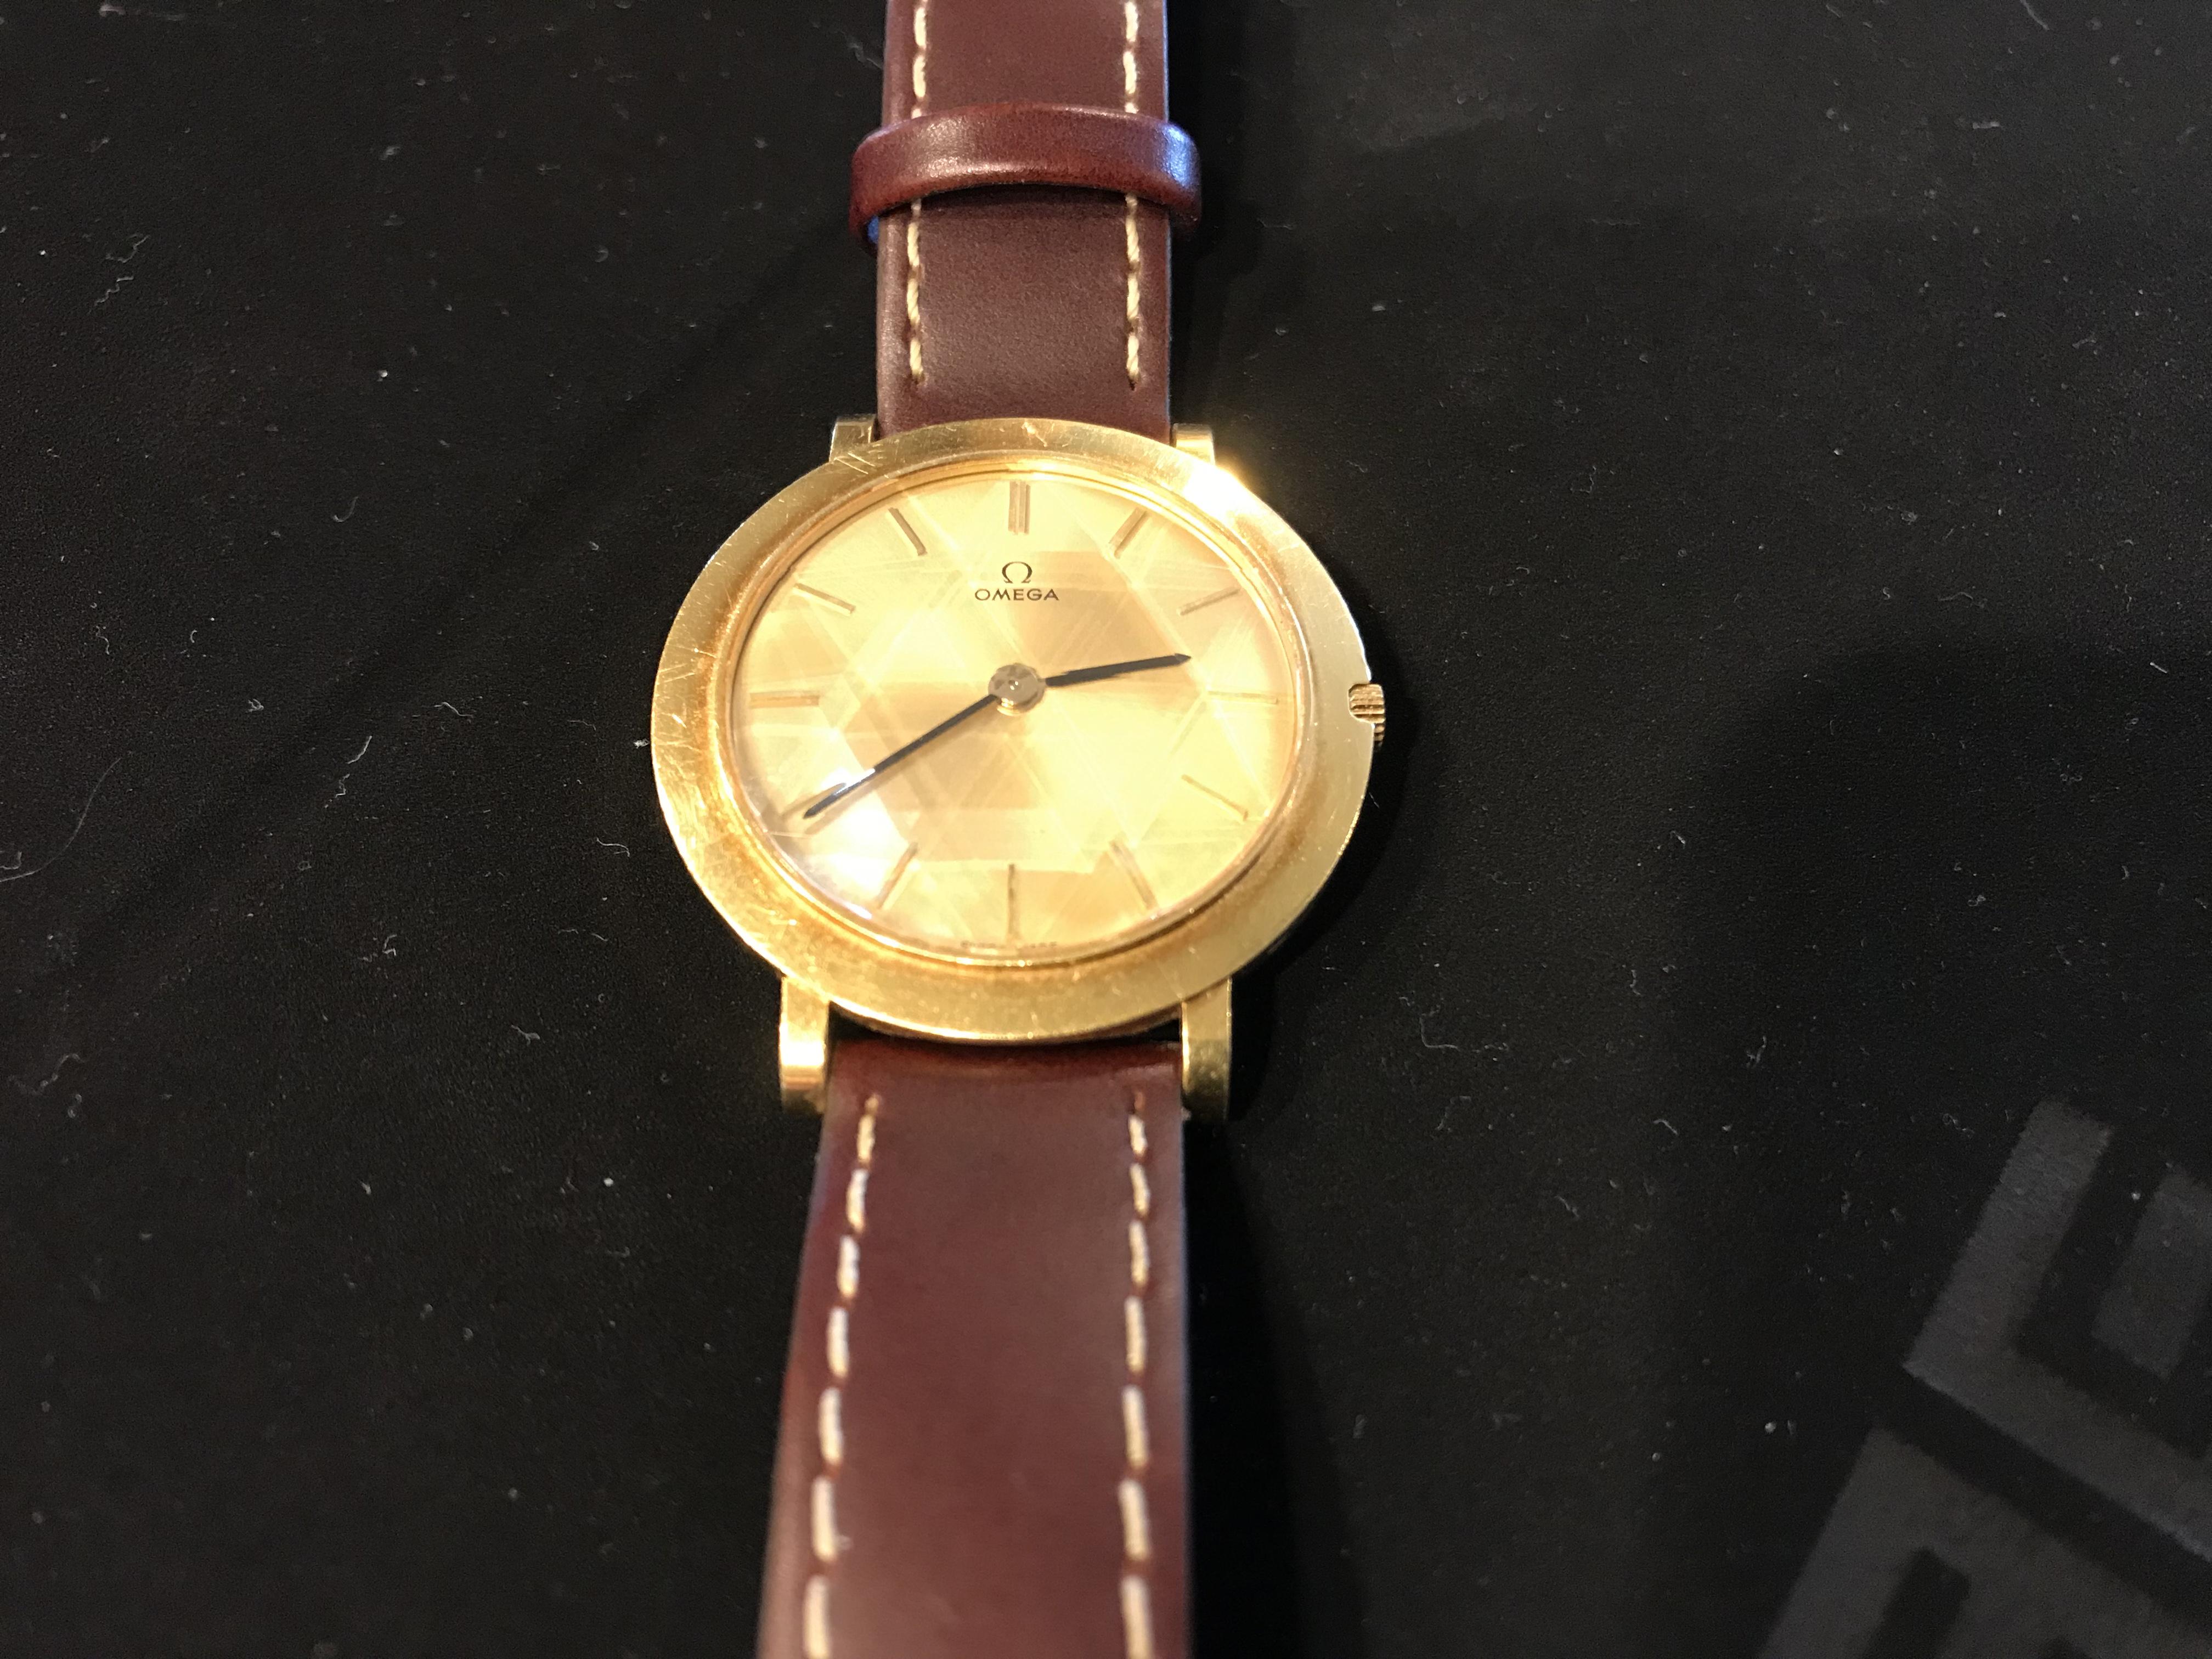
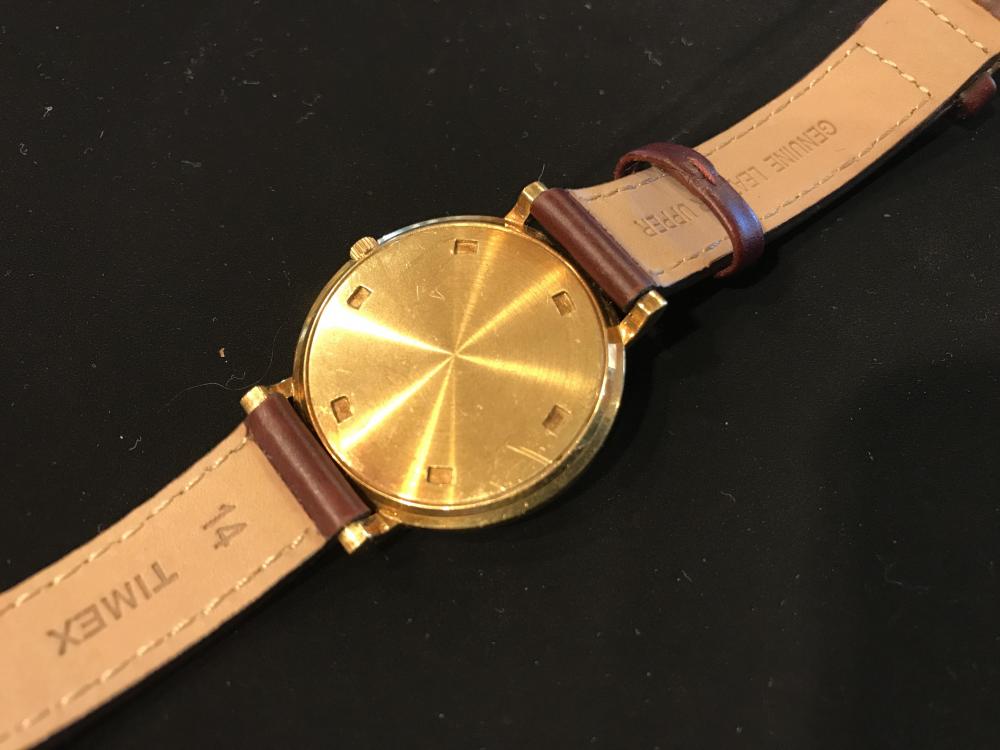
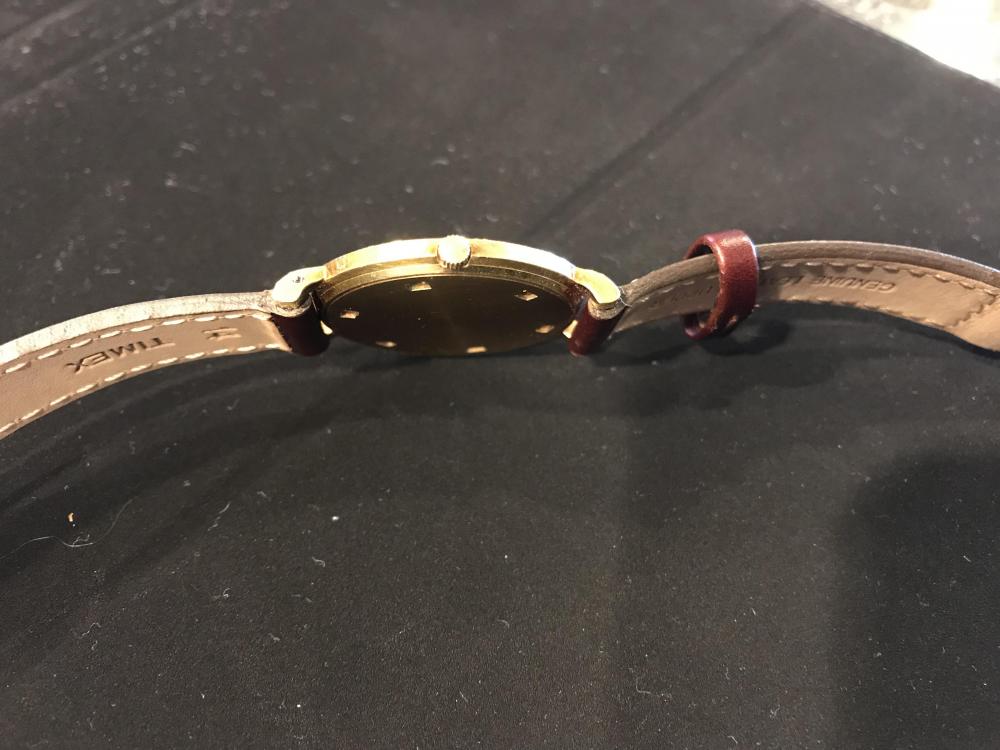
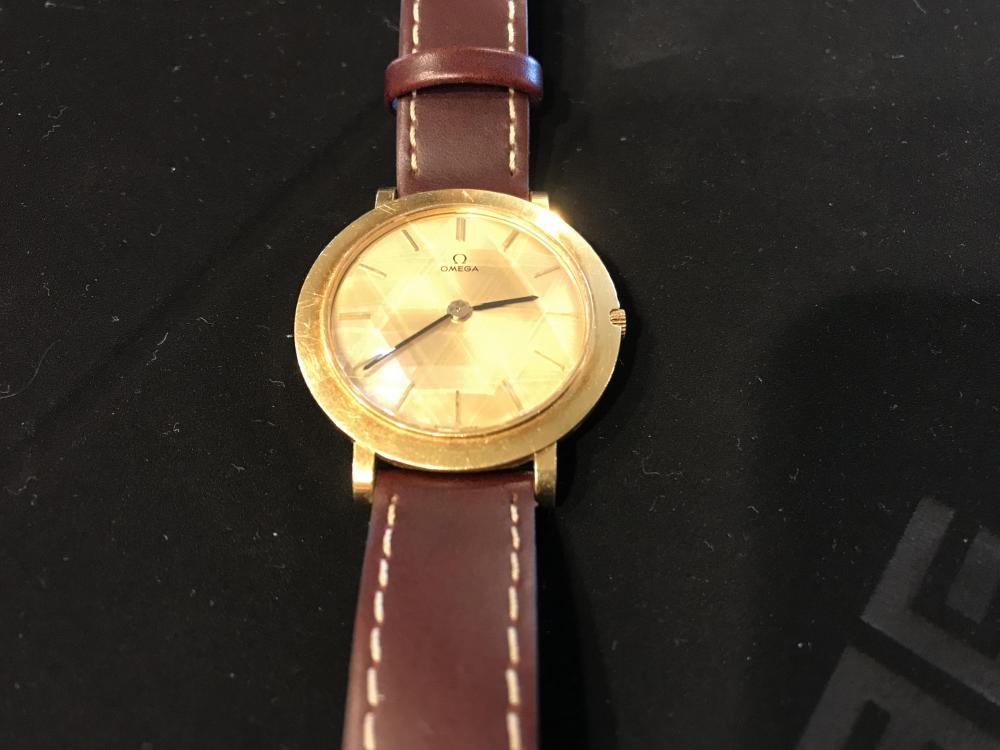
Here’s an interesting piece... it belongs to my sister-in-law, who inherited it from an uncle. My brother was unable to find any info on it, so while I’m visiting them I thought I’d post some pics and see what you folks think. It’s badged as an Omega, but there are no other markings on dial or case. Note the faceted crystal too. I’d have photographed the movement, but I’m away from home and tools. Ignore the Timex strap... Cheers, Gryf
 1 point
 -
I’d say it’s possible an old Seagull movement - similar to a TY 2869, but without a date dial. Cousins lists a range of Seagull movements here https://www.cousinsuk.com/PDF/products/8164_Sea-Gull 2015 pages 15-20.pdf, but there isn’t an exact match in the current catalogue. If you look at the dial side cover in on the TY 2869, https://www.cousinsuk.com/product/chinese-movement-list?code=TY2869M you will see the spring holes are very similar. Given the sge of your movement you may find it’s no longer made. You will note that the balance cock and shock devices are different on yours. Sadly, I don’t know of any resources for positively identifying Chinese movements, or supply of parts, except winding stems. Tech specs are pretty limited although if you can work out the movement number you might find an installation drawin* on the net. The movements are generally considered to be disposable, but plenty of people do service them, although probably not on a commercial basis.1 point
-
Alex I think that cal of Omega is fitted with a tension ring crystal. Also the original Omega crystals have a Omega logo holographed into into its glass much the the same as Rolex does. If I am correct then follow this vid. PS reducing the crystal size is not a good idea as it will effect it's water resistance.1 point
-
Thanks ,...Citizen has some nice , and different vintage watches . The Aqualand diver for example ...
 1 point
 -
The 116610 uses a crystal retainer ring to hold the crystal and gasket on. These can typically only be removed successfully with a special Rolex tool. BUT if you’re determined you could slide a blade underneath it and work around until you create a gap large enough to pull it off. Pushing it back on requires a precise due that is just bigger than the crystal but small enough to still fit atop the slim ring. Part 319 is the retainer ring.1 point
-
I never liked one-dip. I always used Ronsonol lighter fluid. It doesn’t harm anything in a watch and it is shellac friendly.1 point
-
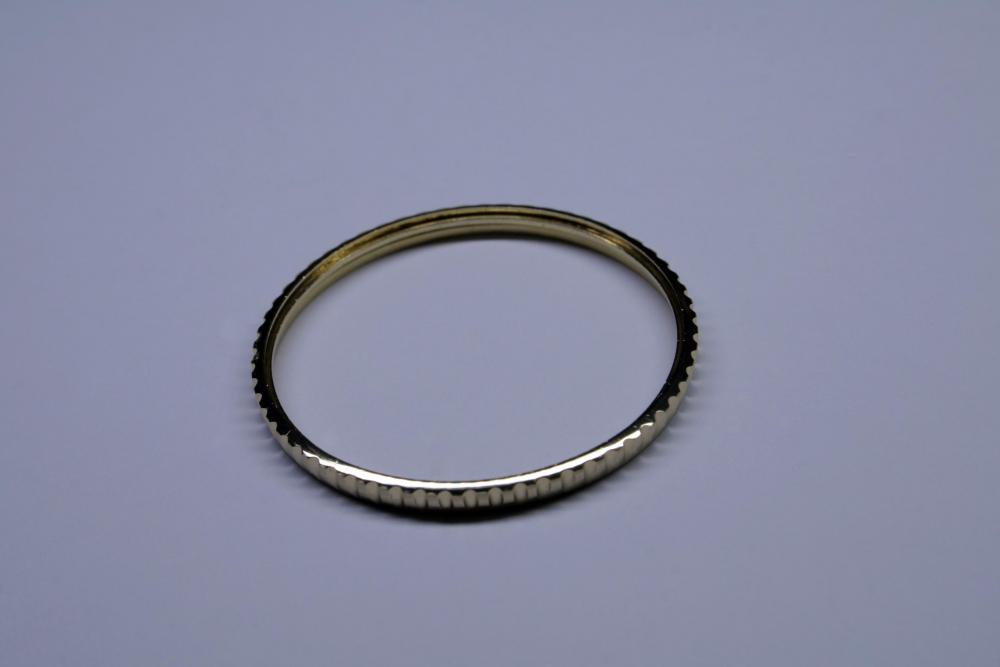
Well, that is some pretty amazing hand work there. I would say, the most accurate way to do the slots, would be to set up the part in a "nest" (scrap piece, usually aluminum, turned to the ideal diameter/shape which is used to support the part and is itself subject to the chuck jaws) to more evenly distribute force and provide better support. We used these all the time diamond grinding thin wall parts. Even in a six-jaw chuck, you would end up with high and low spots (six of each!) around the part without a nest. Once that is sorted, it would go into a dividing plate fixture. This is a chuck (or collet) on a bearing shaft with an attached wheel with a LOT of holes in it. Each ring of holes is a different number of stops around the diameter. So, pick the circle with the correct number of notches to cut. That out of the way, set the dividing head under your mill, and install an endmill of appropriate diameter. On something small like this, you can probably do one pass for the full width (mill equal to groove width). On wider grooves, it is best to use a smaller mill, and cut each side of the slot separately. On stainless, I'd suggest no more than 0.003" depth per pass. Brass might be able to take a heavier cut. A square end mill will give square bottom cuts. But you can also get a chamfered mill (the sharp corners are cut at ~45 degrees) as well as a ball end mil to get a round bottom groove. With those, you have to get the right width mill and do the groove in one pass to have a smooth bottom radius. Solid carbide mills are rather cheap in small diameters, but regular uncoated tool steel mills are fine- just use oil when cutting. Repeat "X" number of times around the ring. I'd leave 0.001" or so of "meat" for polishing away if a mirror finish is your goal. Buff/finish as needed. PS having something like this made at an Aero machine shop around here would be a couple hundred bucks. Sometimes it's easier to have stuff made by those already equipped to do it, although I'm right there with you regarding the whole "I did it myself" thing...1 point
-
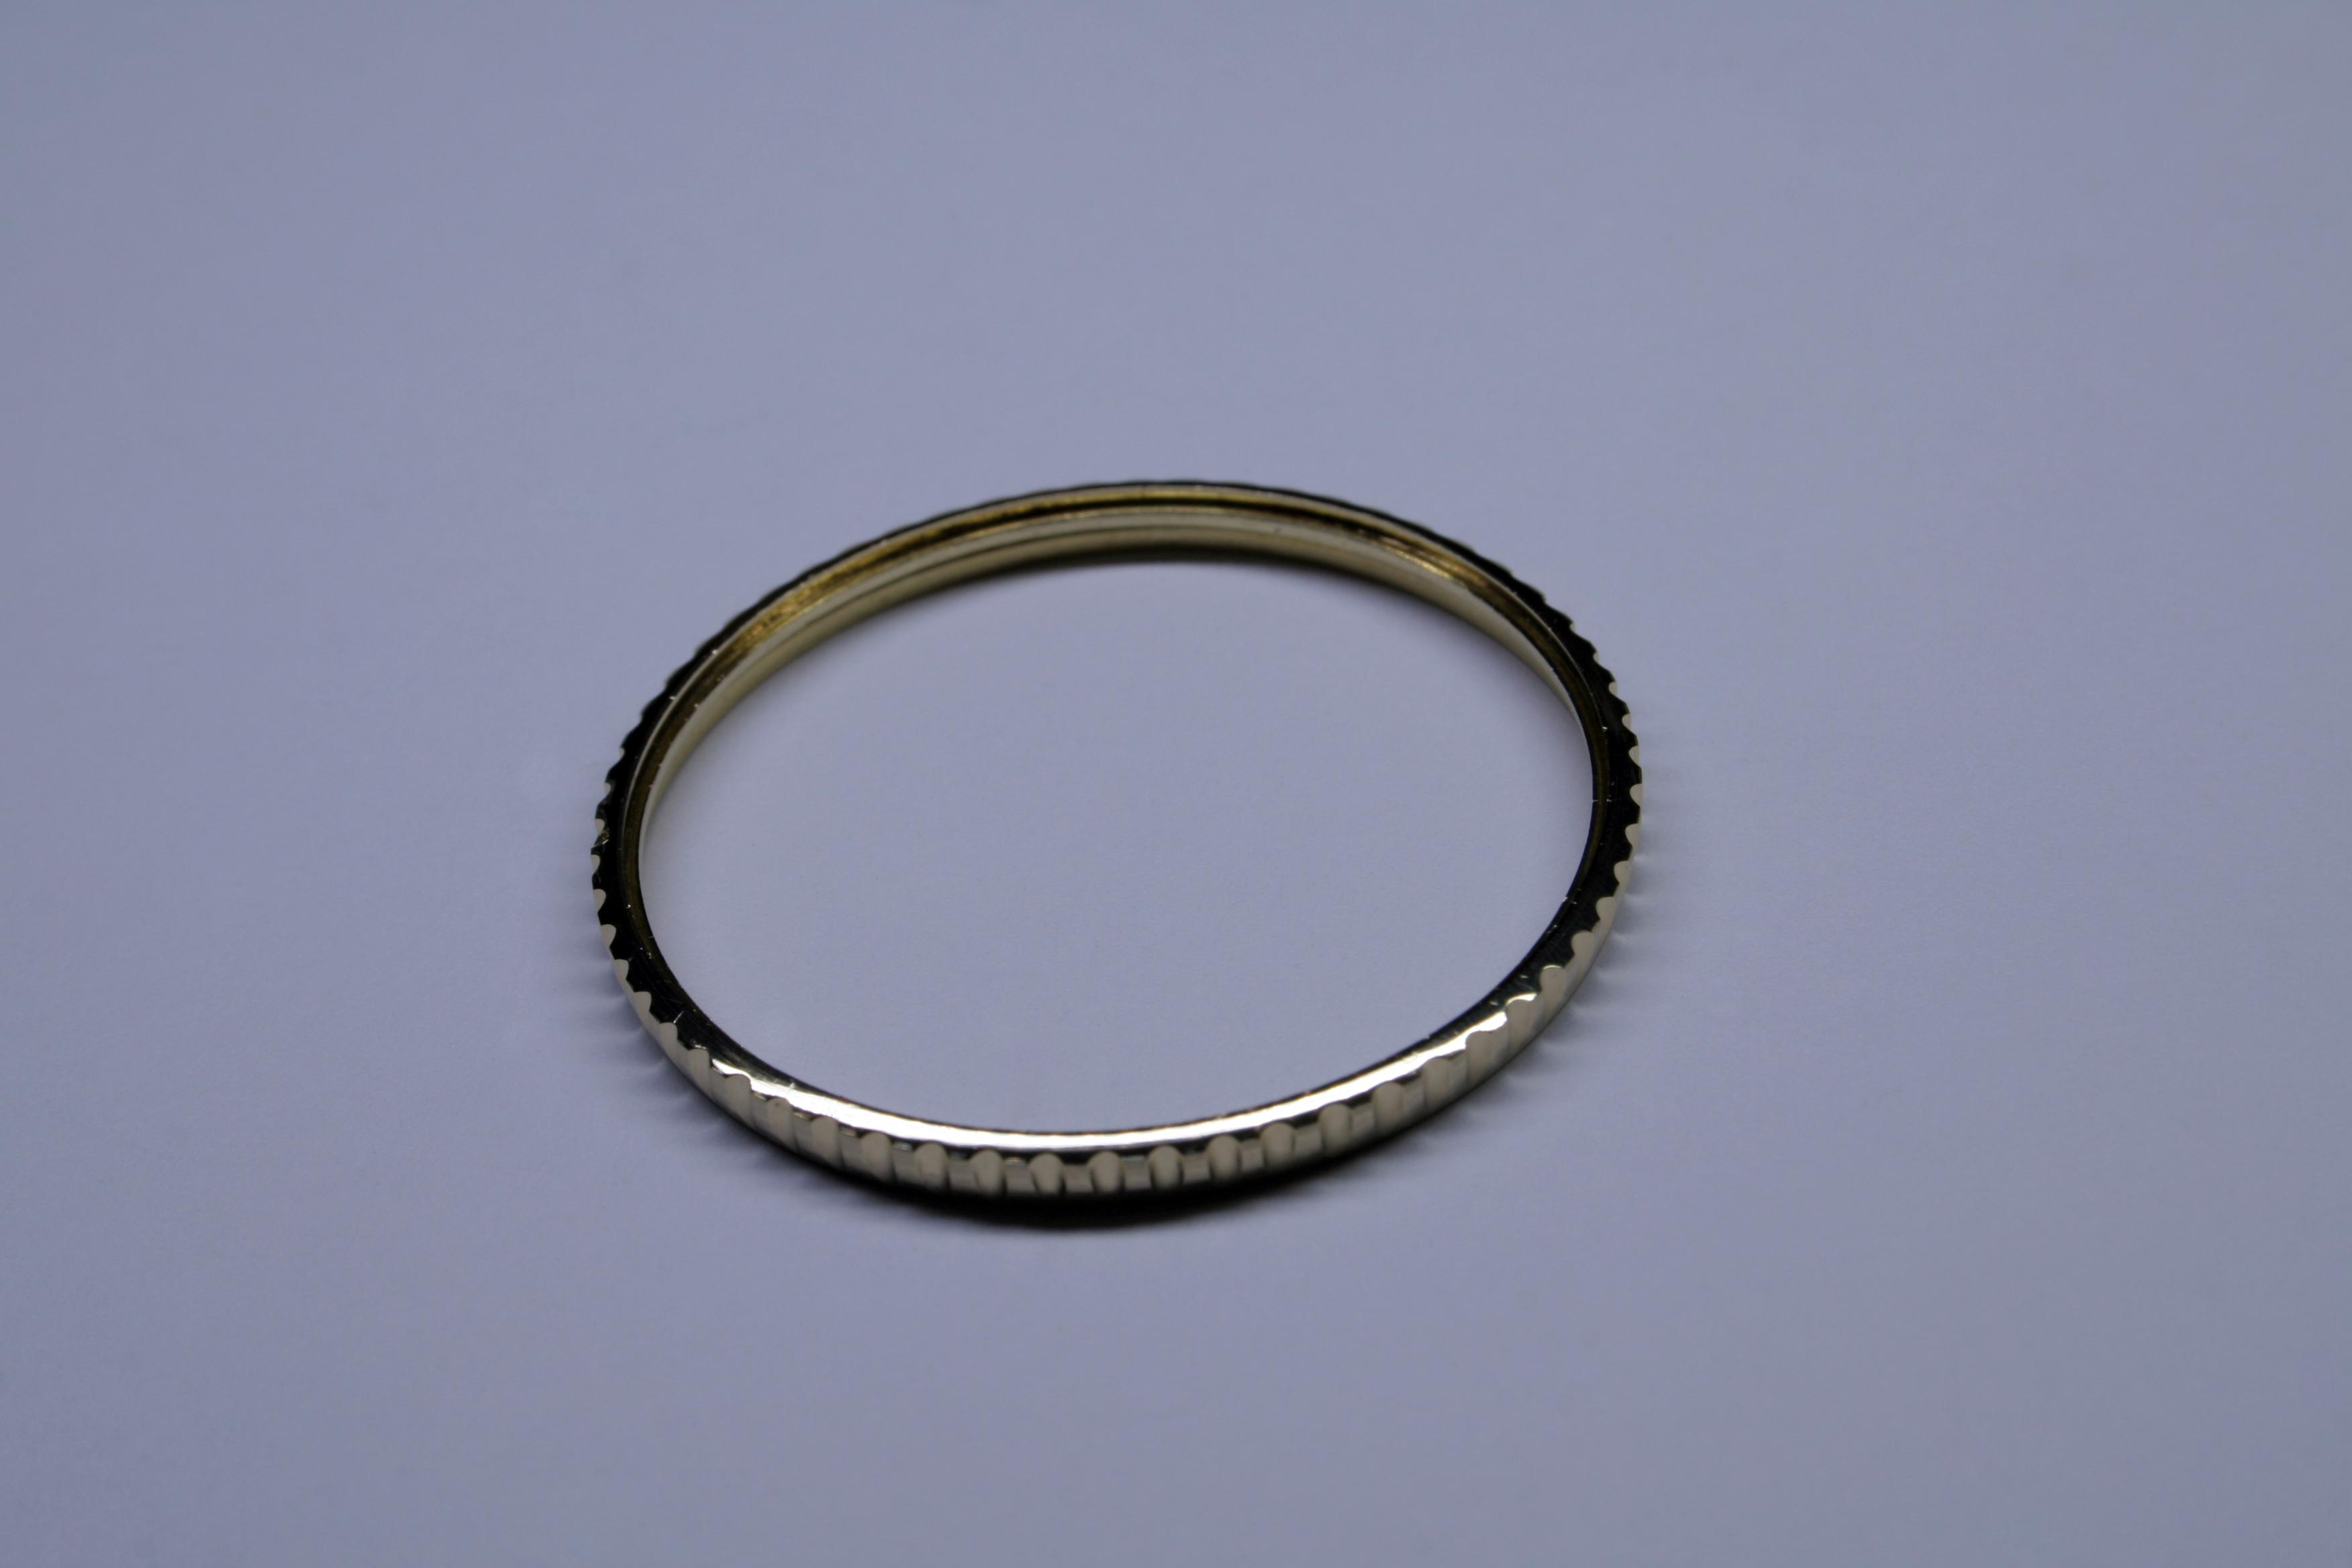
Well here's a quick update on the Navitimer project. I tried to freehand cut the symmetrical notches in a piece of scrap brass and did not achieve stellar results. Going back to the drawing board I tried several different methods to get evenly spaced notches in a round piece of stock and each new method was found wanting. I returned to the original plan with some minor modifications and am now happy with the result. I did most of the work under a stereo microscope which allowed me to see the entire piece while I filed away. On the original test piece I tried cutting notches while the part was held in a vise- well this didn't work very well because I wasn't able to turn the piece over in my hand while I worked to ensure each cut was correct from all angles. It took about two days and I'm finished now but the muscles in my forearms are a bit sore as is my elbow. I wonder, does anyone else suffer from tendonitis as a result of this hobby? I'll send the bezel out tomorrow to be plated along with the case which needs some laser welding. In the meantime I have to revisit the movement. It runs fine but I've discovered the fourth wheel currently in there is from a Venus 175 movement. The correct wheel has a longer extended pivot for the small second hand. They are also hard to come by but I think I have secured a replacement. Hopefully I'll have a finished piece to show soon.
 1 point