Leaderboard


Popular Content
Showing content with the highest reputation on 09/05/18 in all areas
-
Press down here.
 3 points
 -
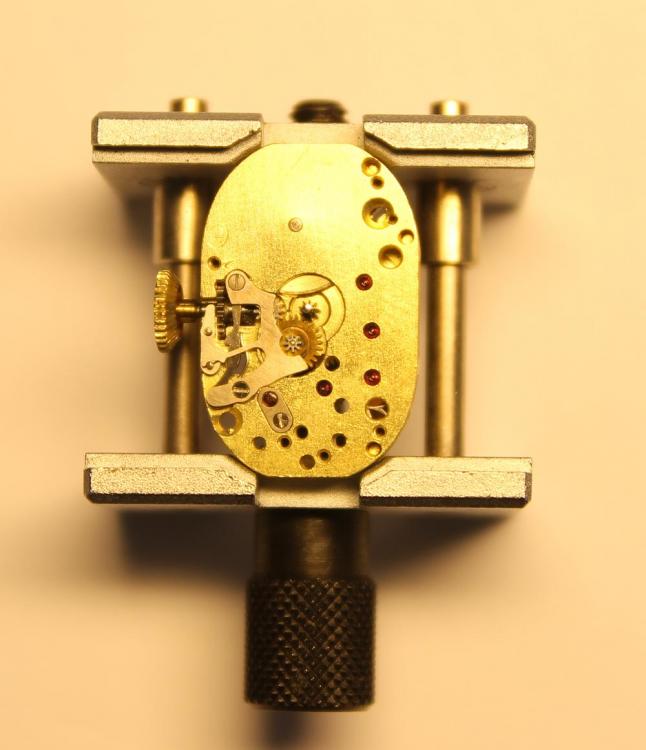
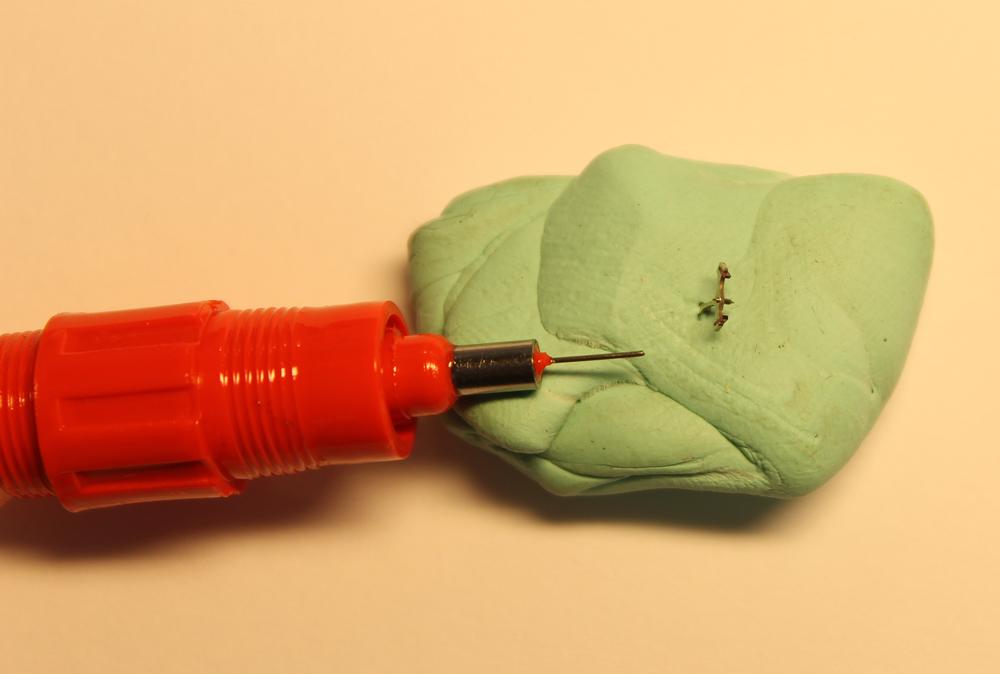
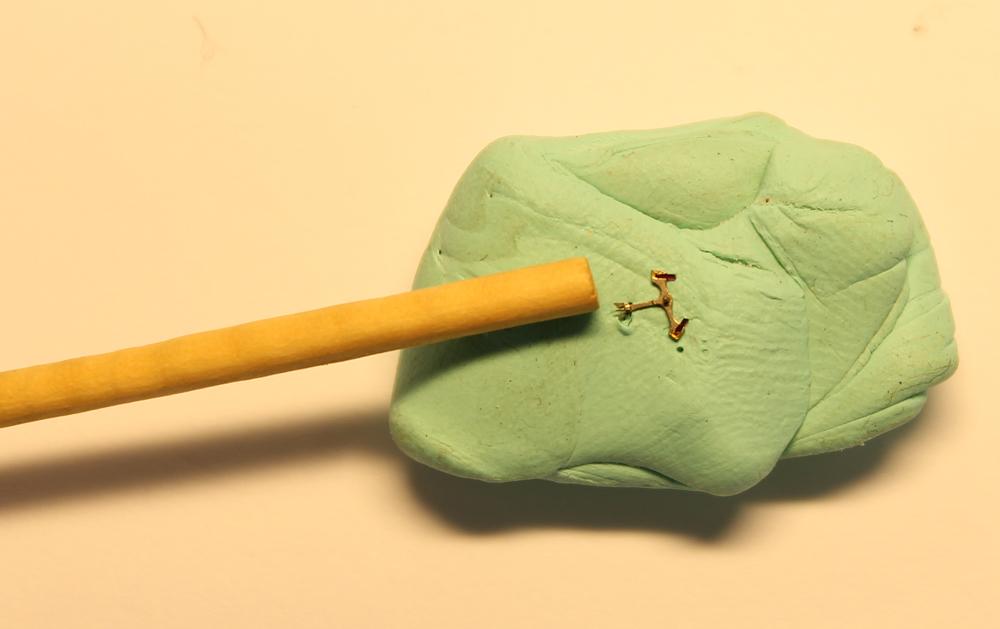
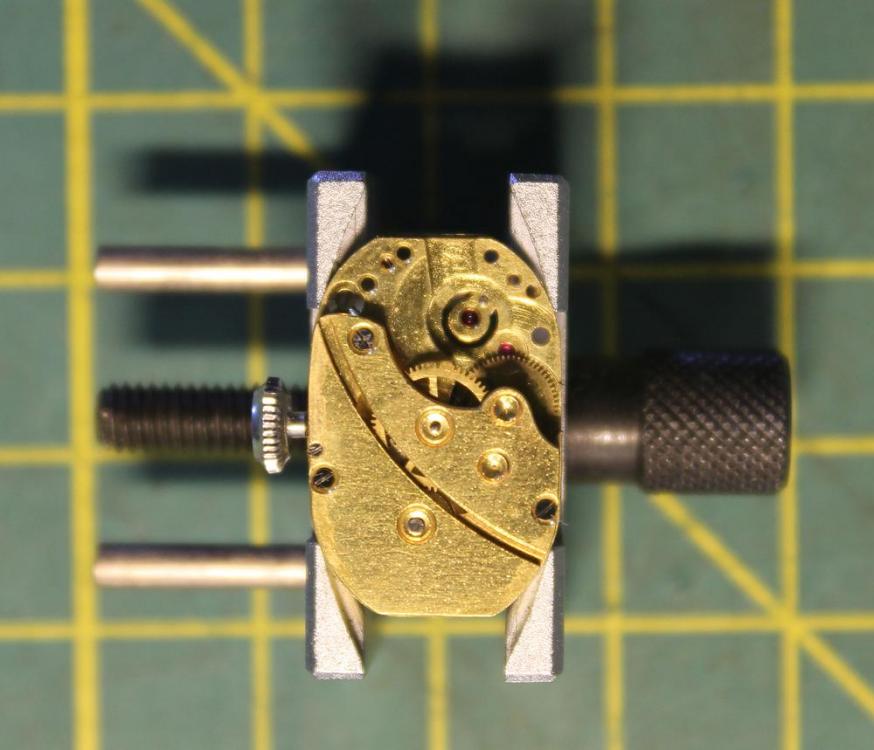
Finally got around to cutting my first successful balance staff. It is for a 201 caliber Jaeger-LeCoultre 8-Day aircraft clock. In fact this is the same clock that got me interested in watch repair as a hobby. The first attempt resulted in a pivot being cut off while I was finishing it up, it was complete except for the finishing on the last pivot and it just disappeared. That was with wire rod. Second attempt was with blued wire rod, which I should have been using to begin with. Took my time and ended up with a usable staff. Installed on the balance assembly and it worked!!
.thumb.jpg.b124489a6965611eedfa1f086272f6a9.jpg) 2 points
2 points -
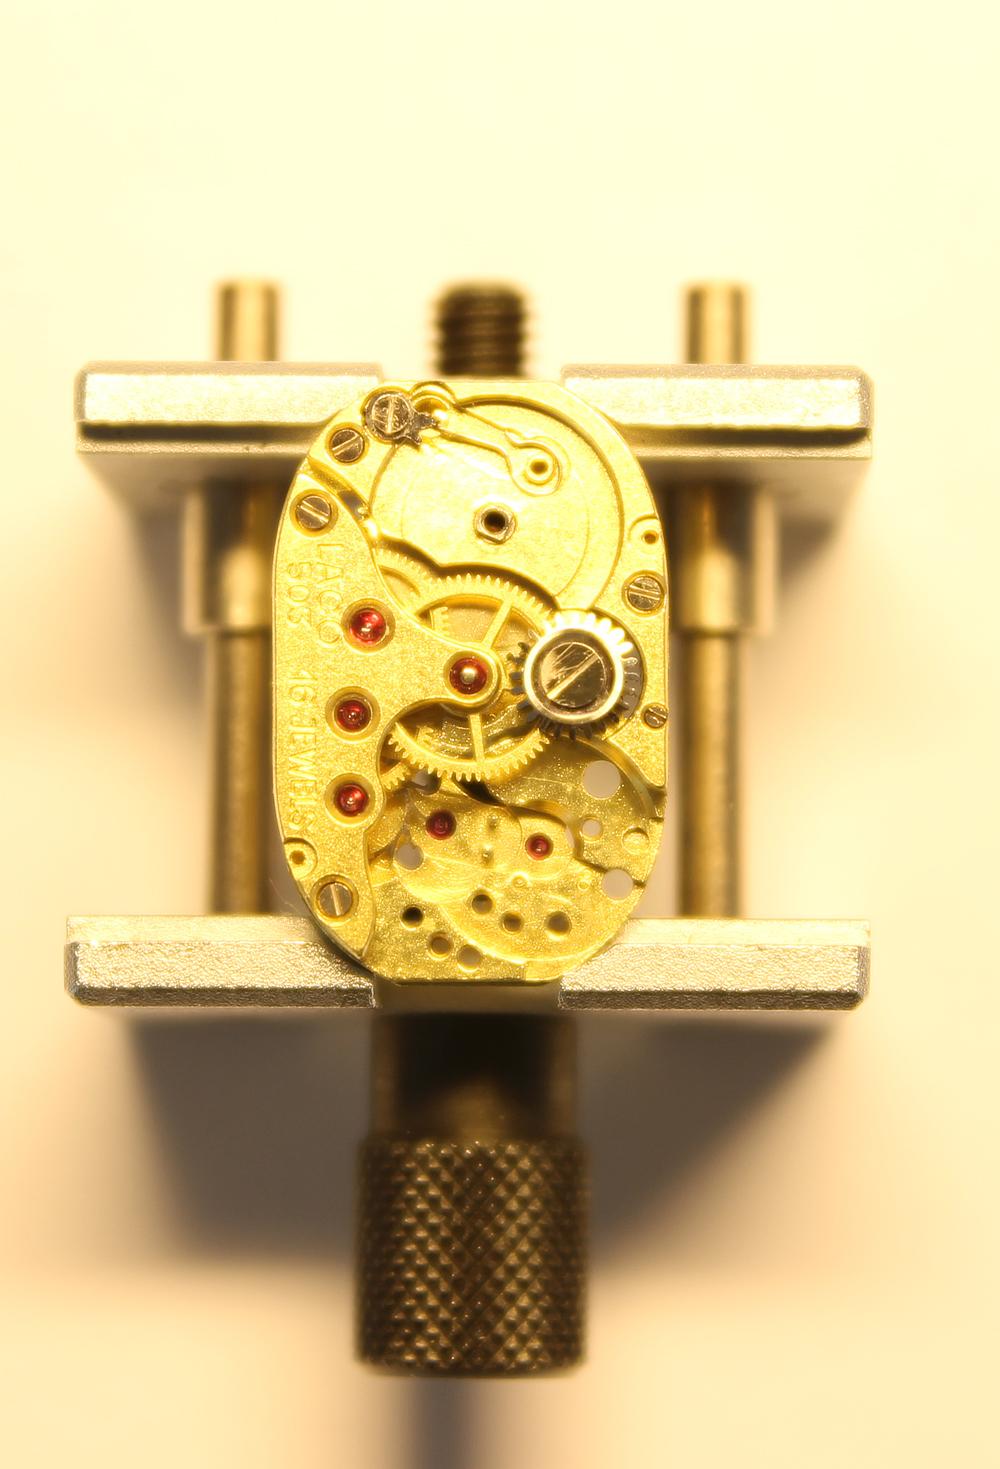
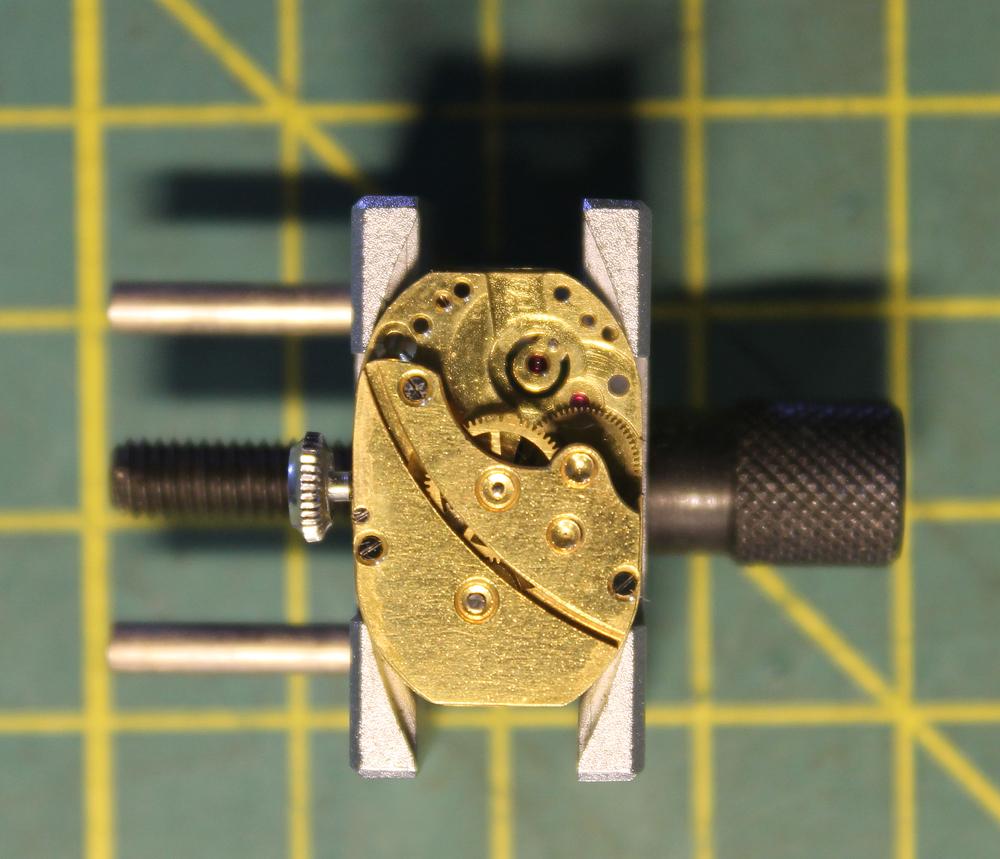
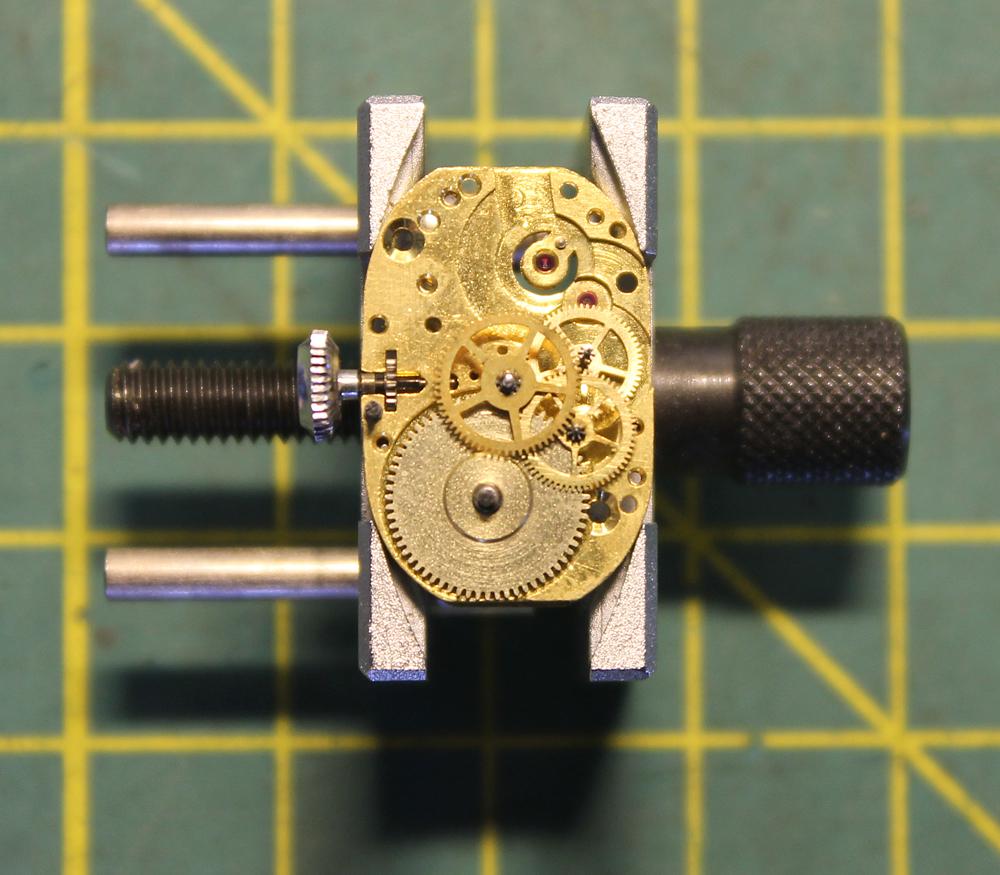
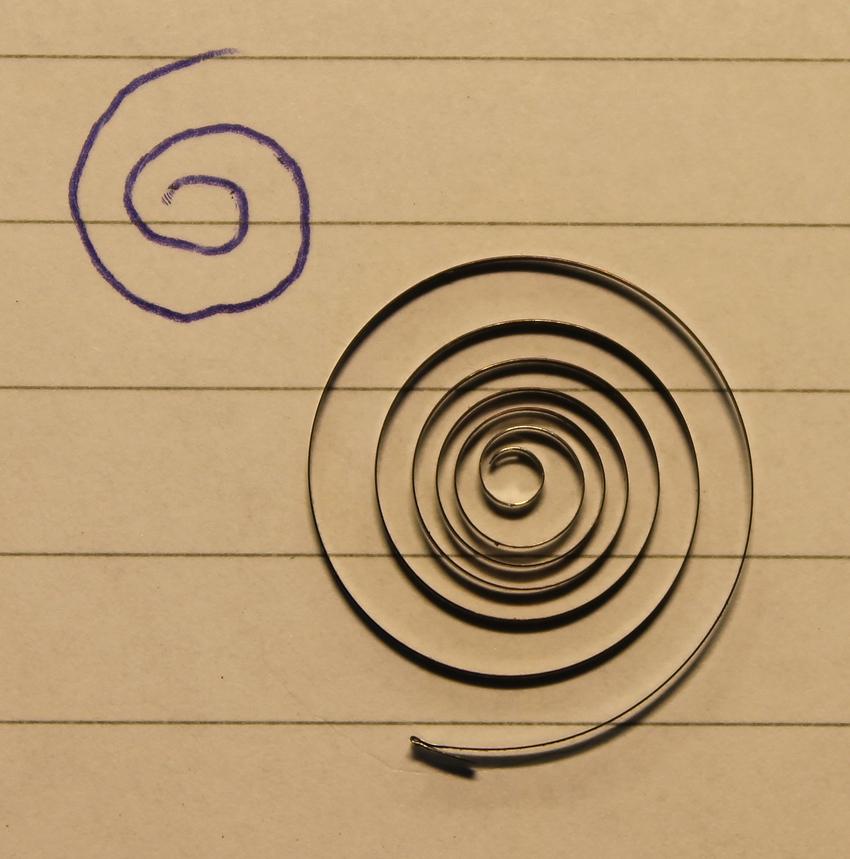
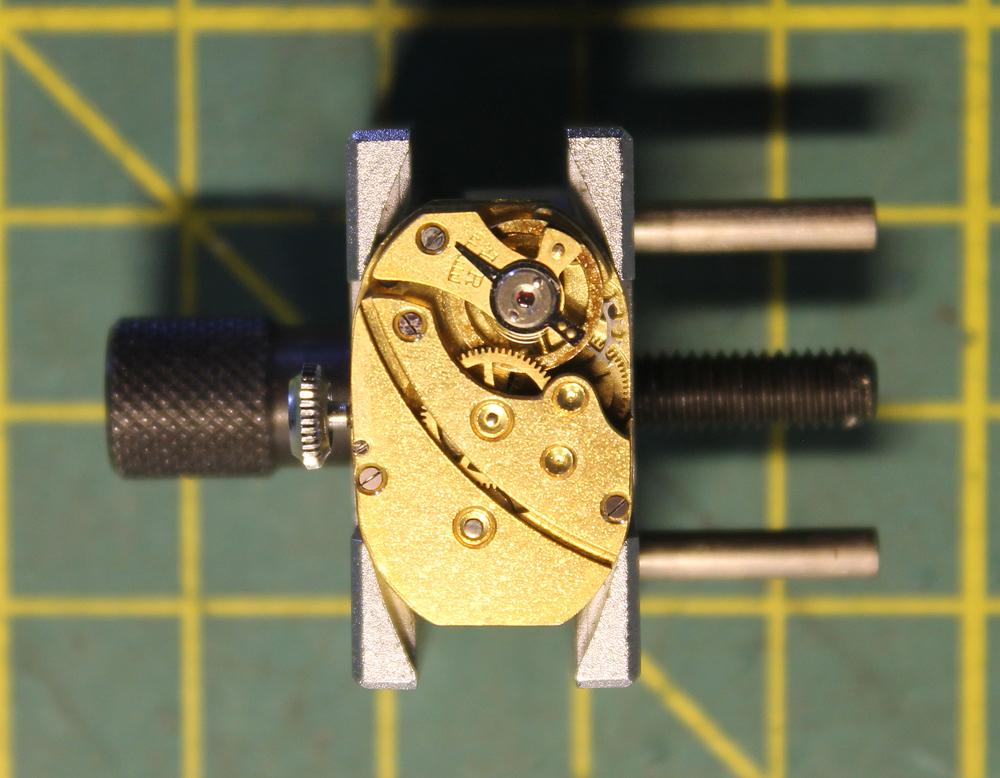
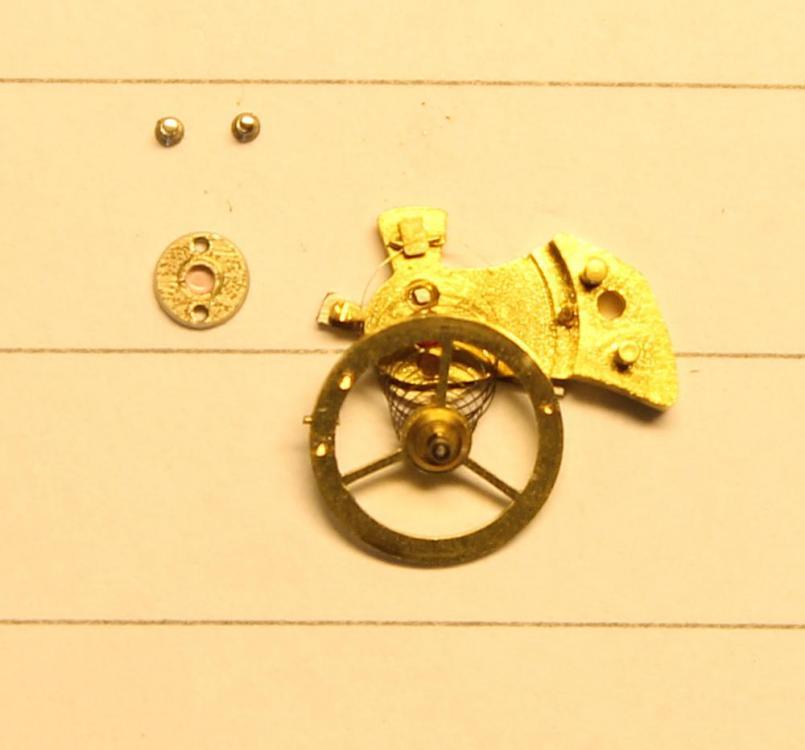
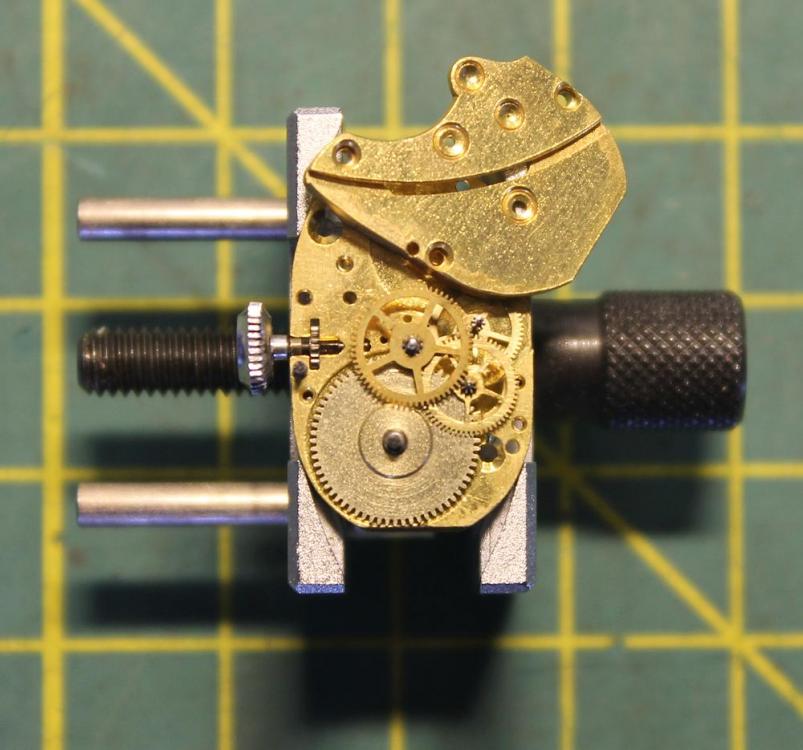
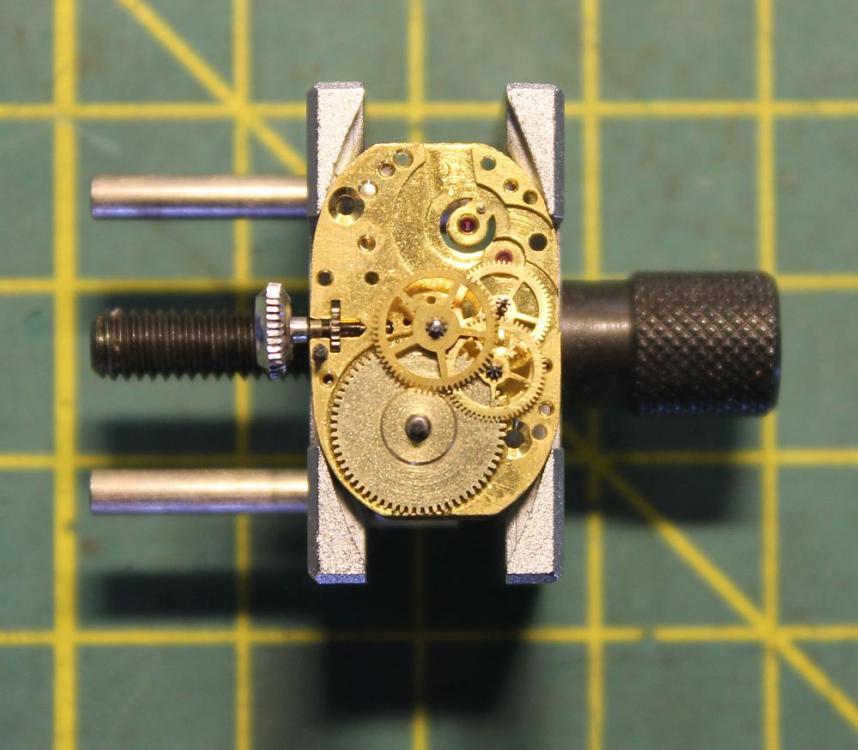
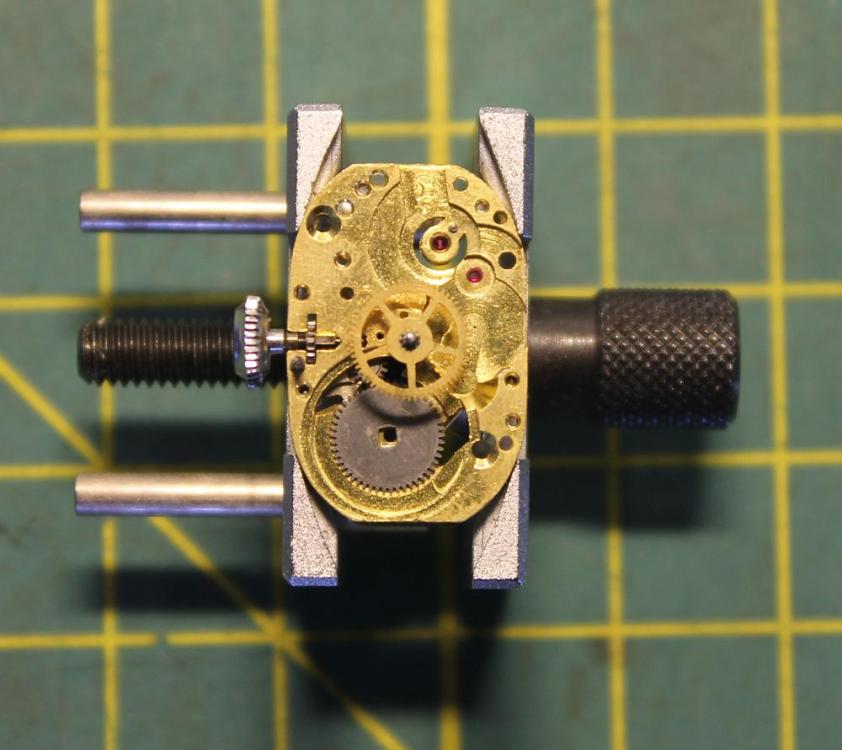
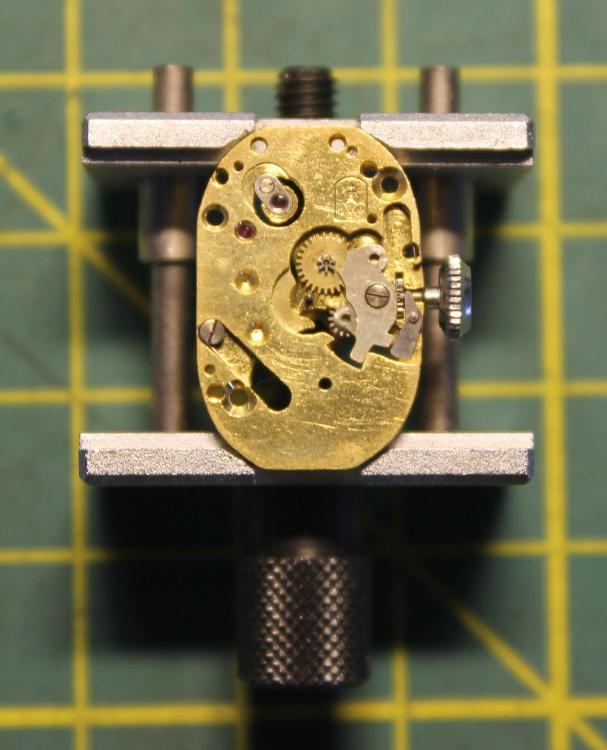
The disadvantage of doing a walkthrough "live" and promised to come back is, that if things don't go as planned, that you still have return and include them. I'm sure that the seasoned watch makers under us do recognize my story below and smile, hopefully in sympathy .... The first hurdle I encountered were the screws underneath the balance bridge. These screws have to be undone in order to get to the balance cap-stone. For illustration I attached a picture below, it's of another balance, the Kasper 200 I recently did. In case of the LACO balance, I just couldn't get these two screws out. I do have hardened screwdriver tips and the size screwdriver which fitted these little screws was 0.6mm. The tip of the blade twisted / broke right off. Luckily I had a few spare blades, but after ruining my 3rd blade, with one more spare blade to go, I give up. The screw slots are still fine, but I just can't get them out. My next size up screwdriver is 0.8mm, but that one is too wide for the screw-slots. Now I happen to know that the next owner is going to use these watches as dress-accessories, so it is doubtful that this watch is going to see daily use for a prolonged period. I decided put a tiny droplet of oil on the balance pivot jewel and leave it. I'm not happy about it, but in this case the risk / reward was also a part of the "perseverance"-equation. The balance cap-stone on the main-plate was no problem and while having the main-plate still empty, I took the opportunity to check the line up of the balance impulse jewel and the banking pins; the jewel was right in the middle. After having cleaning the jewels and pivots, I started demagnetizing and assembling the movement. The barrel goes in first, followed by the wheel train and the center wheel. Then the barrel bridge can be mounted, then the train-bridge. Once together, the train wasn't happy ! It was hardly turning, even though all the pivots were properly seated. I took the wheel-bridge and the barrel-bridge off and started re-cleaning the jewels and pivots. It was not after the 3rd time cleaning that the wheel train was running smoothly. Mounted the ratchet wheel and ready for the keyless works; Started on assembling the keyless works. During the dismantling of the keyless works I forgot to mention that the bottom edge of the intermediate wheel is slightly chamfered. The chamfer has to face down during the assembly; Keyless works mounted; For oiling the pallet jewels, I also use my 0.1mm Rotring pen. Residual oil on the pen-tip is enough for a nice small droplet on the impulse faces; Installed the pallet fork but the "action" was "sluggish". The balance rotated freely during the beat-error test, so I tried to see if the movement would run at all; it wasn't happy I knew that the wheel-train and balance were functioning fine, so it had to be the pallet fork. I have to say that the pallet-fork is not my favored watch part to handle, but I had finally a good "response" of the fork after 5x dismantling, cleaning the jewels and the pivots. I use the end of peg-wood to clean the pivots, that method is what I currently know, but perhaps there are people who can teach me better ways? It was for me a nerve wracking operation cleaning these tiny pivots, never mind doing it five times I've read stories from people having to revisit and re-clean an old watch over & over again to get rid of the old oil. Now I finally met my opponent. The watch is running, but it's far from happy; I'll let it run for a while to see if the situation improves, but I have so my doubts. The good news is that the movement is from a none-runner, now a runner ....... well, barely........ This movement may become indeed an "Endeavor" on its own ....... If it stays the same, I guess the next step is to repeat the process. Clean, clean and clean ever better. If you spot something that I'm doing wrong, or you see were improvement can be made, please let me know ! I guess, as for a "walkthrough", this write-up is hereby concluded. The movement was disassembled and reassembled. I would have wished for a happy ending, but not to be. However, on the bright side, these are the problems one learns from. From now on it's trouble shooting. I may, or may not, report back if I managed to get it to run 100% and what was done to achieve this. Hope you still enjoyed this write up

 1 point
 -
There are other references but SWIGART ILLUSTRATED MANUAL OF AMERICAN WATCH MOVEMENTS is one of the best. There are usually a few on ebay US now. It lists most Waltham pocket watches and the parts, as well as other poular American brands, and gives the balance staff number, but for example that model you list it lists 2 balance staffs and does not tell you if they are friction or rivet, but it still worth getting if you collect Walthams as it tells you what screws are used on all models and what hands which makes it worth while for just that.1 point
-
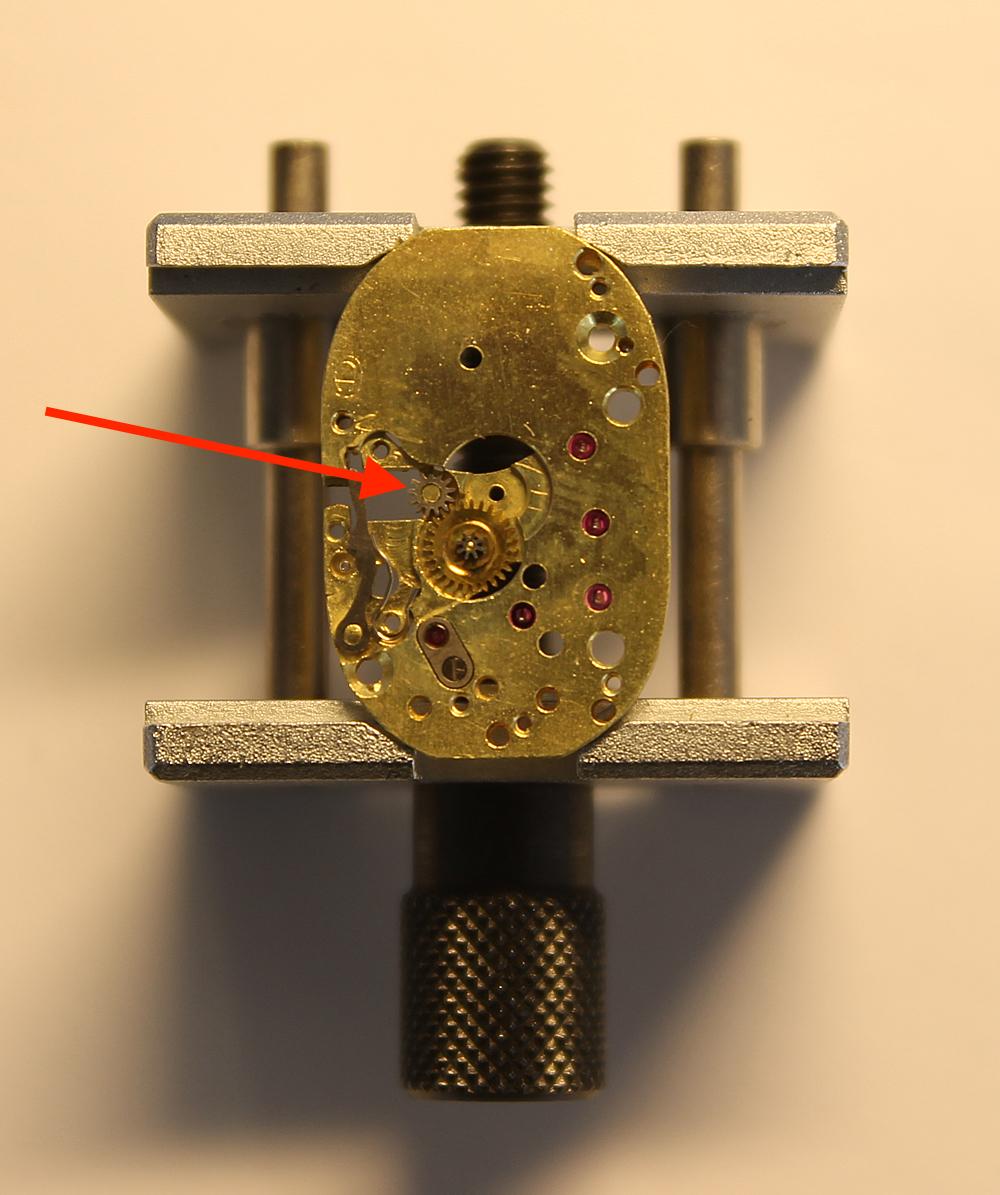
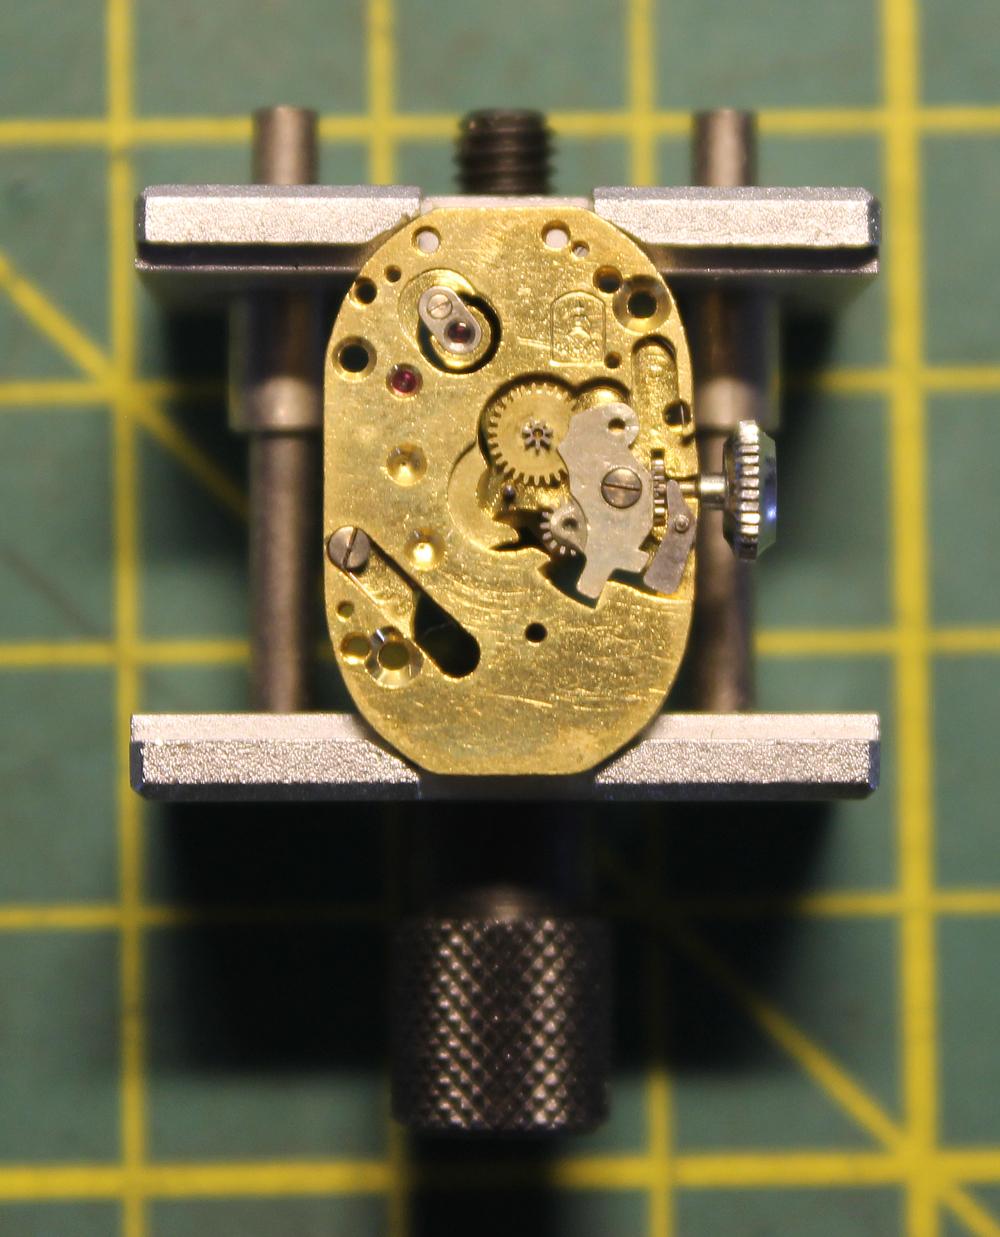
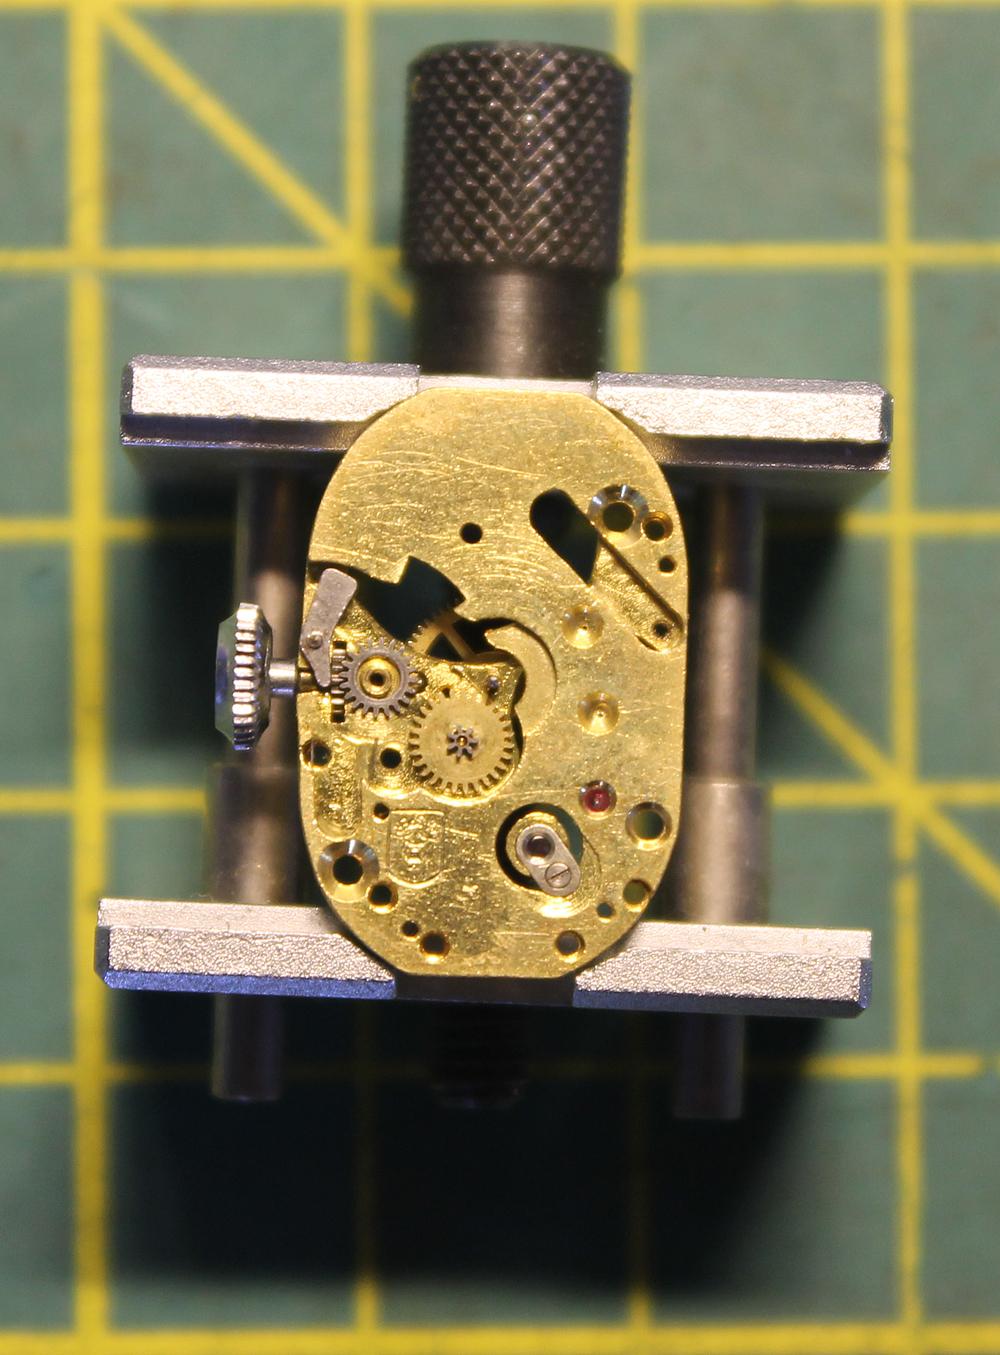
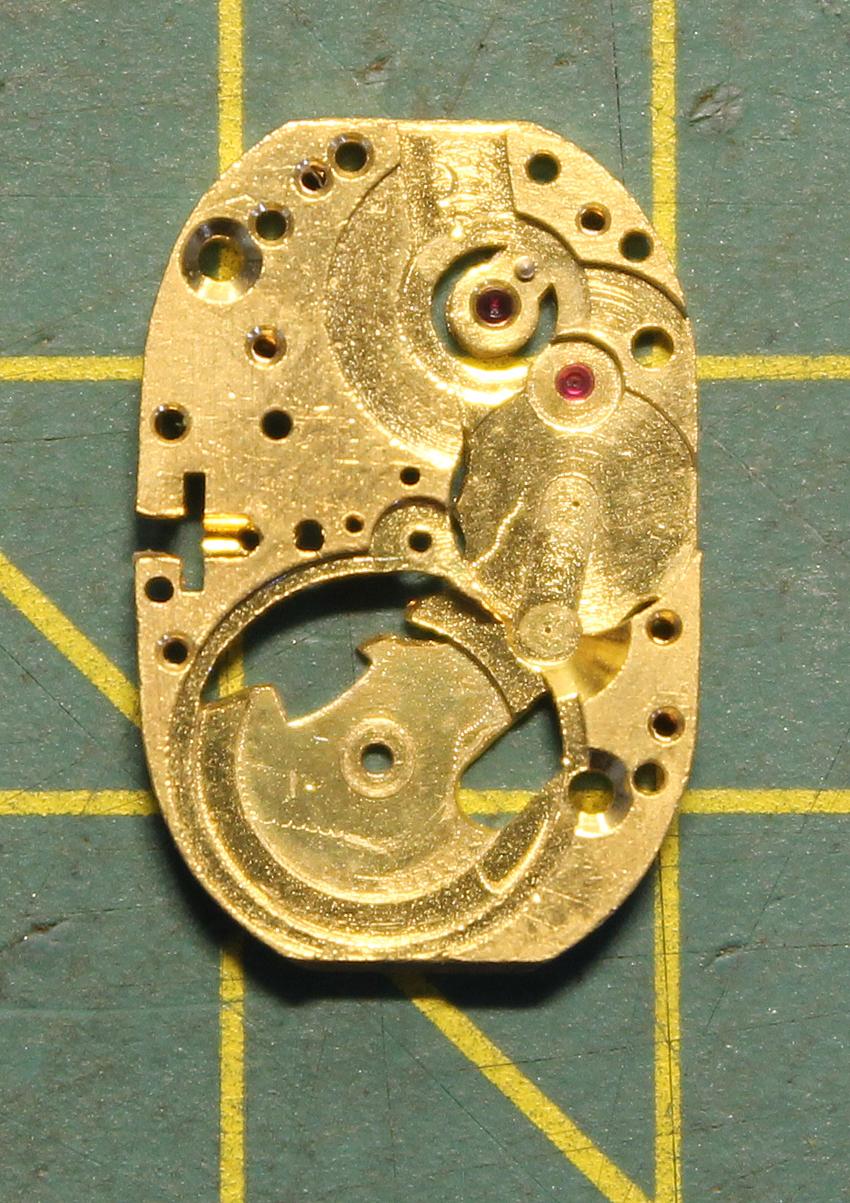
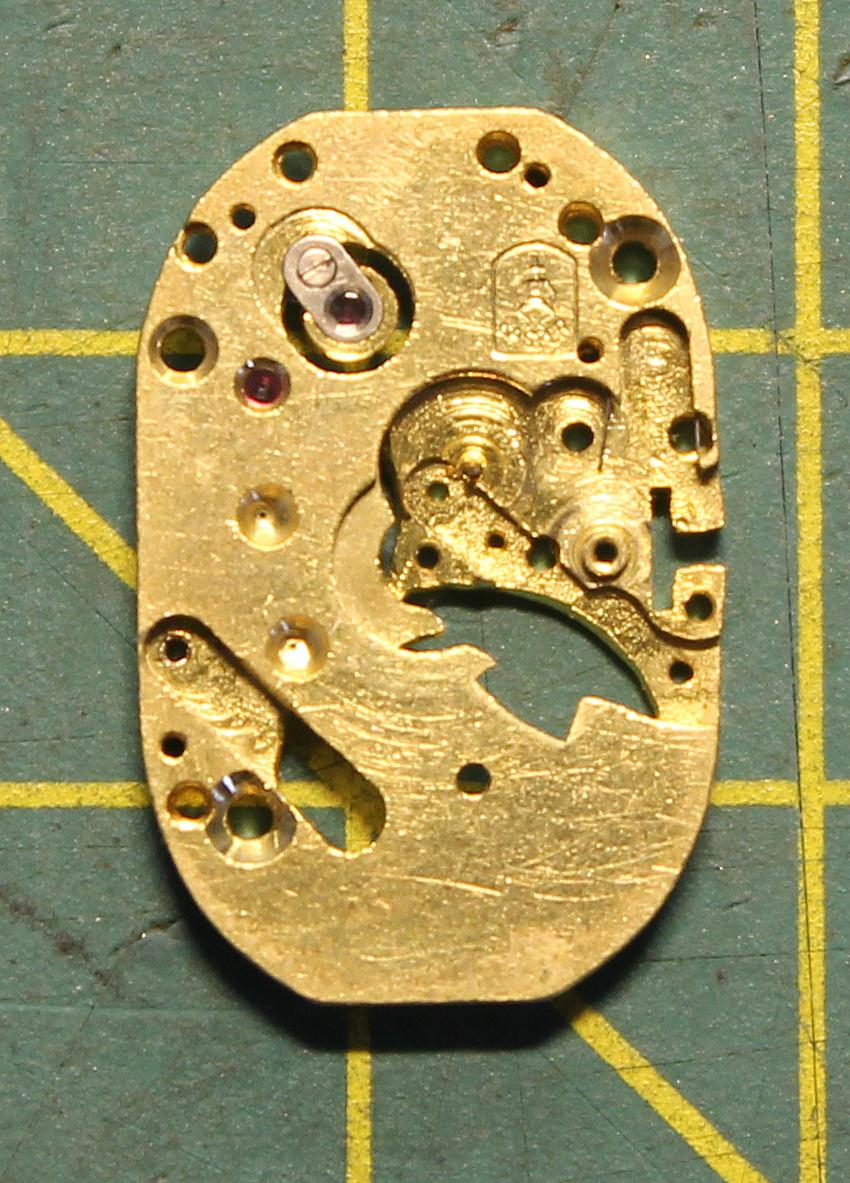
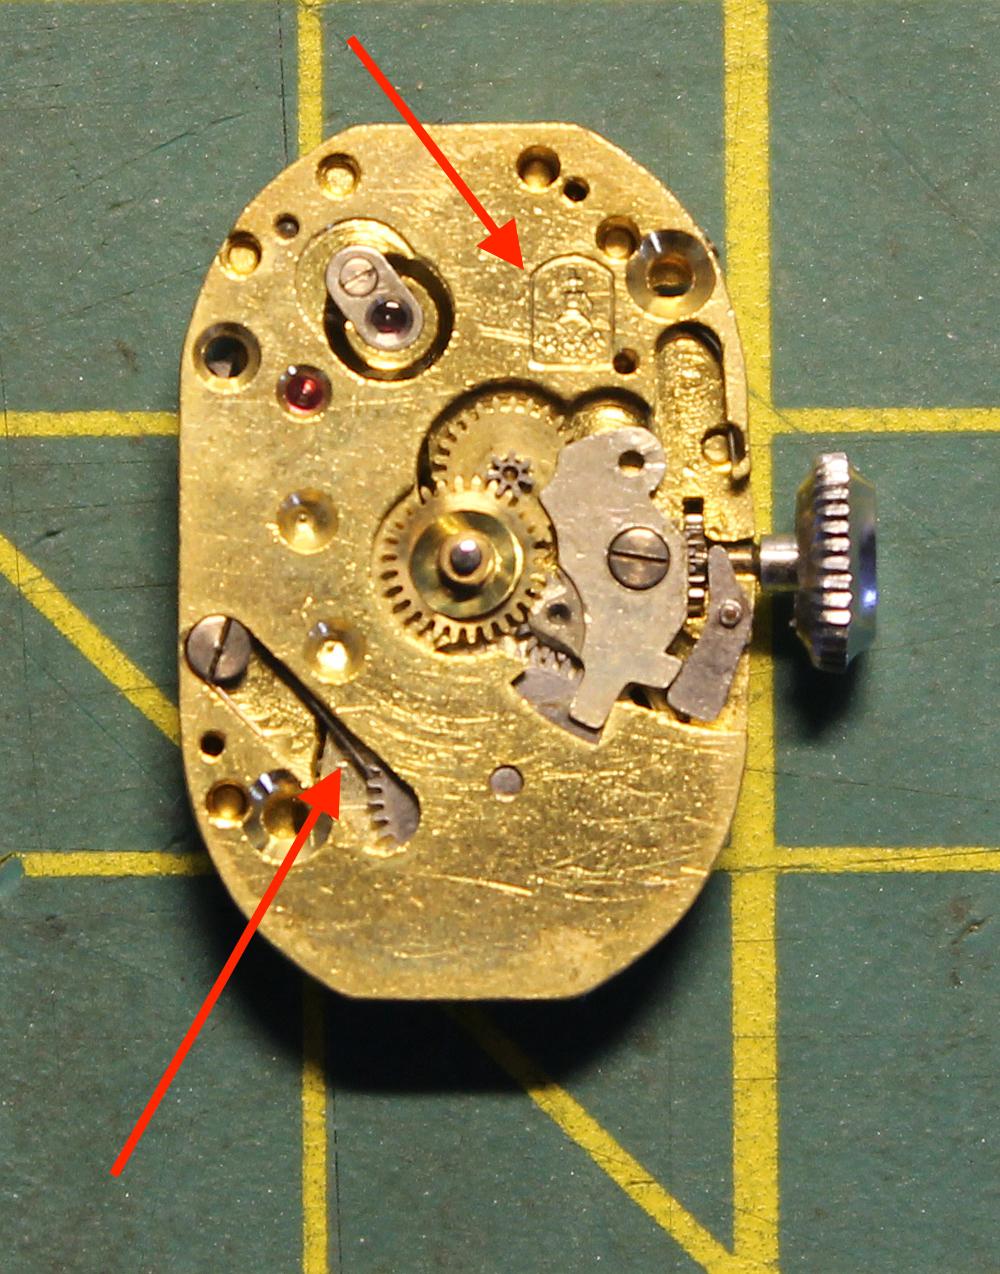
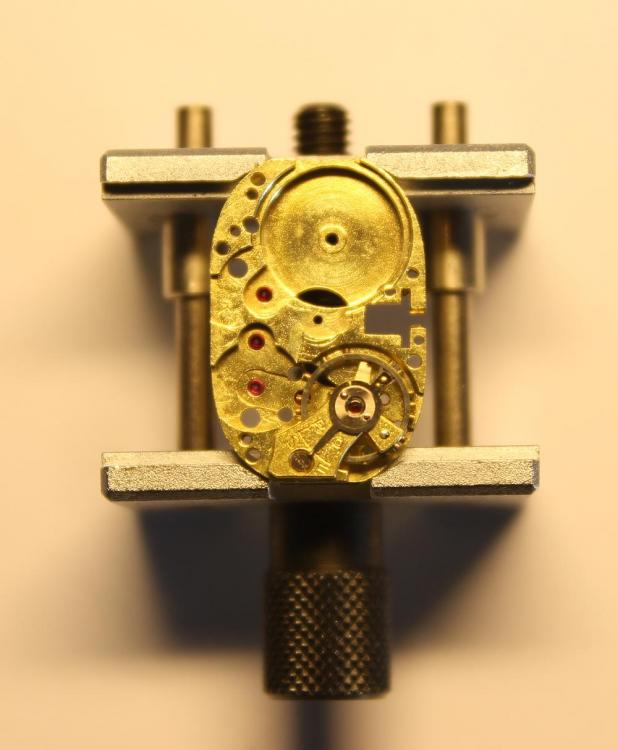
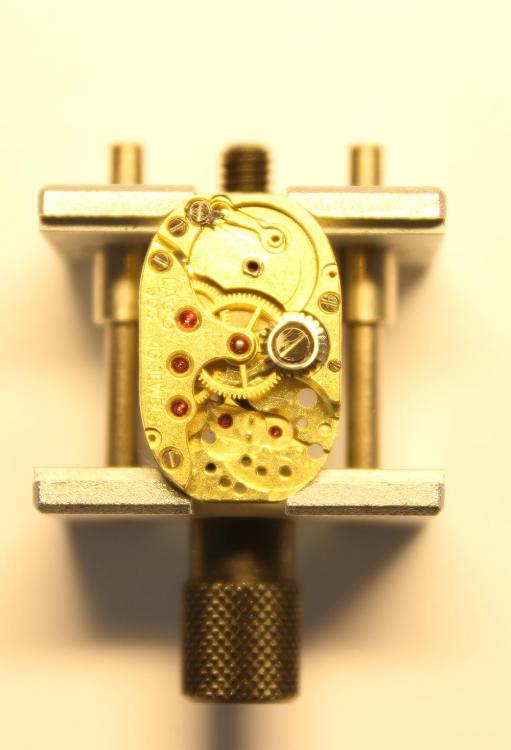
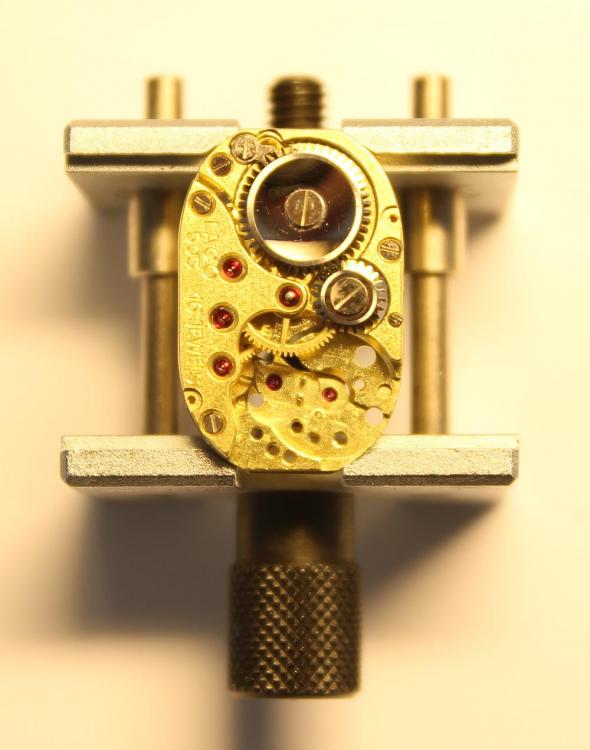
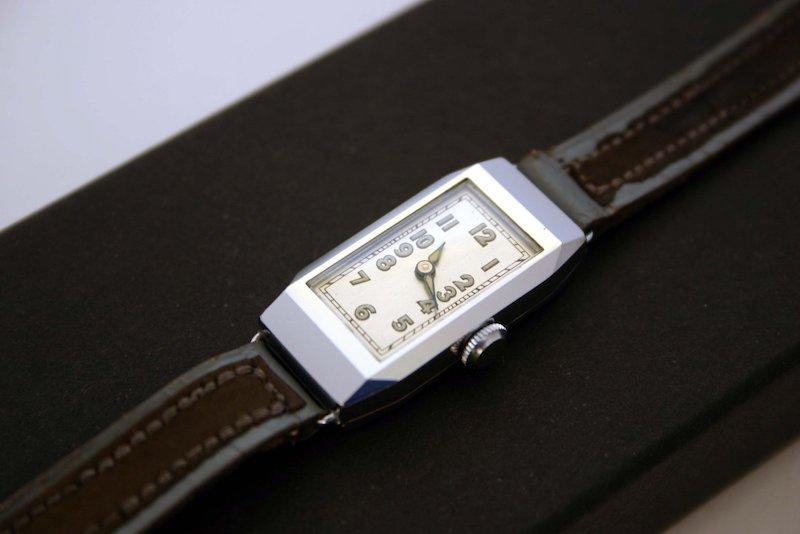
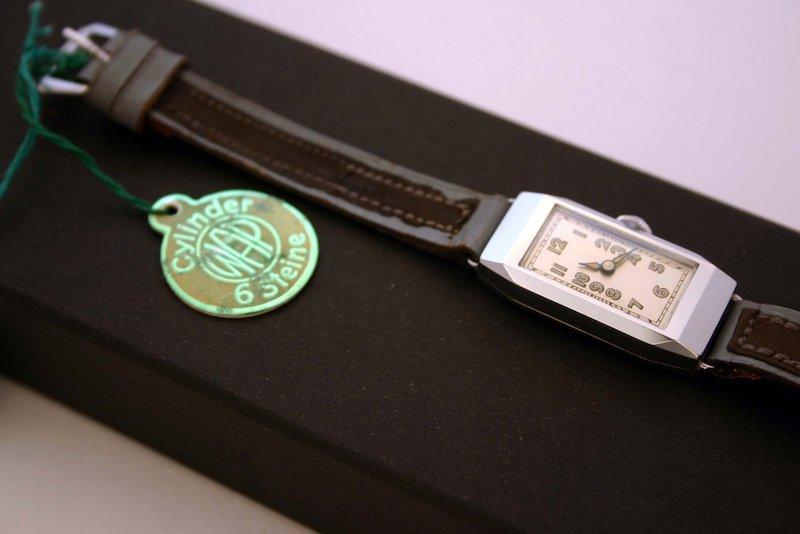
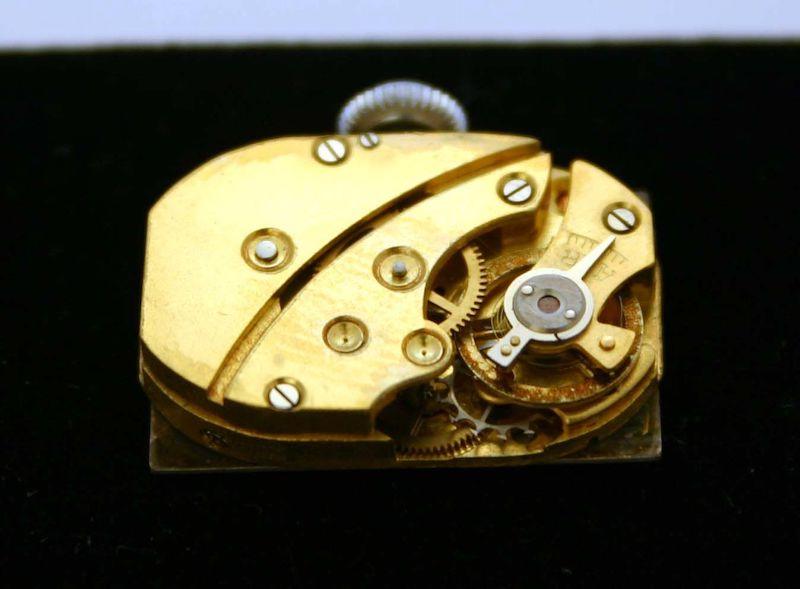
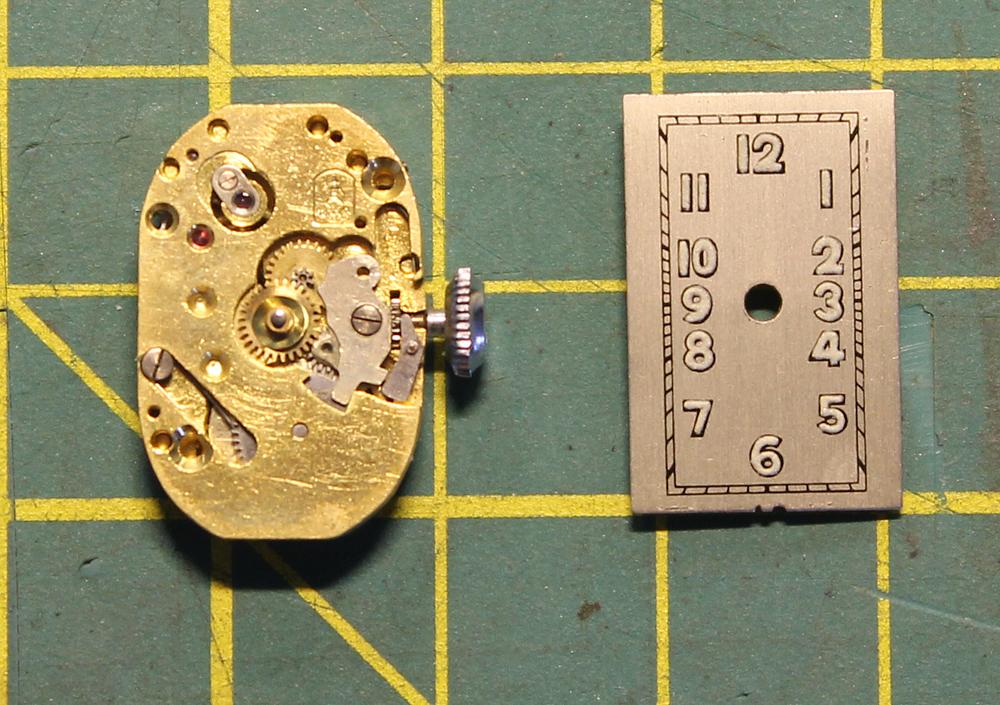
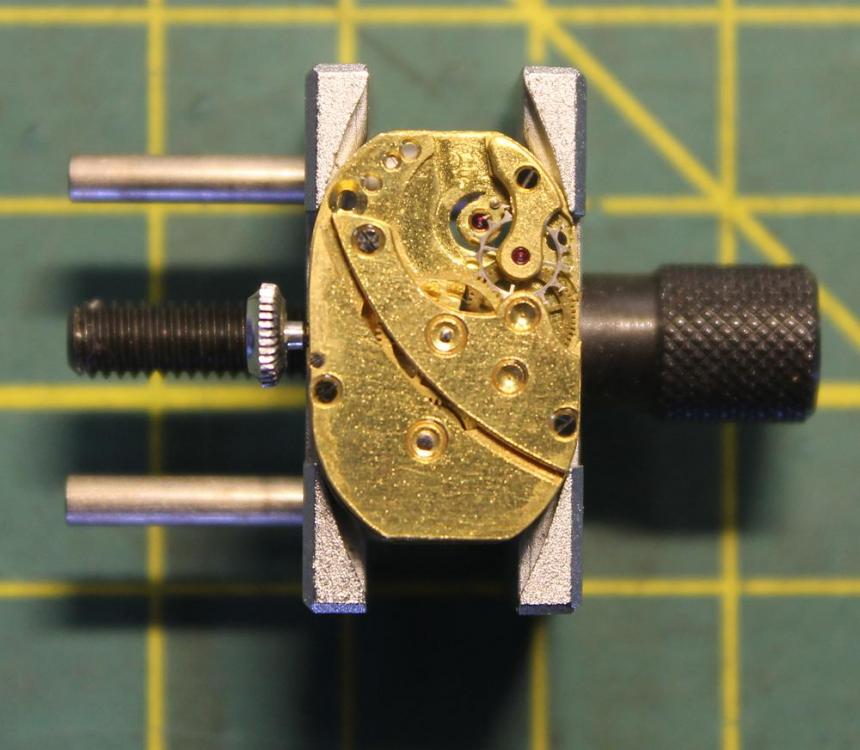
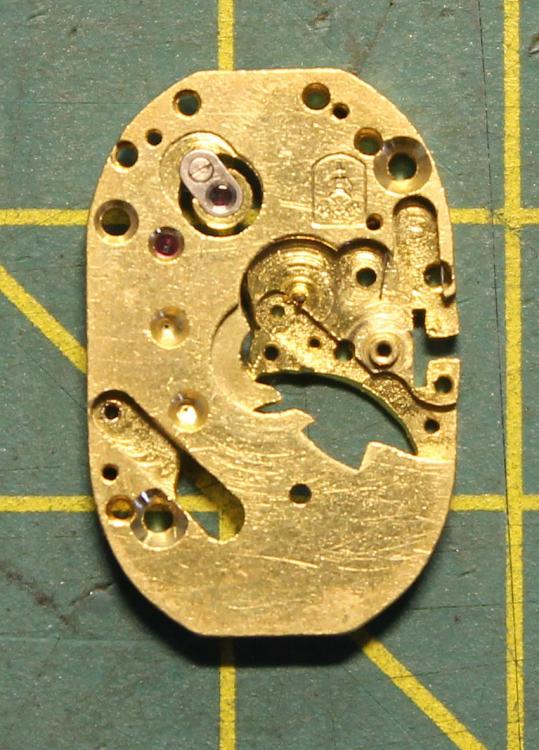
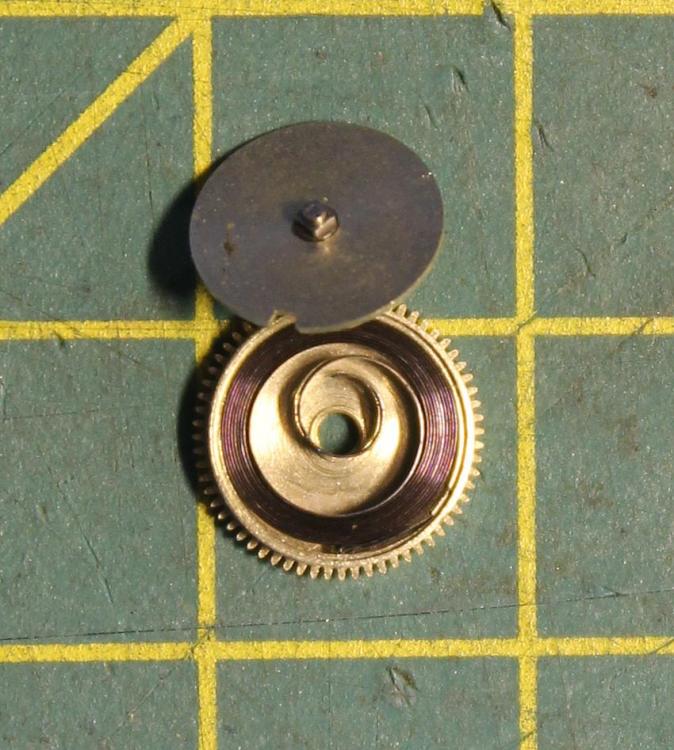
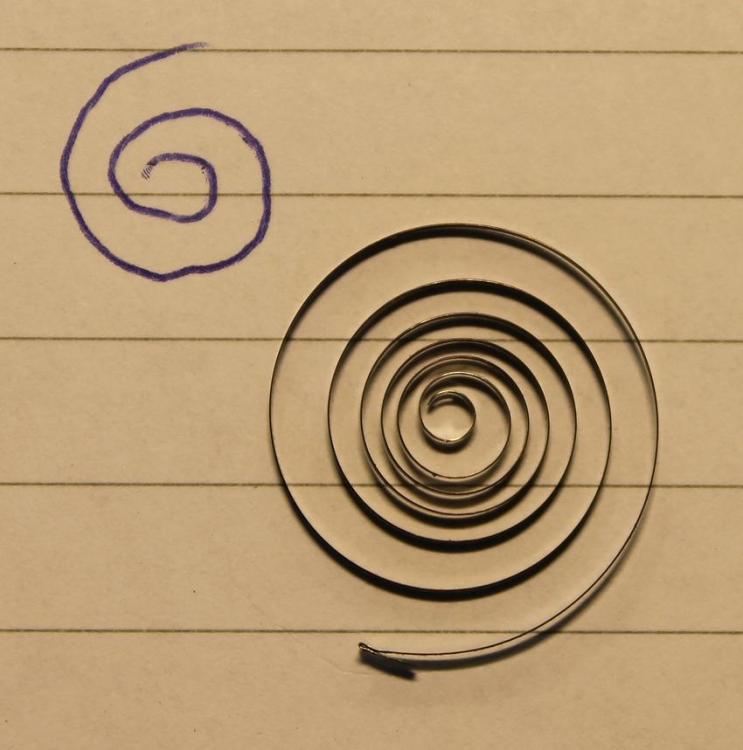
Hello All; I stumbled on eBay over this little N.O.S. 1940's German Art Deco ladies watch. Cylinder escapement, 6-jewels. It looked in good condition and I couldn't help myself..... Upon reception of the watch, it looked different than on the sellers pictures. That is to say, my wife (for which I bought the watch as a little present) thought it was too small for here liking For me on the other hand, the condition was even better than on the pictures. After opening the back-lid I though it was a modern, recently made watch. A few surface scratches on the outside of the case but inside, it all looked like brand new !! Listening carefully and one could still hear the sounds of the factory echoing in the watch case. The surface rust on the balance was negligible, the seller must have taken that picture from the worst possible angle (perhaps he is a very honest man ) A few winding's and there was life in the balance, be it hesitant, but life nonetheless After the disappointed that my wife didn't like it as much as I did , I did set off to strip this little gem. The watch case consisted of two parts, the upper with the crystal and strap-lugs, and the bottom "box" in which the movement houses. It's a press-fit case. The hands and dial came off without major problems or any damage. The dial had two feet and was held in place by two dial-feet screws (bottom left, top right) The hands were lumed, so were the numbers on the dial. Not sure if this lume is the "bad-stuff"?? With the dial off, the movement finally revealed some of its secrets; First, the ratchet wheel and "the click", the latter consisting of a small wire spring which engages in the ratchet wheel teeth; bottom left arrow. Secondly, the maker of the movement. It turns out that it's made by a company called "Kasper & Co", founded in 1911 in Pforzheim, Germany. Initially the company made elastic bracelets for watches, later added manufacturing of watch cases and from 1932 they produced complete wrist watches. In 1955 they produced their first automatic movement cal.1000, followed by their 2nd automatic movement, cal.1450 in 1964. In ca. 1970 the company ceased to exist. Here their logo from 1939 onward, printed on the front face of the main-plate, top arrow pointing to the logo on the watch; However, the watch was sold under the name "WAP" (?) , as shown on the paper-label. So far, I couldn't find any information on "WAP". Most likely this watch is out the 1940's era ..... First I made sure that any residual tension in the mainspring was removed. Failure to do so and the chances are that the escape-wheel takes off as soon as the balance is removed, potentially ruining the movement. Removed the balance and escape-wheel; both being jeweled on either end. The wheel-train bridge and the barrel-bridge consisted out of one piece; I wasn't able to remove the center wheel as the cannon pinion was still attached to it on the other side. To see is the ratchet wheel and the click on the right; With the main plate flipped over, stripping of the key-less works. The key-less work works quite simple. The winding stem is hold in under spring tension and when turned, the main-spring gets wound. When the crown is pulled & hold out, the hands can be manipulated. The winding stem pops back in once released. The main plate looks in very good condition. Last action for today, removing the main-spring from the barrel; At first glance, all looks in perfect condition, no wear nor any tear ..... This was the easy bit, tomorrow the tricky parts; cleaning of the balance wheel and the cleaning & oiling of the cap-stones....... I hope this all goes well and then the re-assembling .... To be continued .....


 1 point

.jpg.204ae0120acd84c87f645be2ed8ddc8a.jpg)