Leaderboard


Popular Content
Showing content with the highest reputation on 02/26/17 in all areas
-
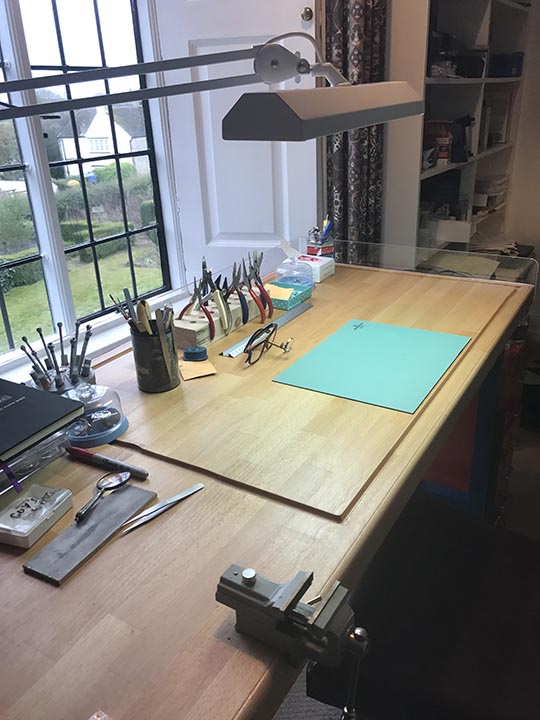
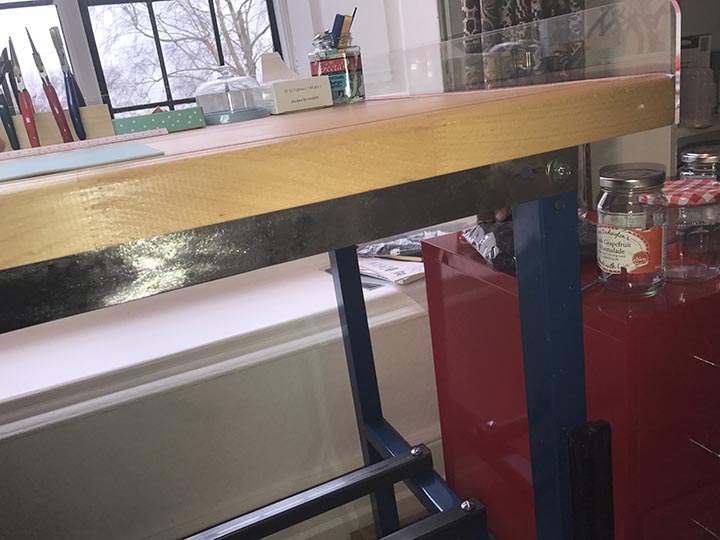
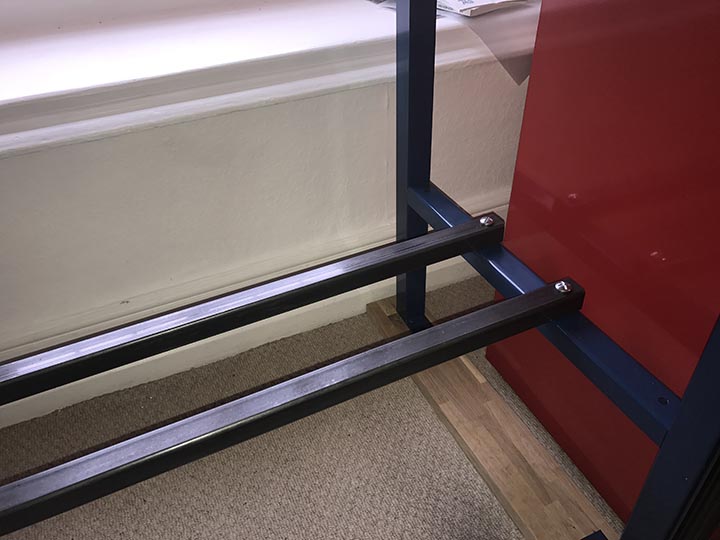
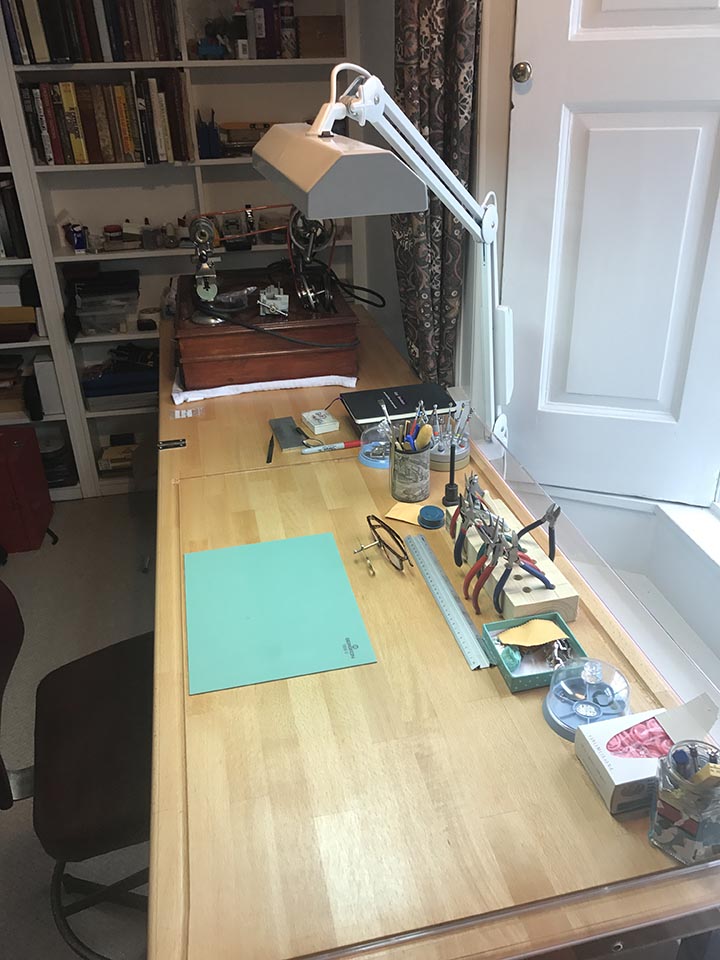
Like a proud father, I feel the urge to show off my latest creation. We recently moved to a new house which finally gave me the space to have an office/workshop. I have been working on a tiny little homemade bench the past few years and have been dreaming of a proper bench. Sadly the ready made ones I wanted are way out of my league. My design goals were: Affordable versatile Free standing (i rent the house and cant drill bolts into the walls) Sturdy I got the original inspiration from Dan Spitz. http://danspitz.com/for-sale/ His concept is to make stunning workbench tops. You then supply the legs. However at £2,000 for the top, there was that budget thing again. I did however steal his idea (I don't actually know if he or someone else came up with it) of the routed groove along the edge. It has already proved to be a godsend in terms of catching small screws, and the odd tool. I decided to add a perspex screen on the back and down one side as I am notoriously rubbish at not flicking click springs etc across the room. So, the basics. Worktop: 40mm solid Beech kitchen work surface from Ebay 2000mm x 620mm - £85 Legs: Steel workbench legs from Machine Mart about £40 including shipping Bench support: 2 L shaped steel struts from an old Victorian bed. £5.00 from a salvage yard, cleaned up with an angle grinder then polished. Struts: 30mm square steel tubing from steel merchant £20.00 Danish oil for bare wood: £5.00 (four coats on either side) £20 for bolts and screws. So I made the whole thing for well under £200. The top is extremely heavy and I haven't totally managed to eradicate minimal side movement and ideally I would bolt it to the wall but as I said I can't. Still it isn't going anywhere and I love it. Of course you don't have to make it 2m long but I wanted somewhere for my lathe. I am building a perspex divider to protect the workbench from cuttings from the lathe. Anyway, I hope it might give some of you some ideas.


 3 points
 -
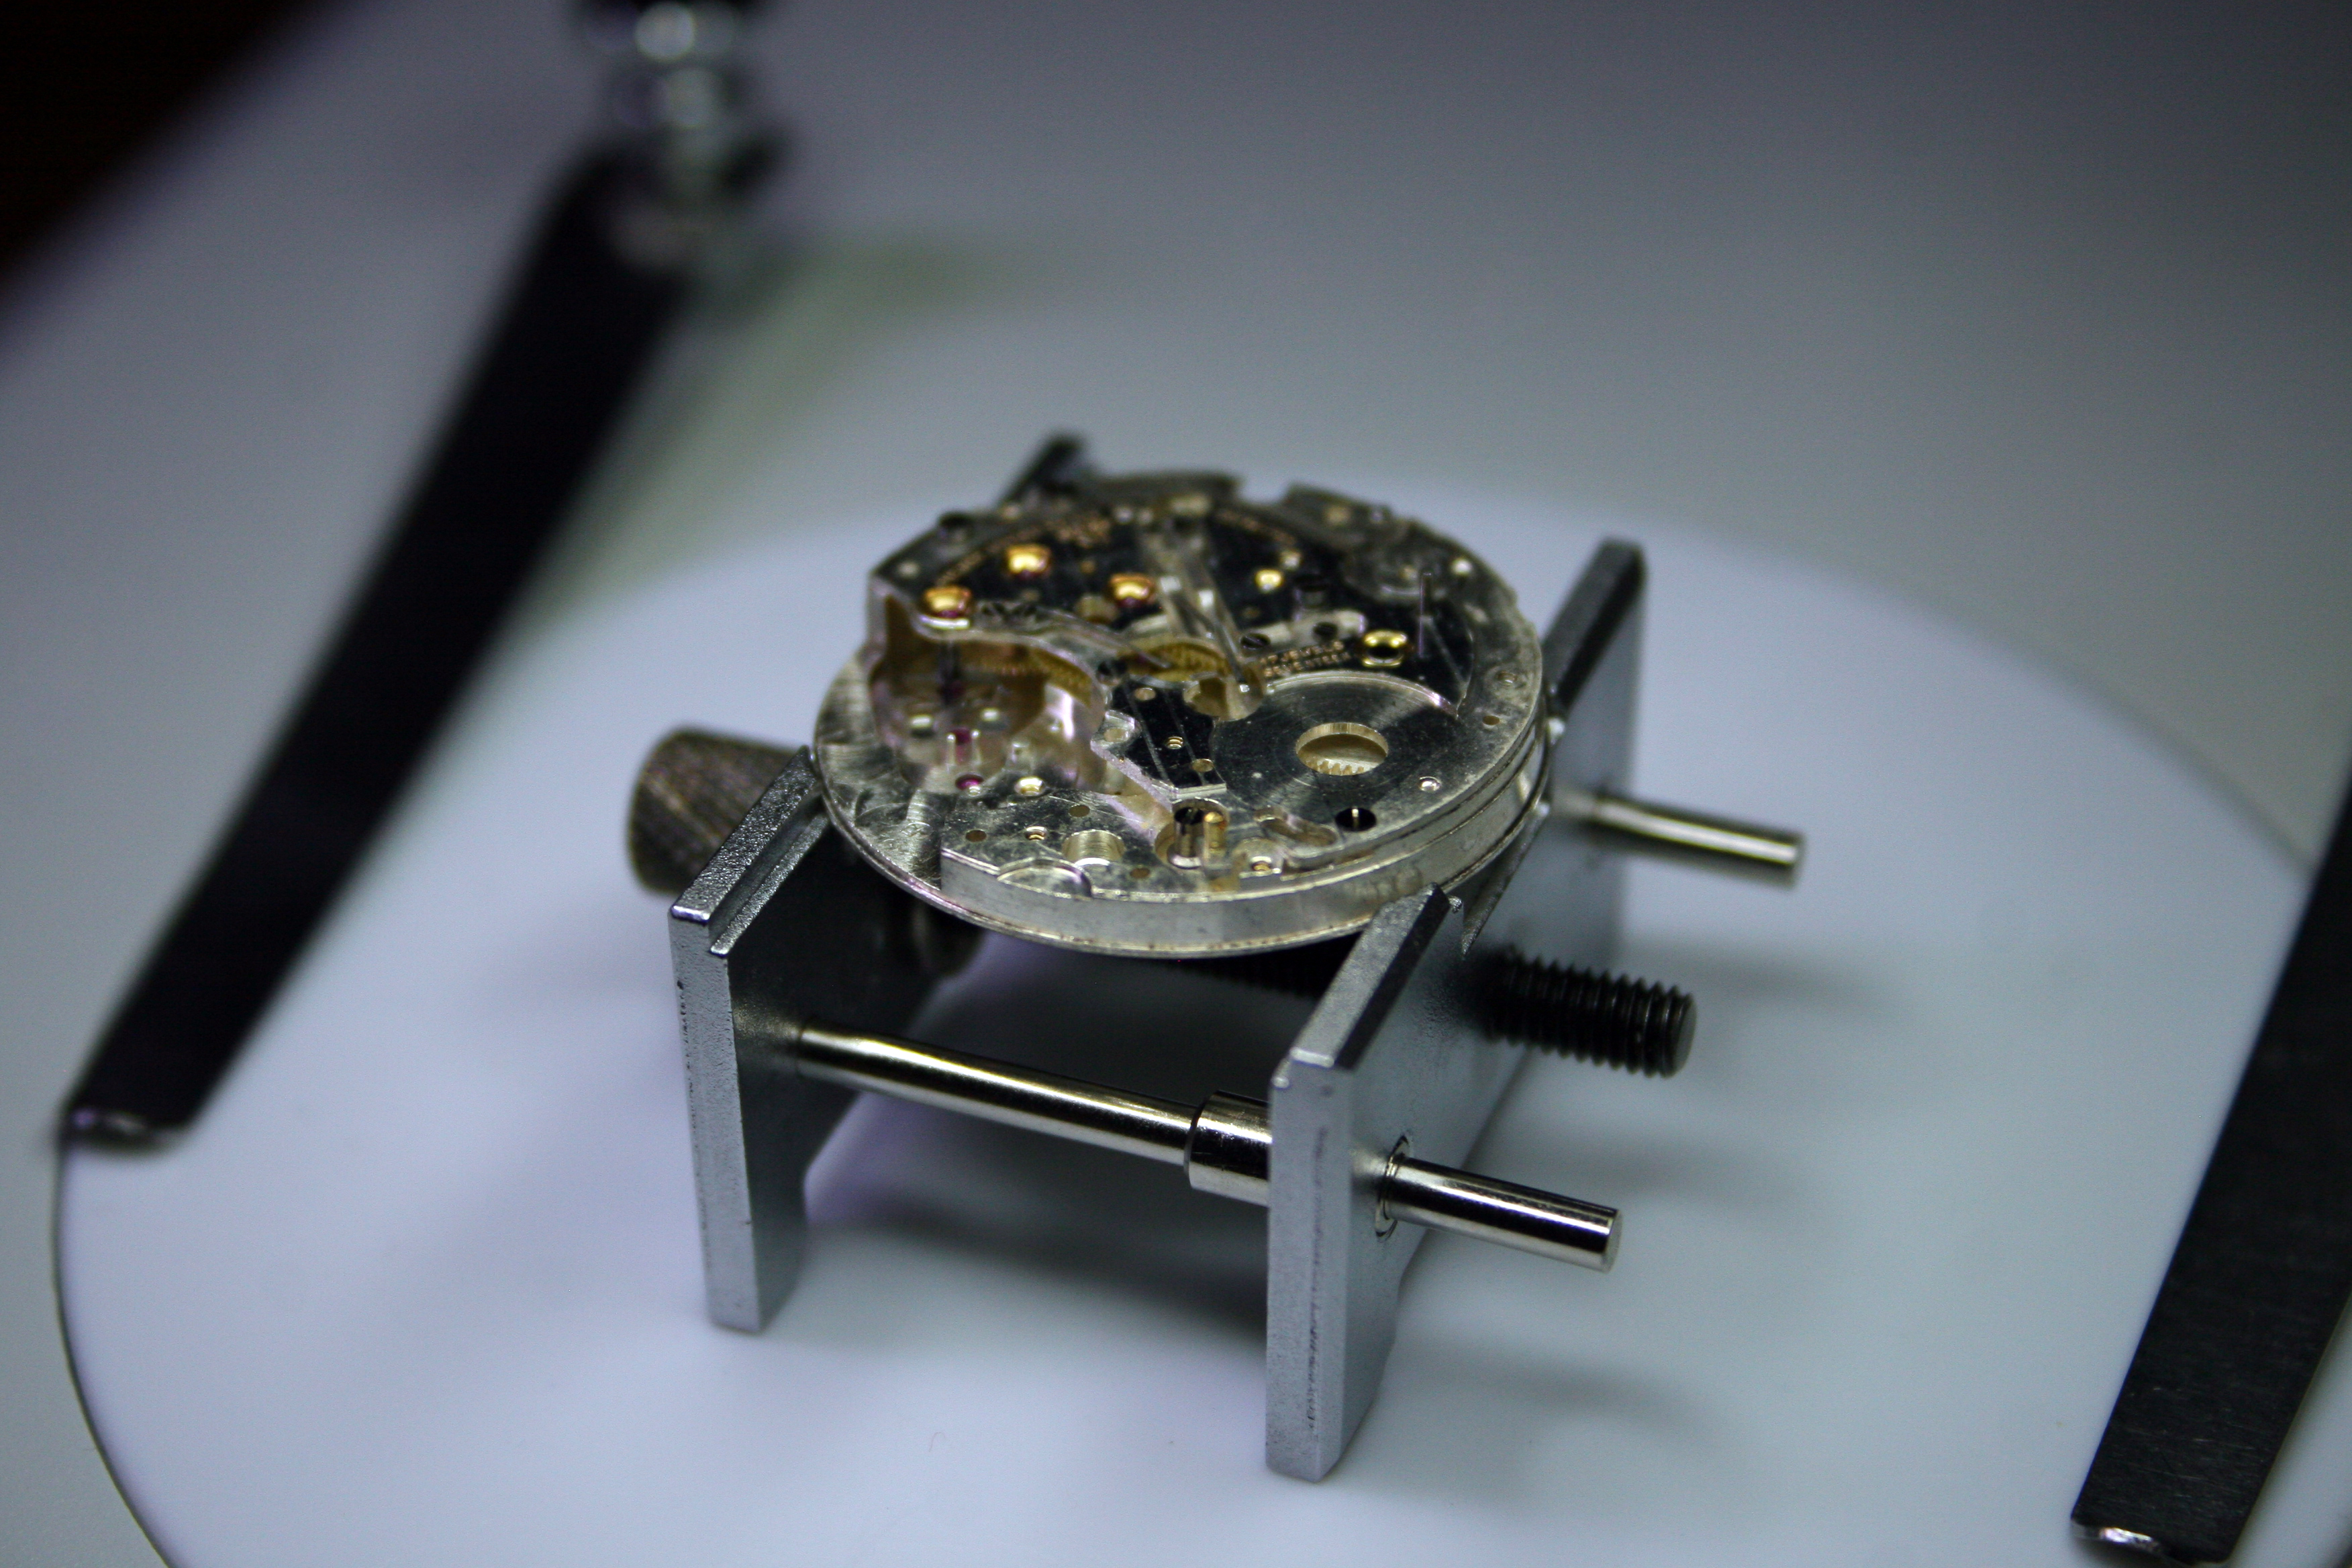
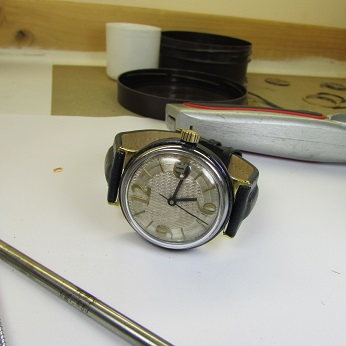
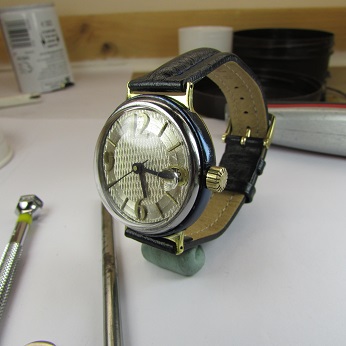
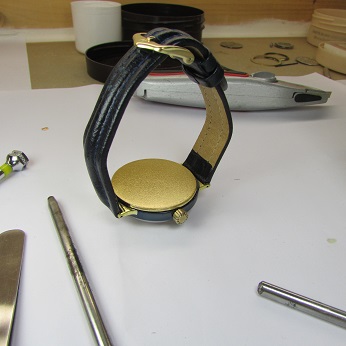
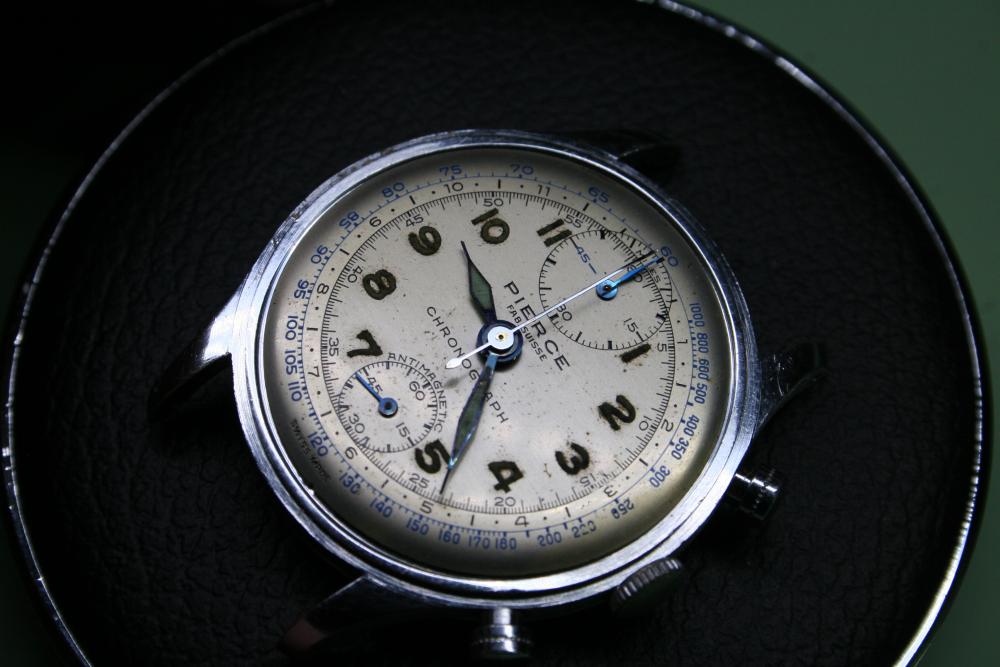
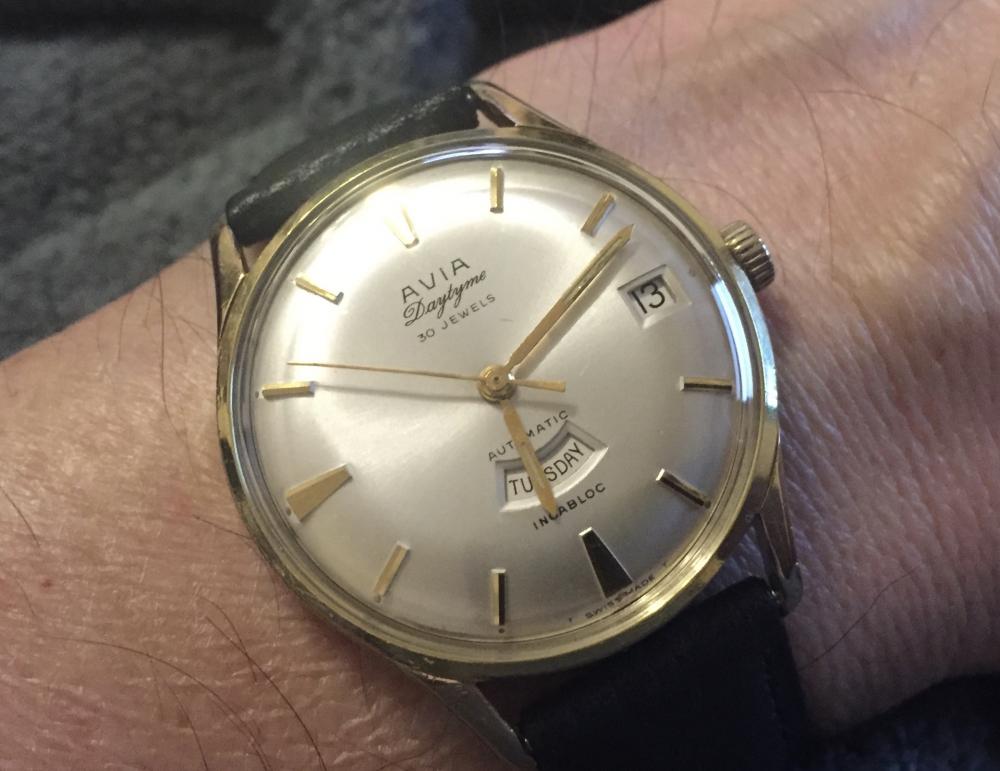
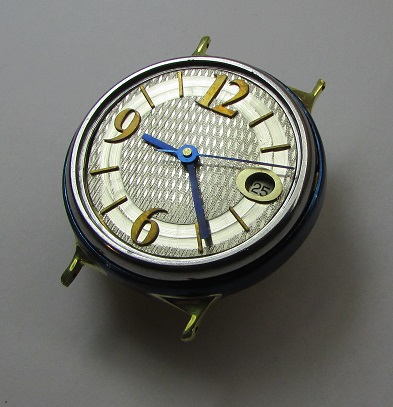
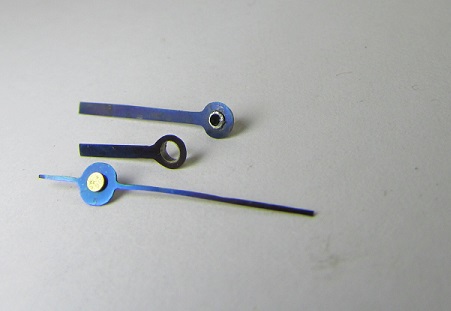
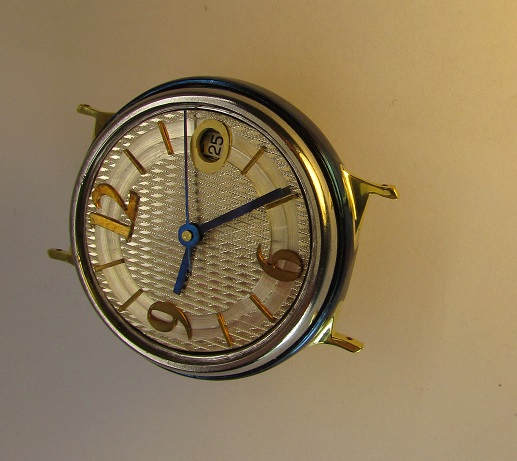
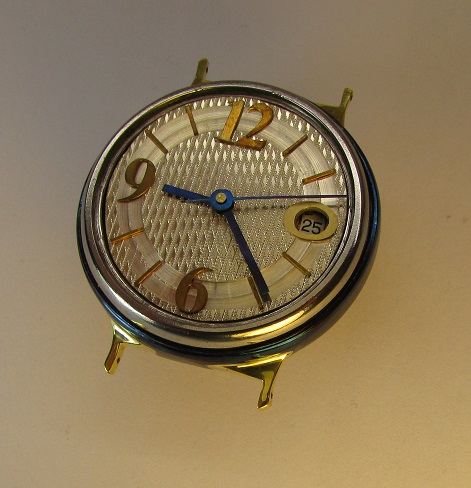
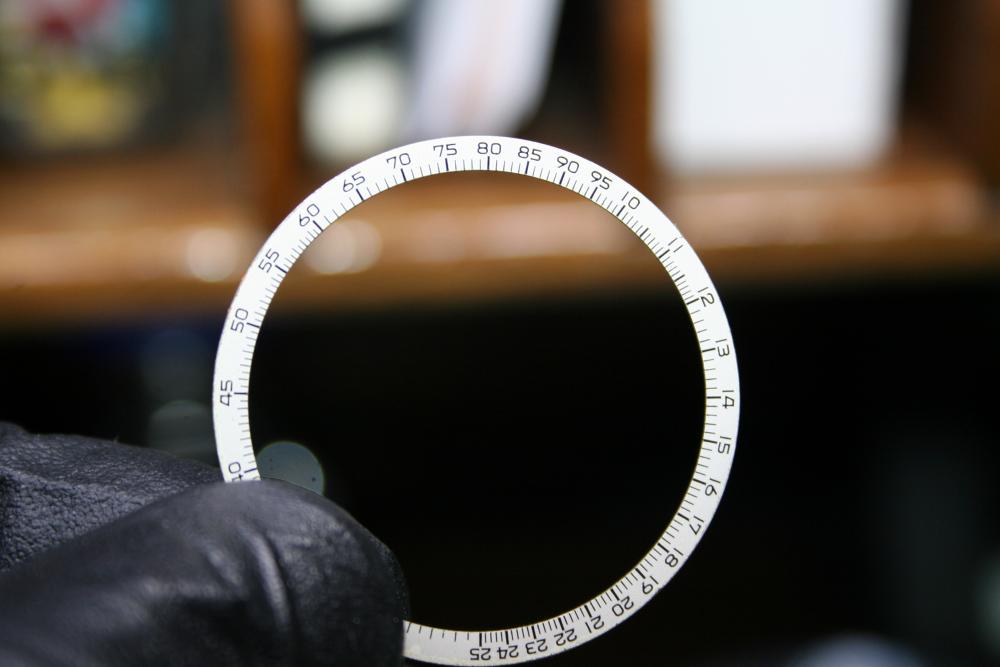
This project has got to the stage where I am getting glad it is over. Anyway, crown made, parts sprayed with clear laquer, acrylic fitted and strap fitted. A few other problems I had to deal with to get the watch keeping regular time. The watch now keeps good time and I will regularly wear it and see what snags come up (which I am sure they will !!)
 3 points
 -
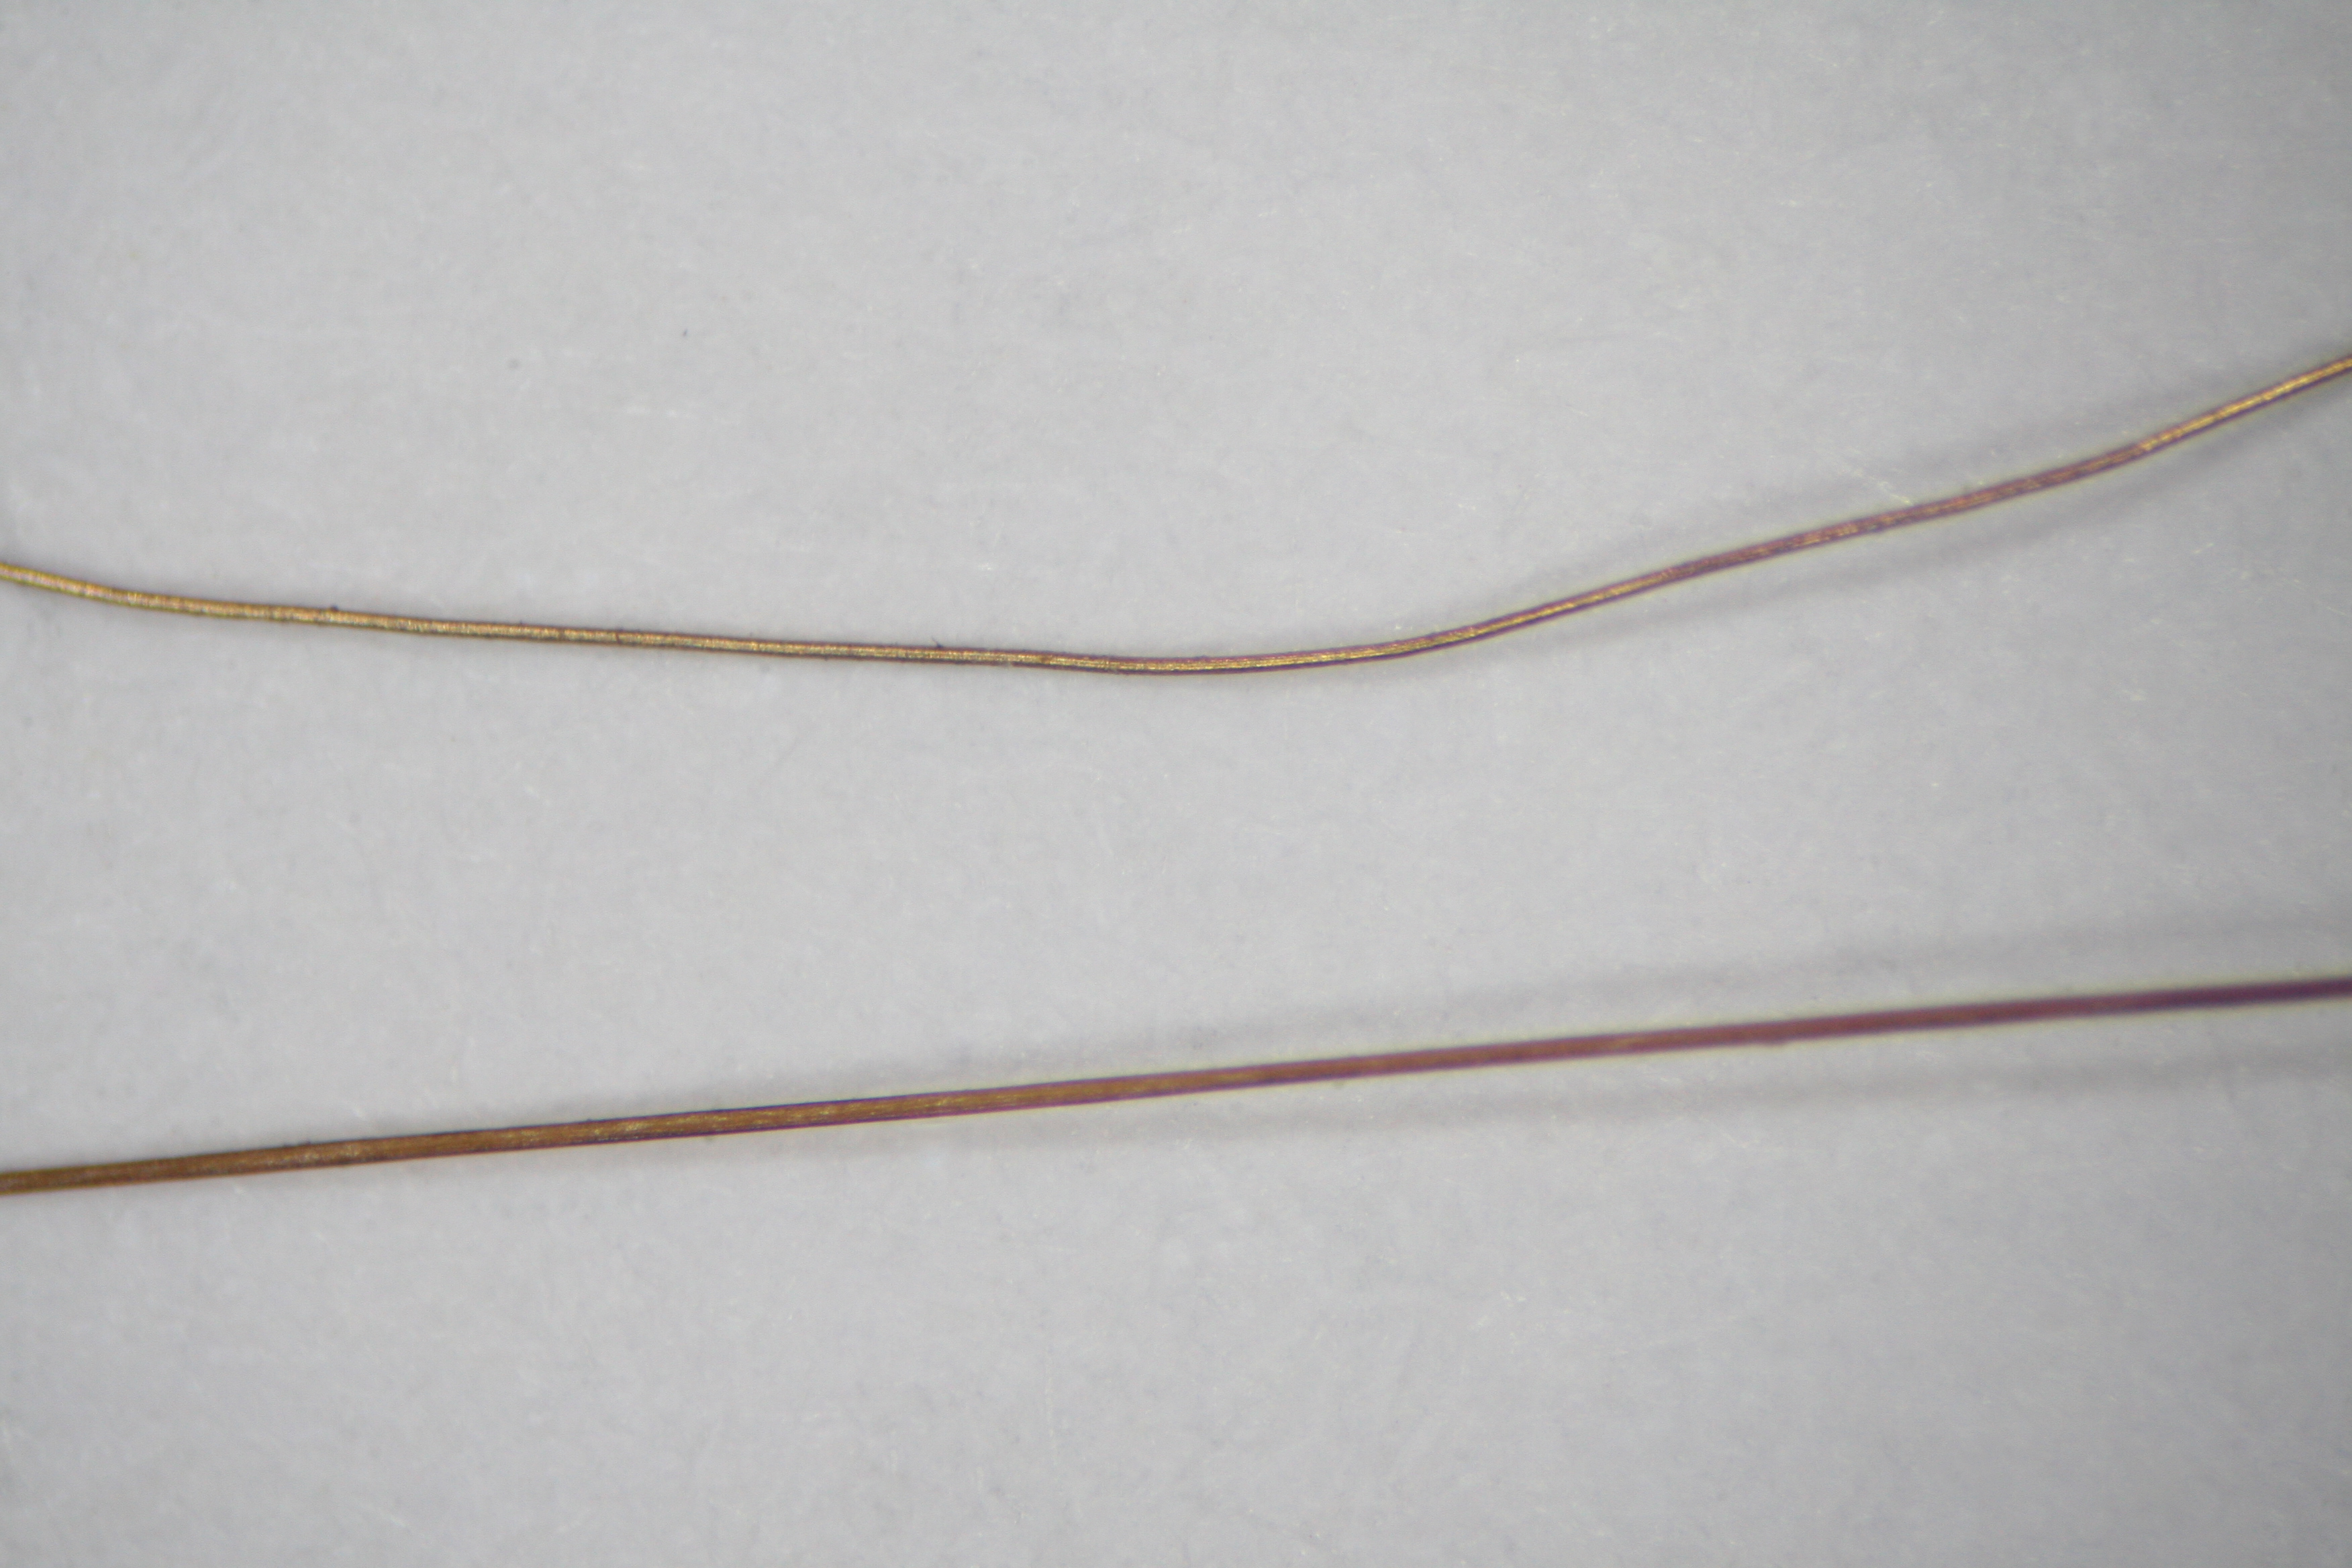
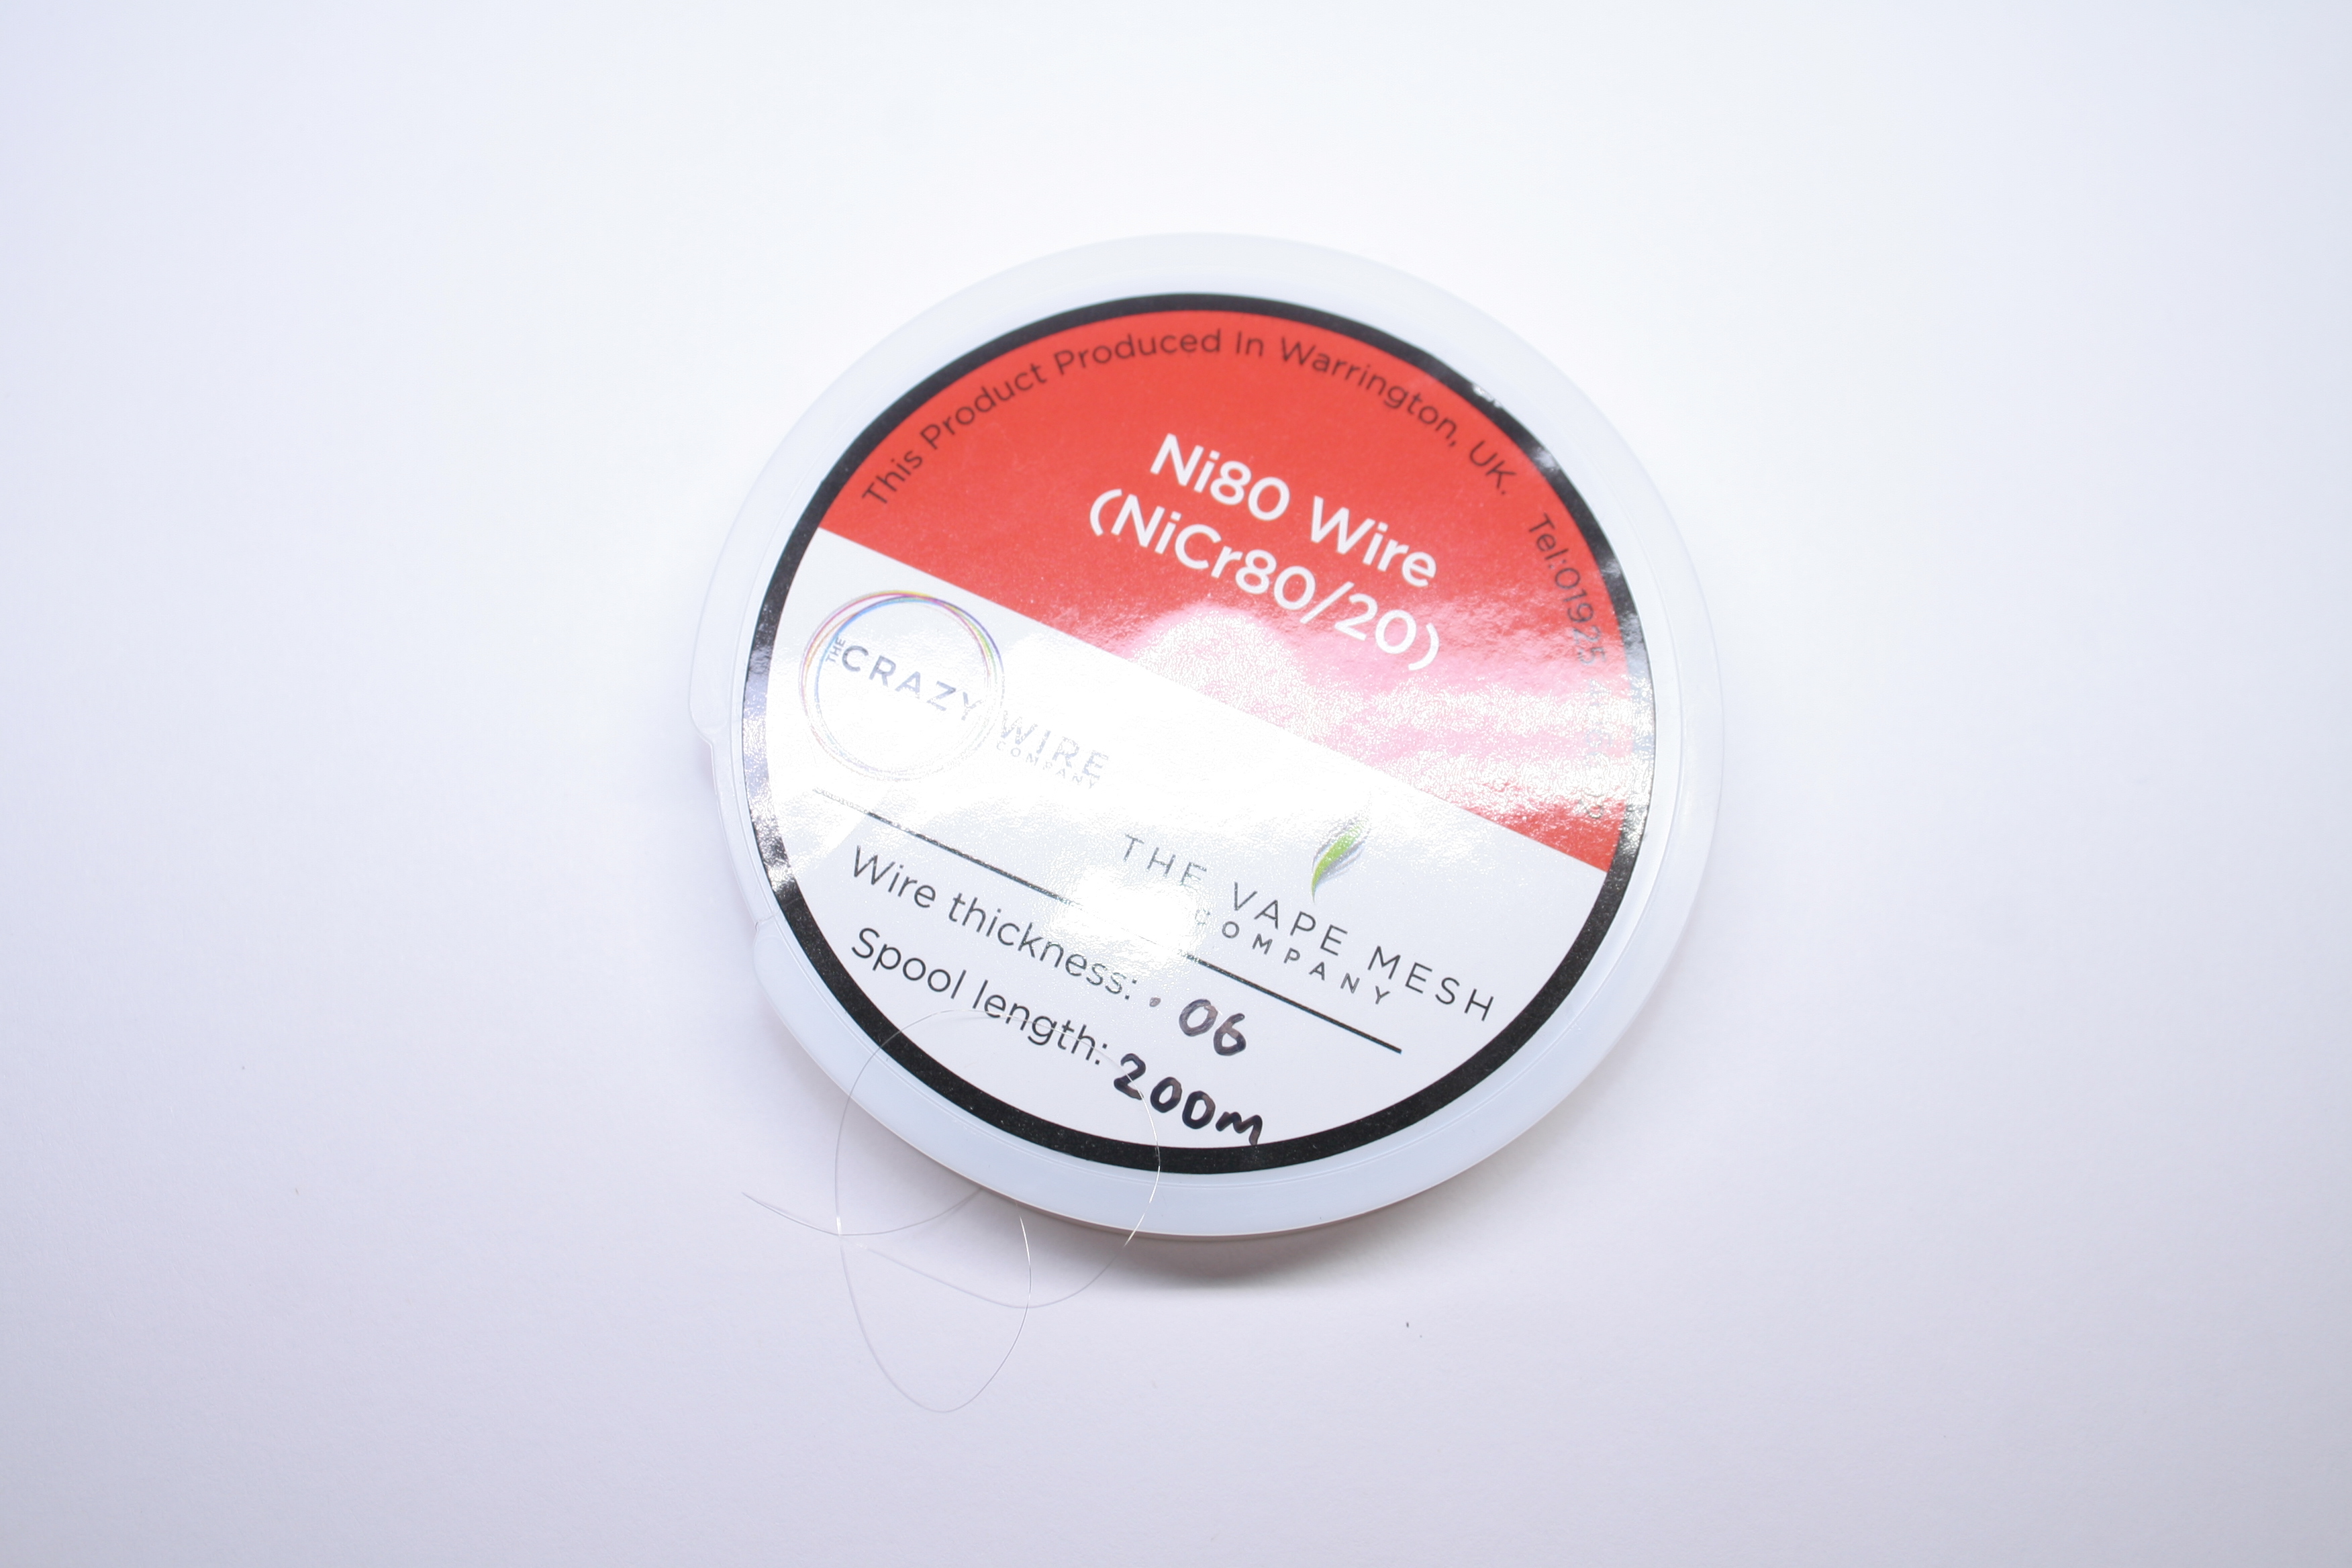
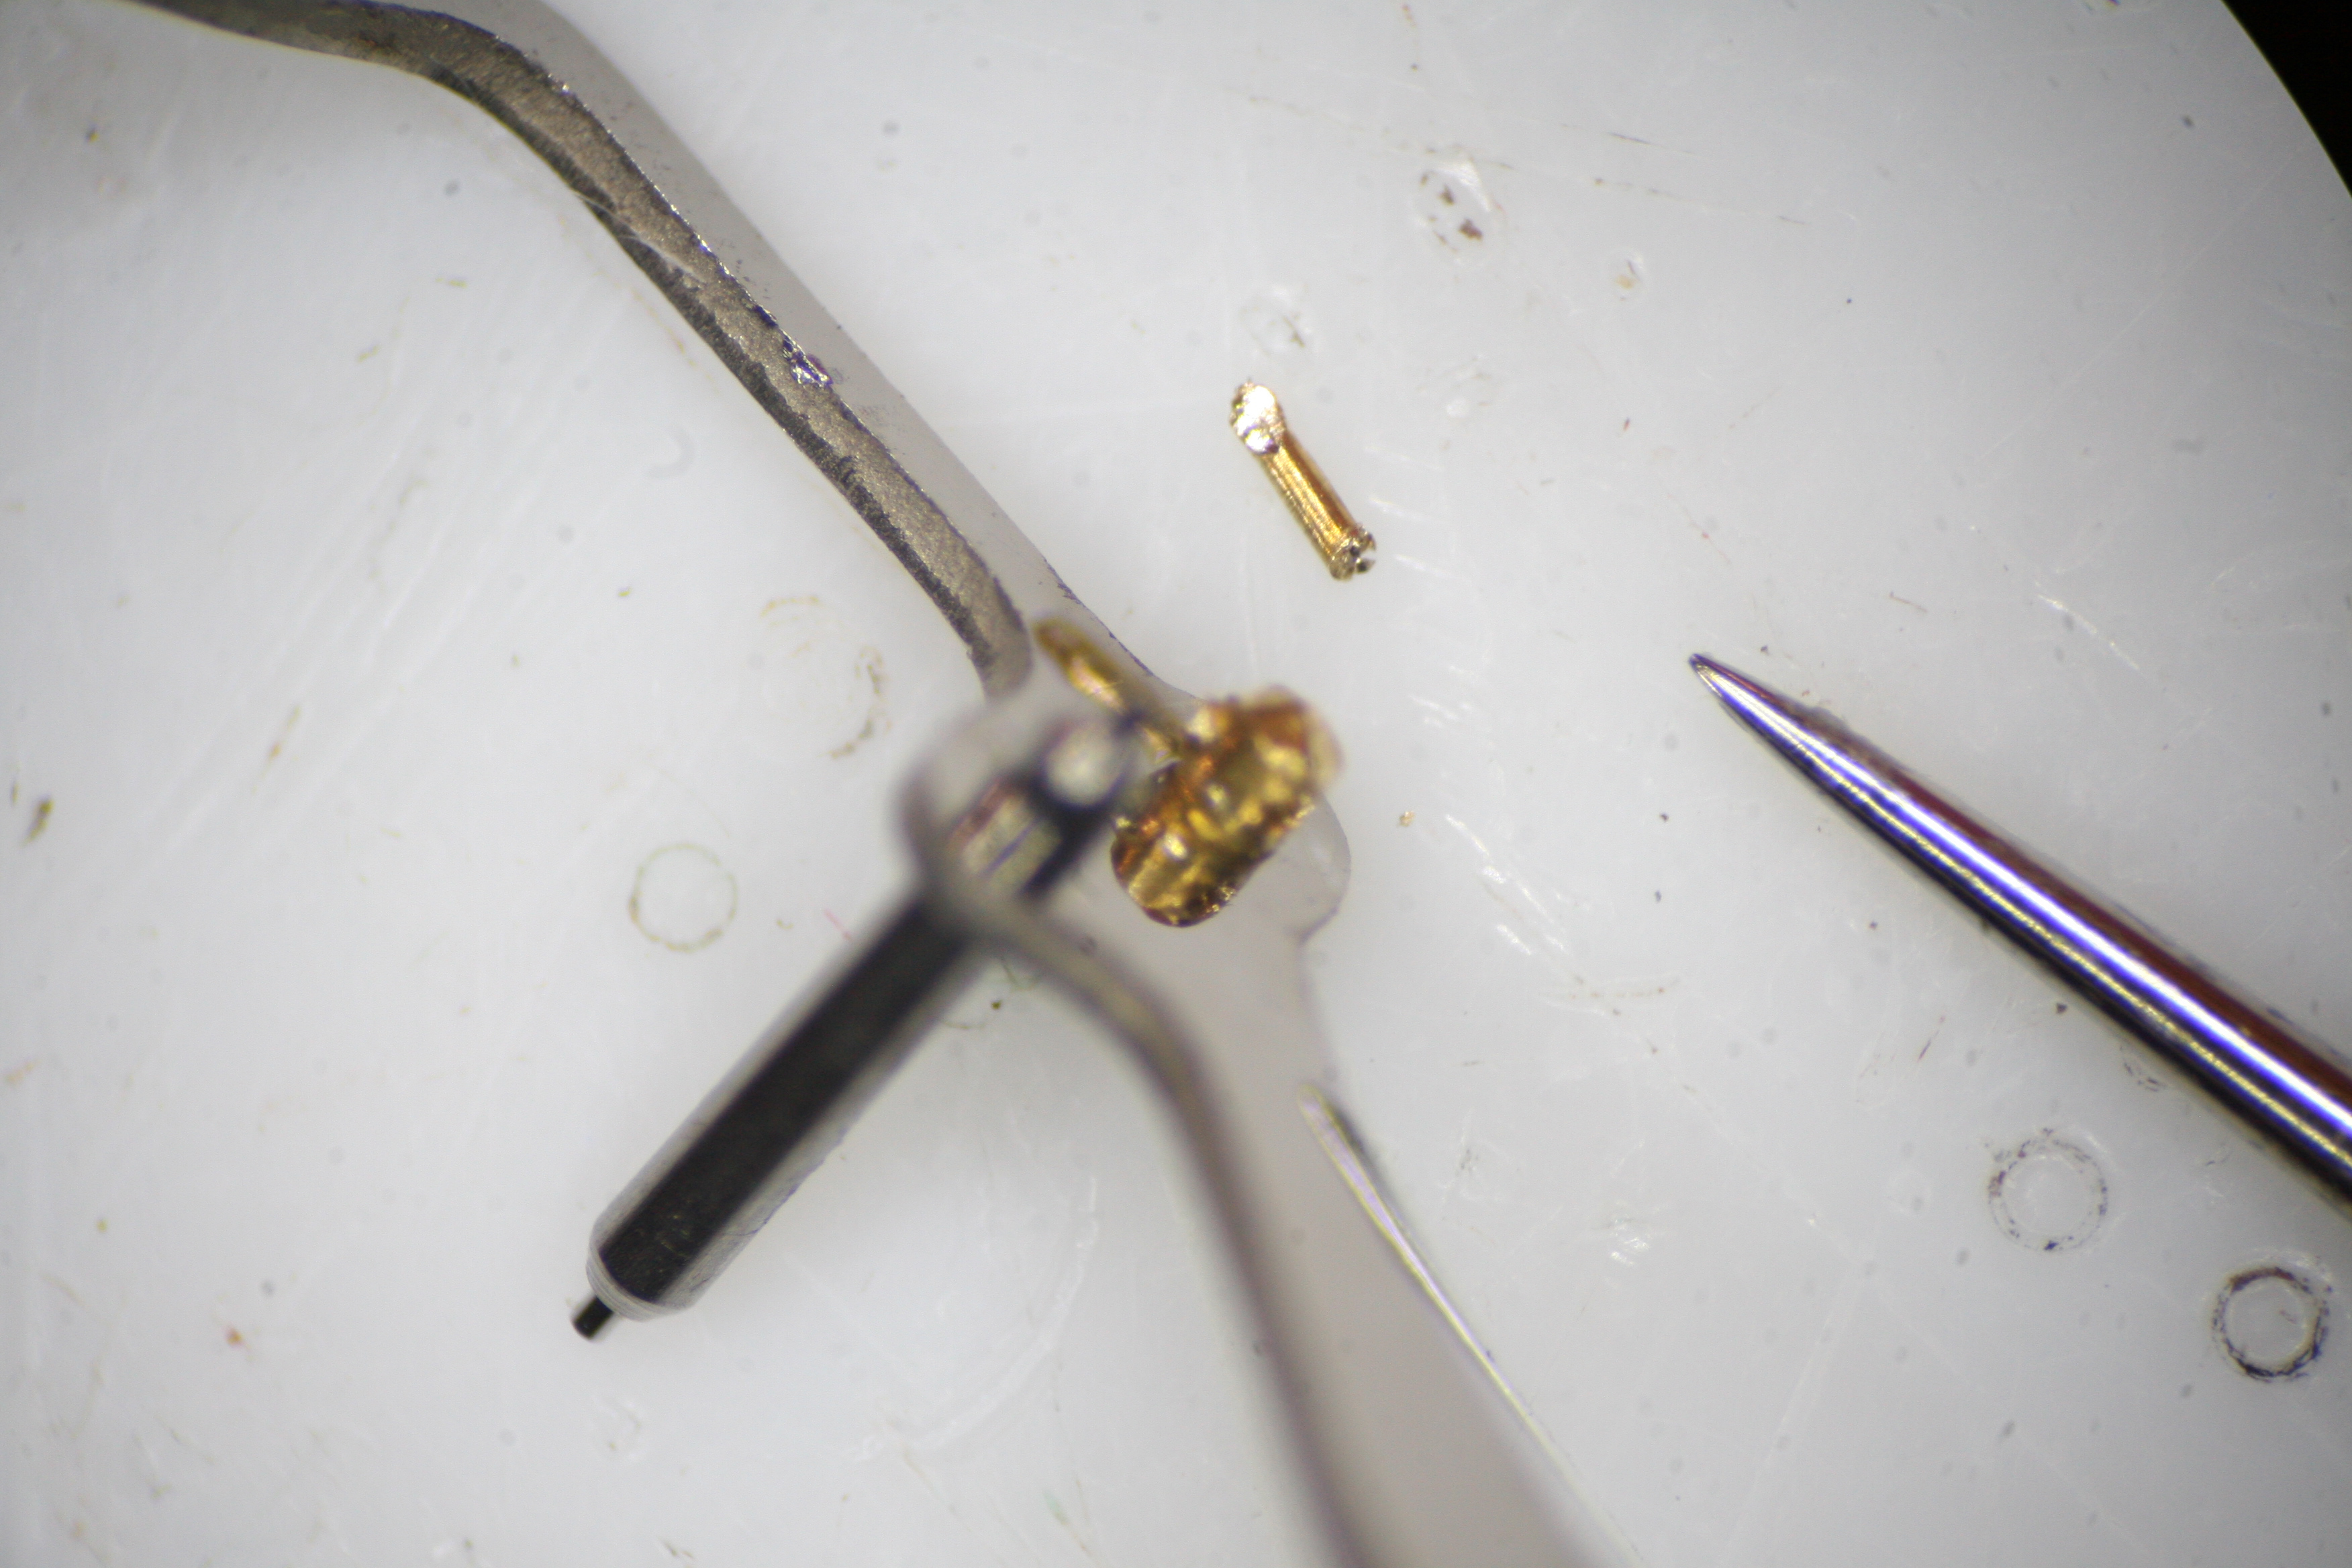
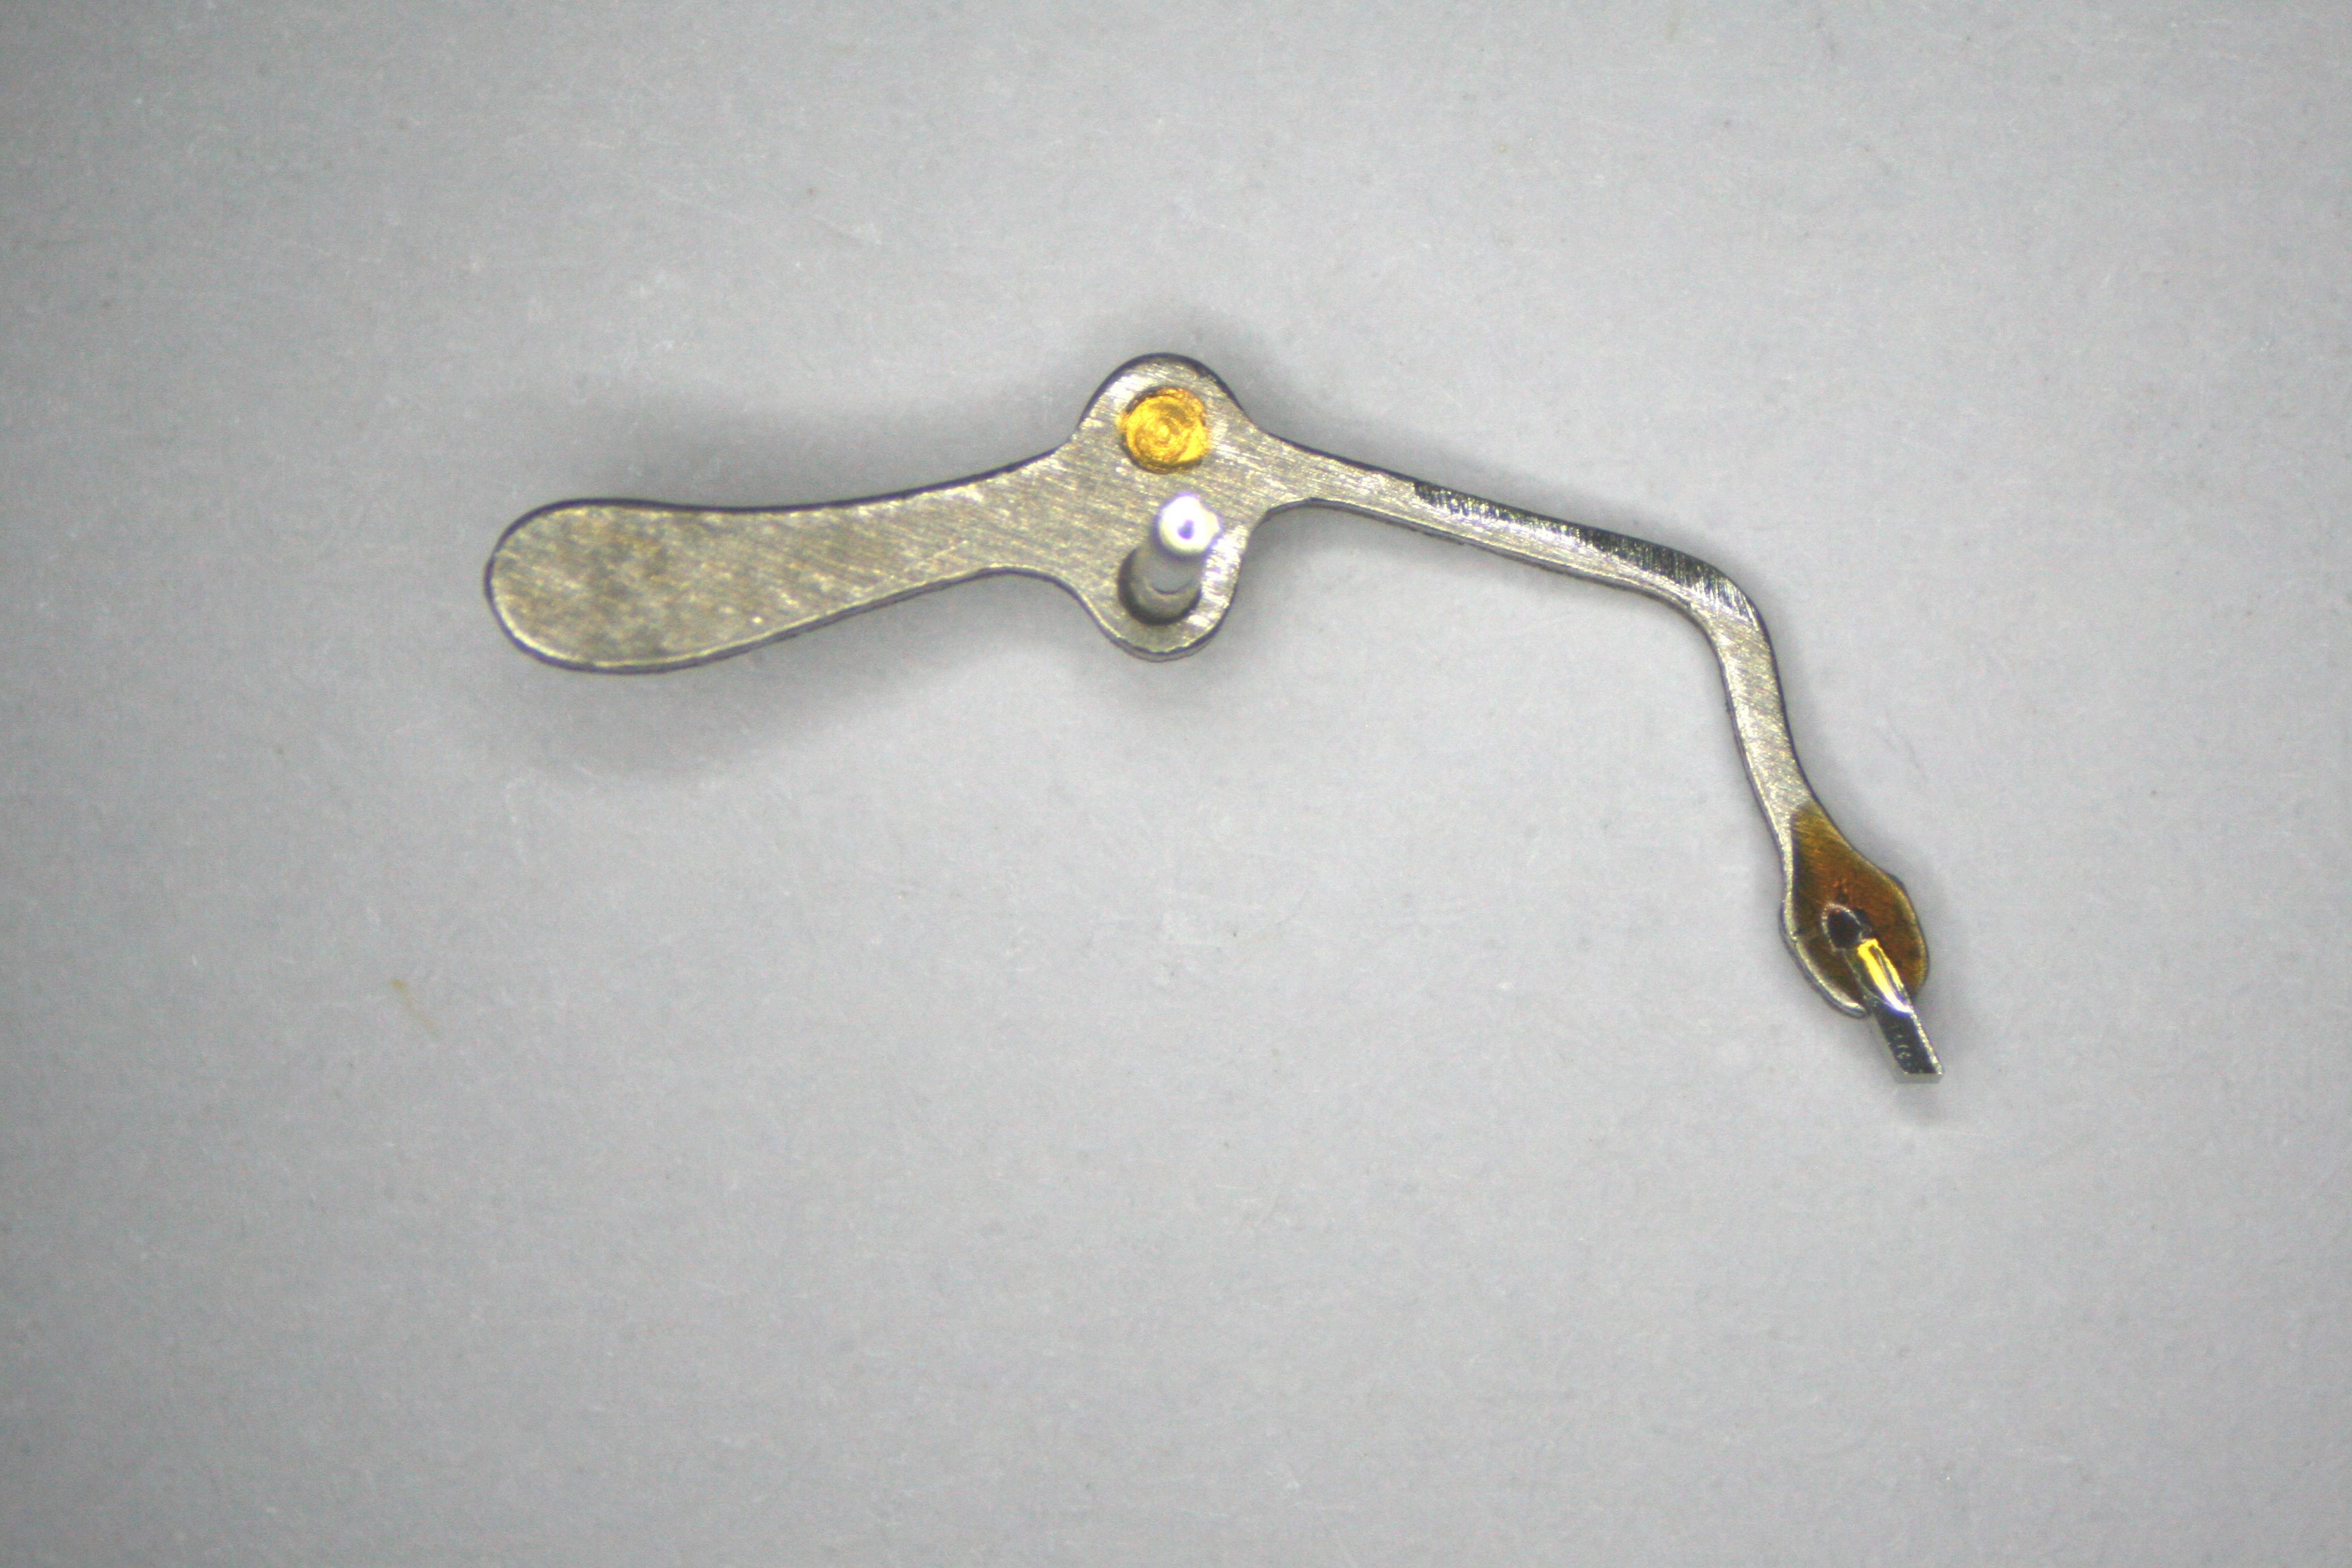
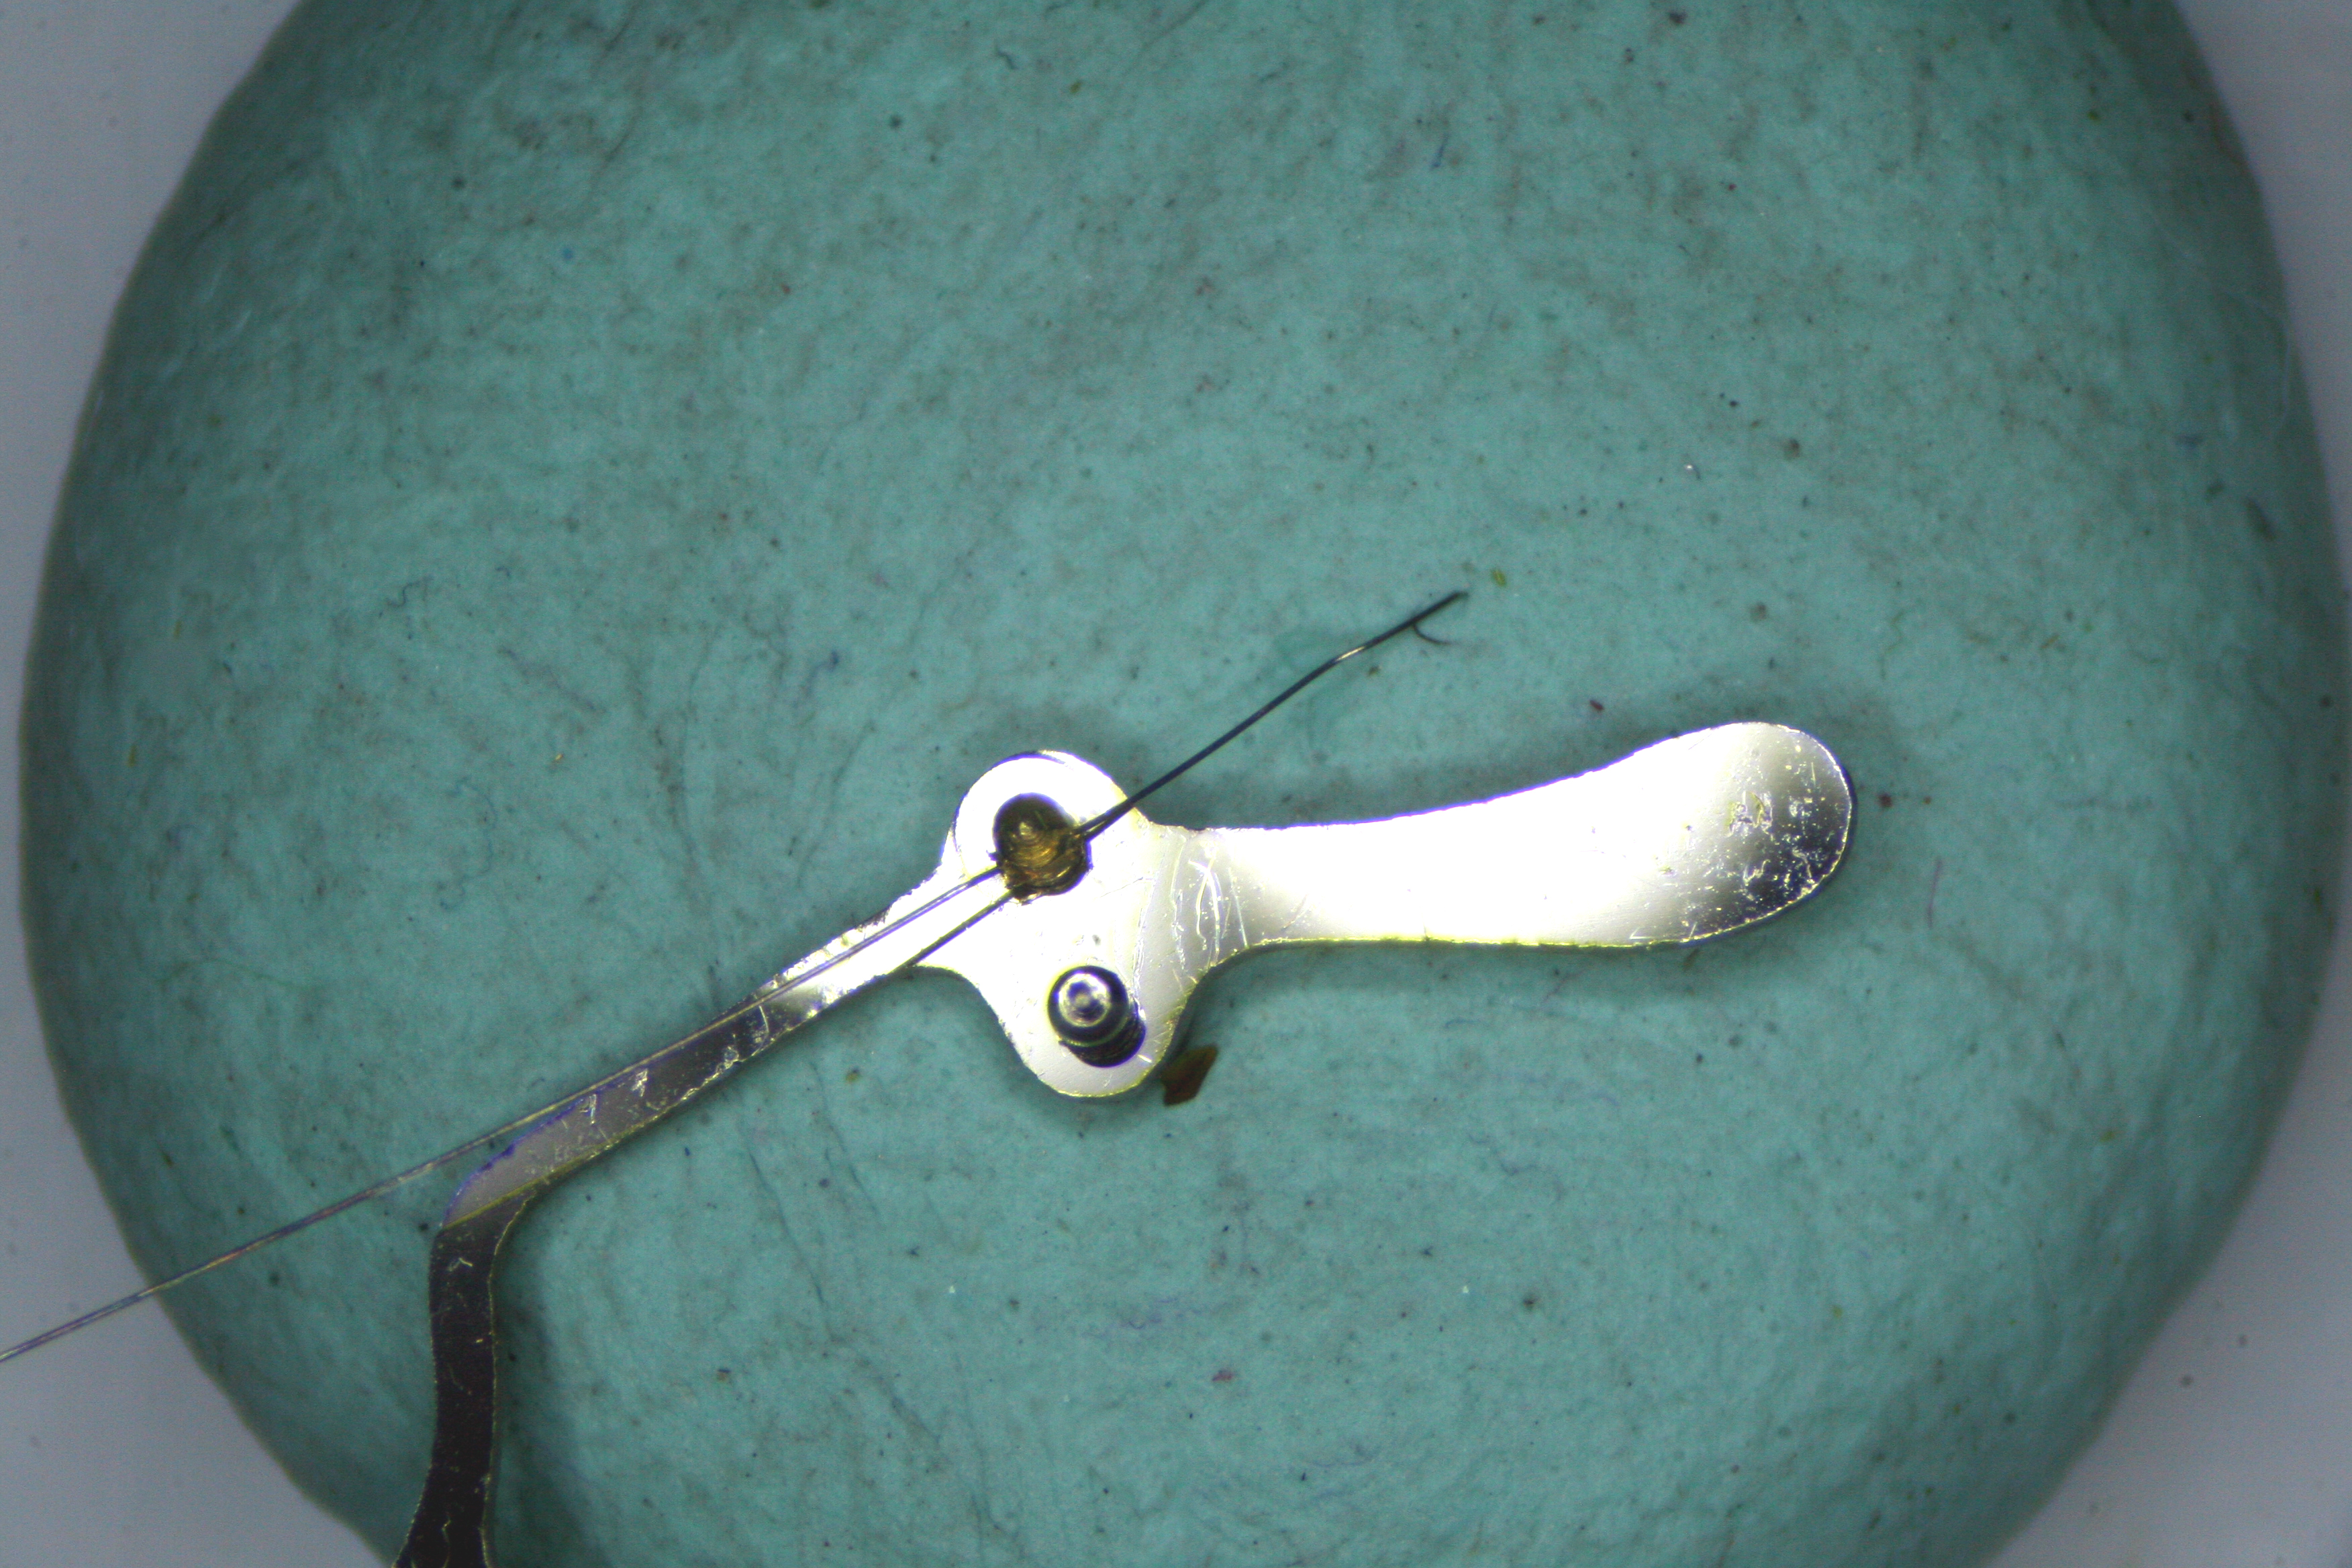
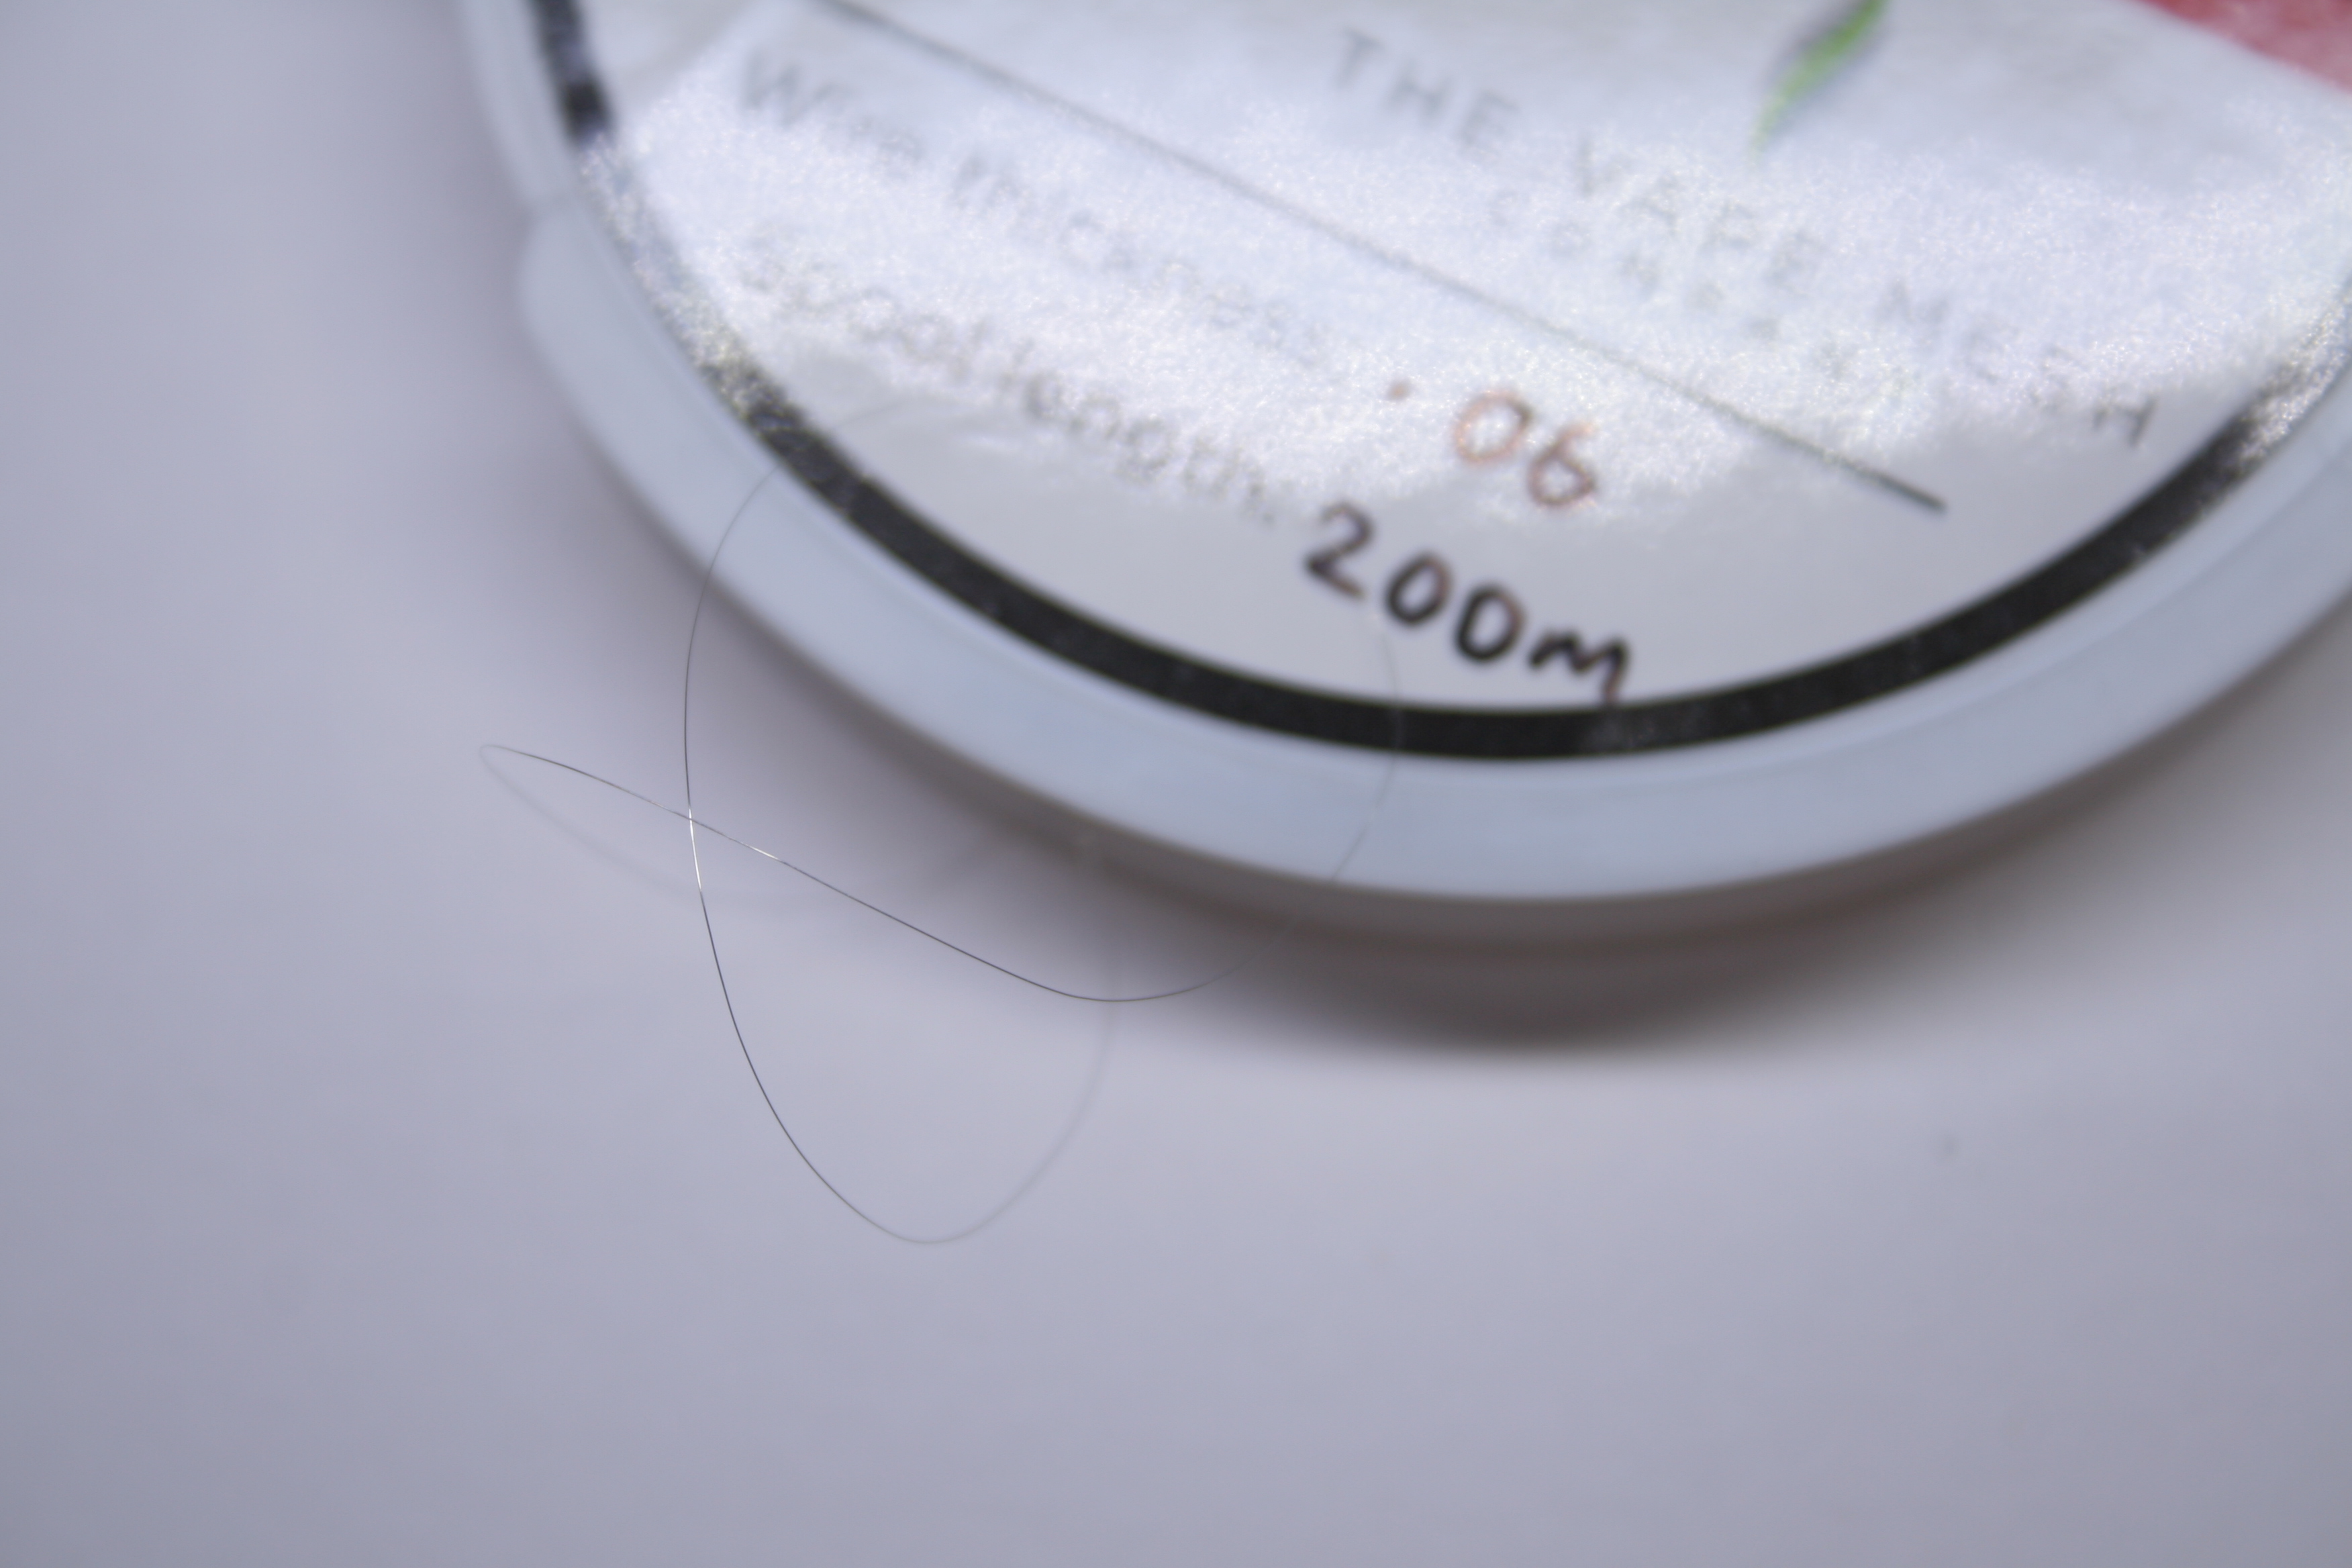
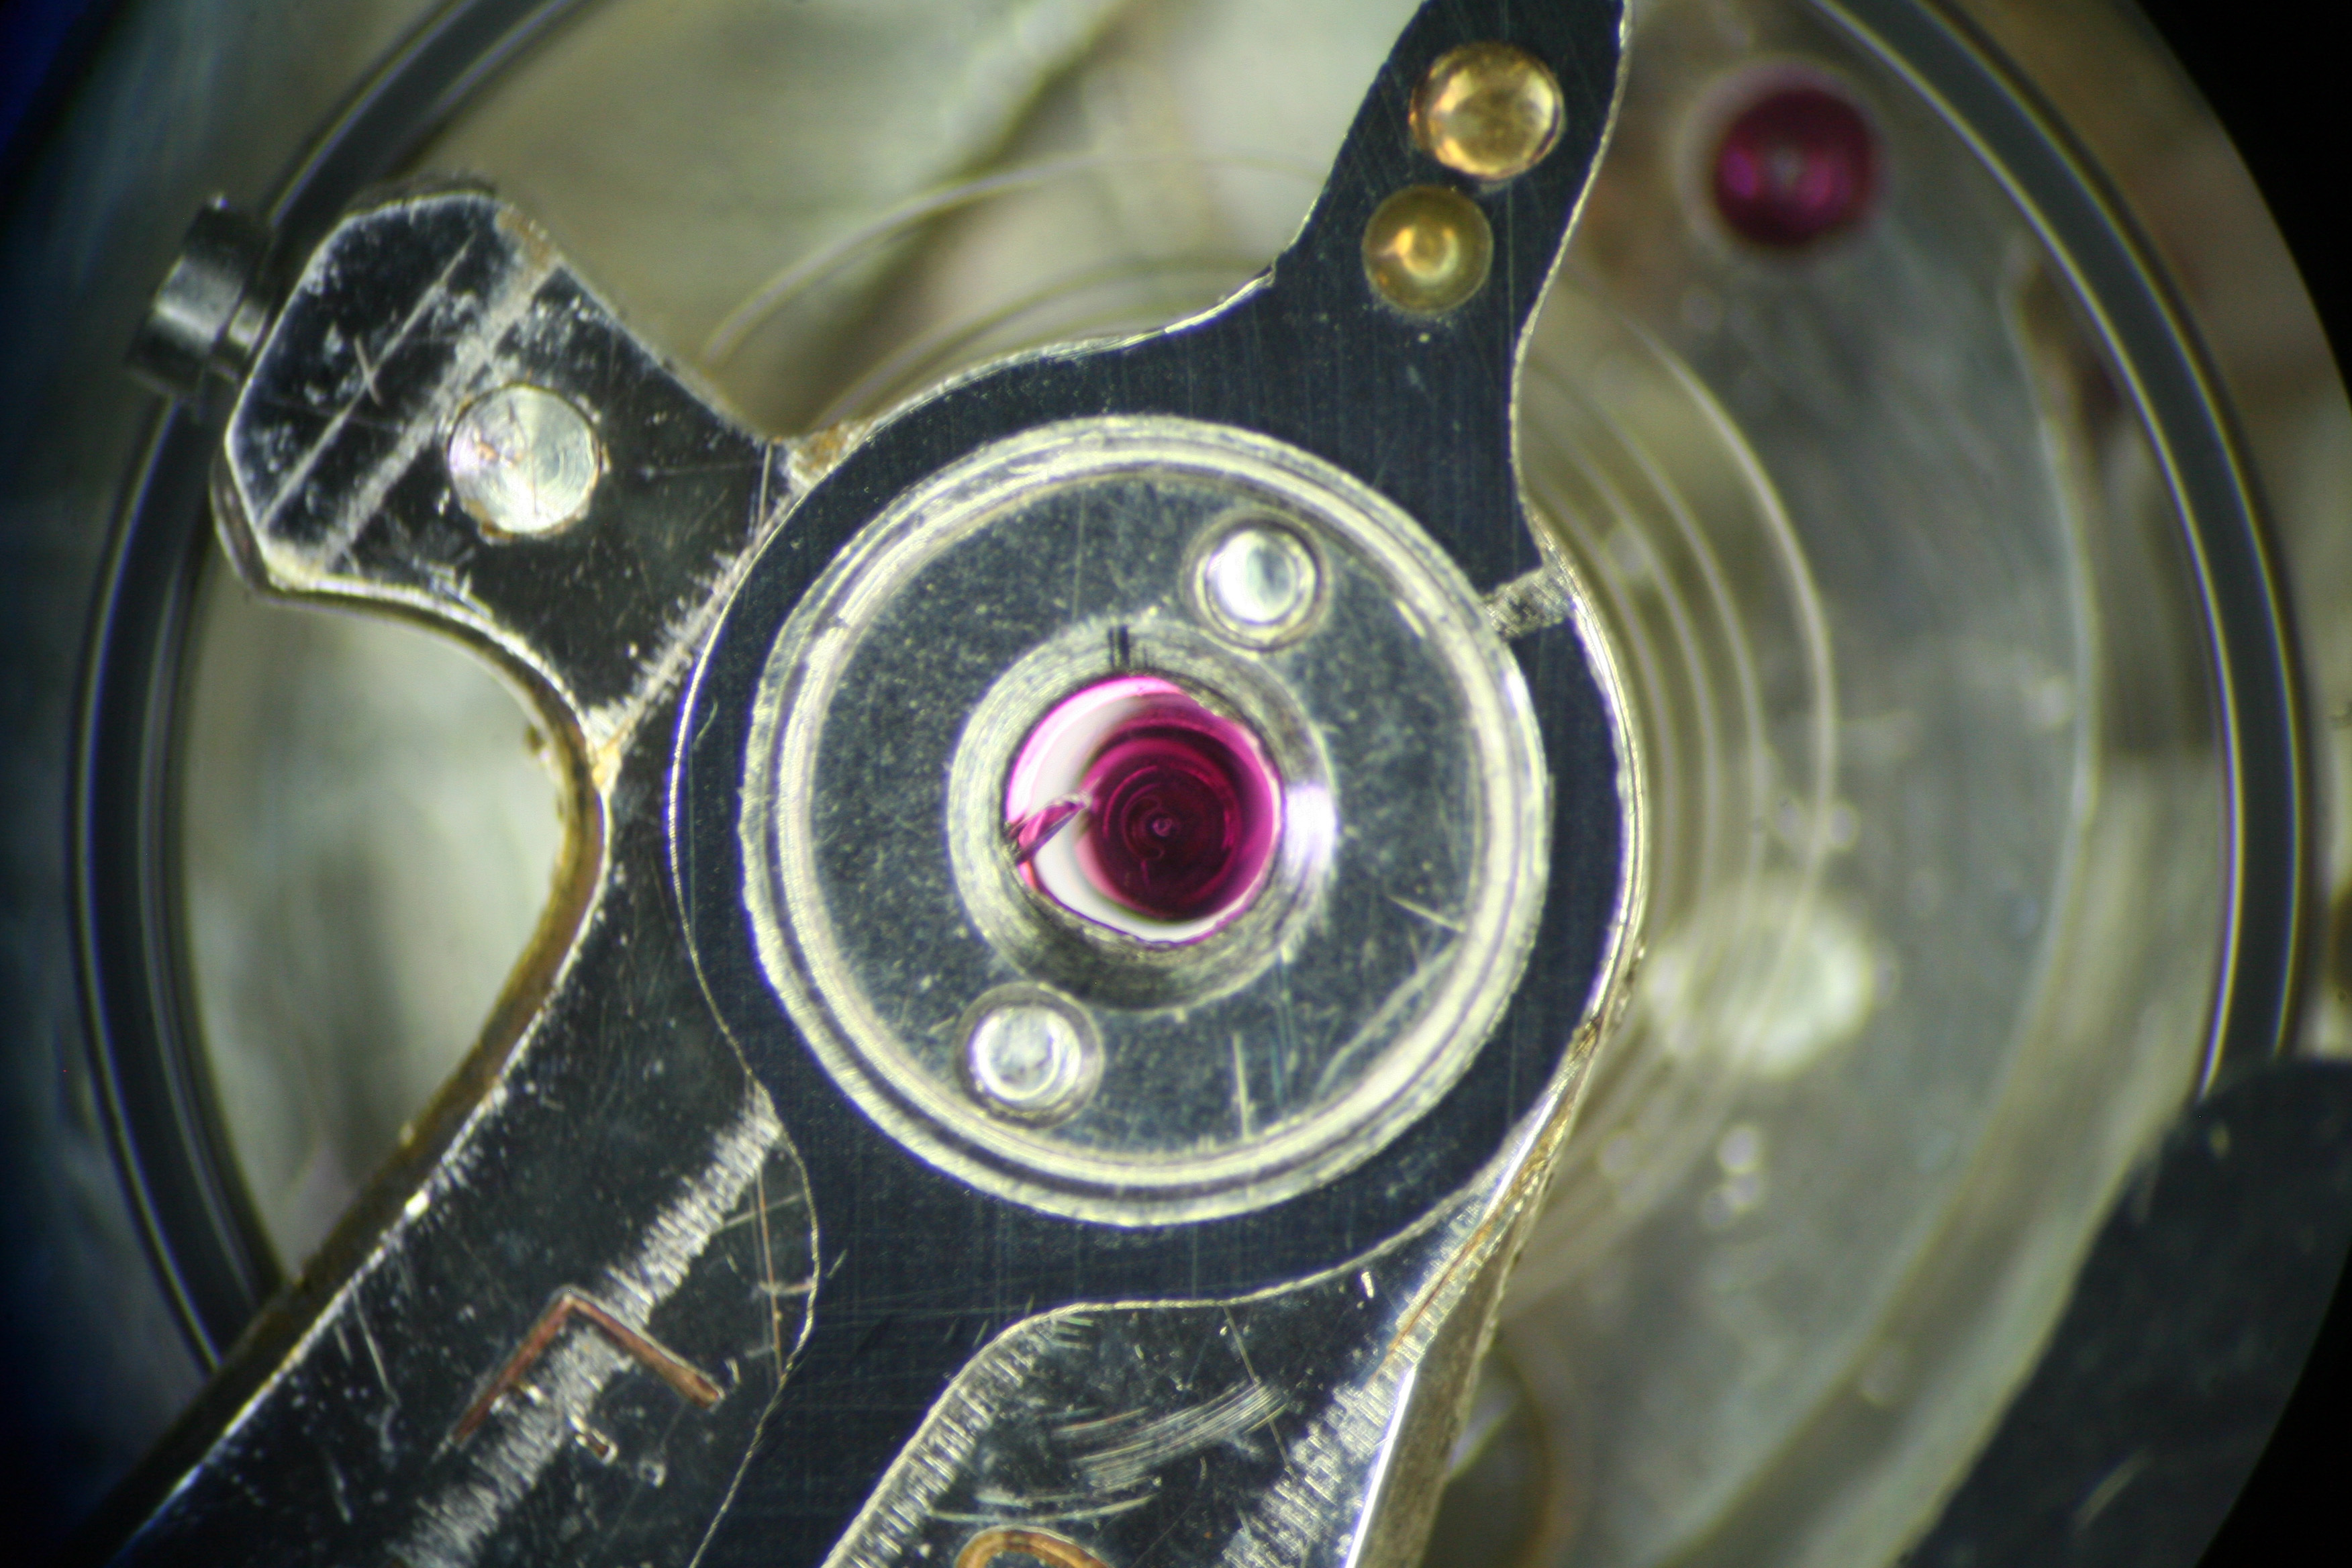
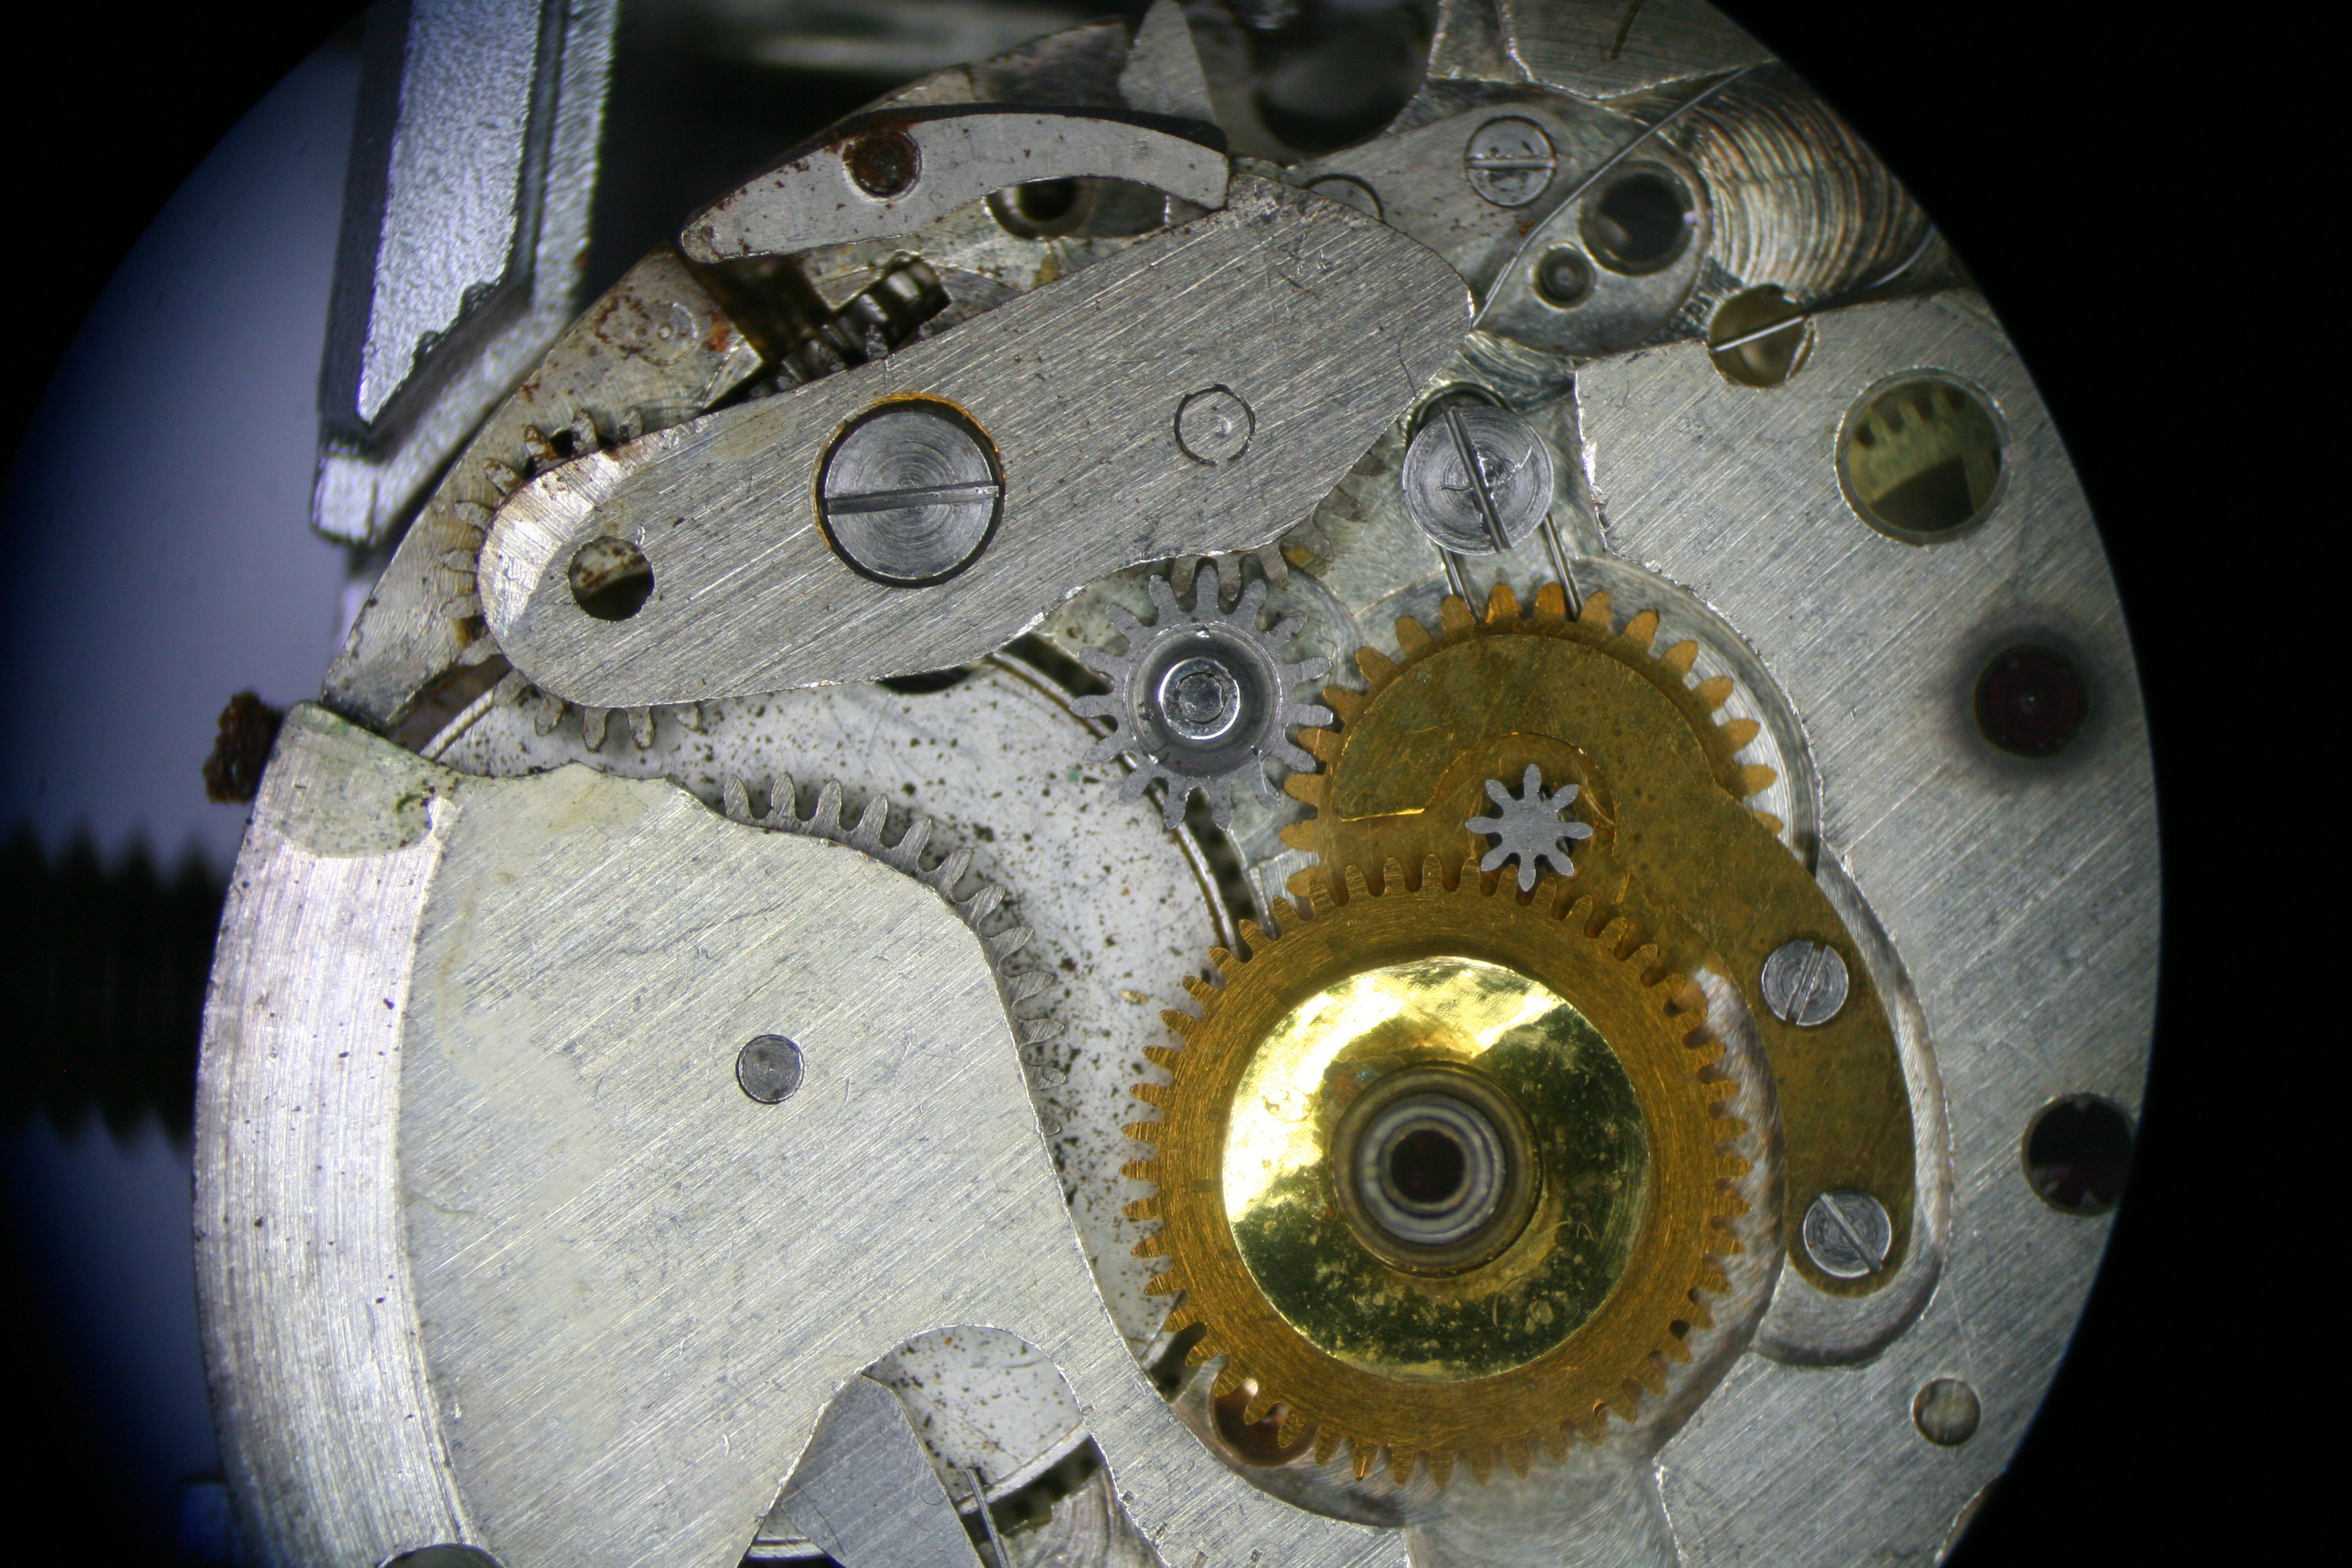
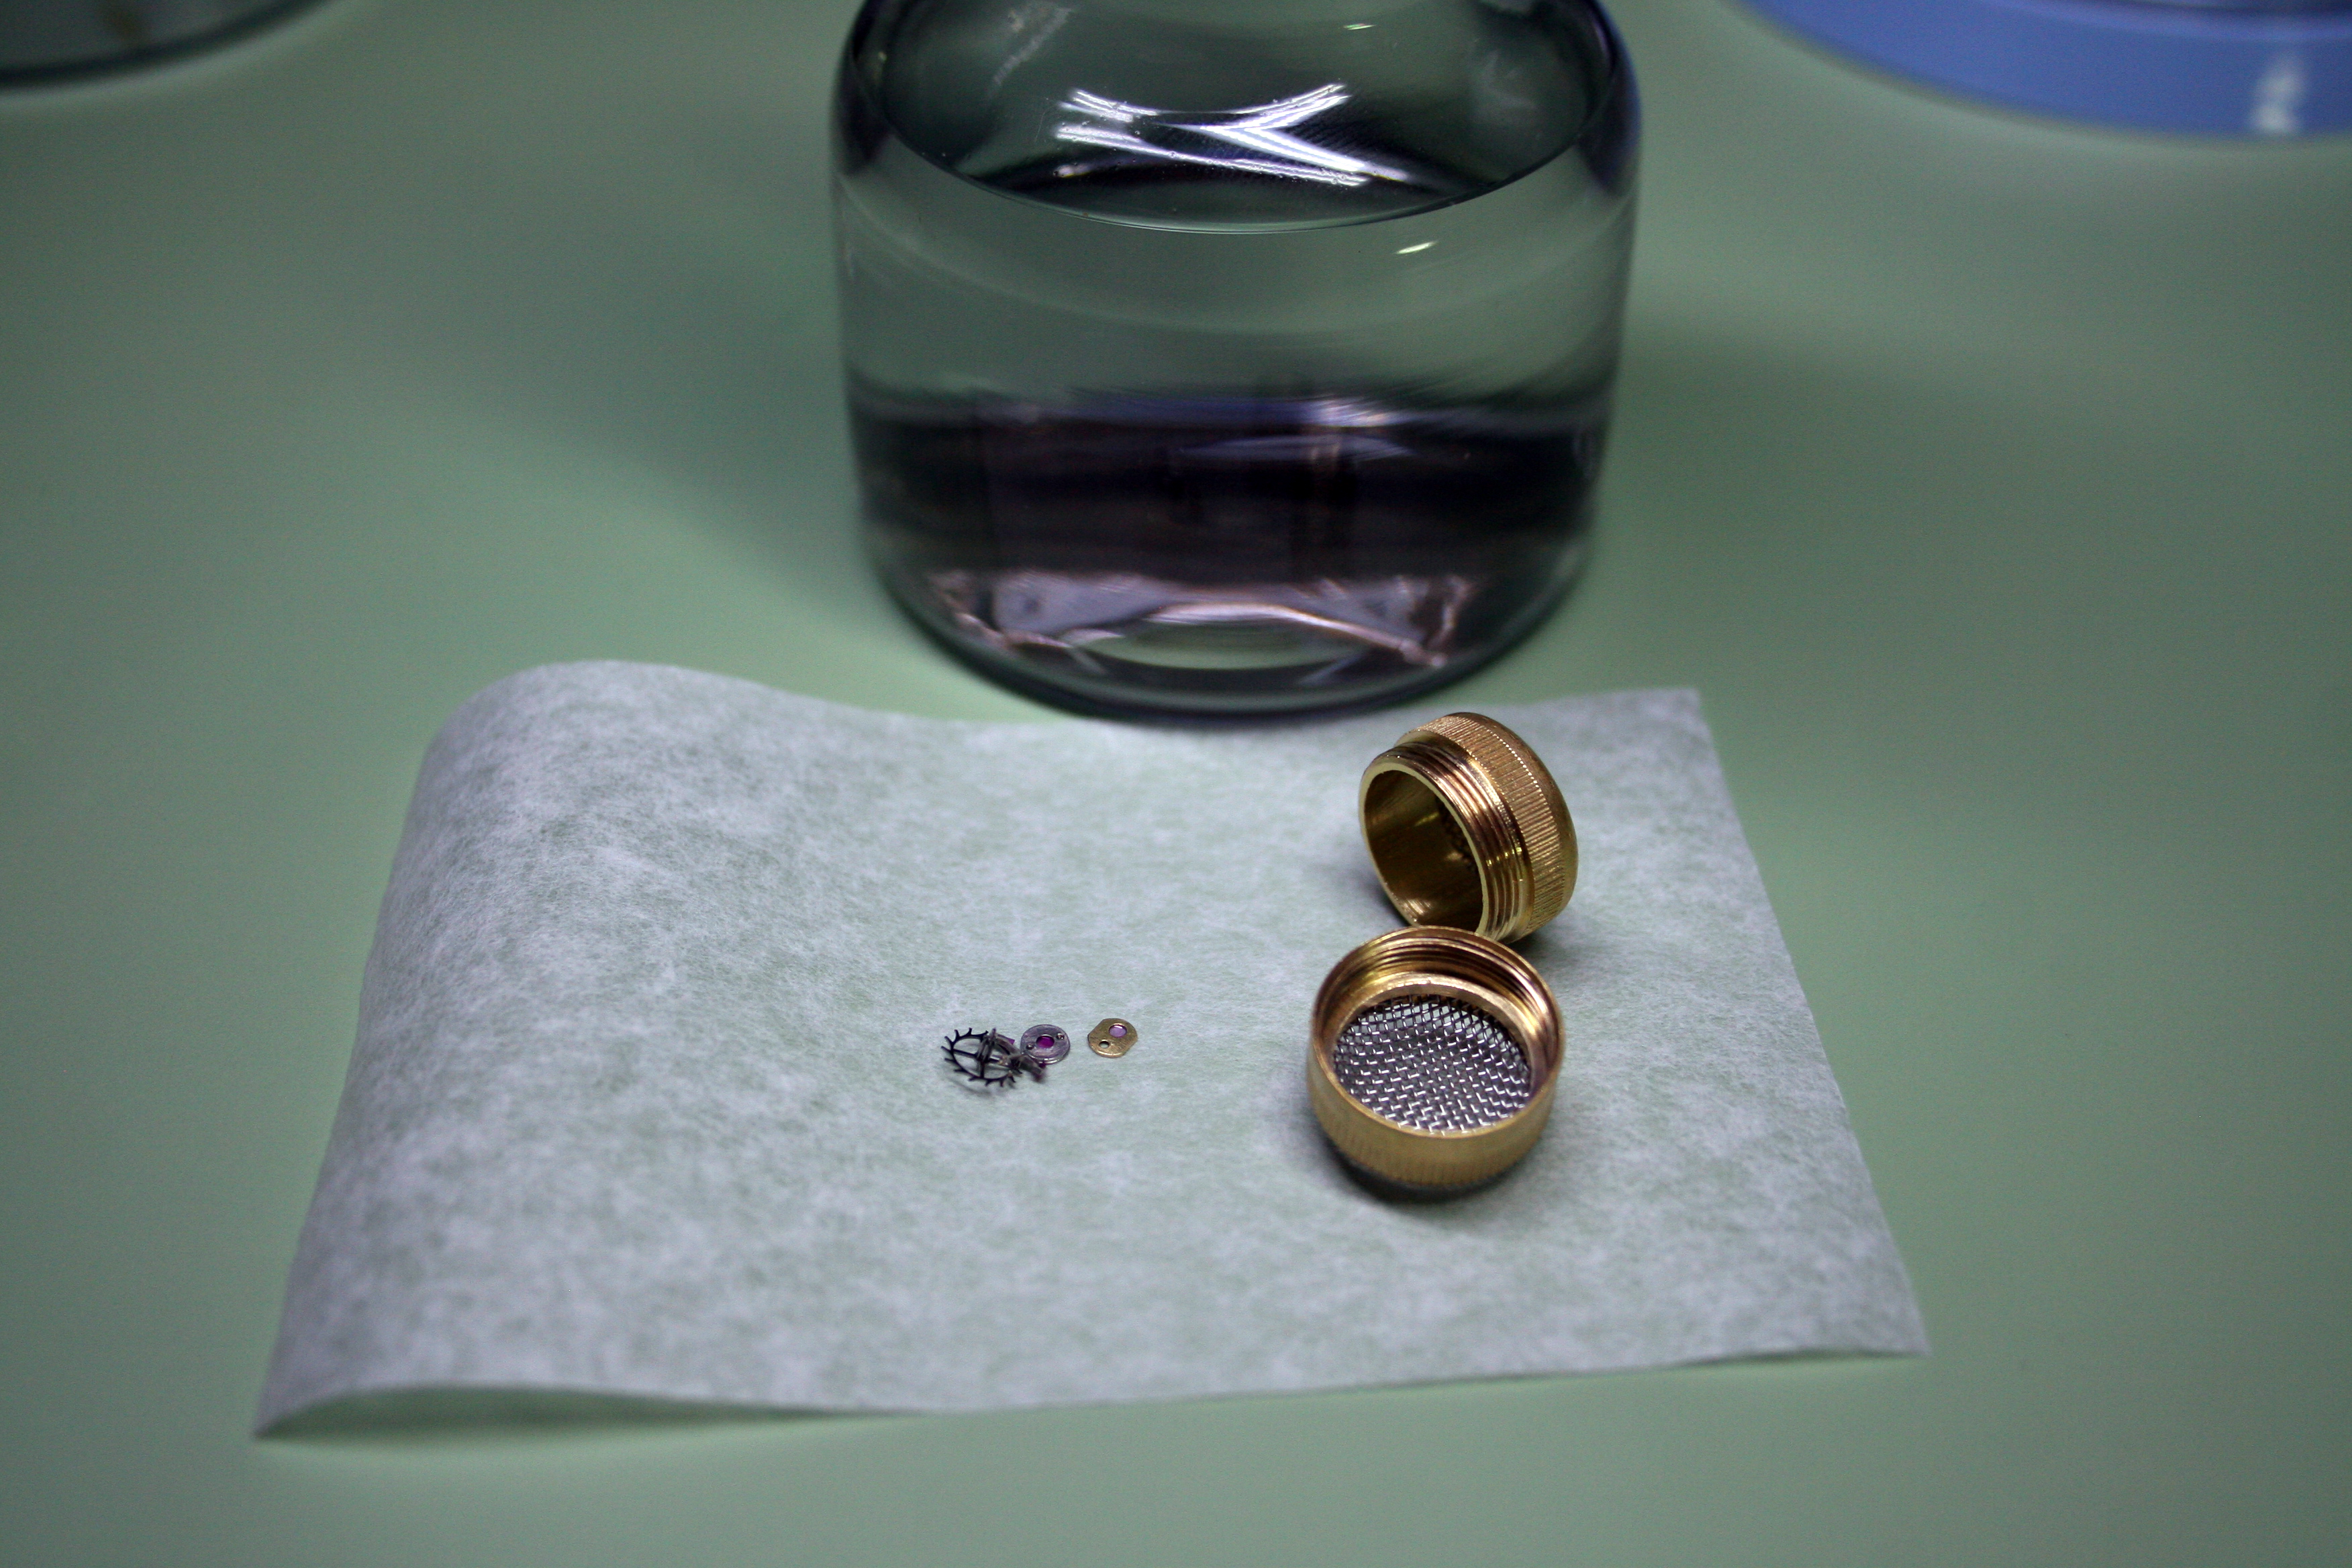
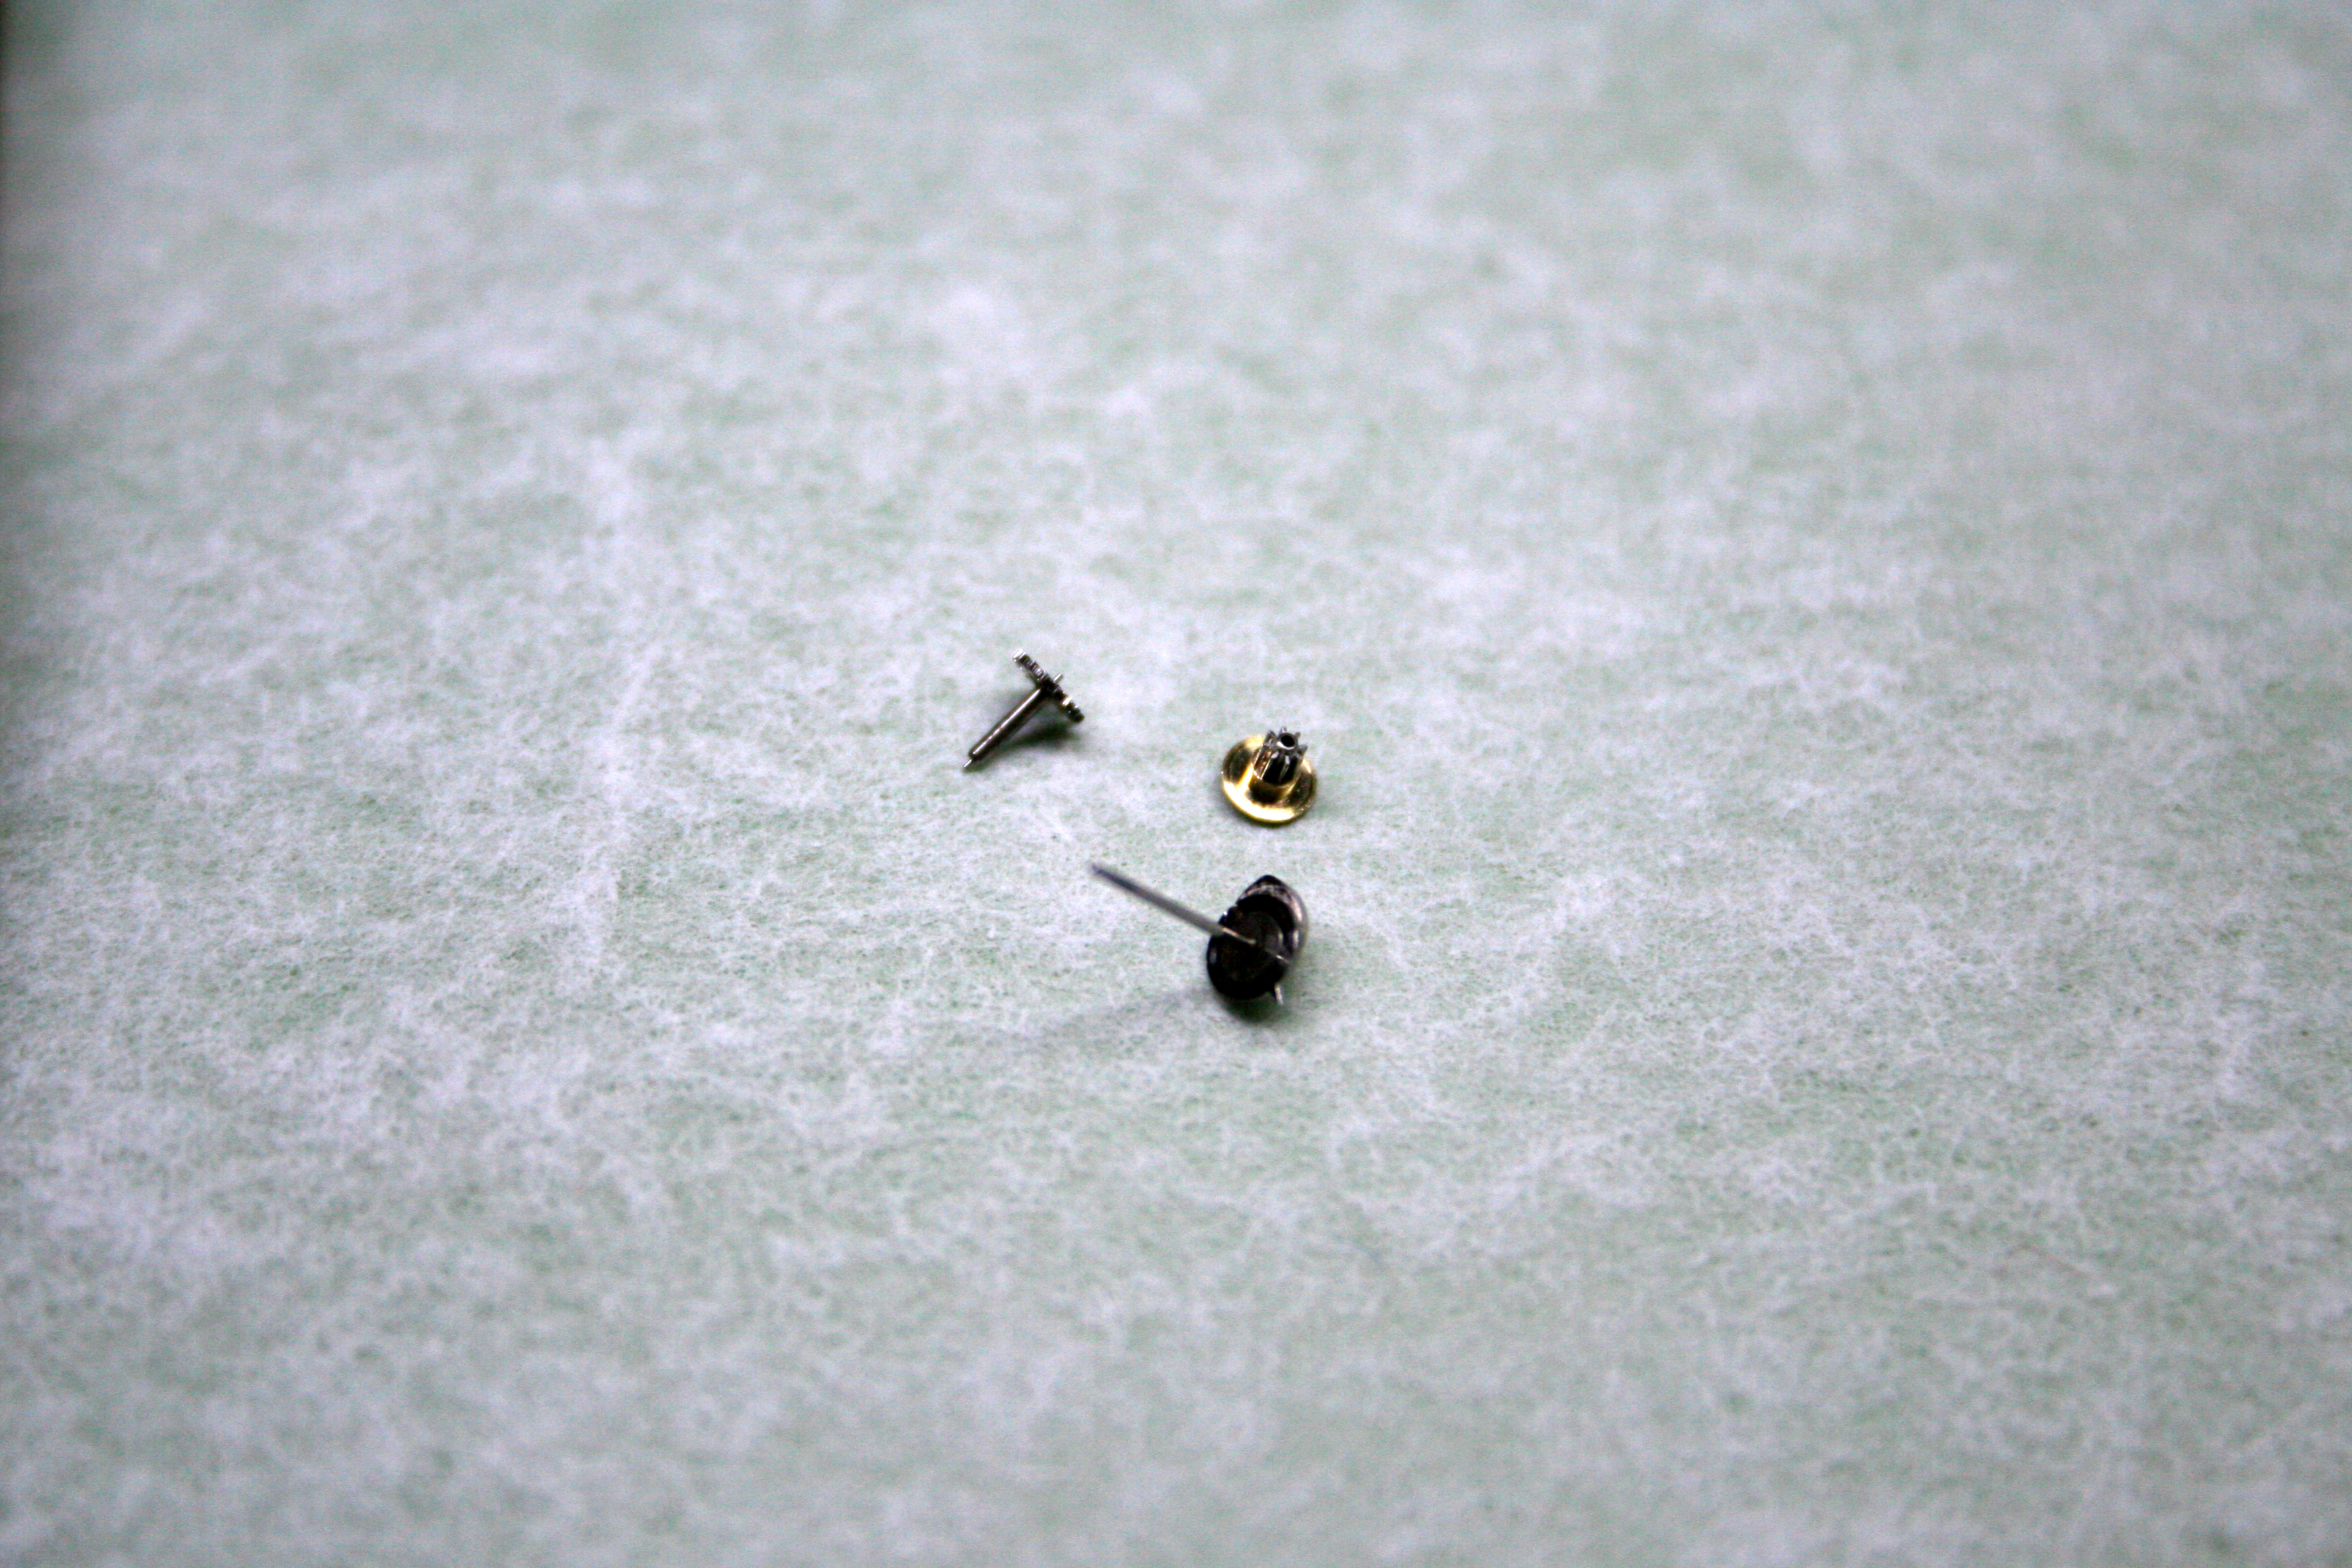
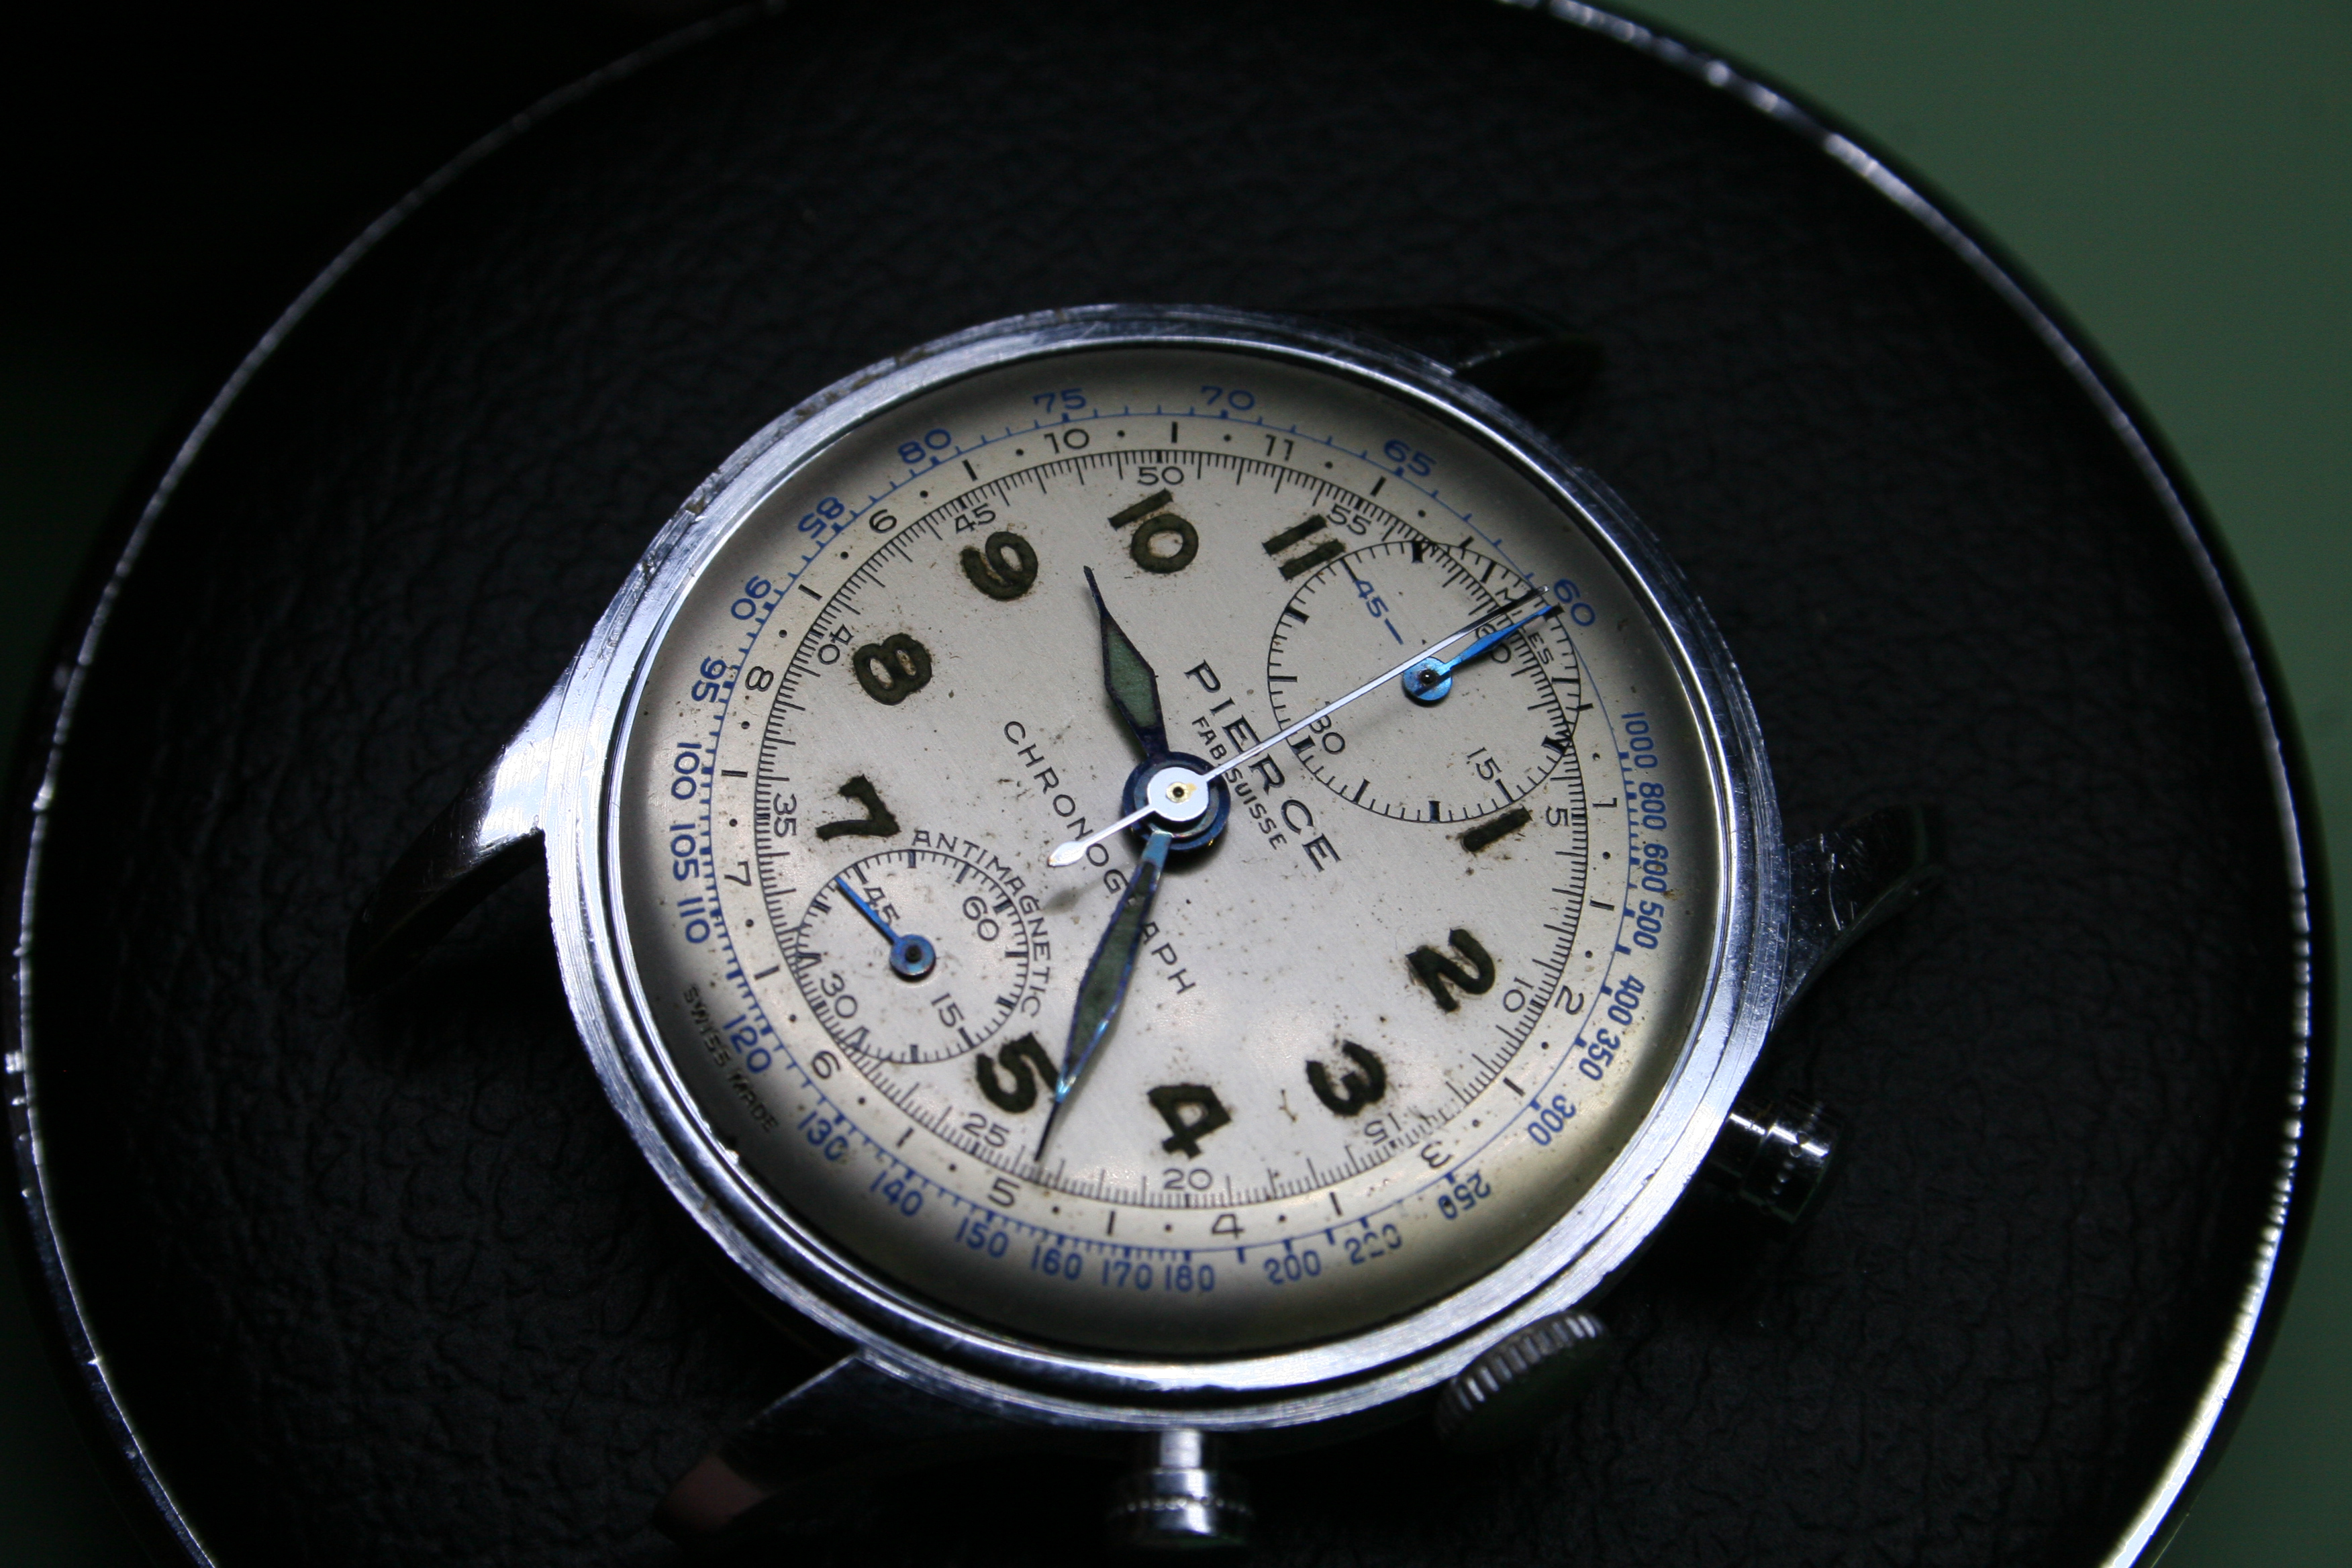
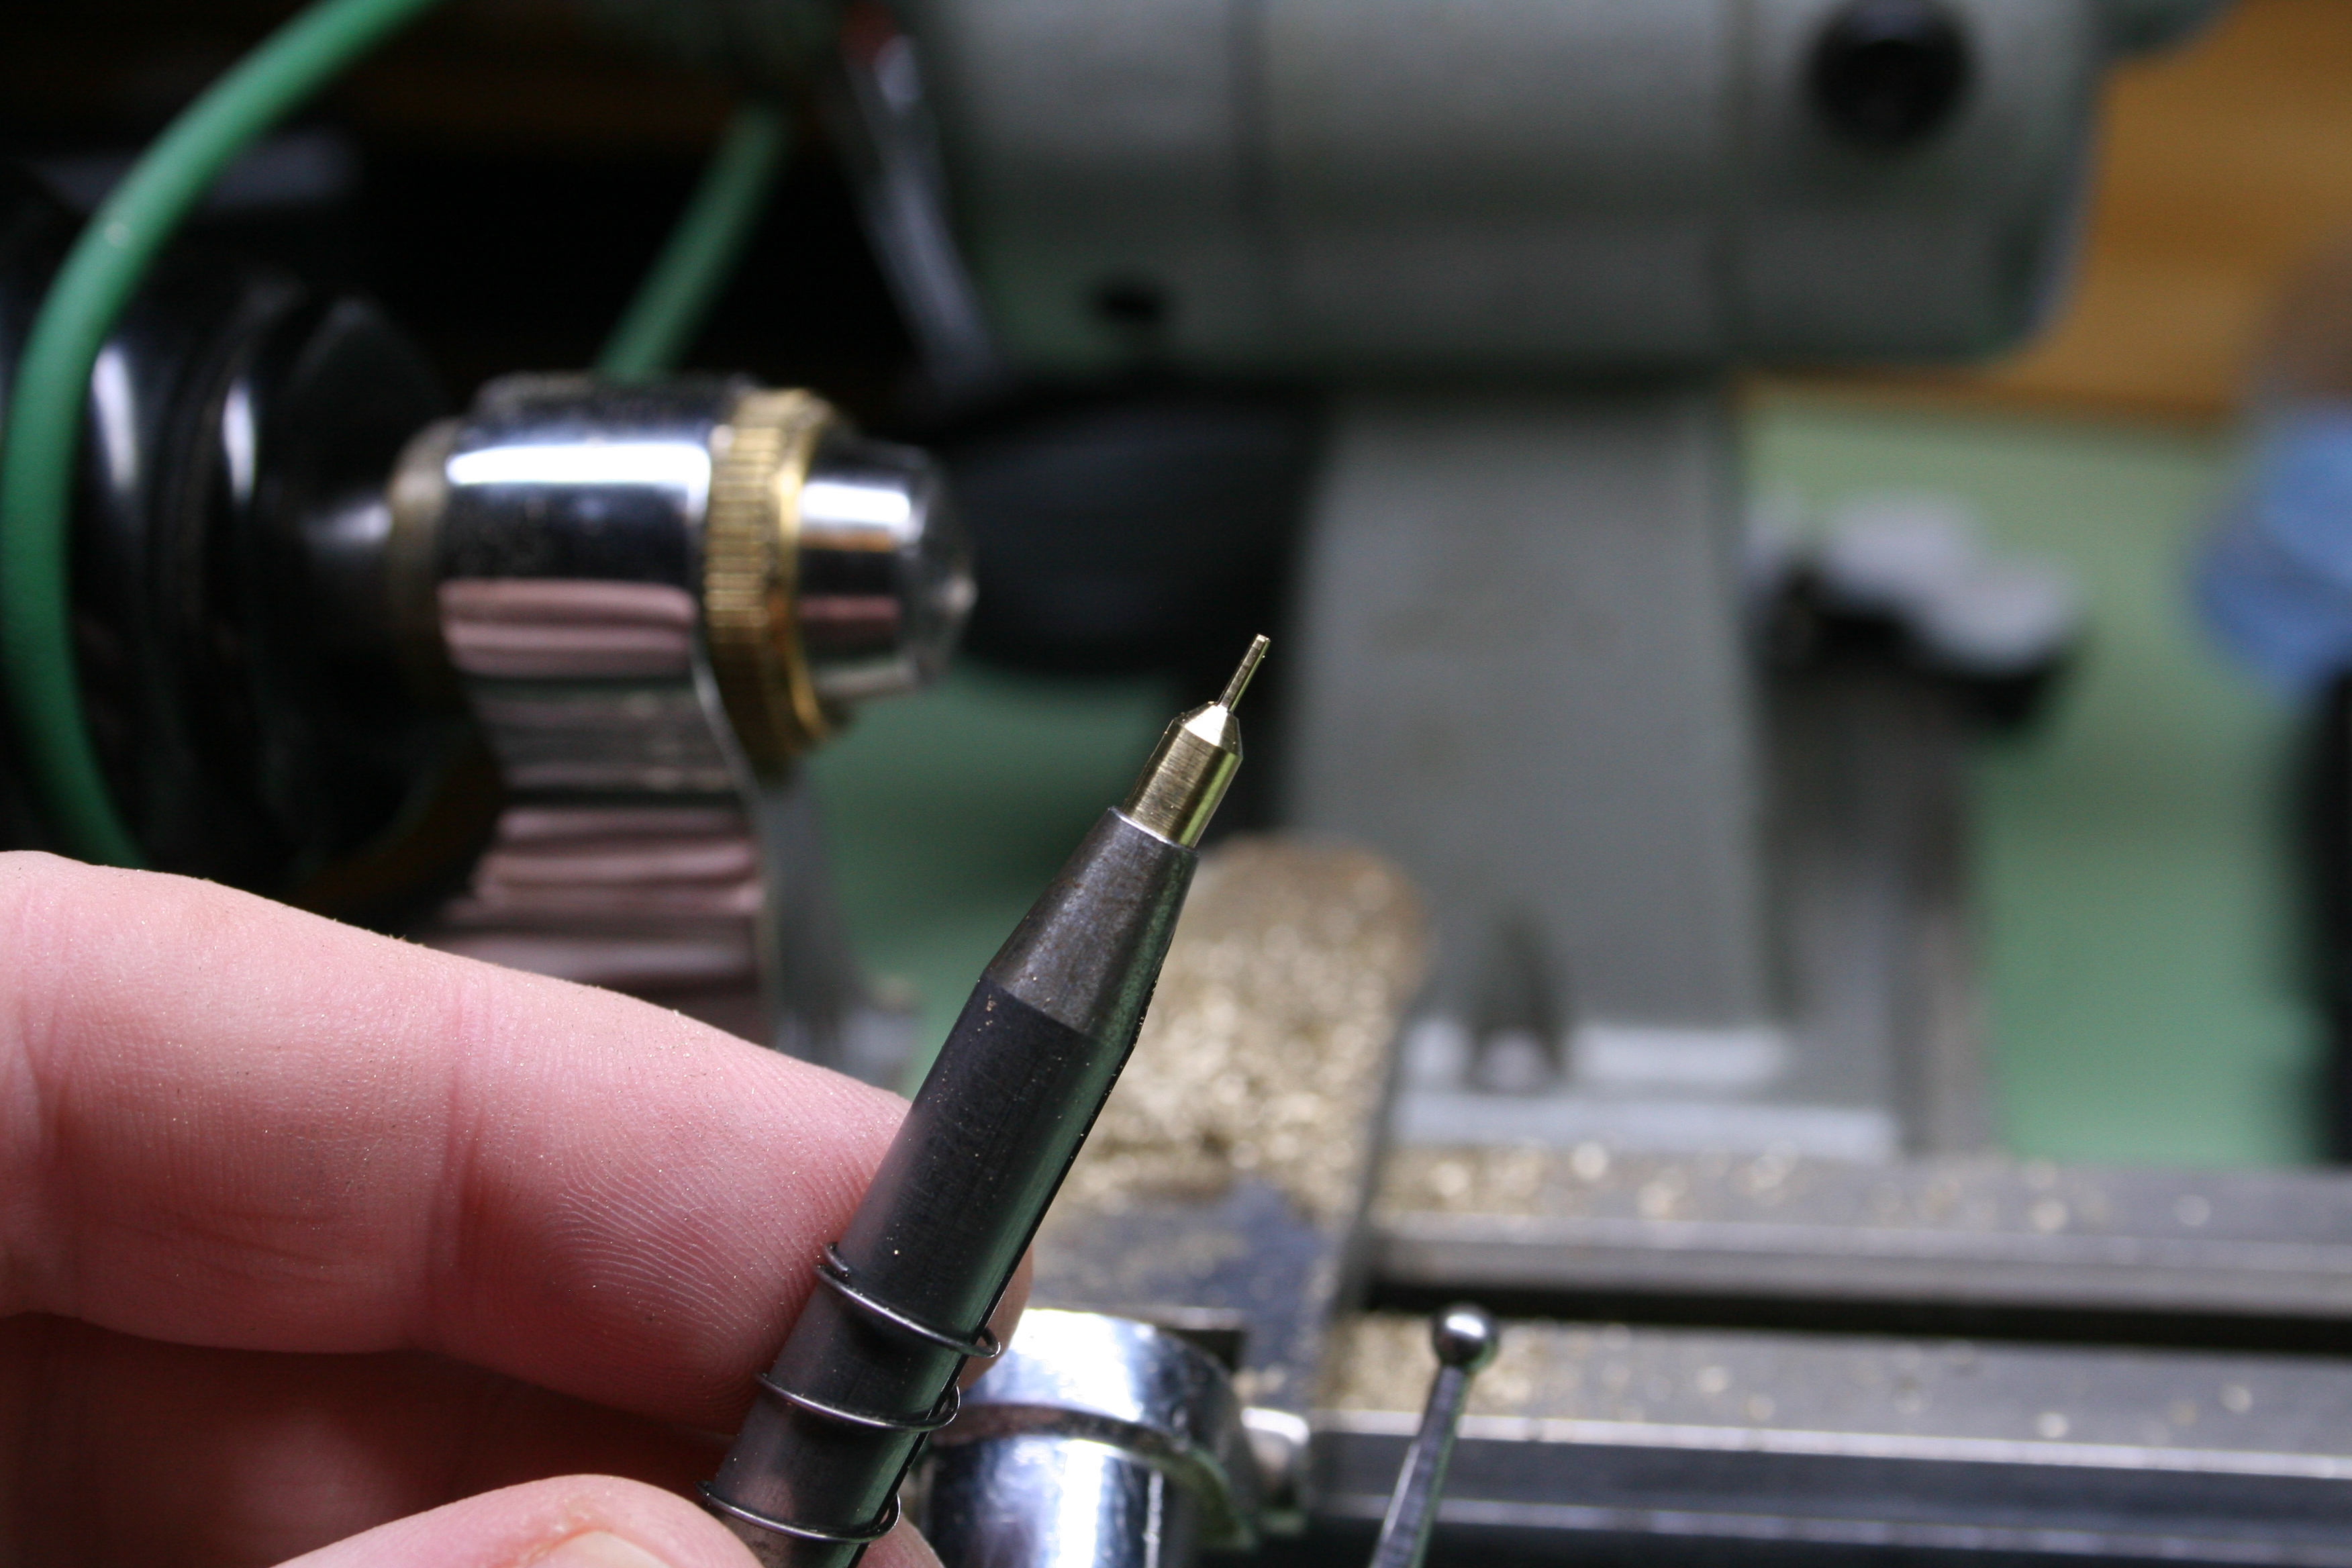
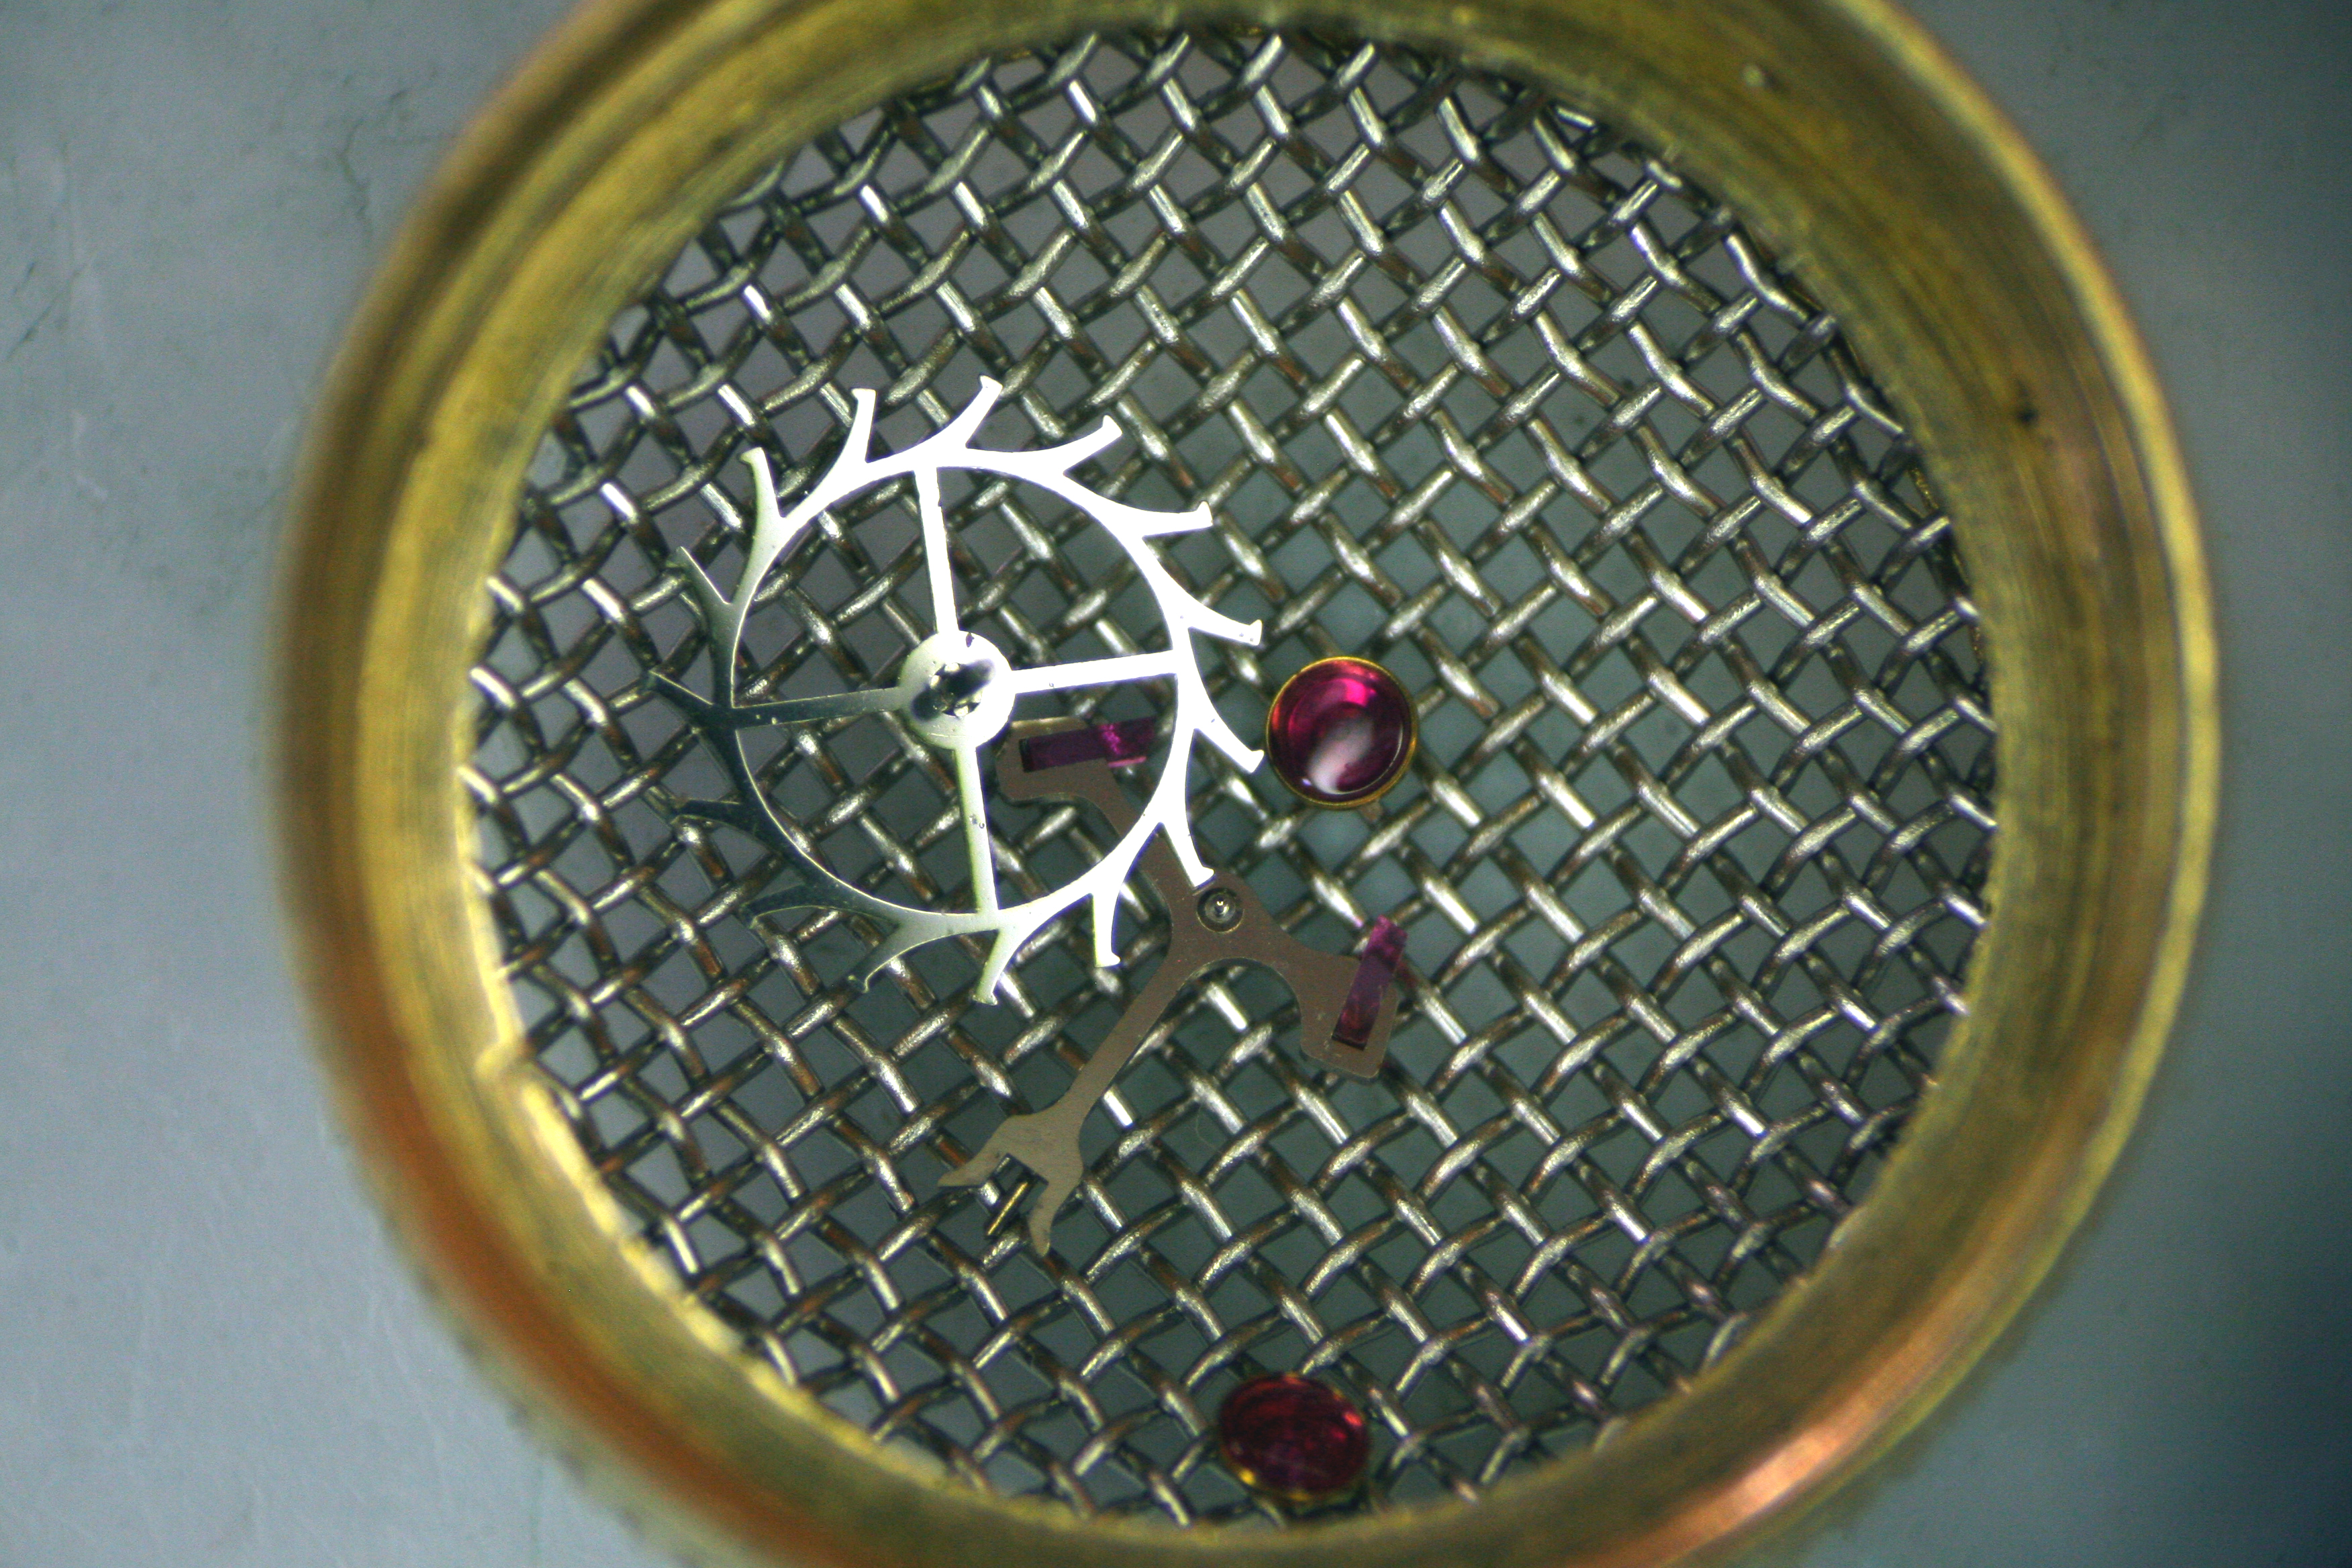
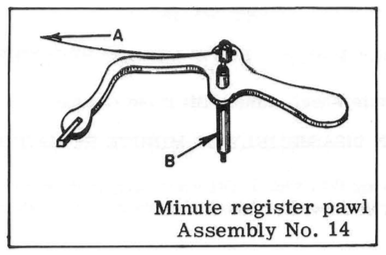
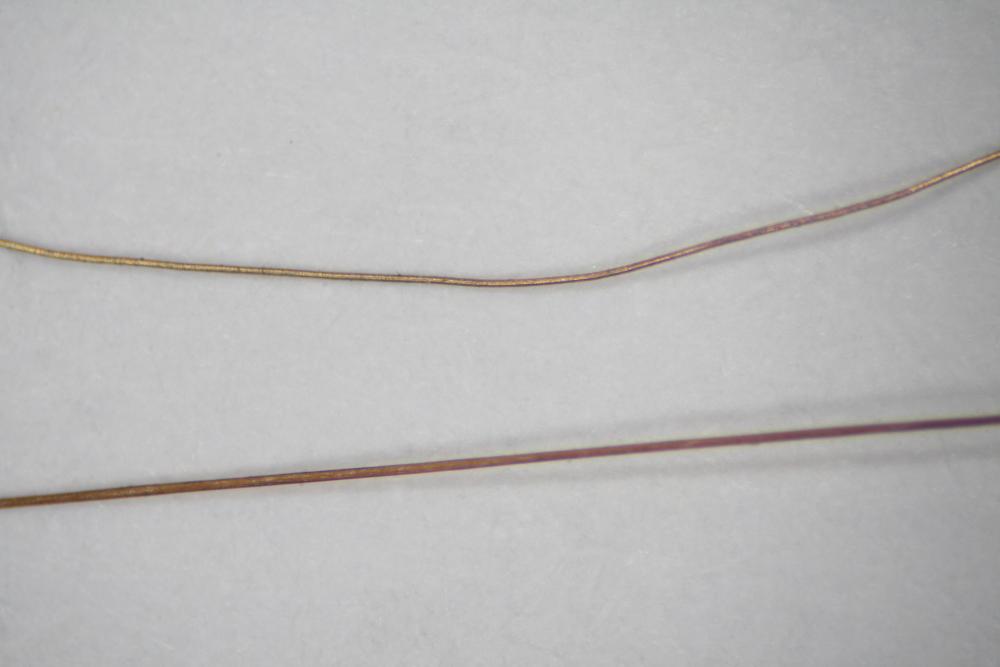
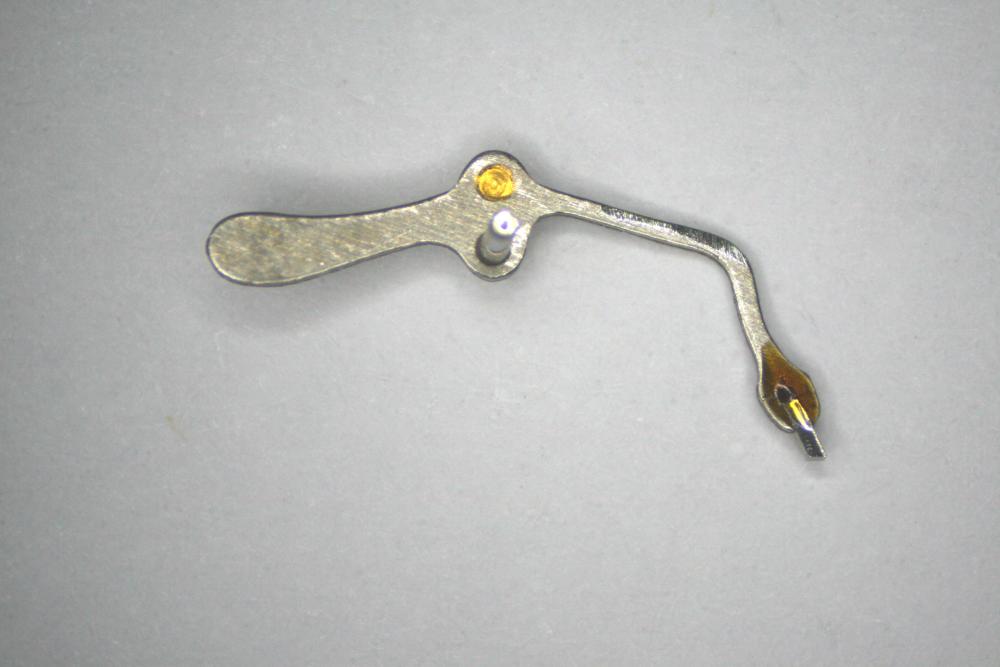
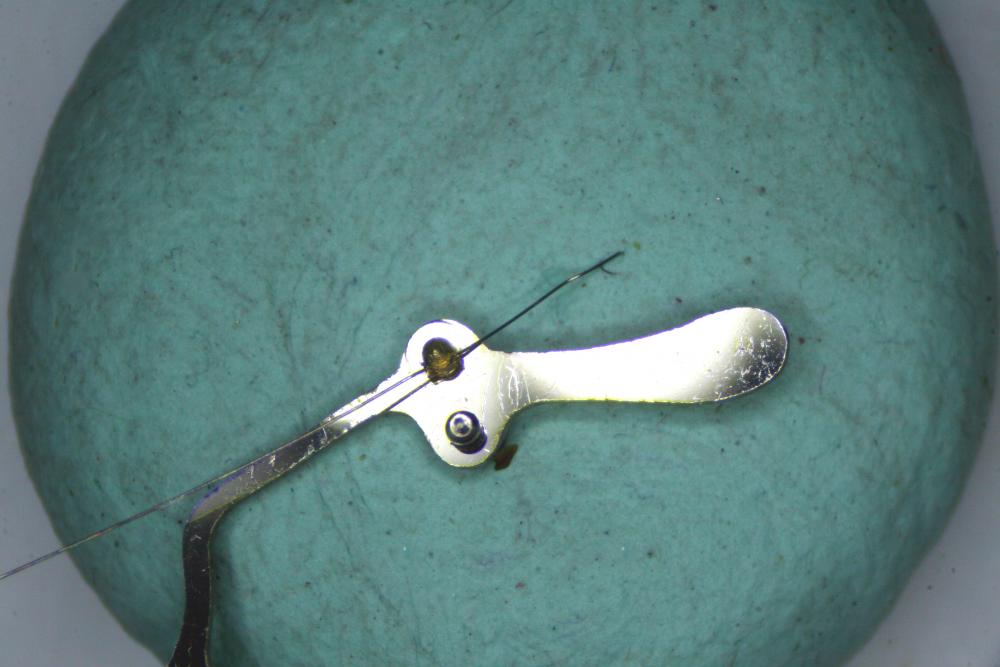
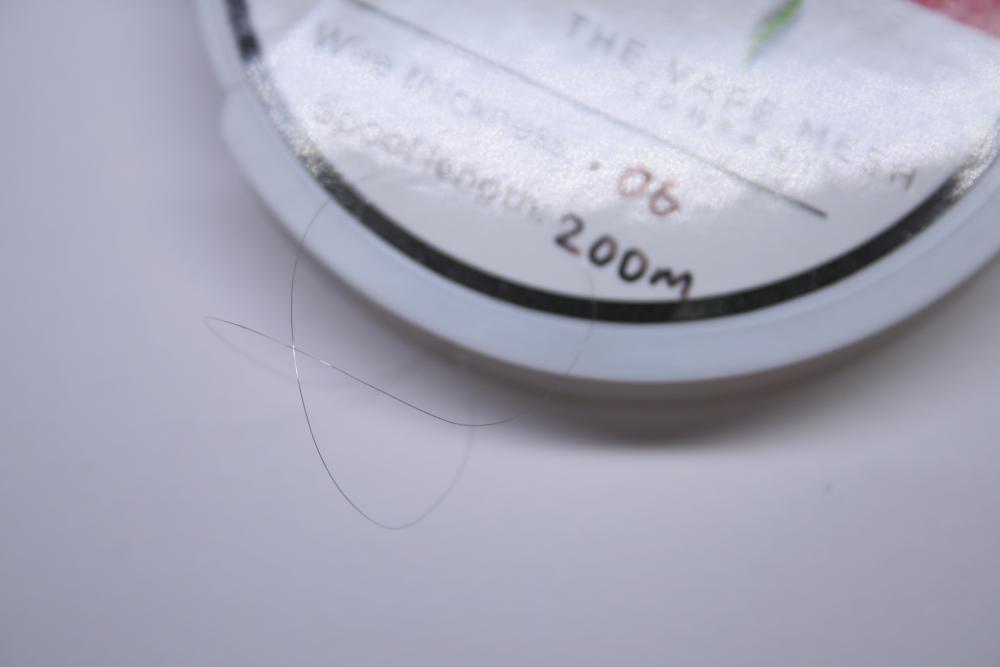
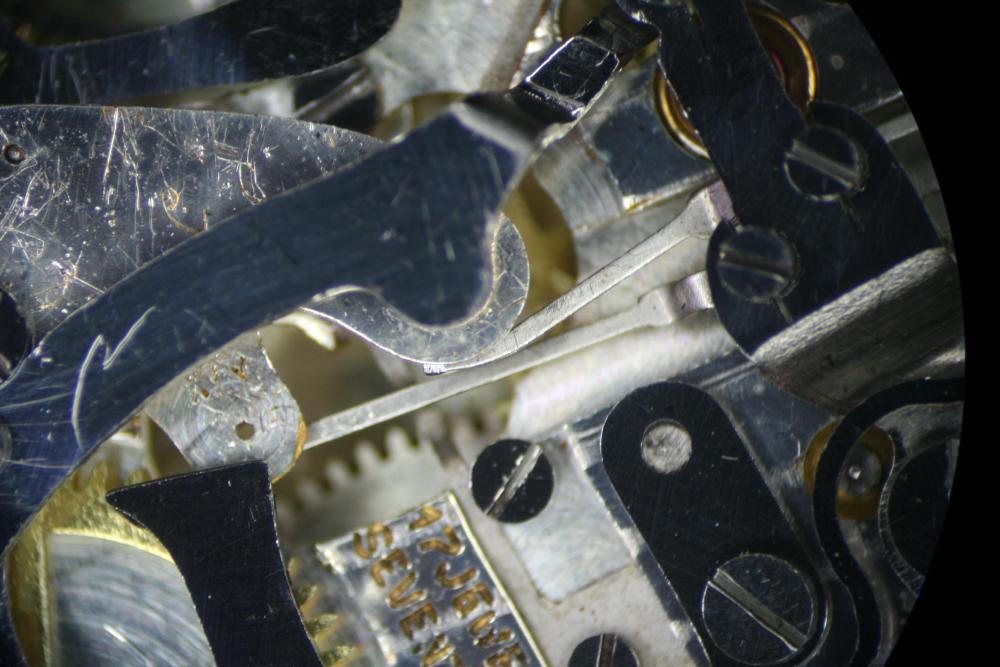
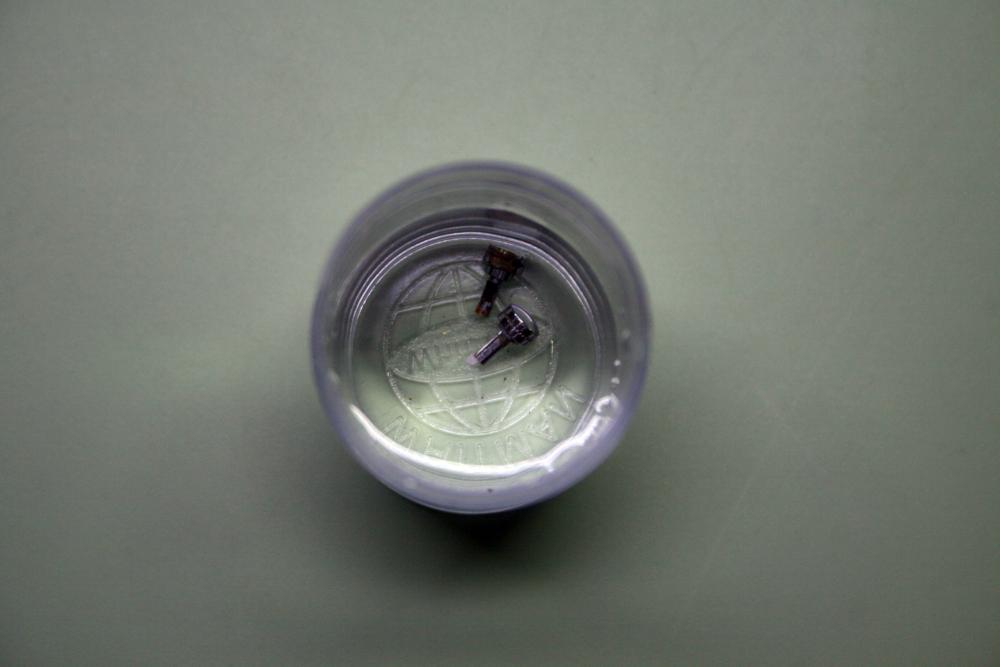
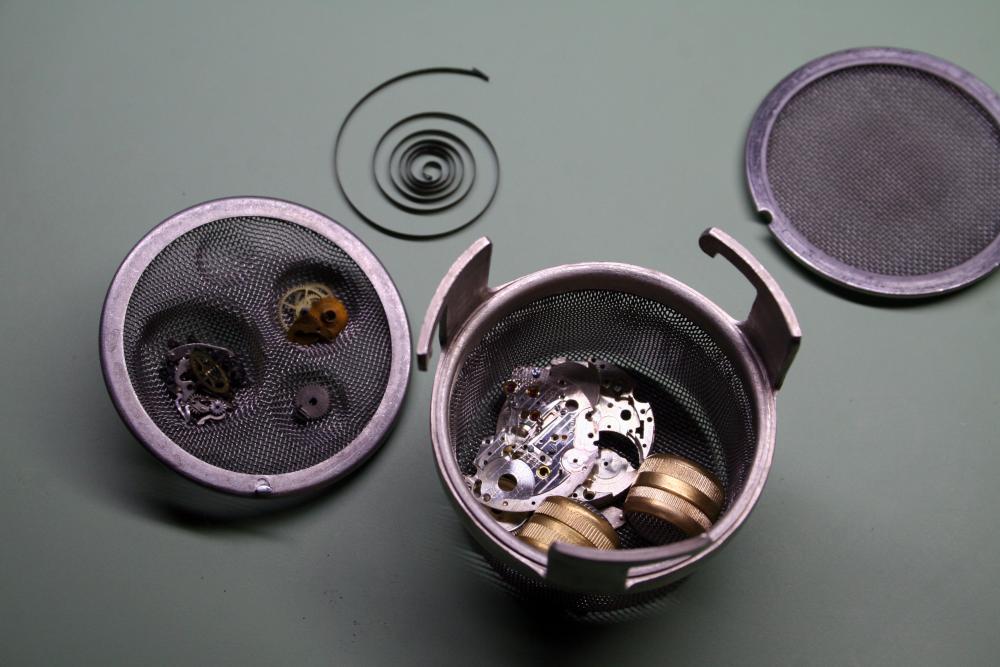
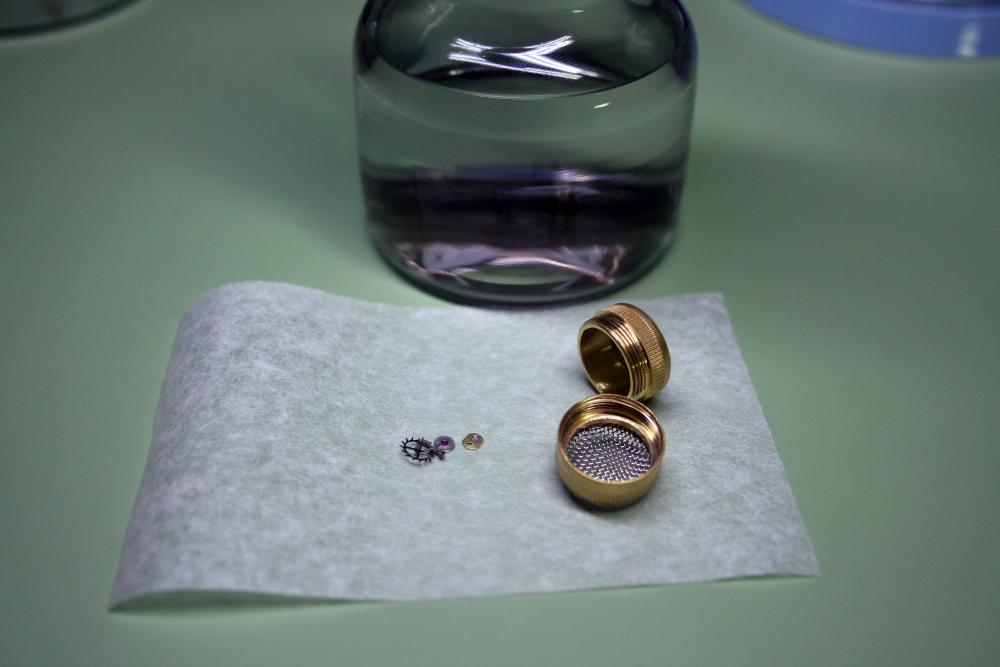
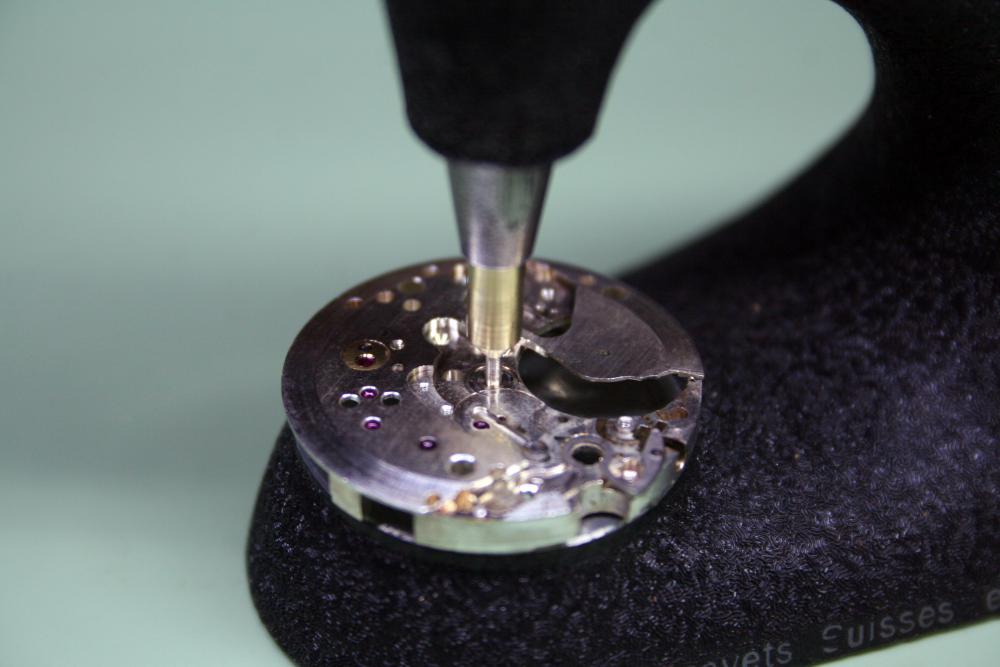
I thought I'd break this out as a separate narrative from the Pierce Navigator repair I posted here. Anyone who has done an old chronograph repair is aware of how delicate part 8270 (minute recording jumper) is. The Pierce 134 movement is put together quite a bit differently from your normal chronograph in that it has a vertical clutch arrangement as opposed to the laterally engaged coupling clutch found in the more common Venus and Valjoux chronograph movements. As a result of this uniqueness many parts, while functionally the same, are designed in a wholly different way. The Pierce minute recording jumper (pawl) is different from the typical jumper piece in that it is not a spring, but rather a pivoting lever which is held in tension by the thinest of wires. The wire needs to be manipulated in to put the jumper under just enough tension to hold the minute register wheel static until activated by the intermediate wheel. Too much tension will cause the watch to stop when the elapsed minutes are recorded, and too little tension will allow the minute register wheel to spin freely. Unfortunately it is not uncommon for the wire providing tension to fail after manipulation. Here I have a jumper in which the wire has broken and the jewel (well, actually it's just a cut piece of steel) has come lose. Initially I though it would be a simple fix to replace the broken wire. I used some 18 gauge electrical wire which was composed of several strands of thinner copper wire. Stripping the insulation off, I took a single strand of the copper wire and assumed it would suffice. Under the microscope it was evident that this approach wouldn't work. Even the smallest copper wire I could find was several times thicker than the wire I needed. Using the bench micrometer I measured the thickness of the broken wire at 0.05mm. To give an idea of how thin this is, I snapped a picture under the microscope of the wire next to a human hair. The wire is on top, the hair on the bottom. Armed with hard data I was ready to take a second shot at the challenge. Using the internets I found a company in the UK which could supply nickel wire in the same thickness. I placed an order, then added a couple spools of varying thickness just in case (and to make the product to shipping cost ratio a bit more reasonable). The wire arrived in due course and was exactly as described. I began my repair by knocking out the brass pin which secured the old broken wire to the pawl. A sewing needled was used to knock the pin out. The "jewel" was then replaced using a bit of shellac and a alcohol lamp. Now it was time to replace the spring wire. I cut a length from the spool and threaded it through the eye piece on the jumper. Naturally this was done under a microscope. A replacement pin was inserted to hold the wire in place and the excess was trimmed off using the scissors on my Swiss army knife (they seemed to be the perfect tool for this job). As you can see had two jumpers to repair: I'm very pleased to have been able to repair these parts as they can be quite expensive when purchased second hand; from personal experience I've seen the Valjoux and Venus jumpers cost between $30 and $120 USD which is quite a lot for a little bit of steel. Pierce parts can be hard to come by also. I currently have two Pierces in varying stages of repair so the jumpers will come in handy. On a side note I don't vape so I have no idea why tiny nickel wire is necessary for smokeless smoking.
.thumb.jpg.659e45086cdb83afb64c371dfb284dba.jpg)


 2 points
 -
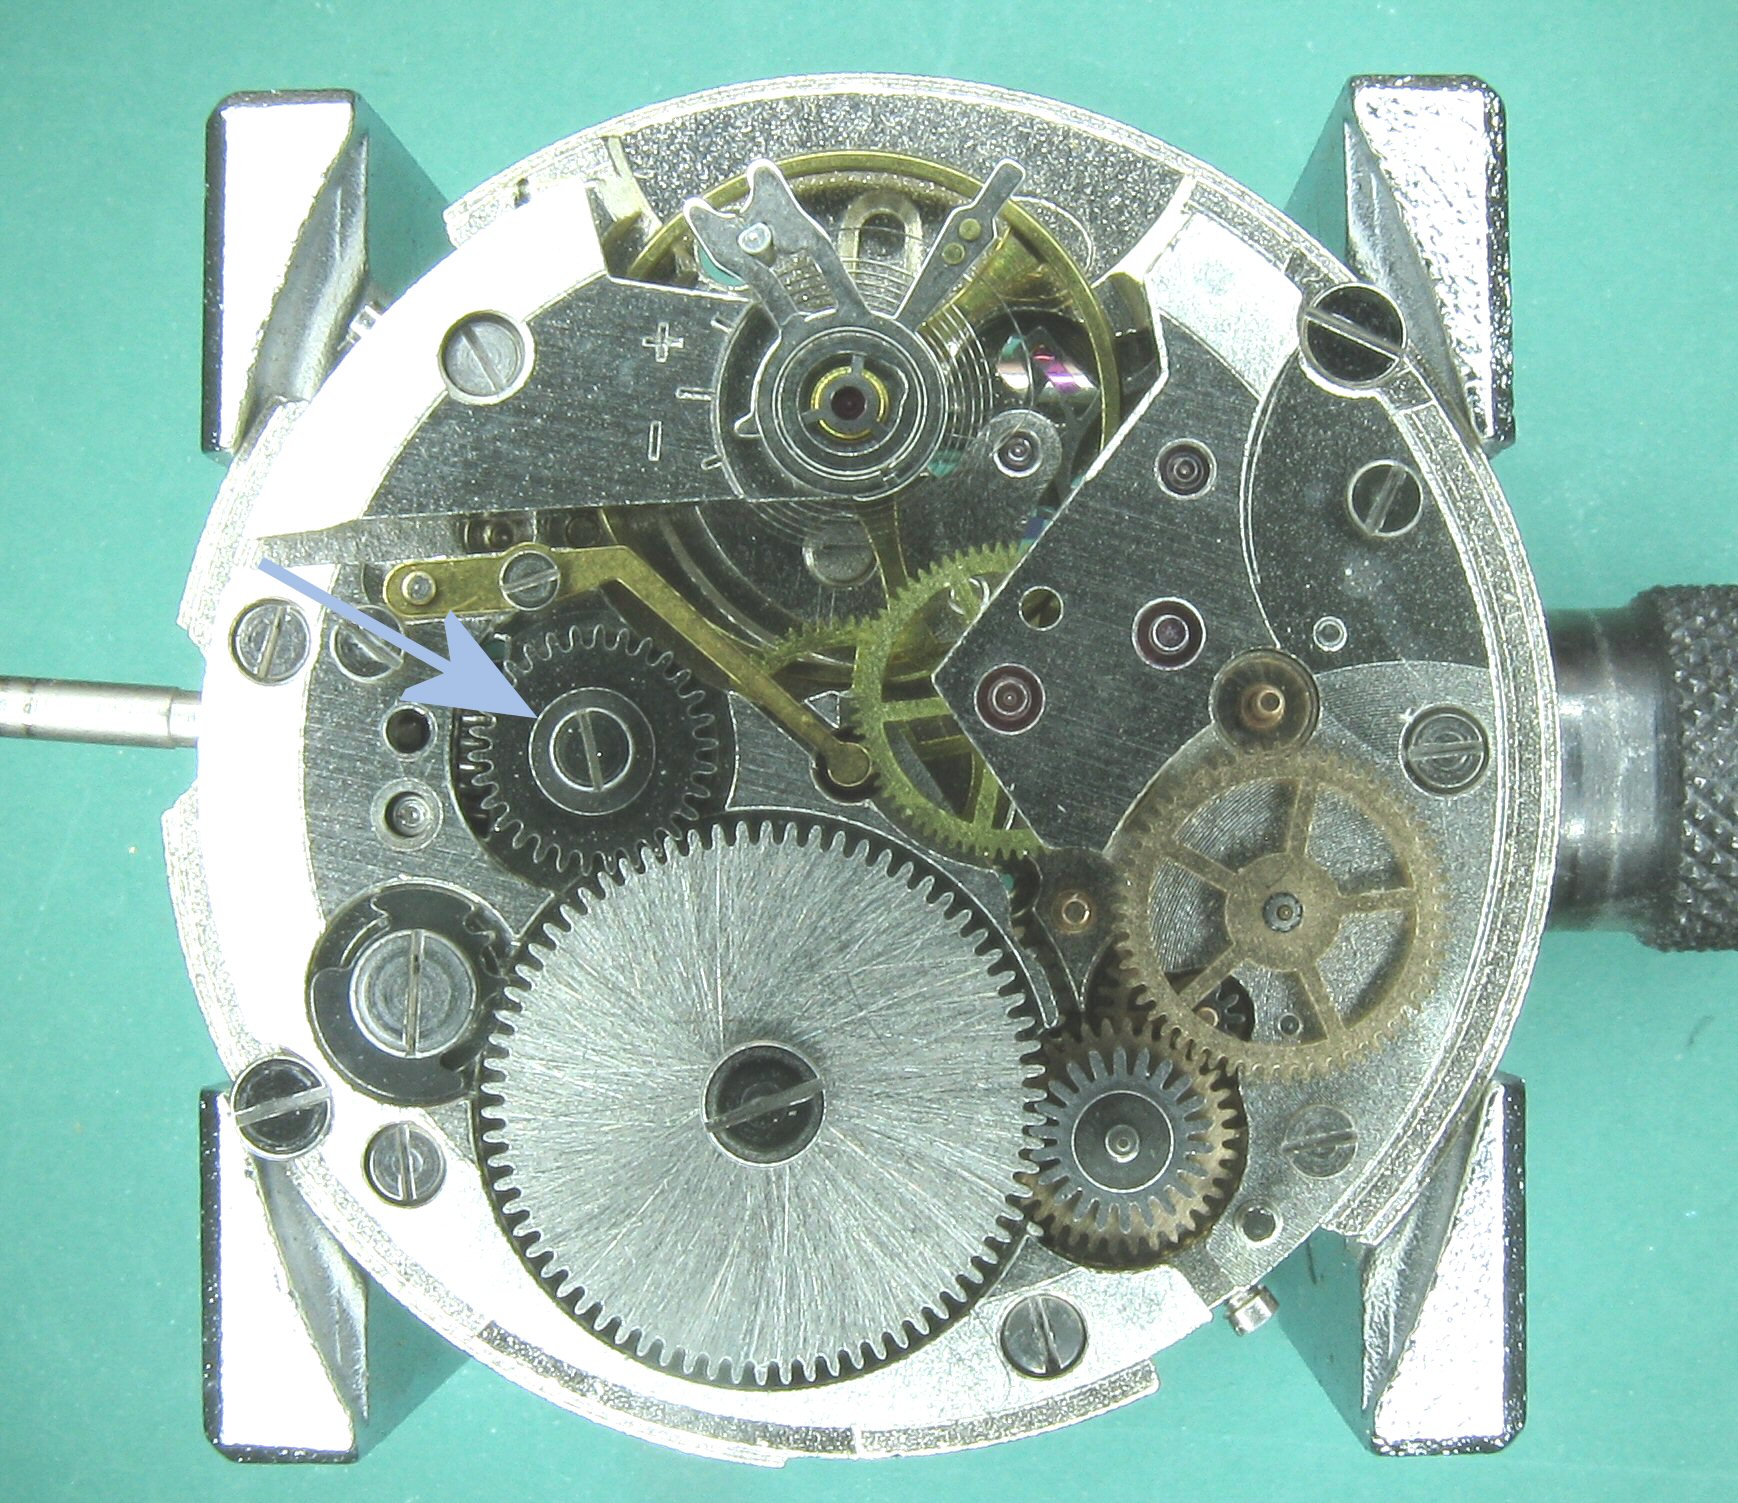
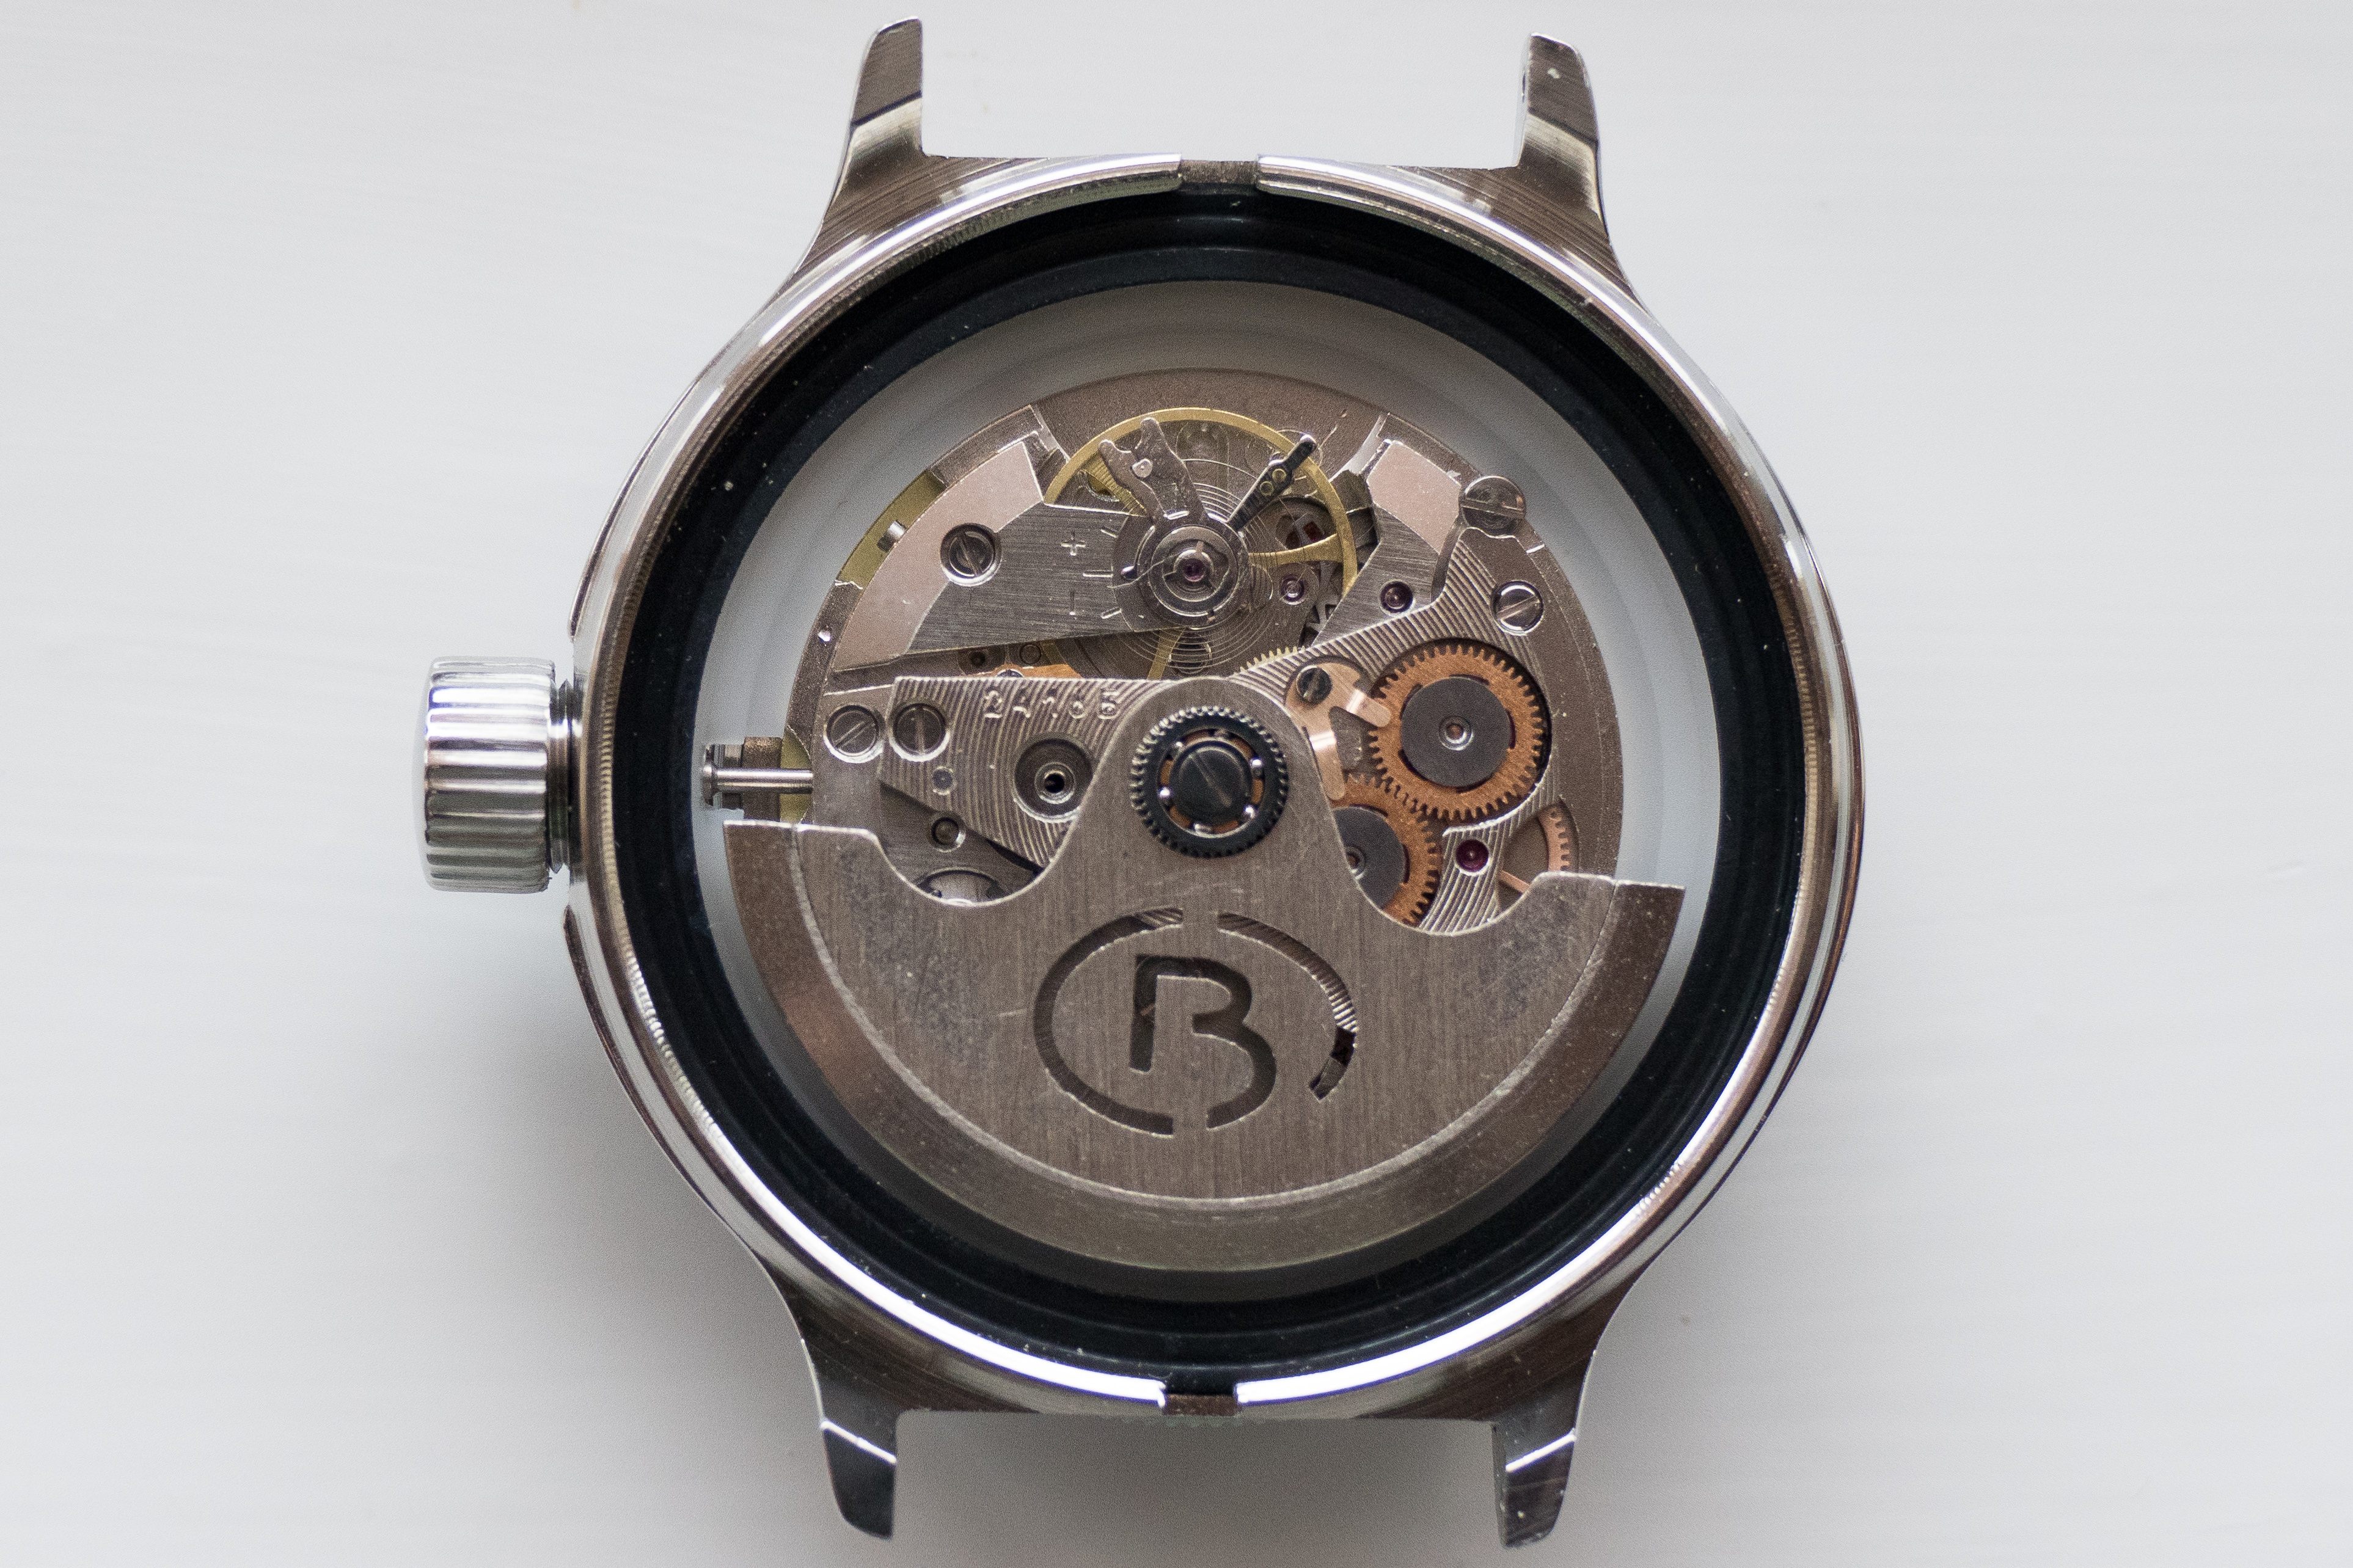
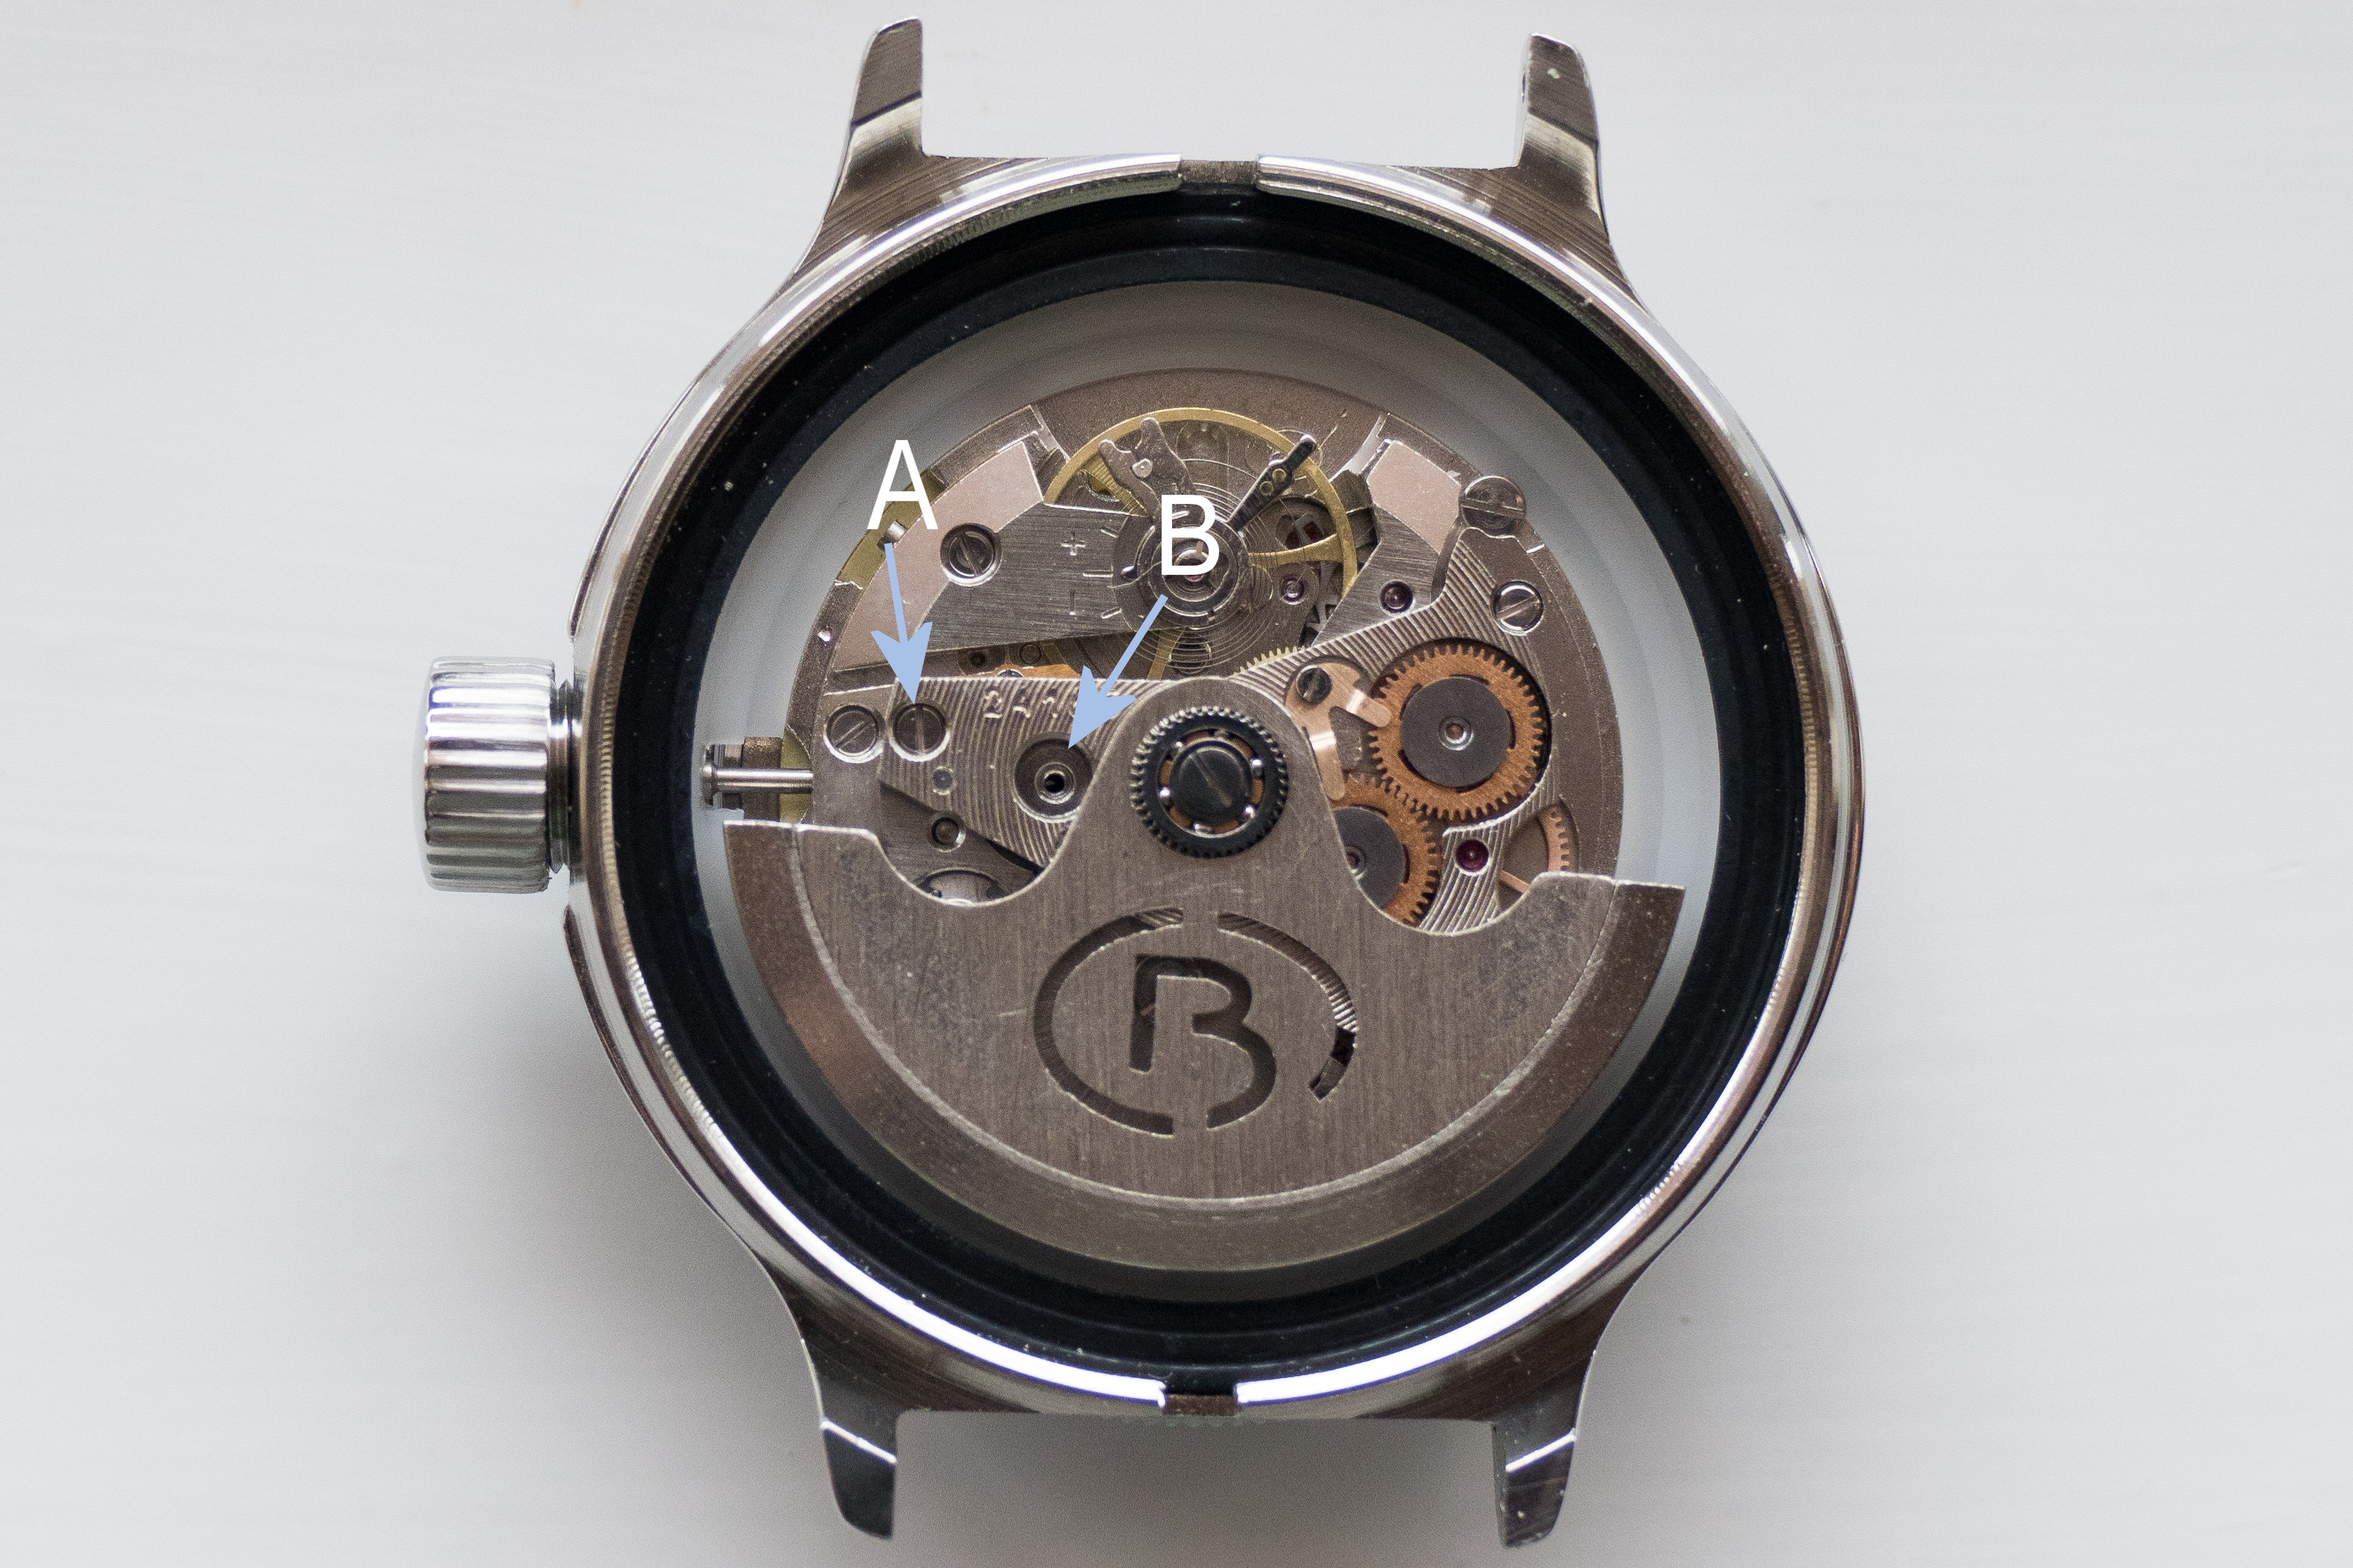
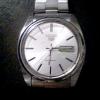
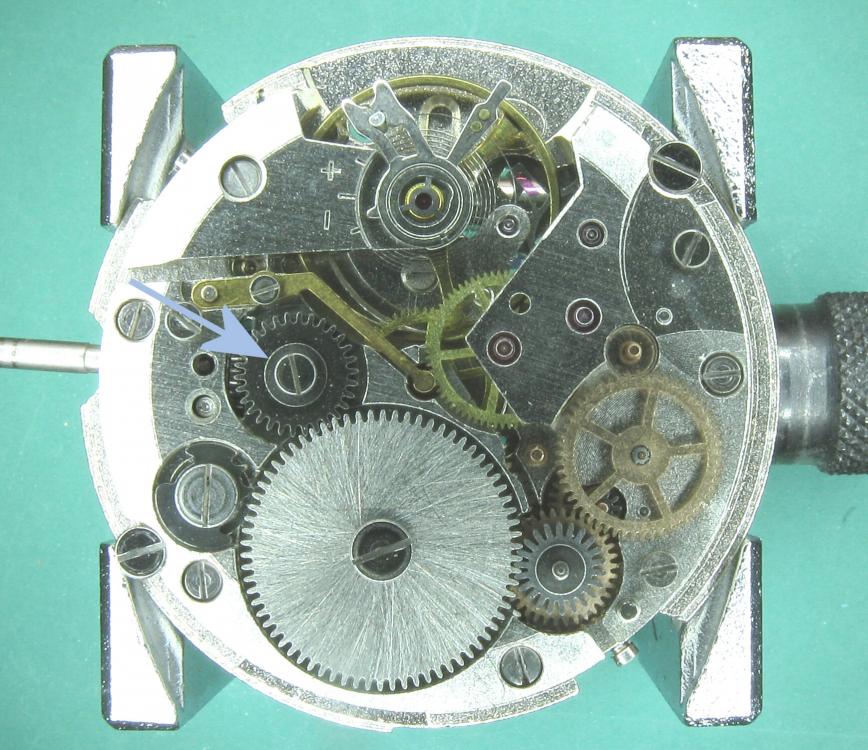
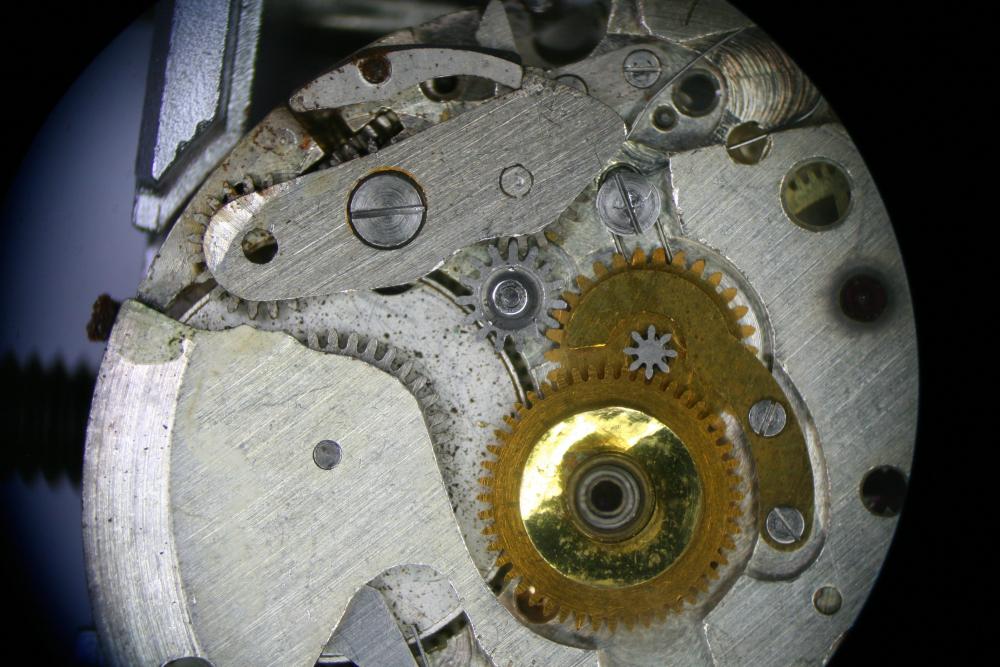
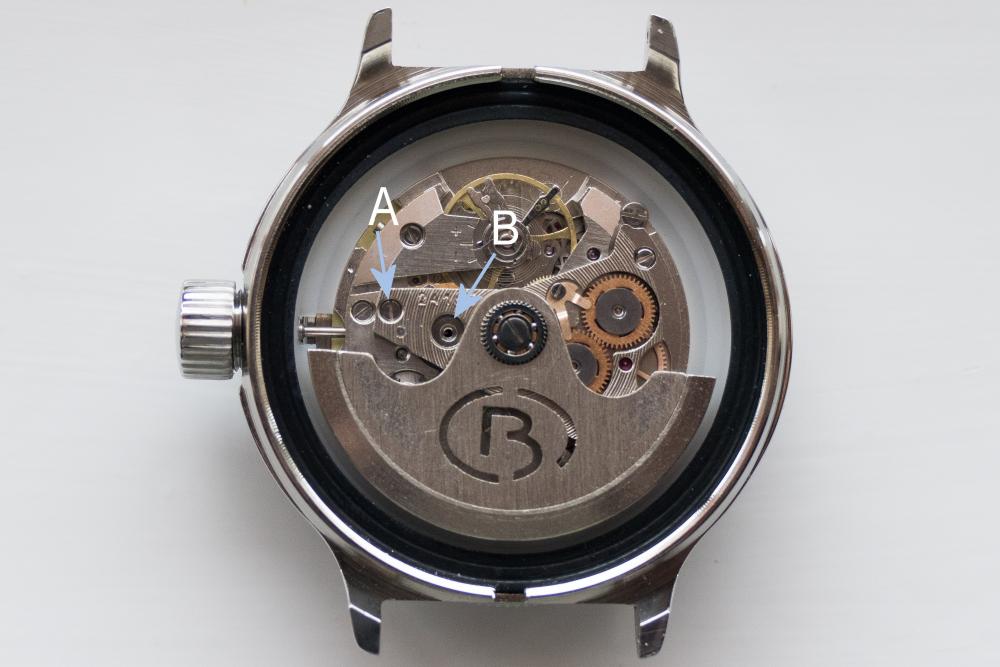
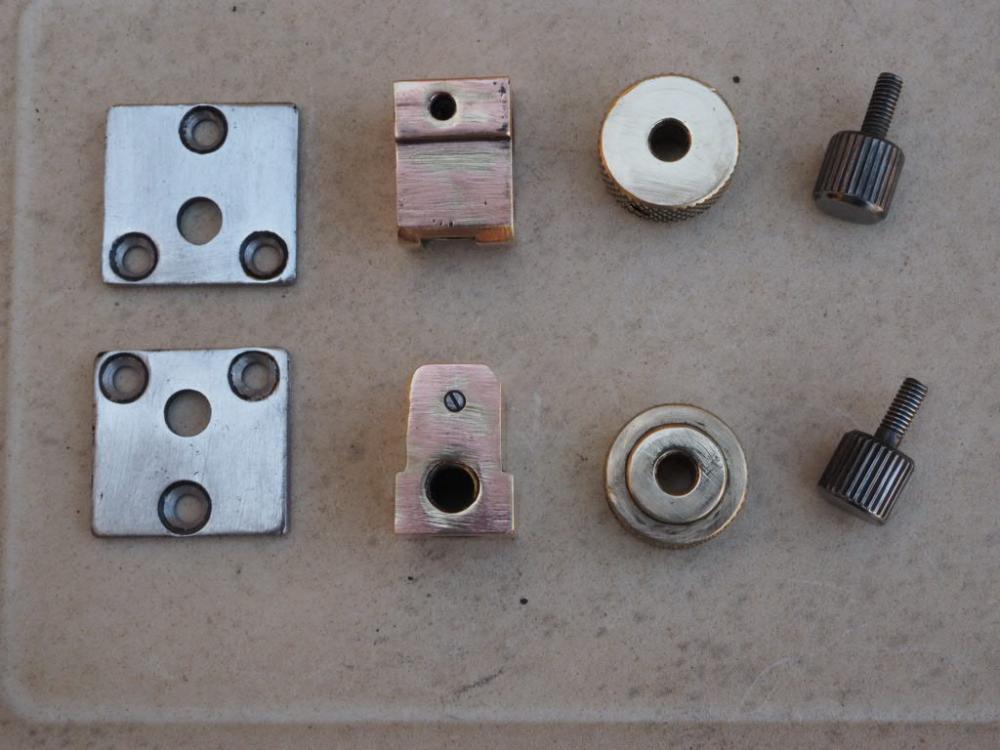
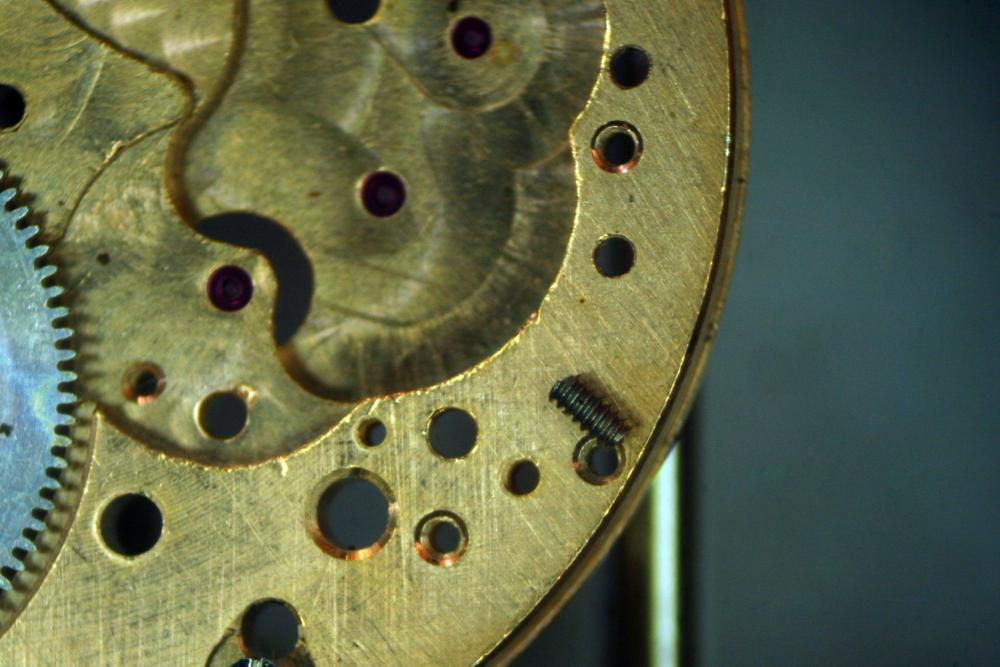
Hi Kevin That's a very nice SCUBA Dude you have there. That little washer looks suspiciously like the washer that goes on the crown wheel screw arrowed If it is then it means that the crown wheel screw must be adrift somewhere in the movement which could be the cause of the stoppage. Beware when it comes to dealing with this screw though as it is a lefty even though it isn't marked as such. Have a look here for a walk through on another 2416b Amphibia (also a blue SCUBA Dude); Just ask if you have any issues when you do yours. Good luck, and enjoy.
 2 points
 -
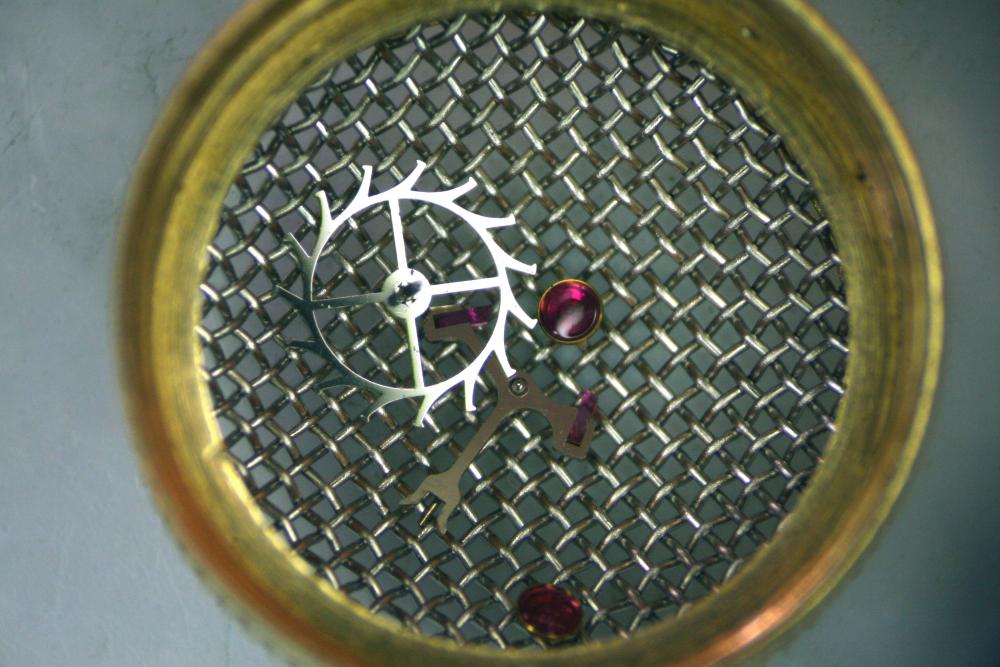
I could not find an adequate lower balance jewel already in casing so I removed the jewel from its casing and found a replacement that fit the pivot and fit the hole, and tada it fits. Sent from my iPhone using Tapatalk Pro2 points
-
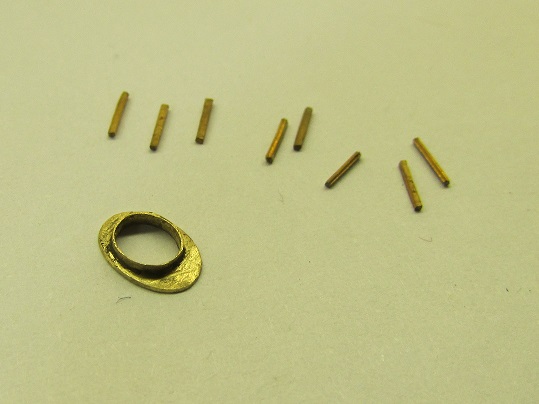
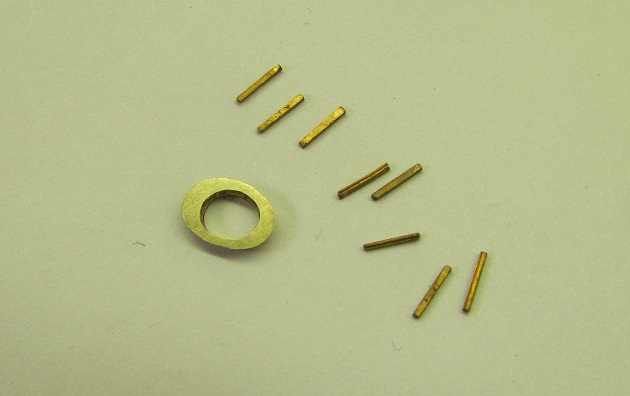
Got the ring from Cousins and it finished up like this........
 2 points
 -
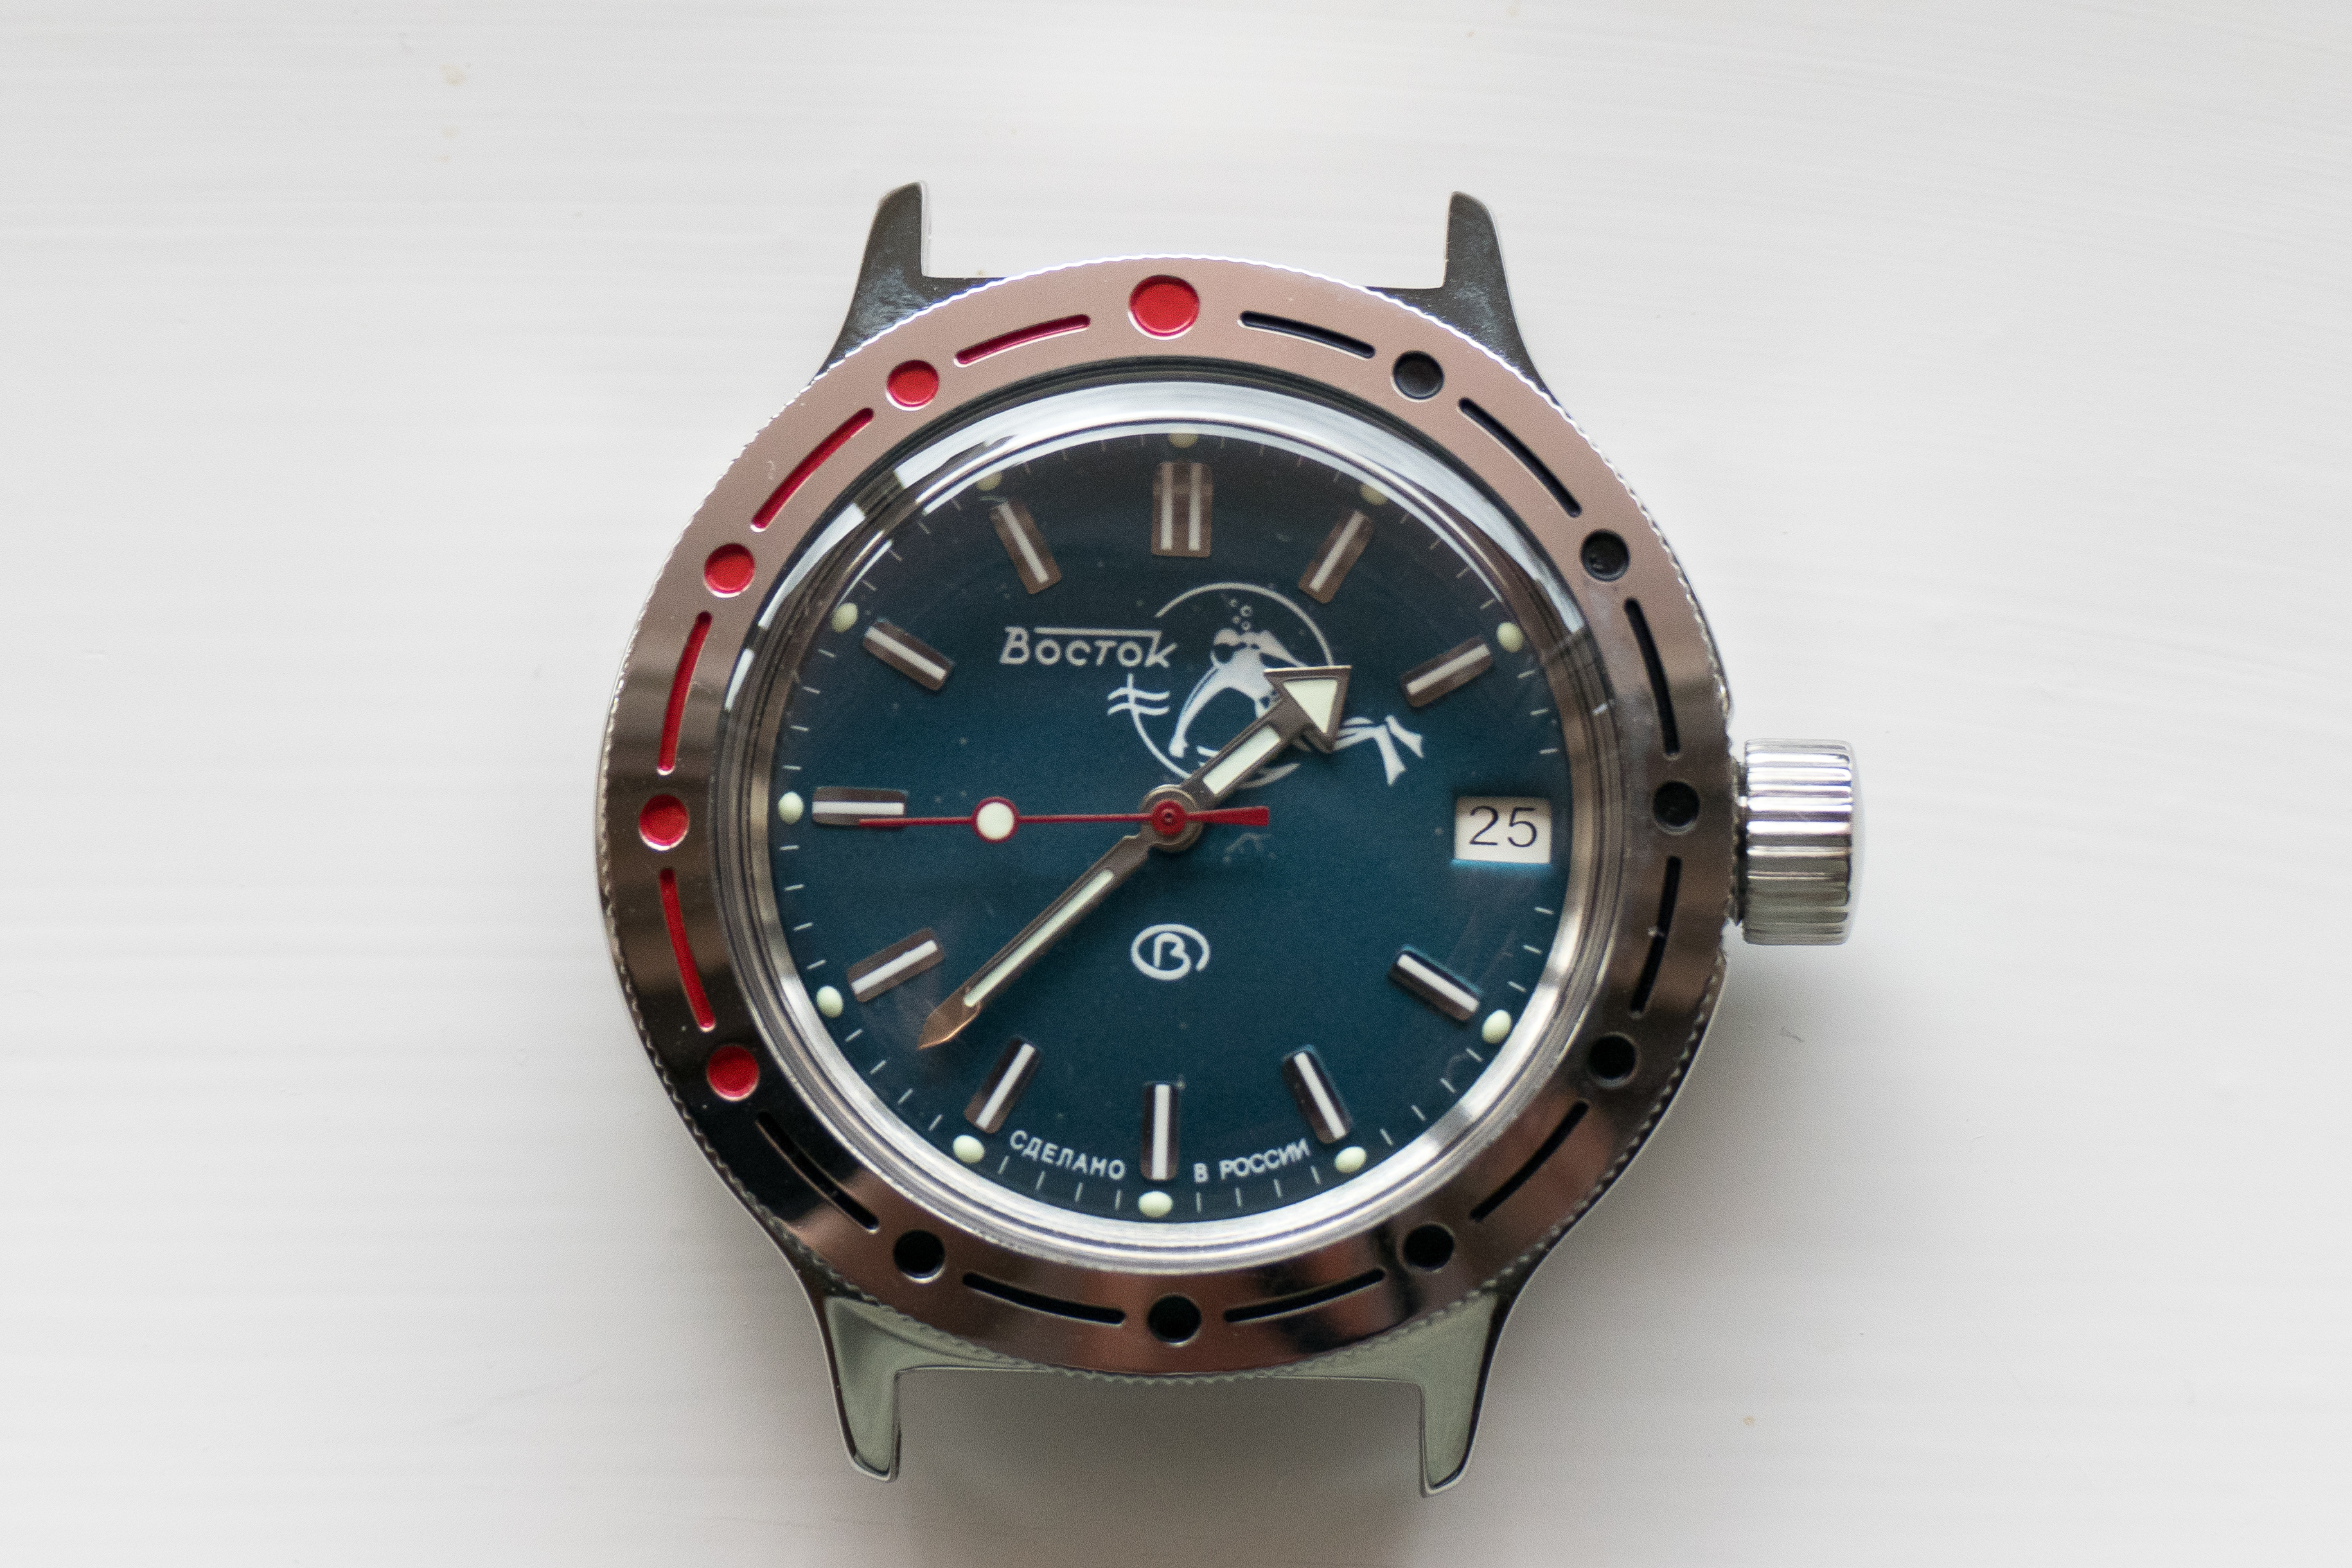
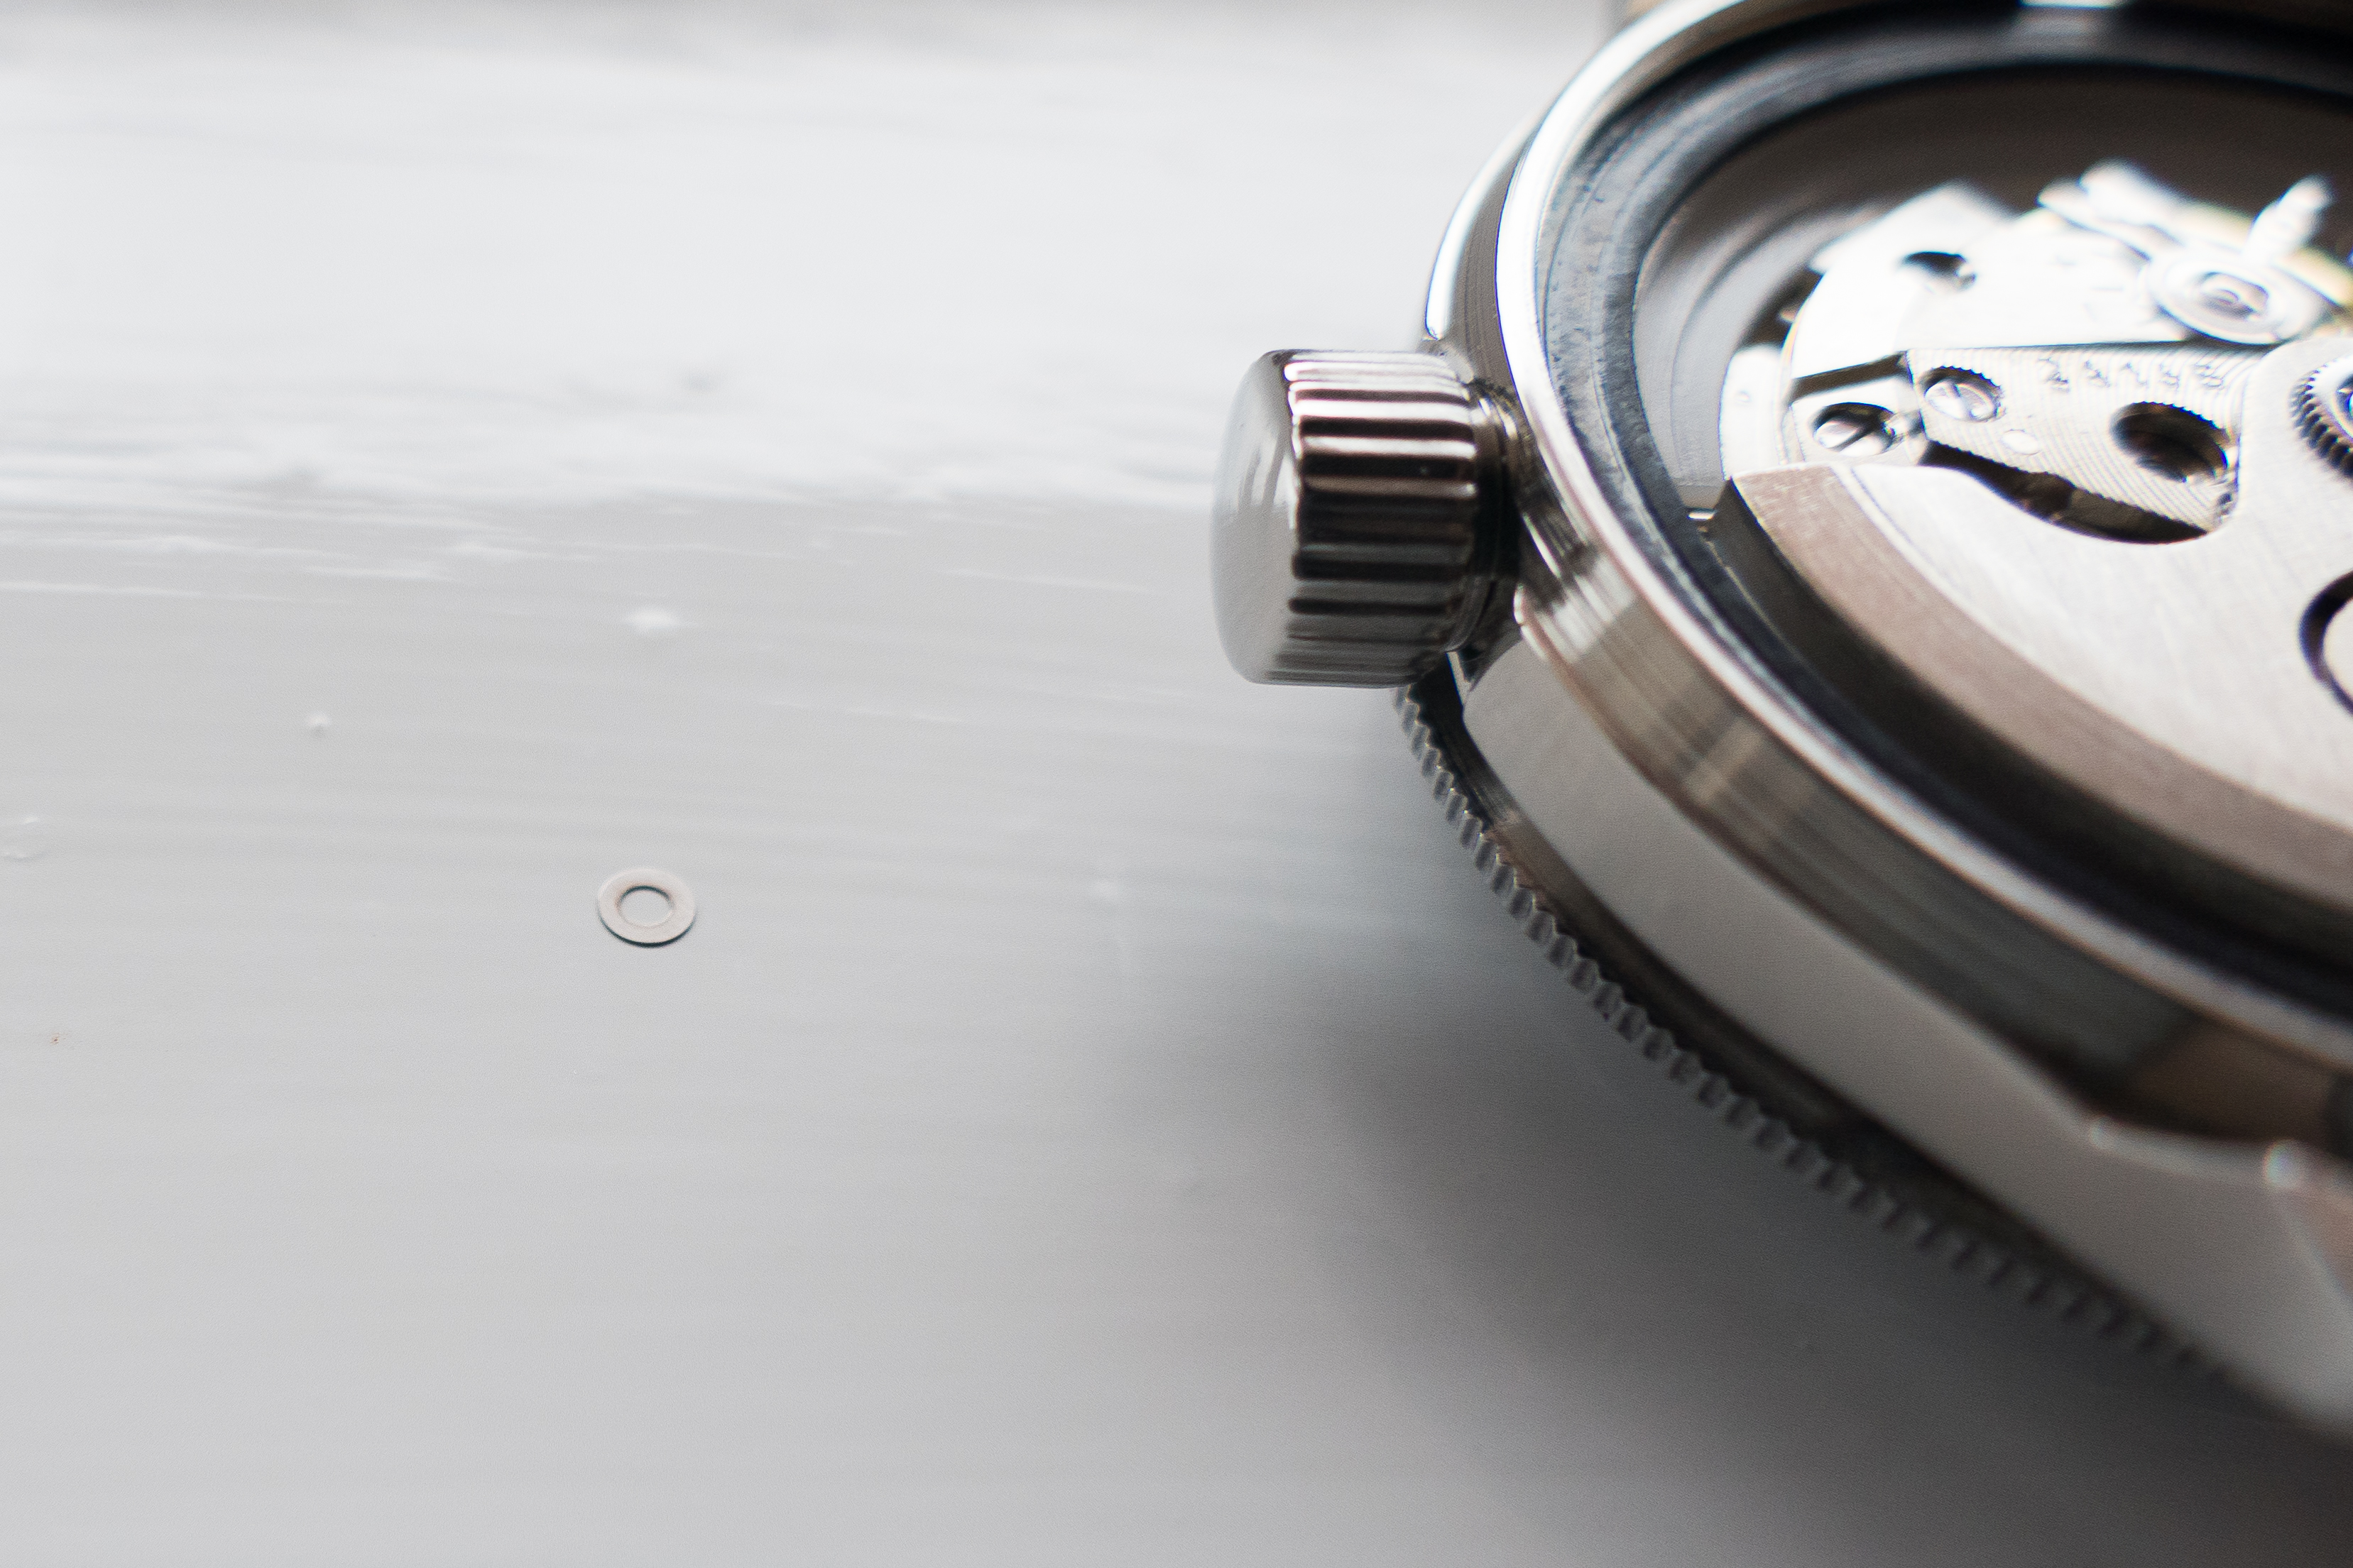
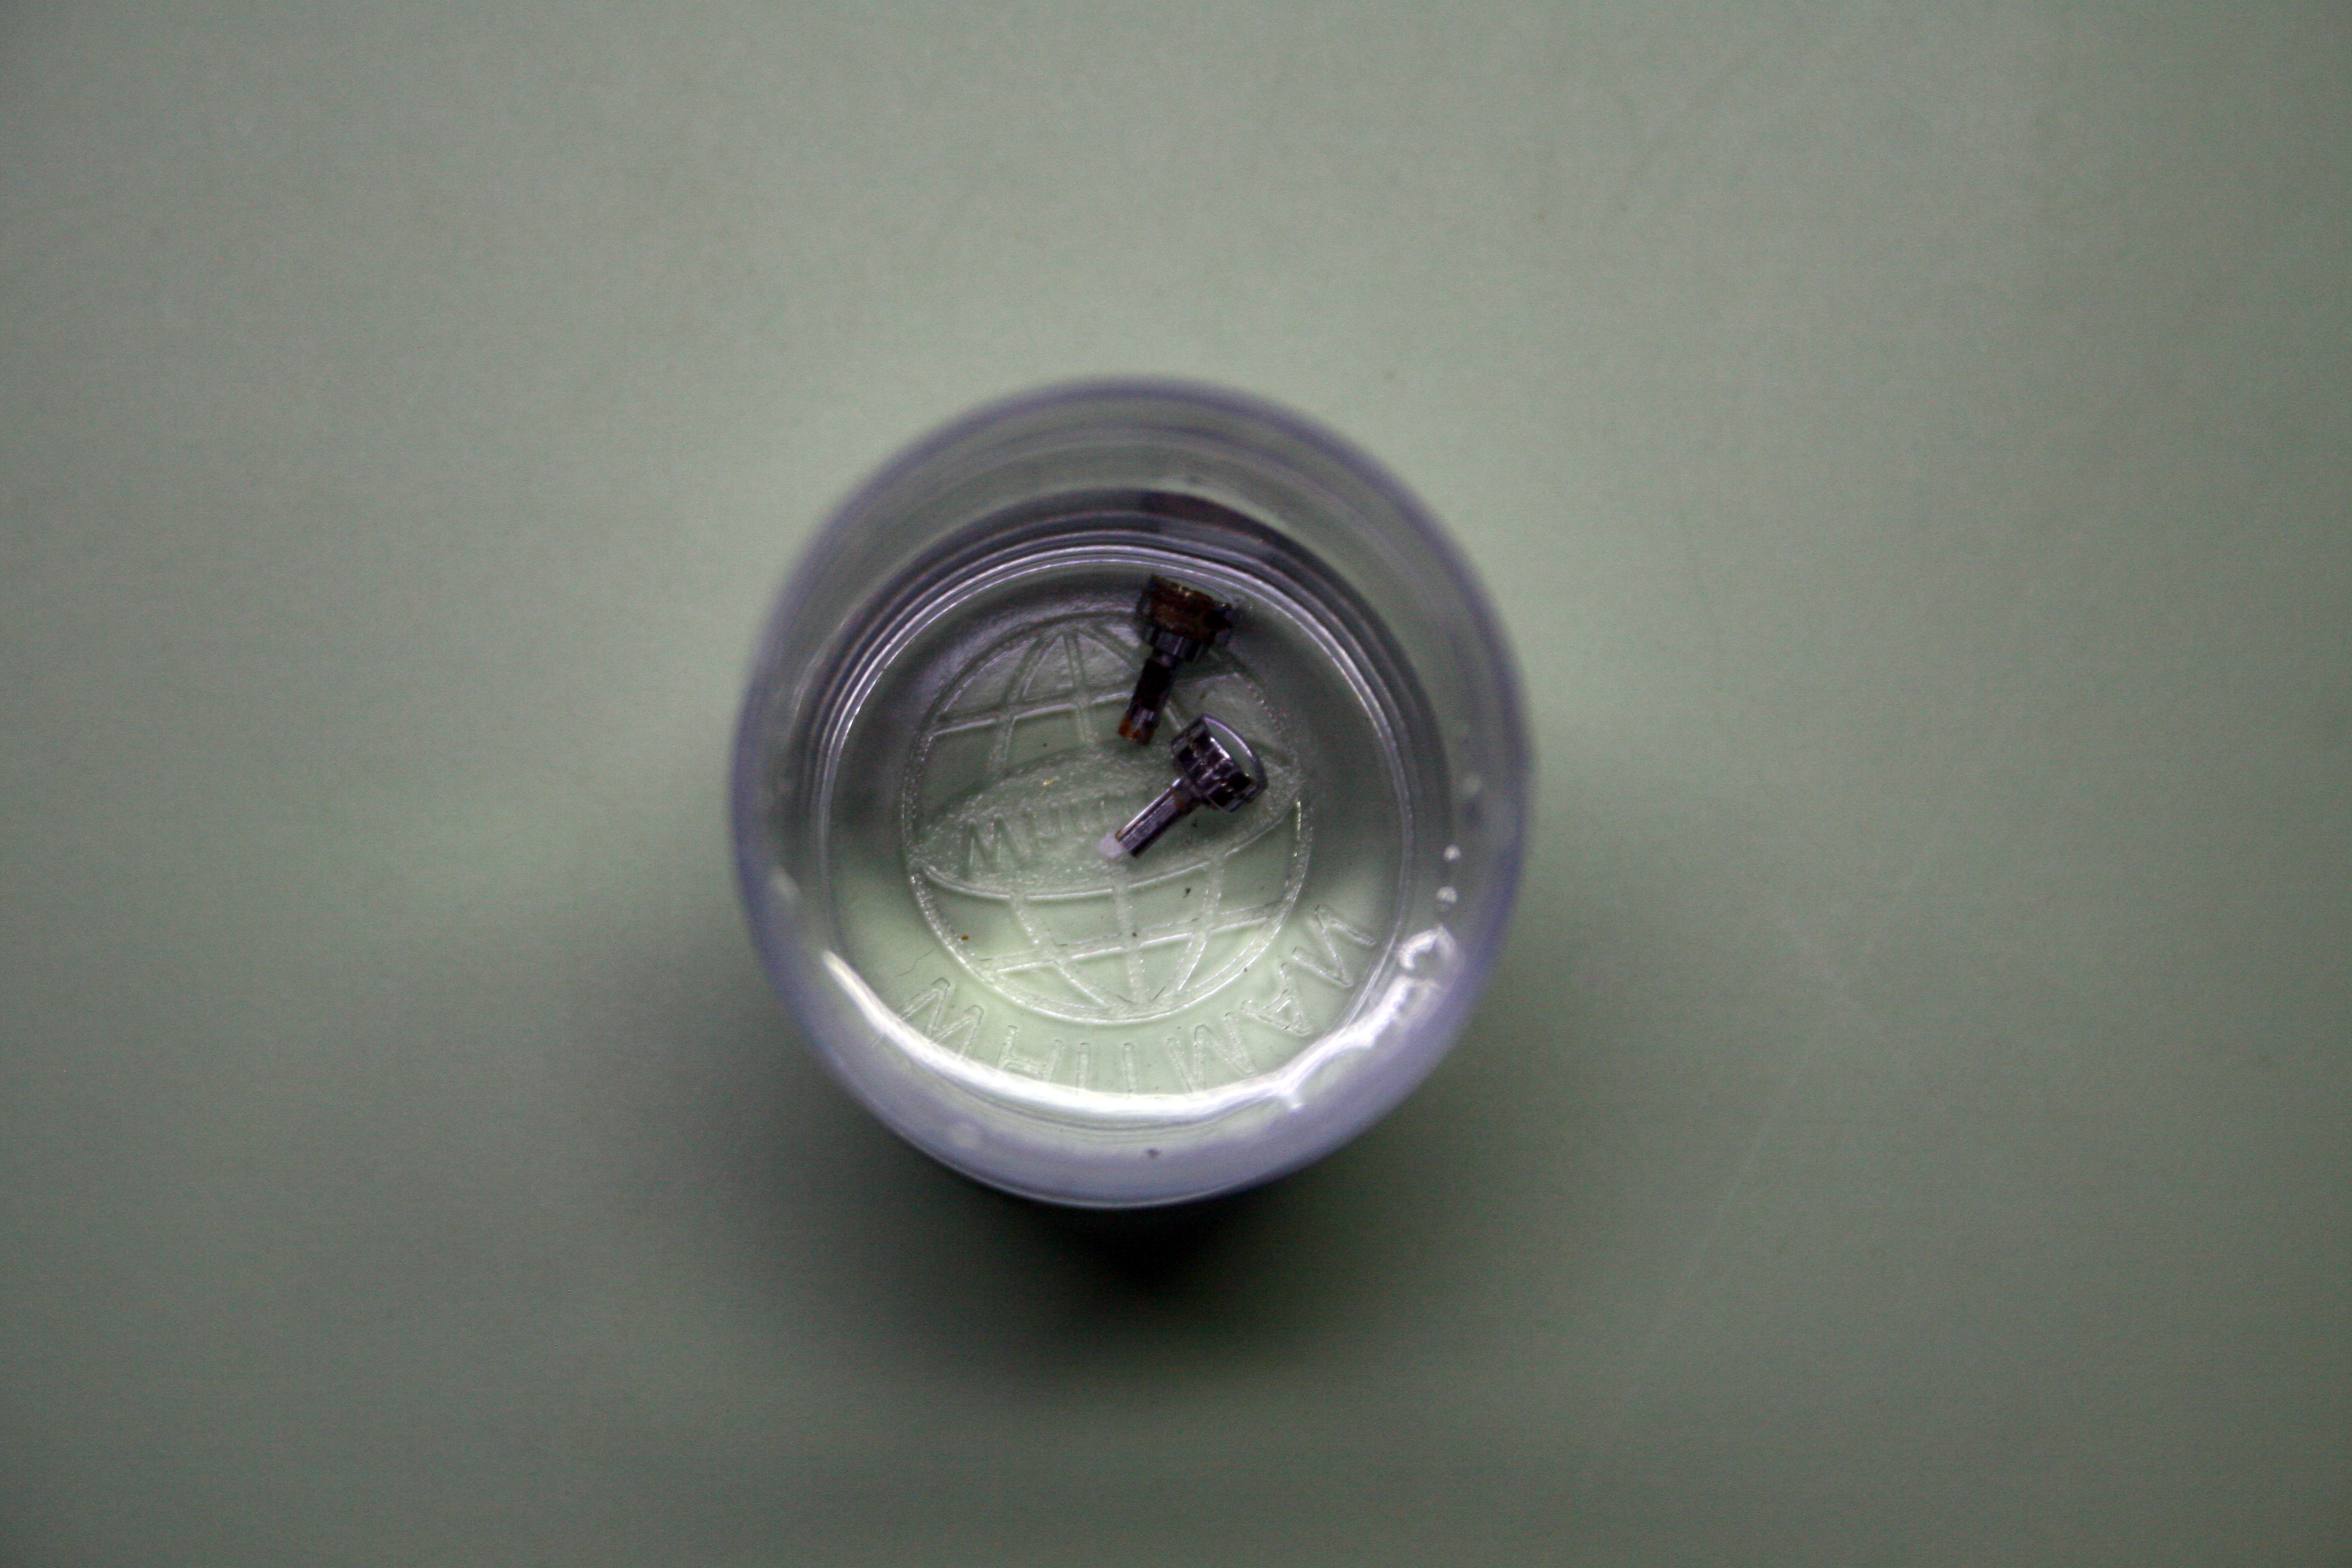
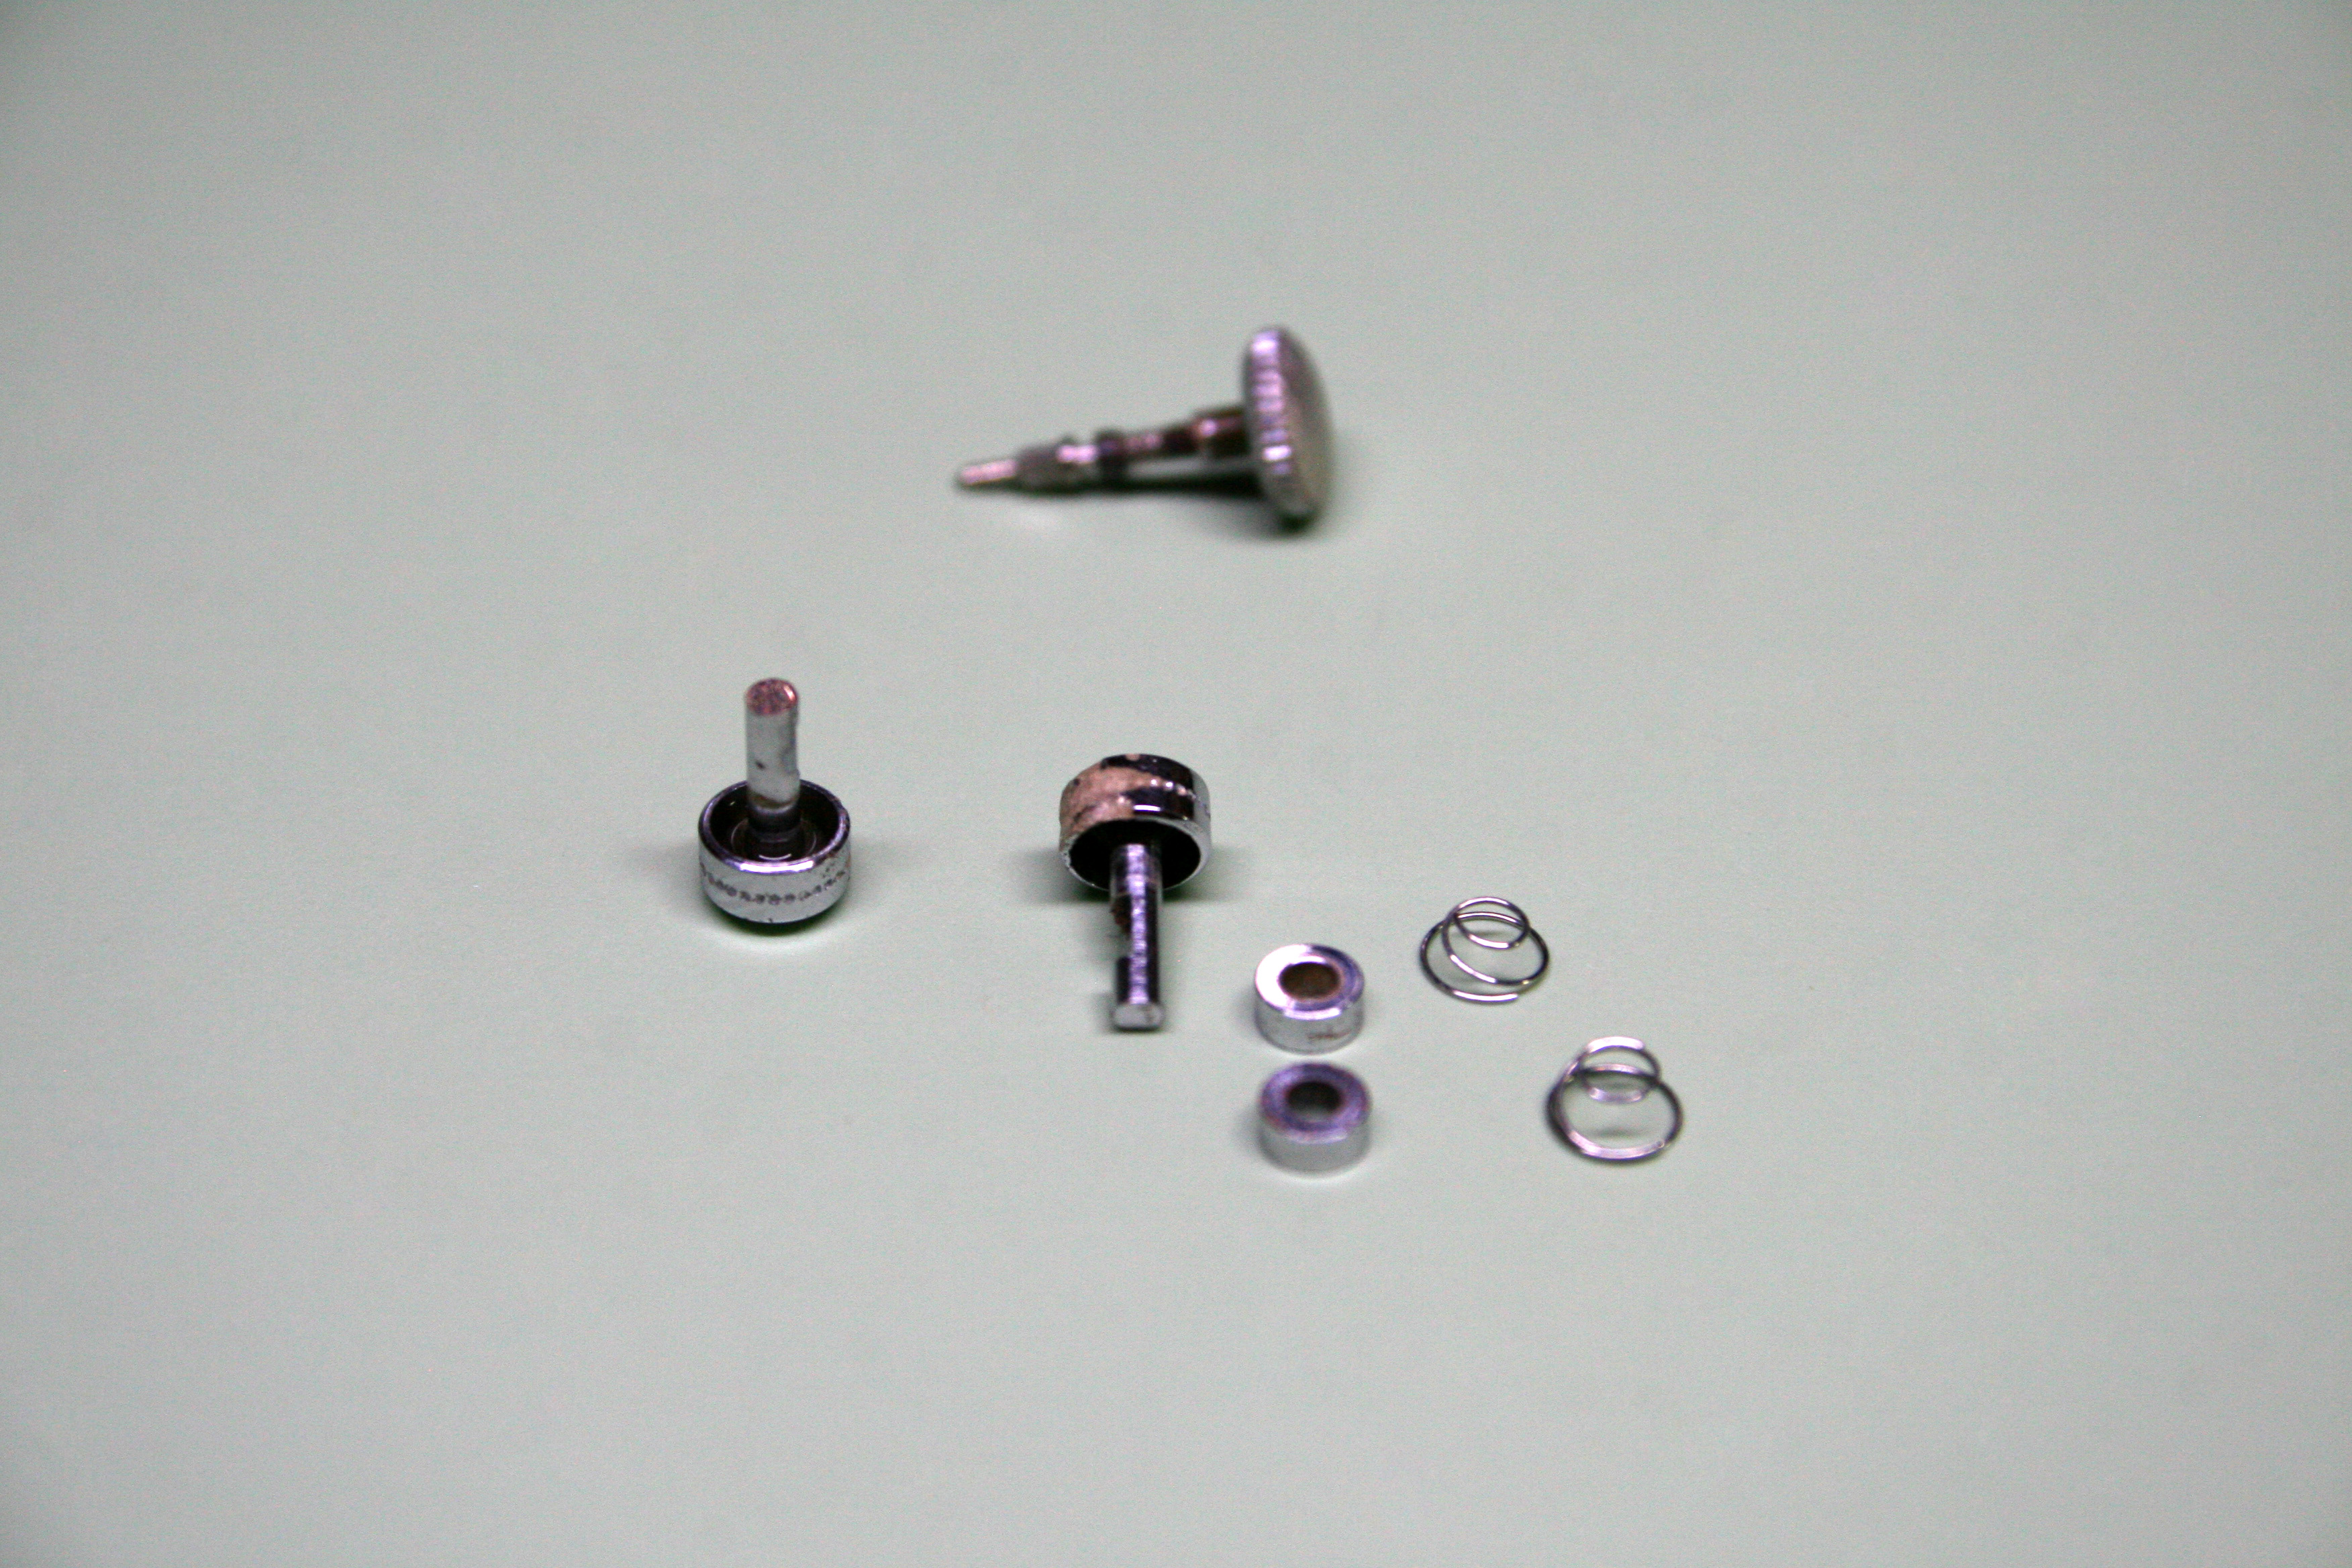
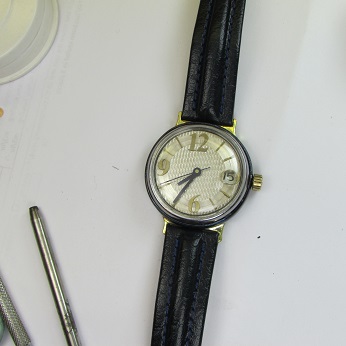
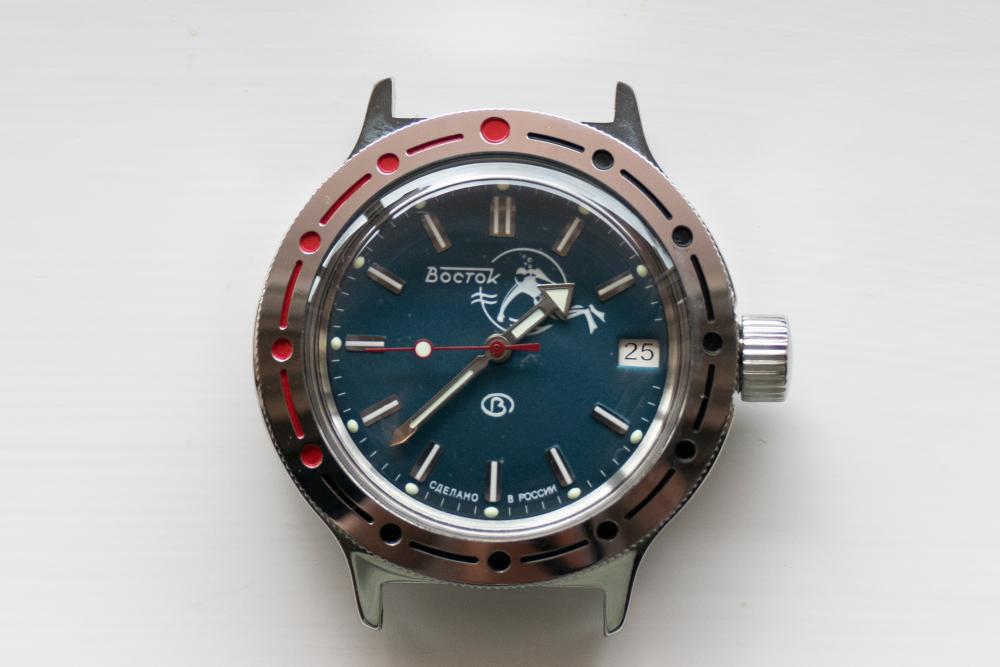
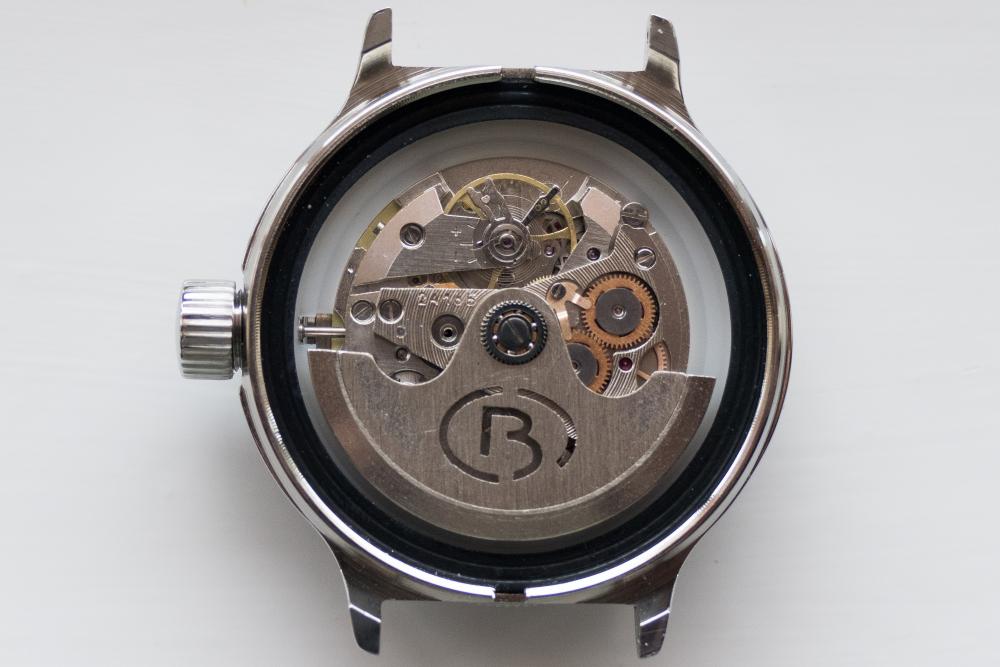
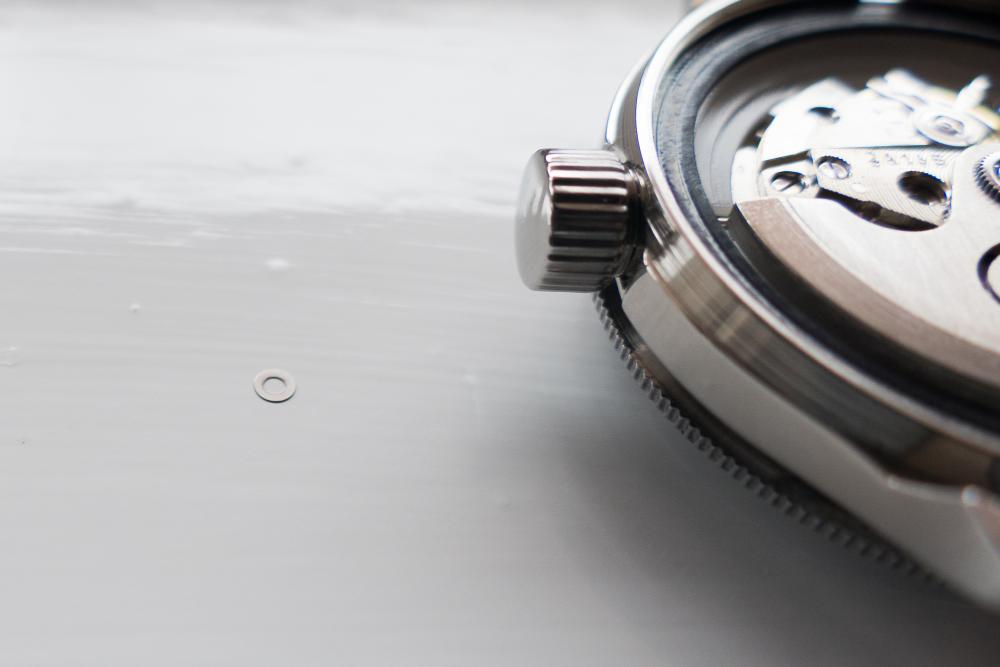
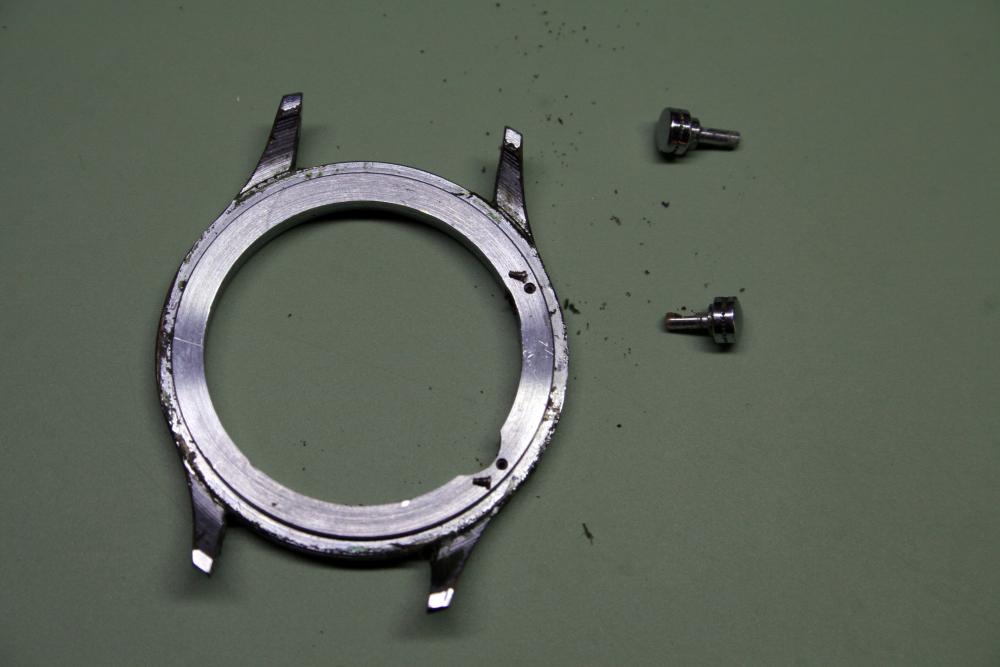
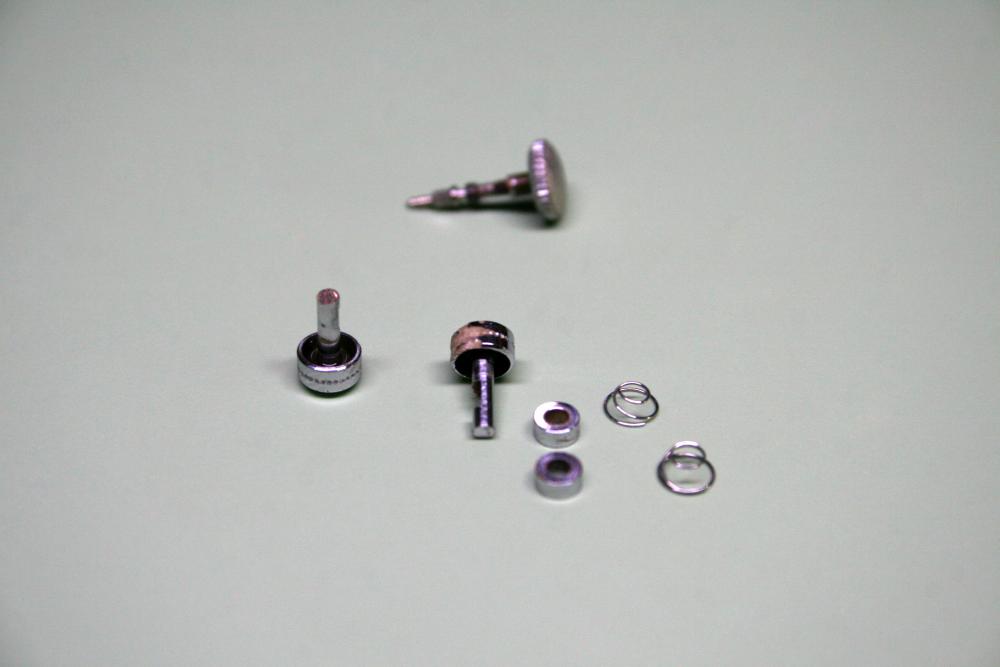
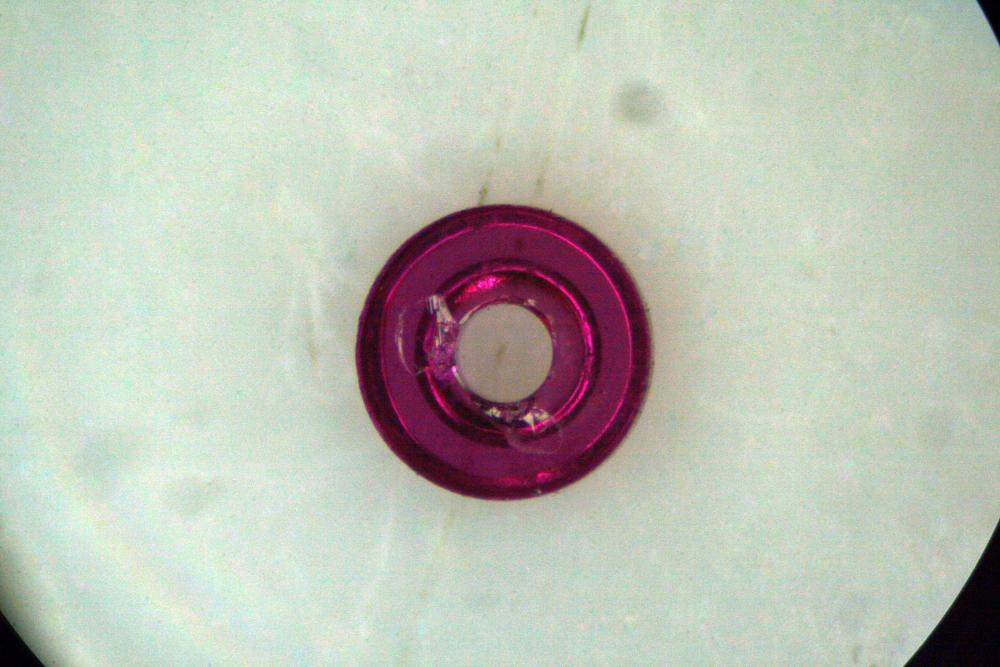
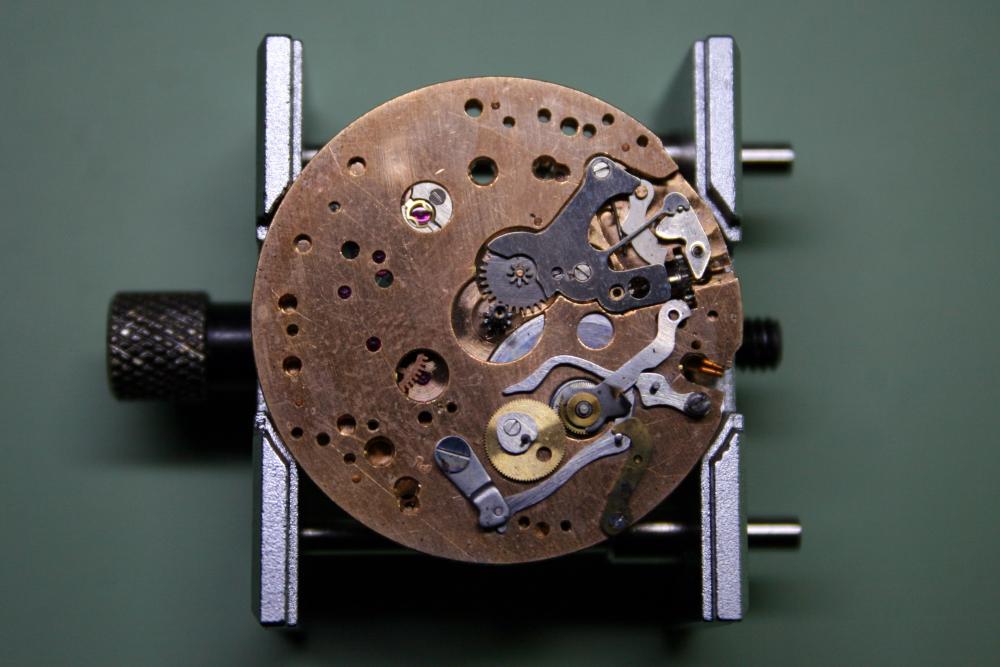
I'm very new to watch repair so I've experimented with a few scrap watches from ebay and had modest success in improving them. I think I'm ready to tackle something more than a basic movement so I recently won an automatic Vostok Amphibia with a 2416B movement that was said to be new but not working. It does indeed look new, with all the plastic protection still in place. However after winding it worked very well, gaining 20 seconds per day. I could see nothing wrong with it so wore it for 3 days. Then it stopped dead and no amount of gentle shaking would persuade the second hand to budge. Off with the back and I found the balance will turn anticlockwise with no problem and spring back, but it will not turn clockwise at all because something is preventing it from moving. Not only that, but on removing the back a tiny washer/shim fell out. I've shown it beside the watch below. It measures 2mm dia by 0.06mm thick and is ferrous. The next stage is to strip the movement and find out what's going on but I thought I should ask advice here before diving in. So, questions: I'm guessing something is not right in the balance/pallet/escapement area - should I look for anything in particular? What is that washer for?! Is it even part of the movement or is it from the assembly machinery in the factory? I'm hoping someone with 2416B experience can identify it and tell me where it should go. Other than taking usual care, is there anything particular that I should beware of when stripping this movement? All help greatly appreciated! Kevin
 1 point
 -
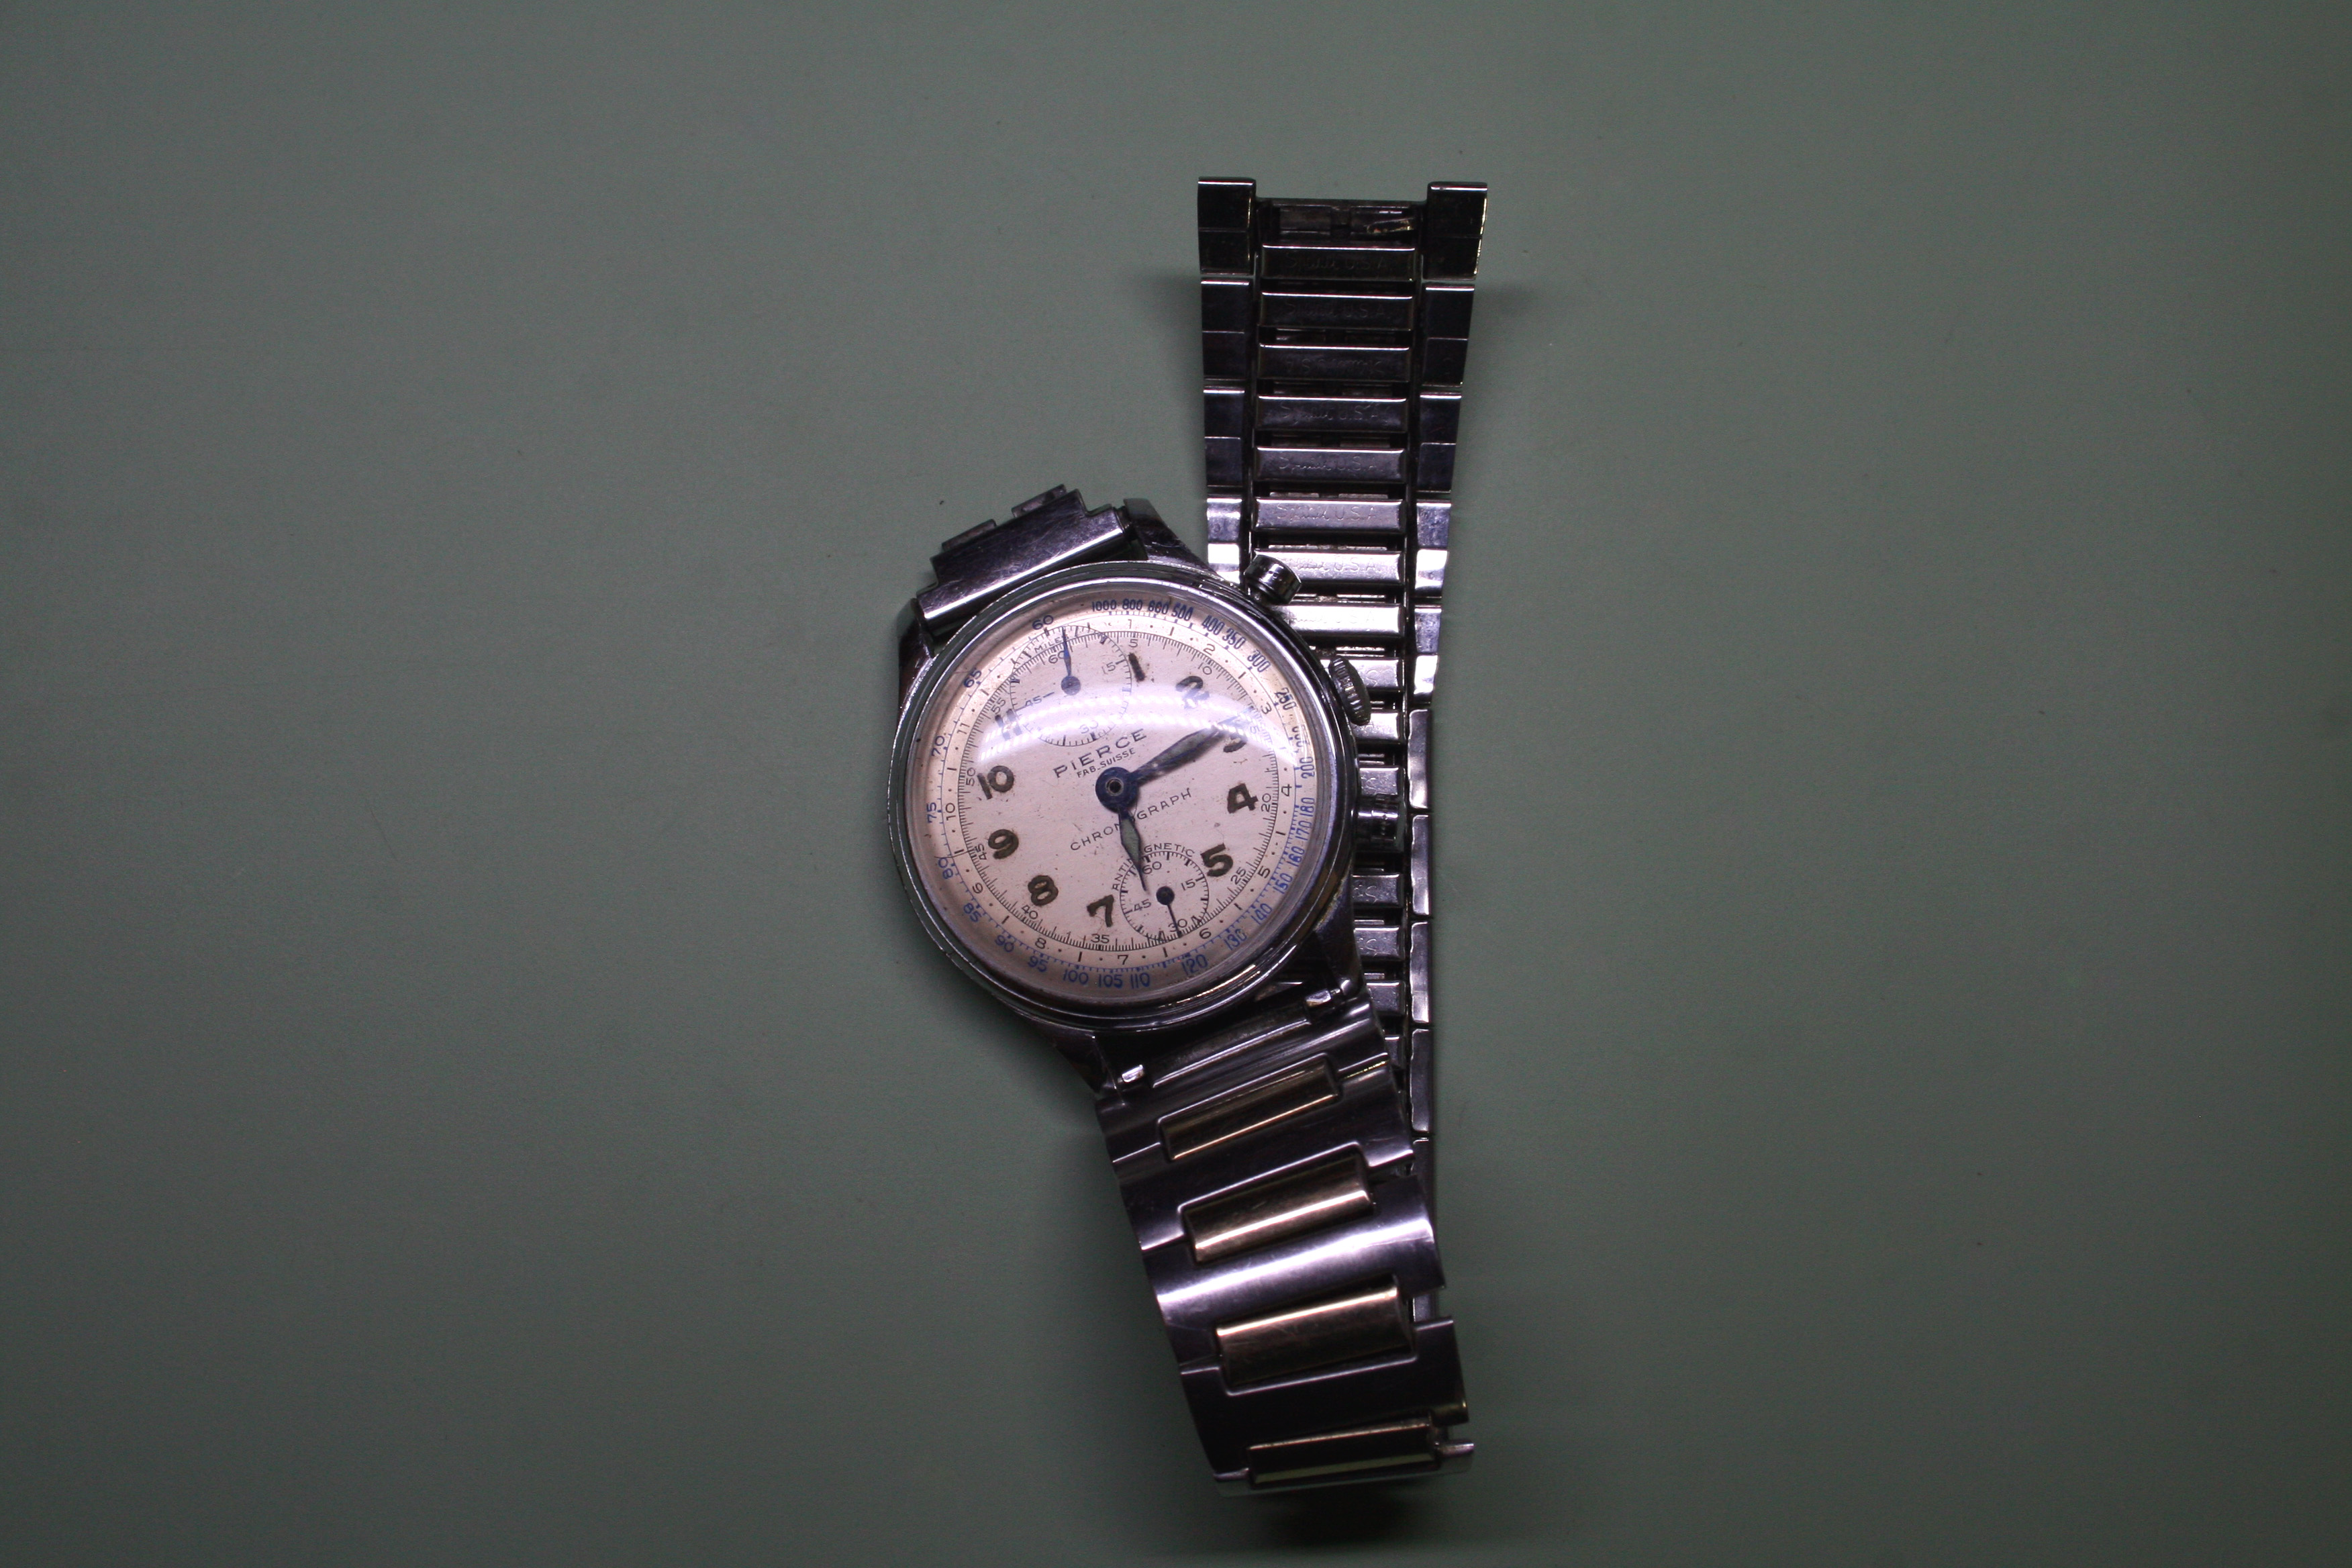
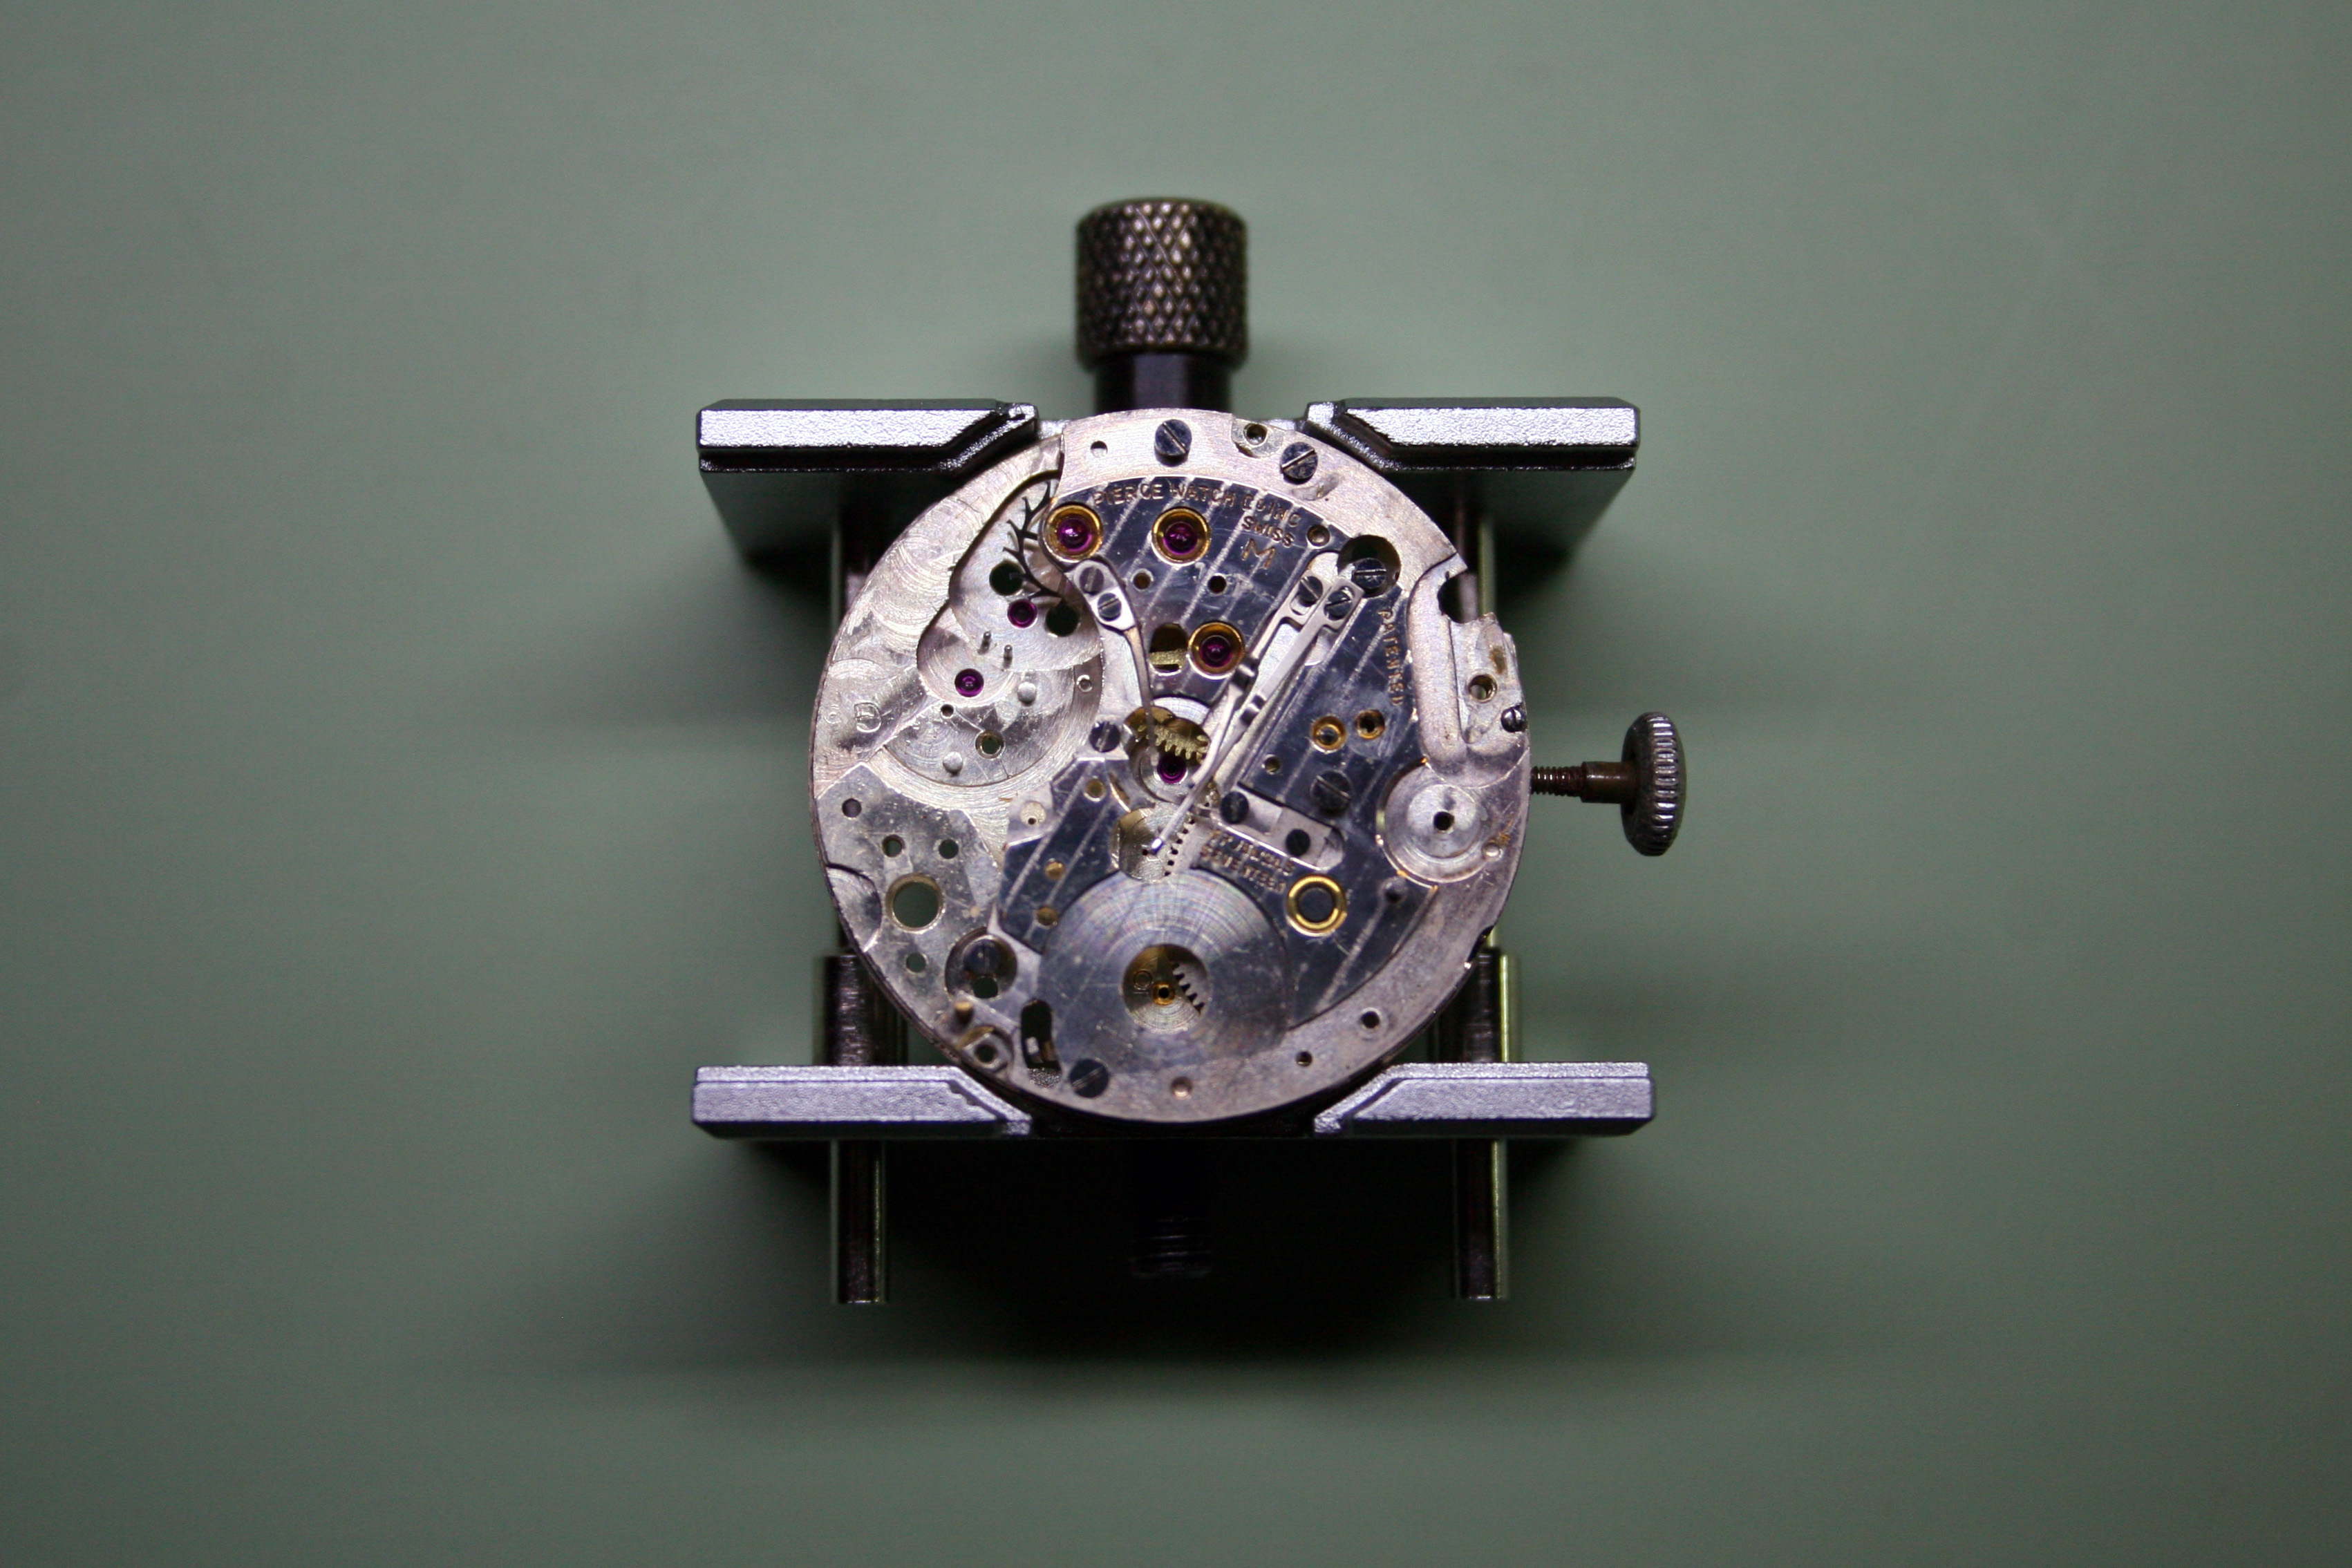
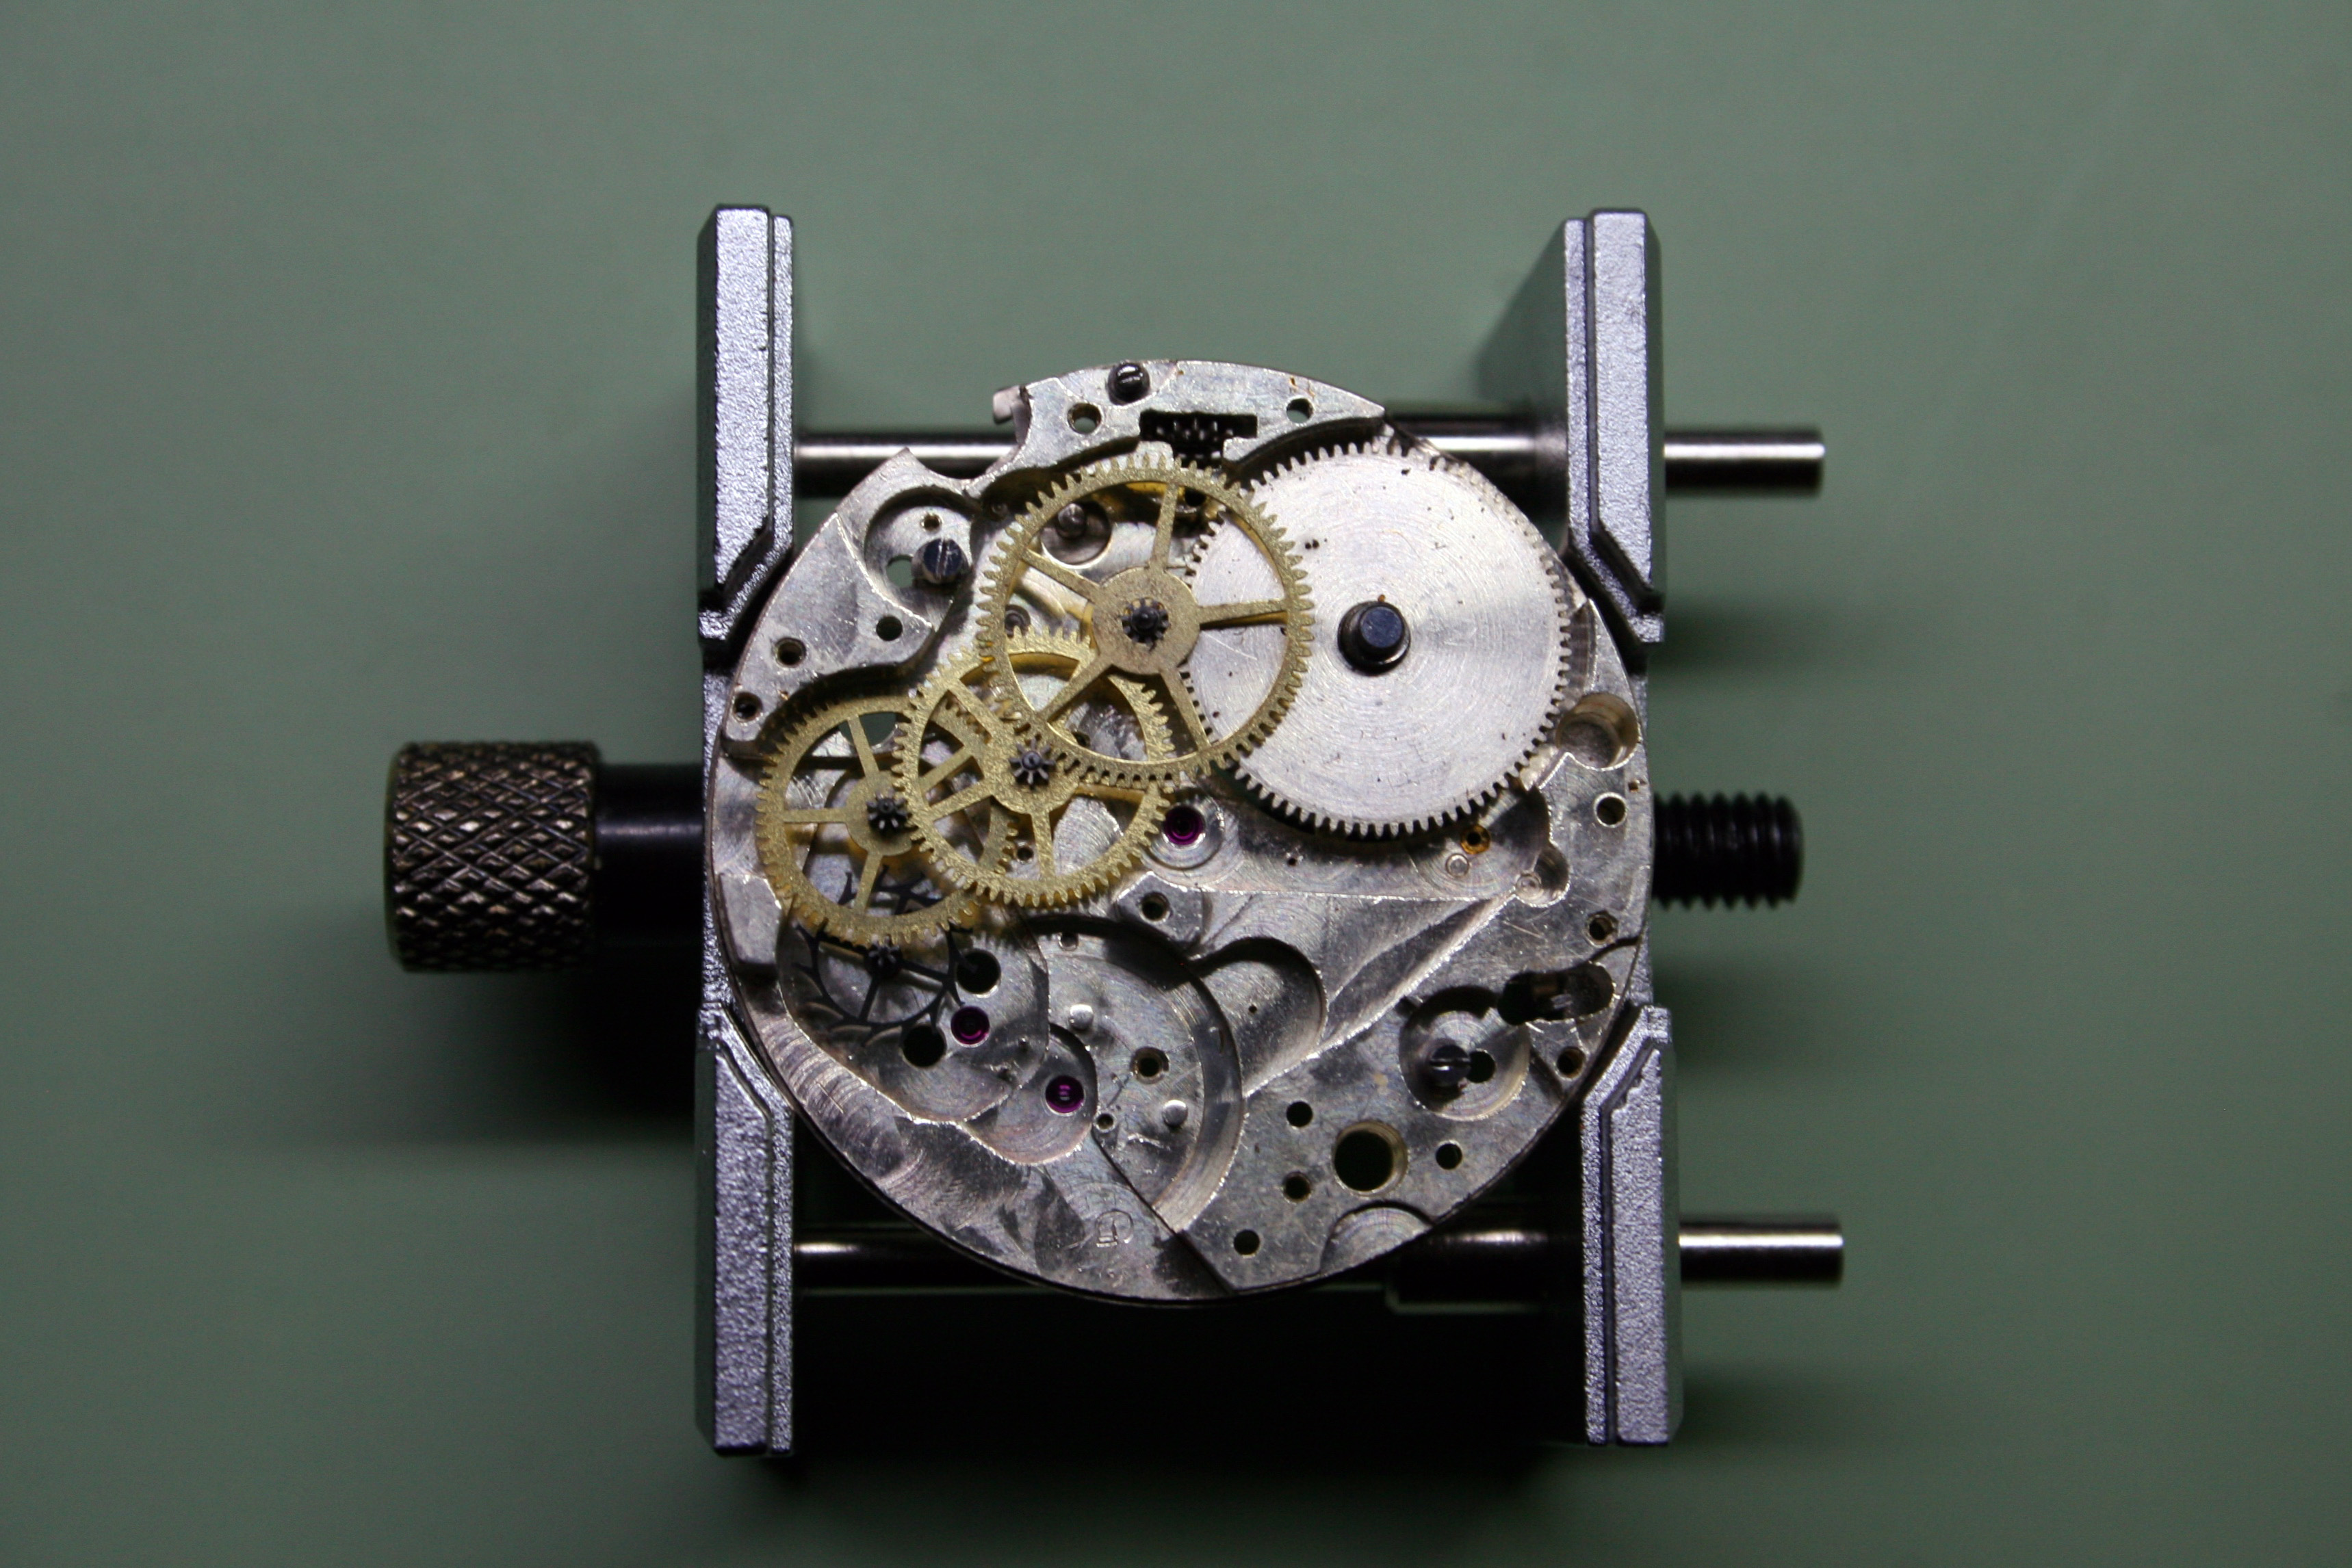
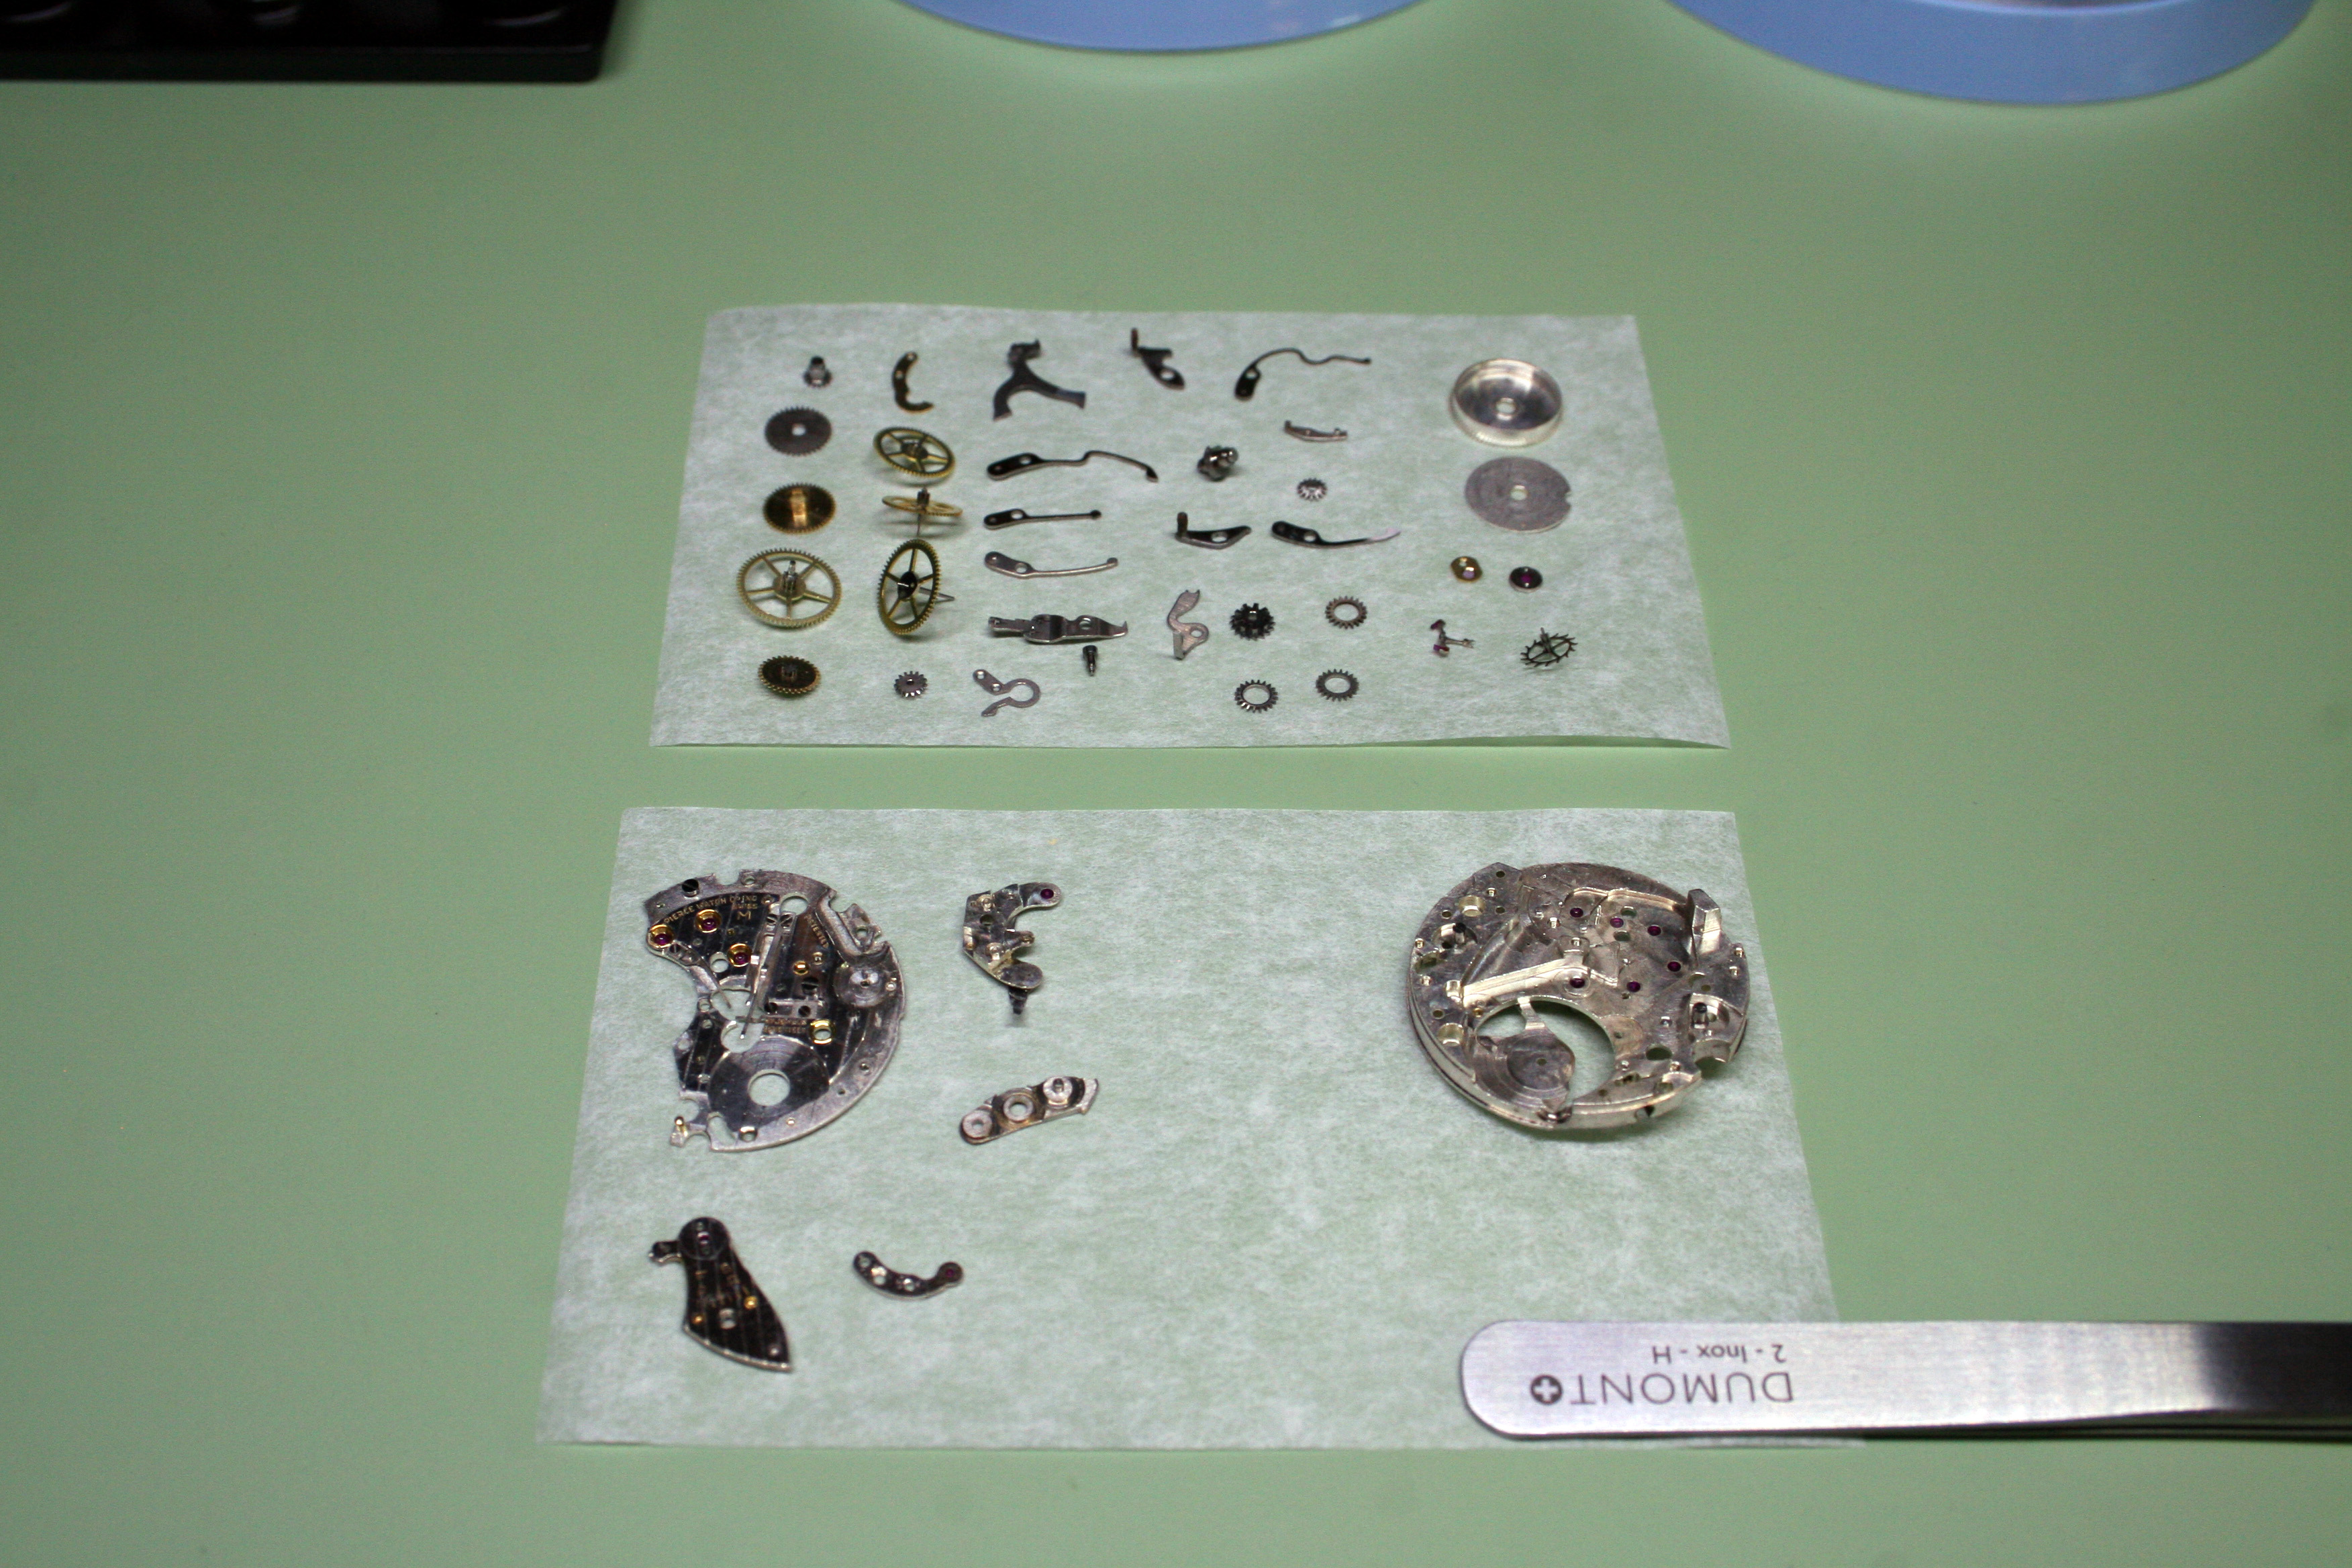
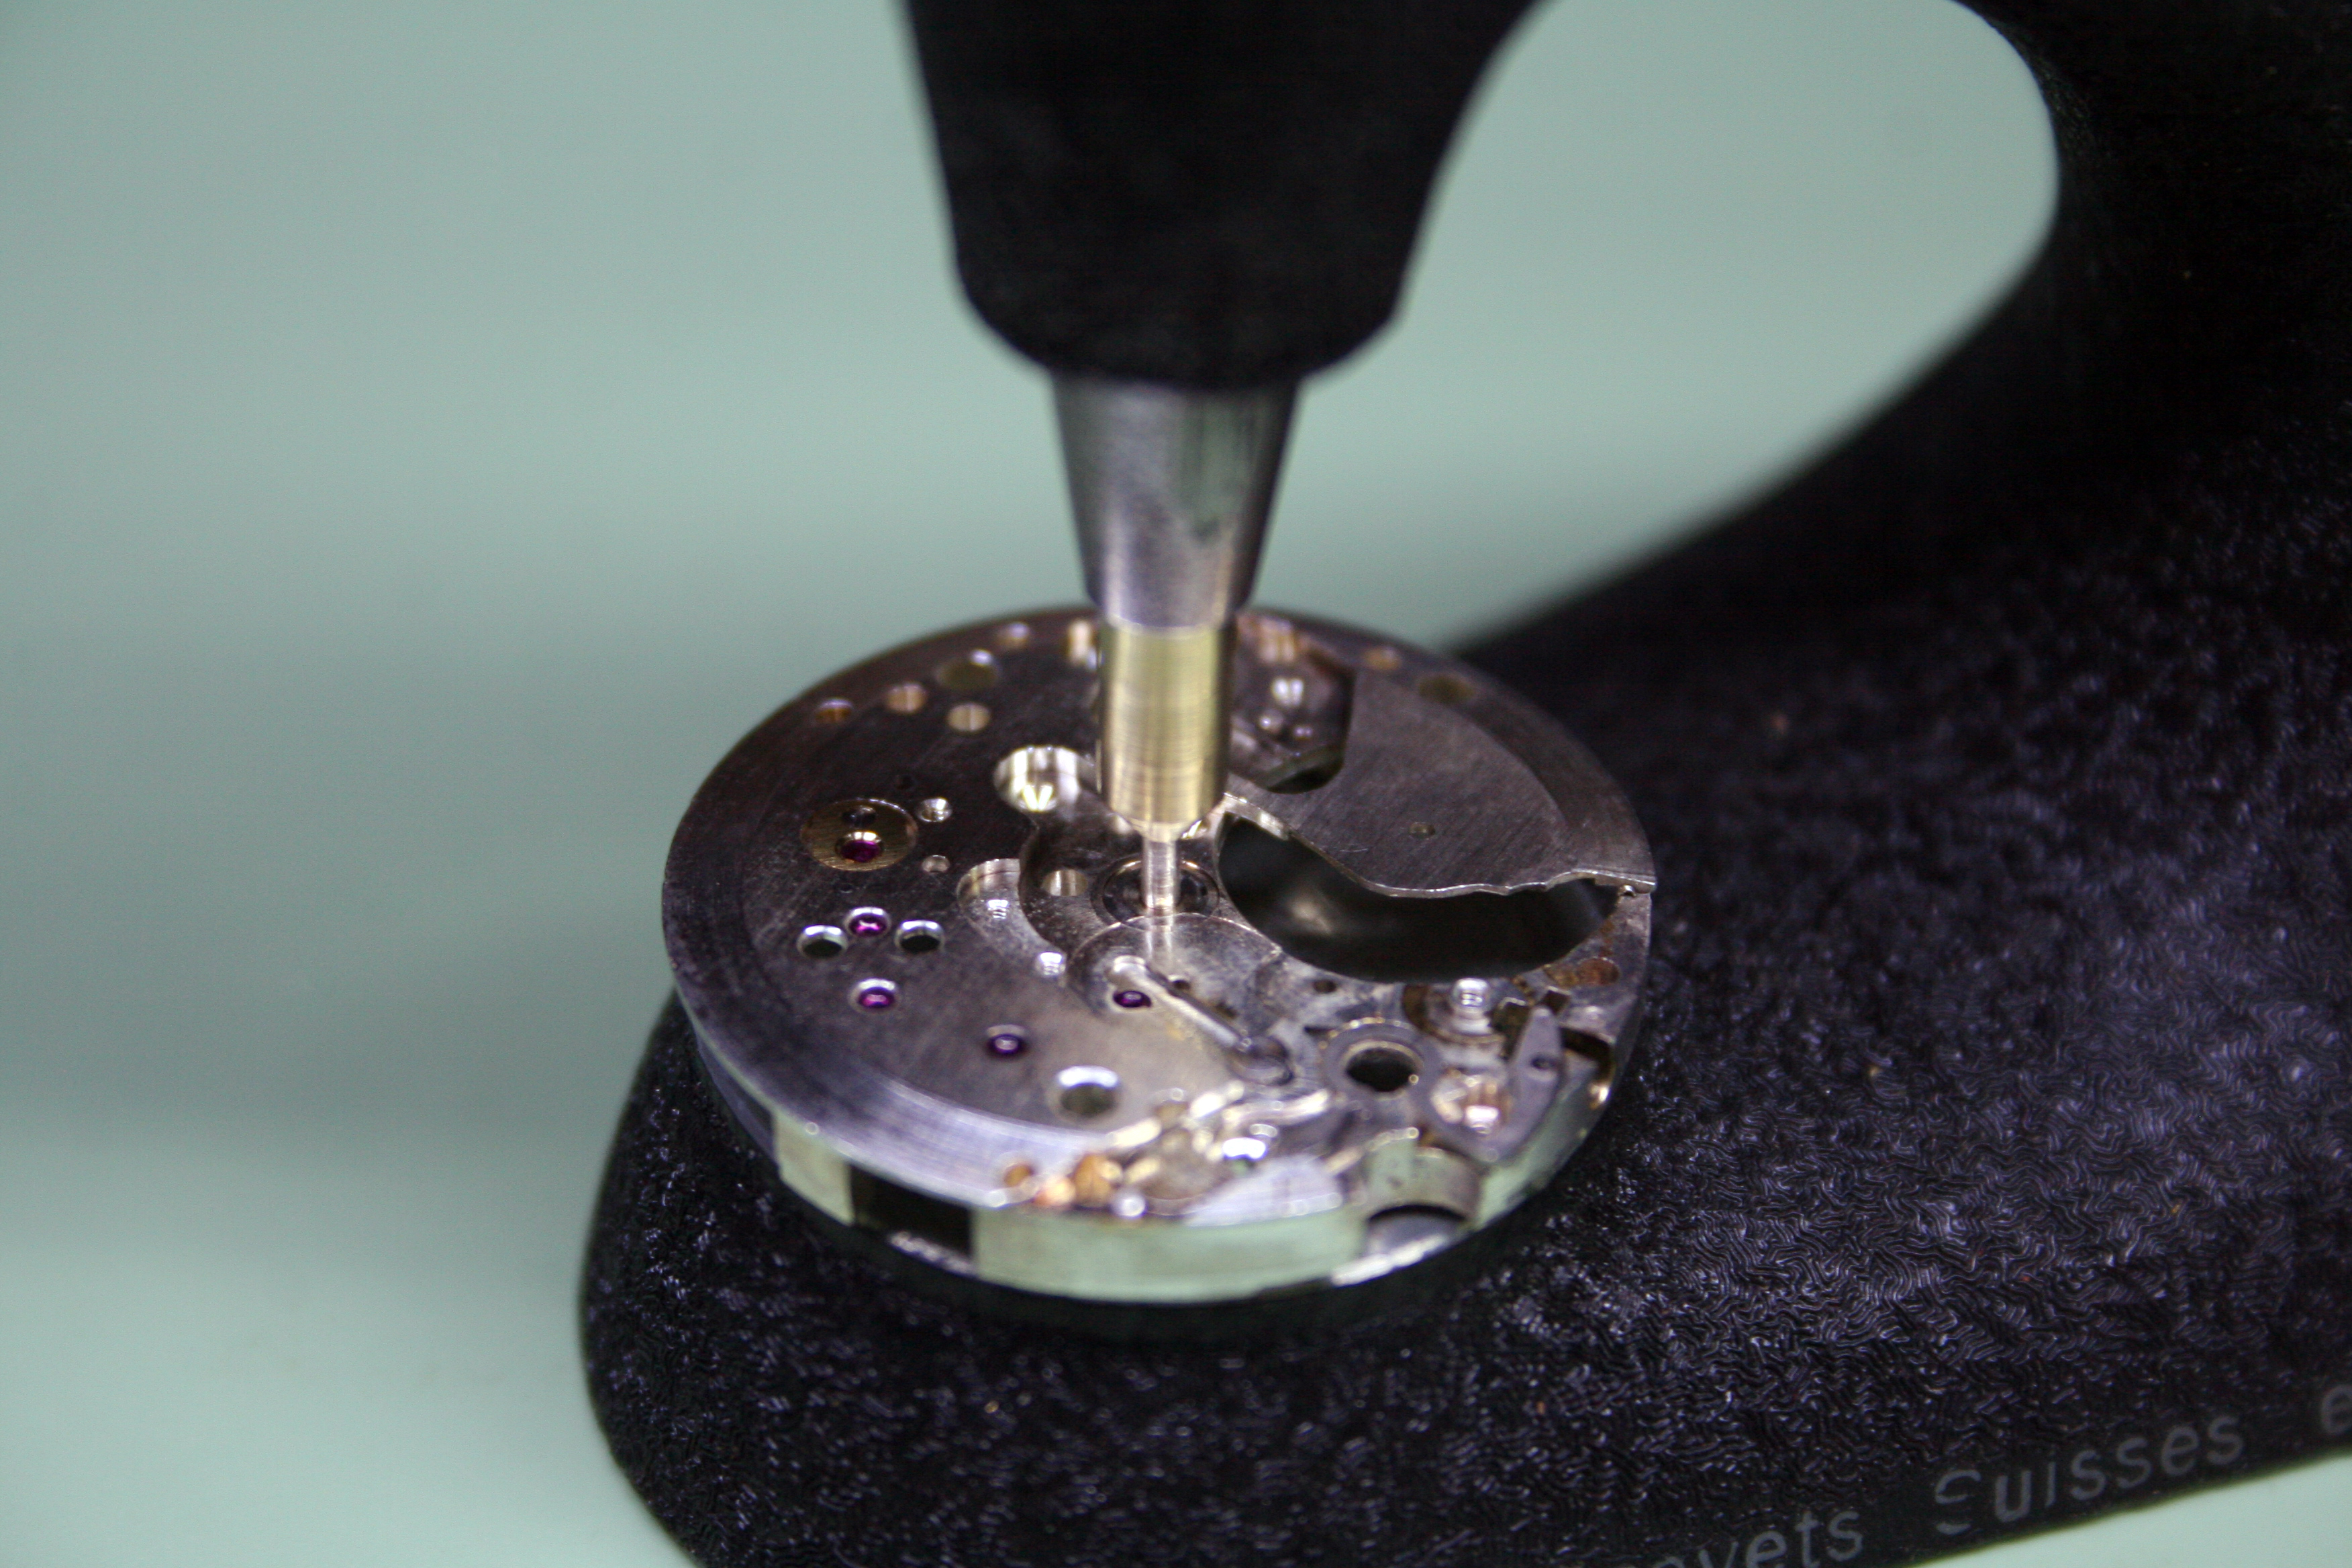
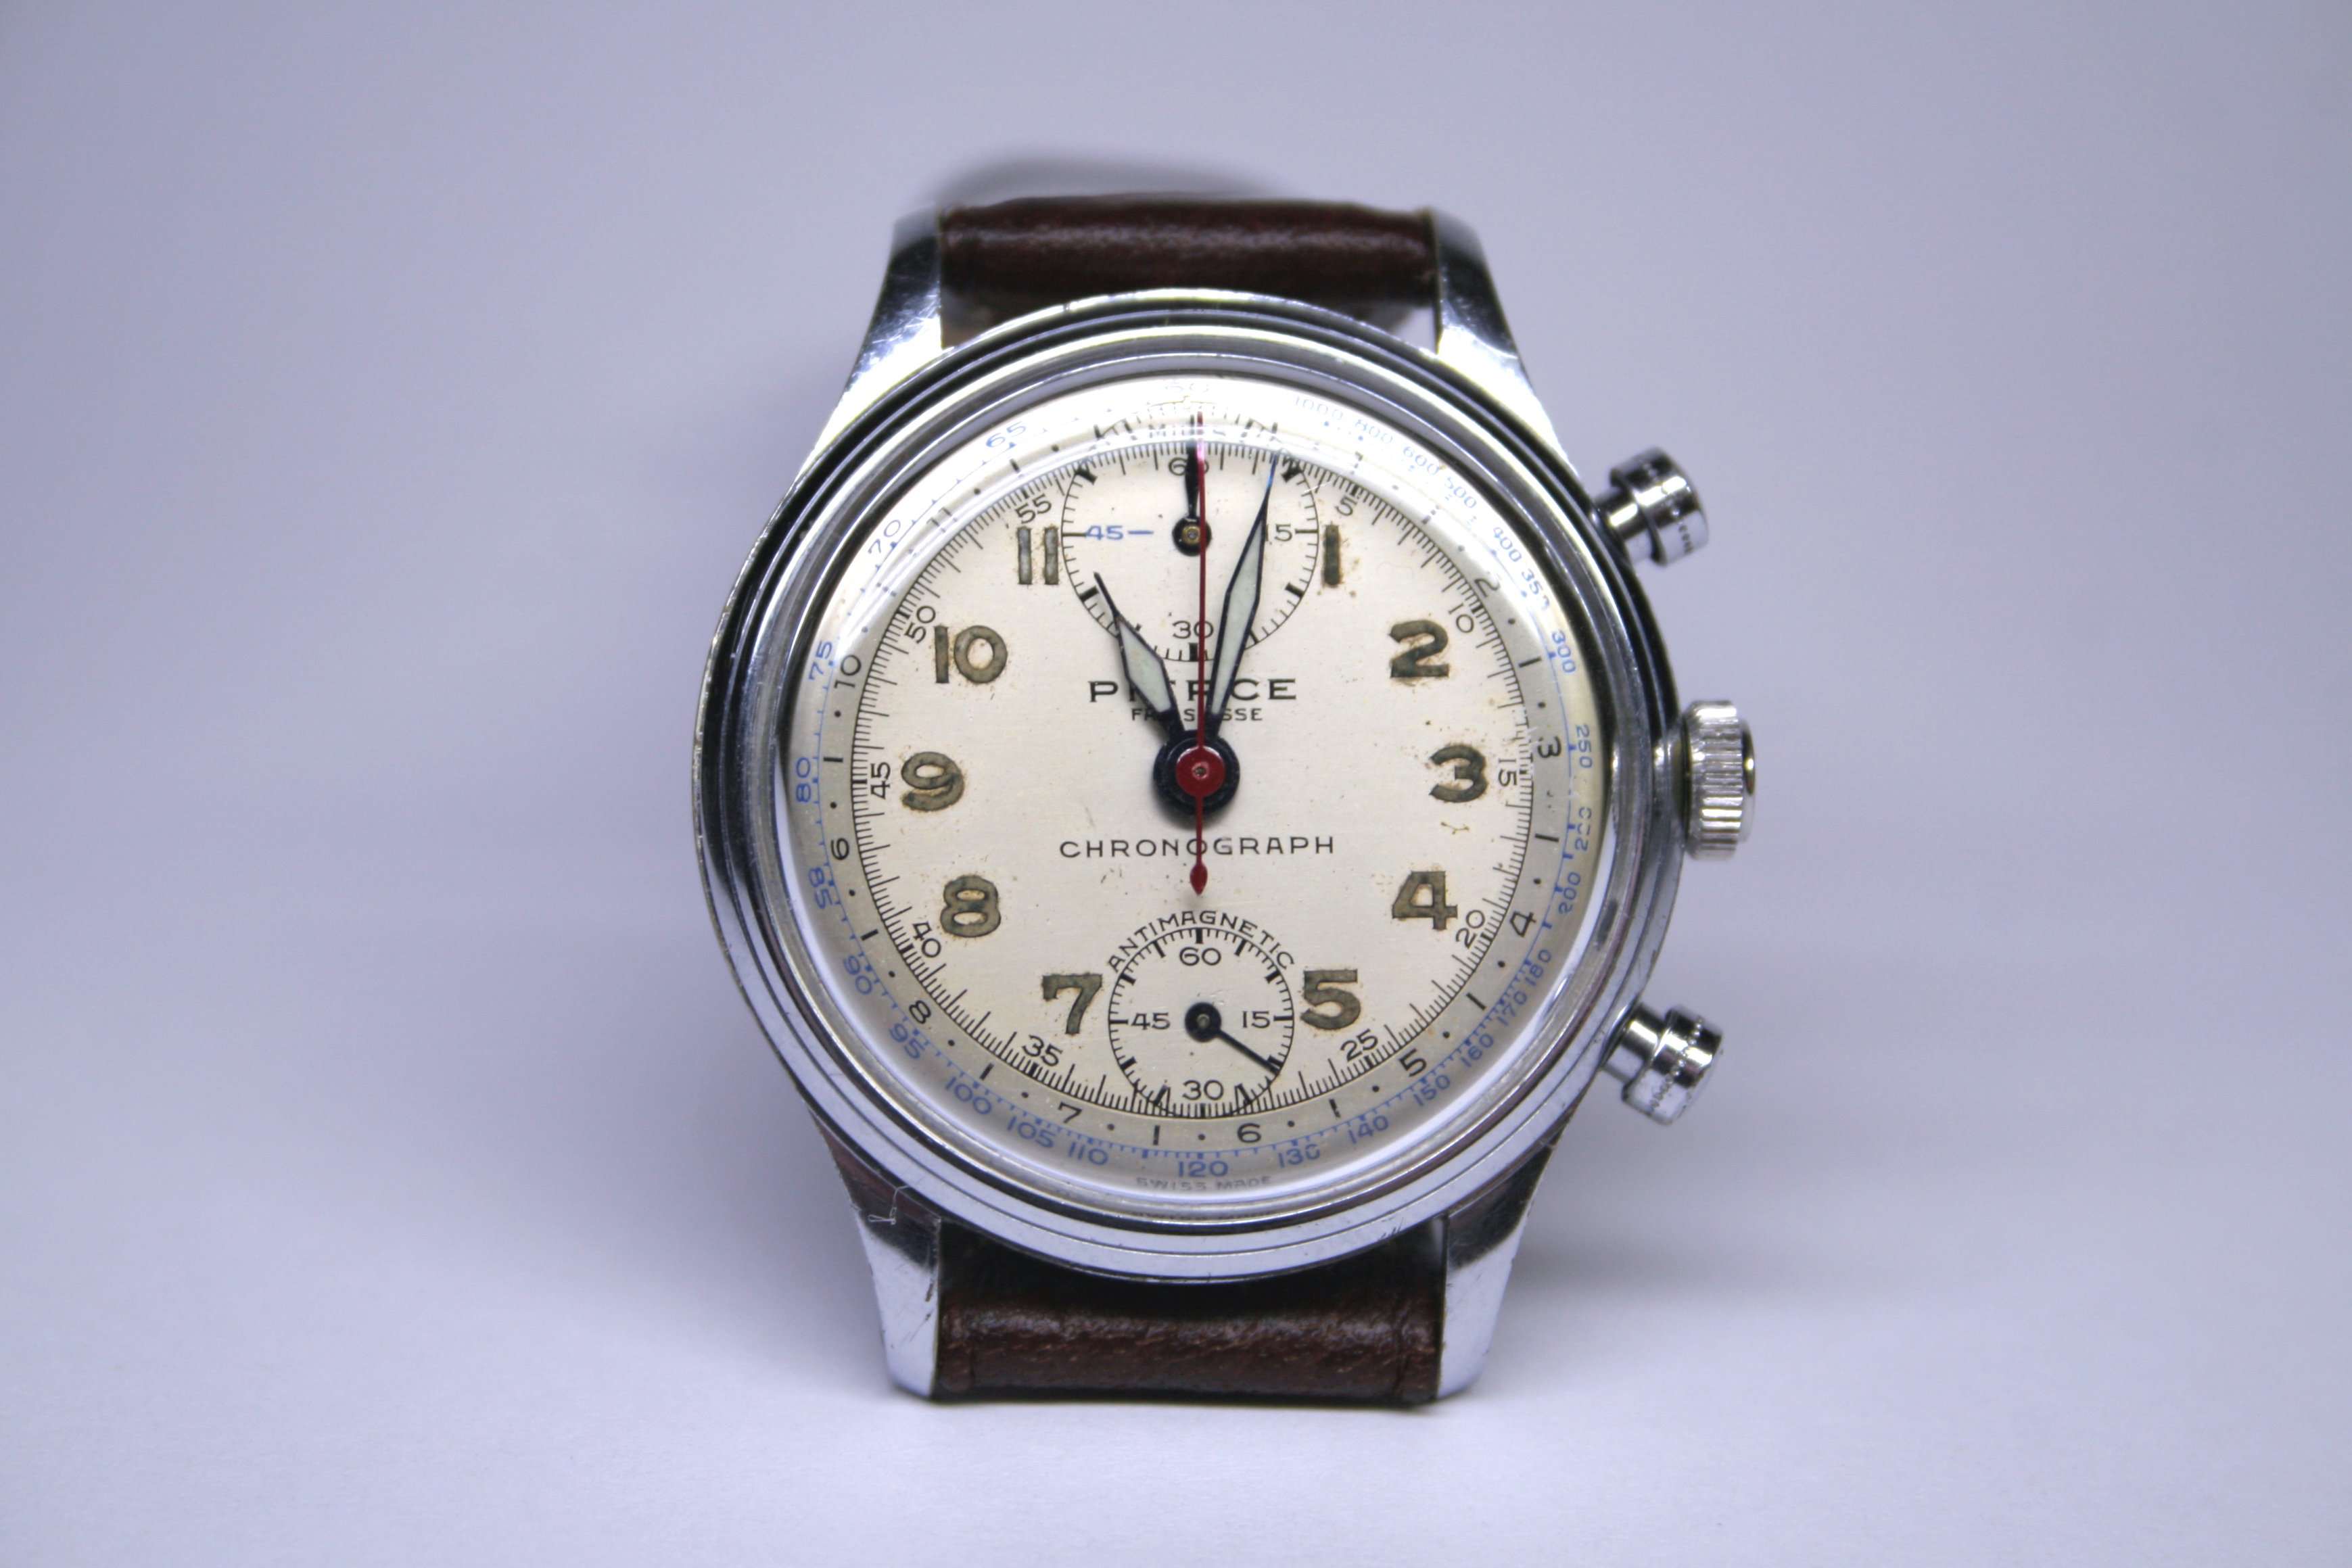
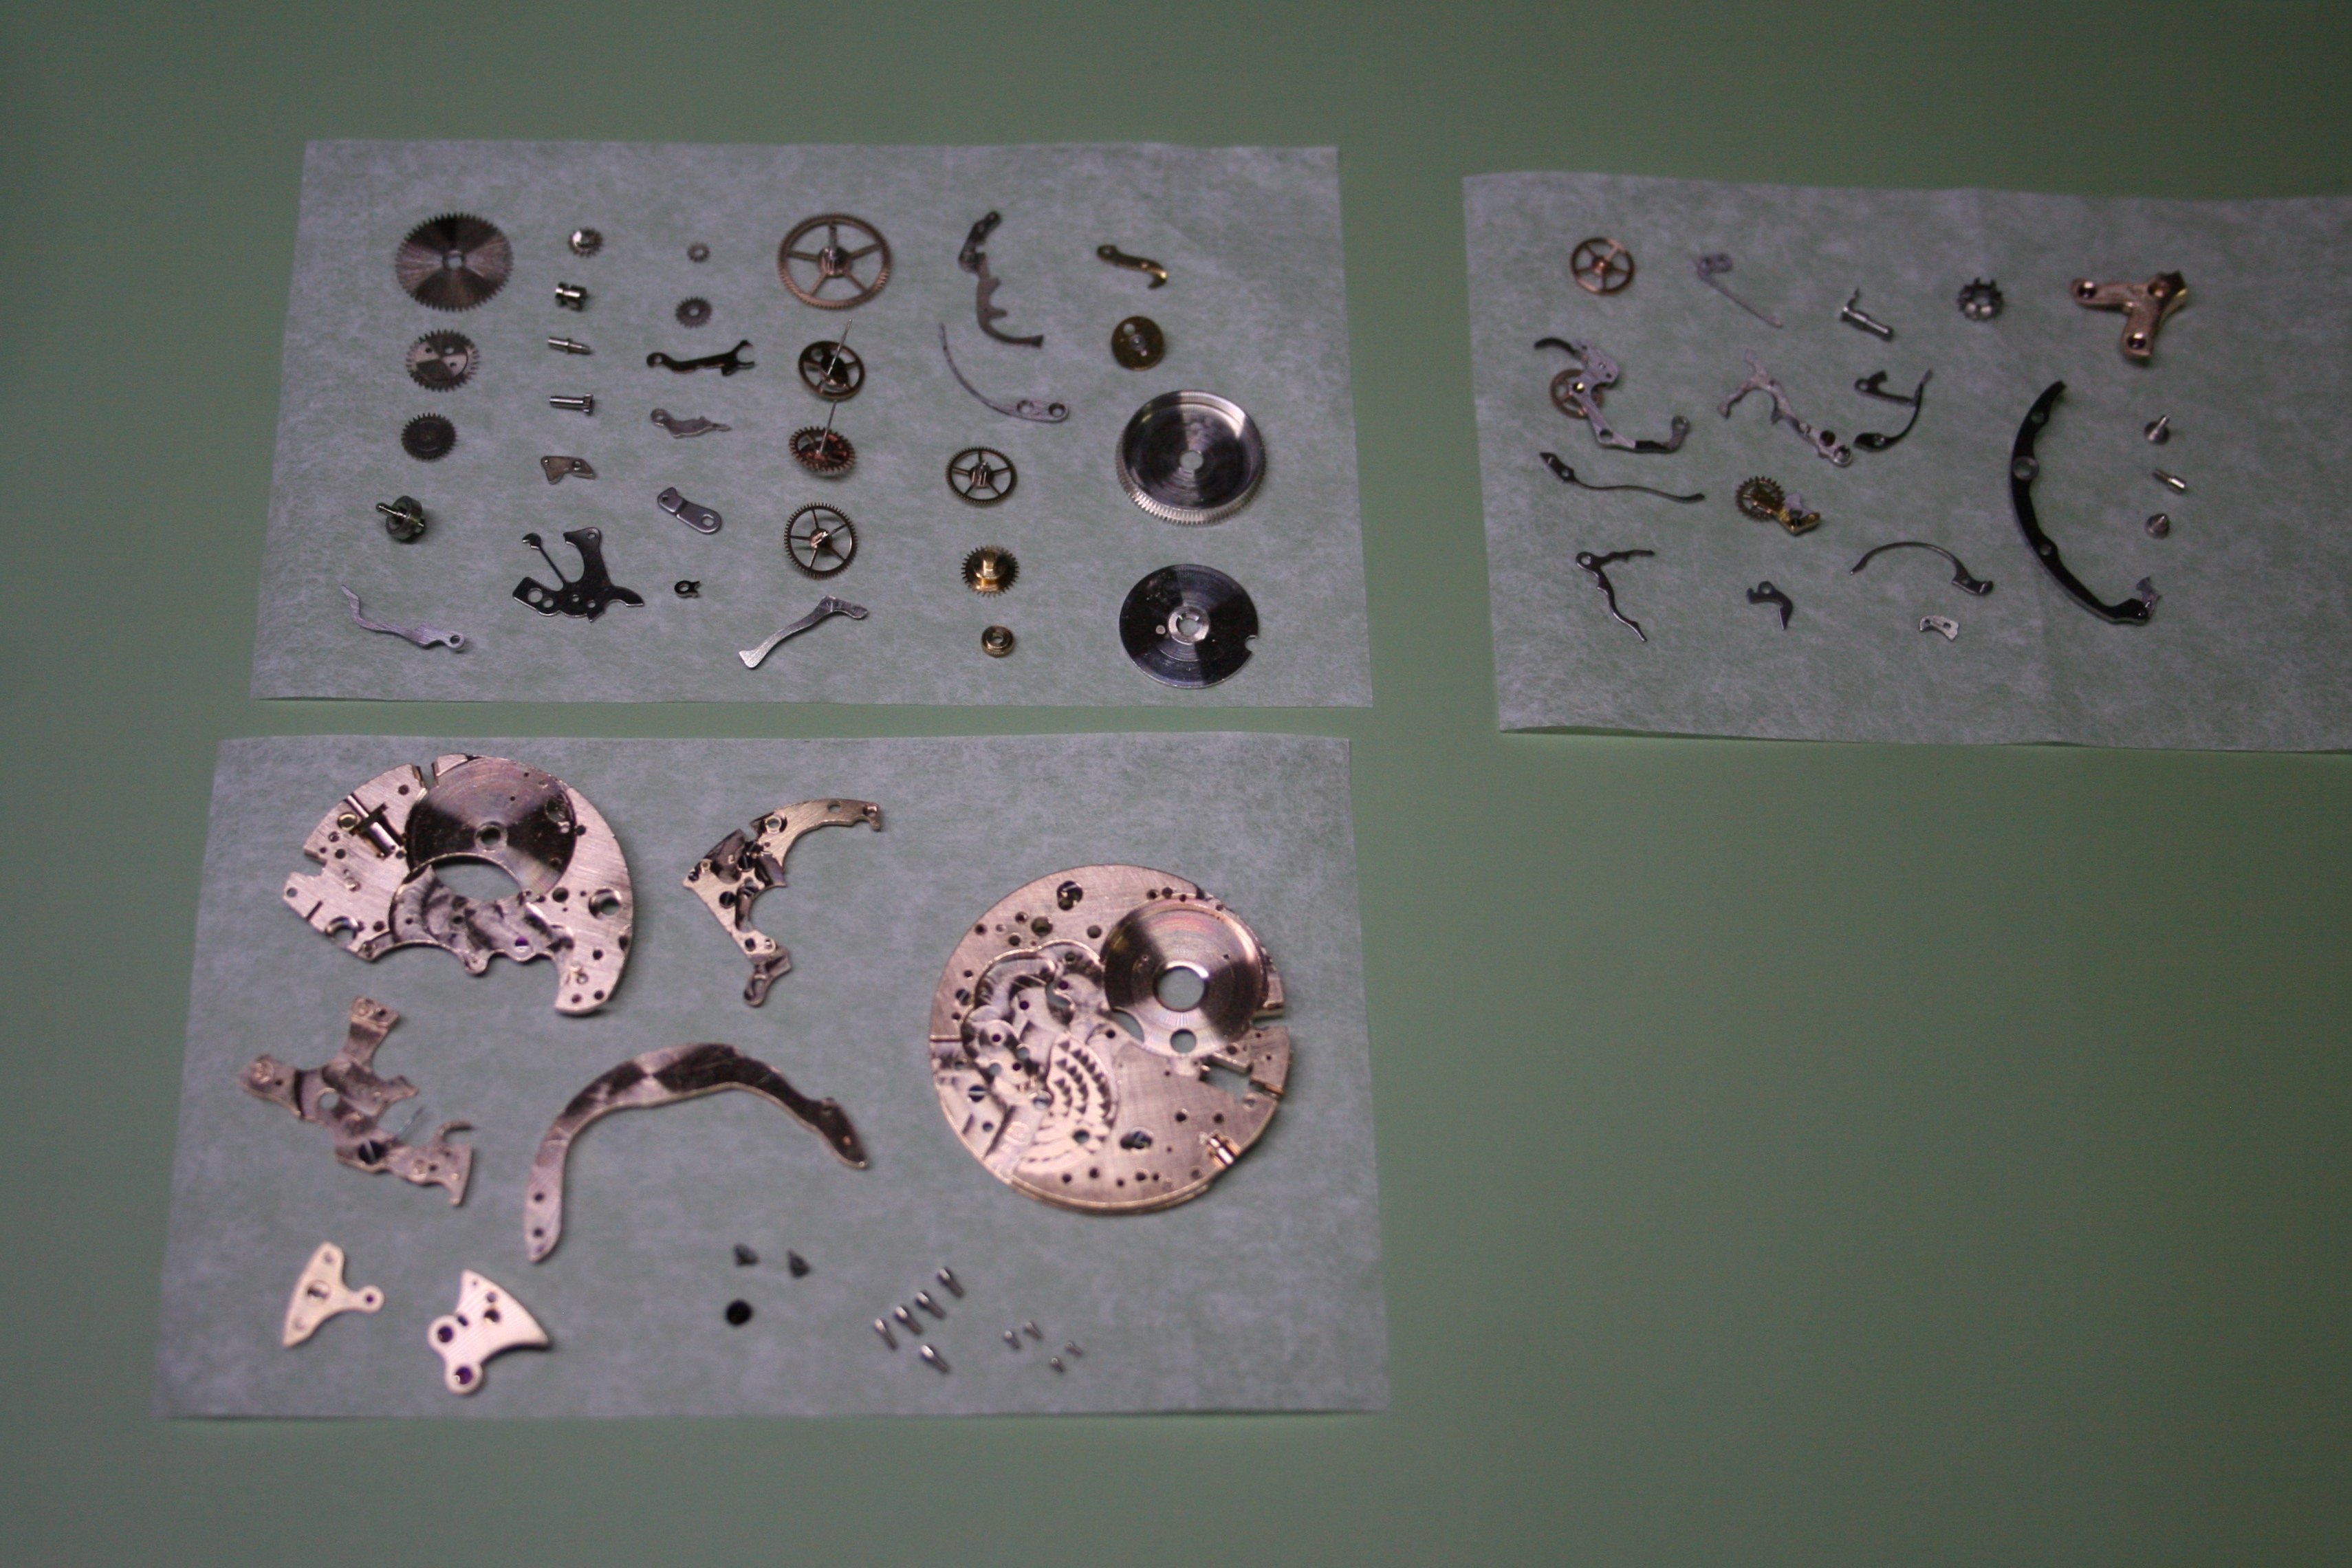
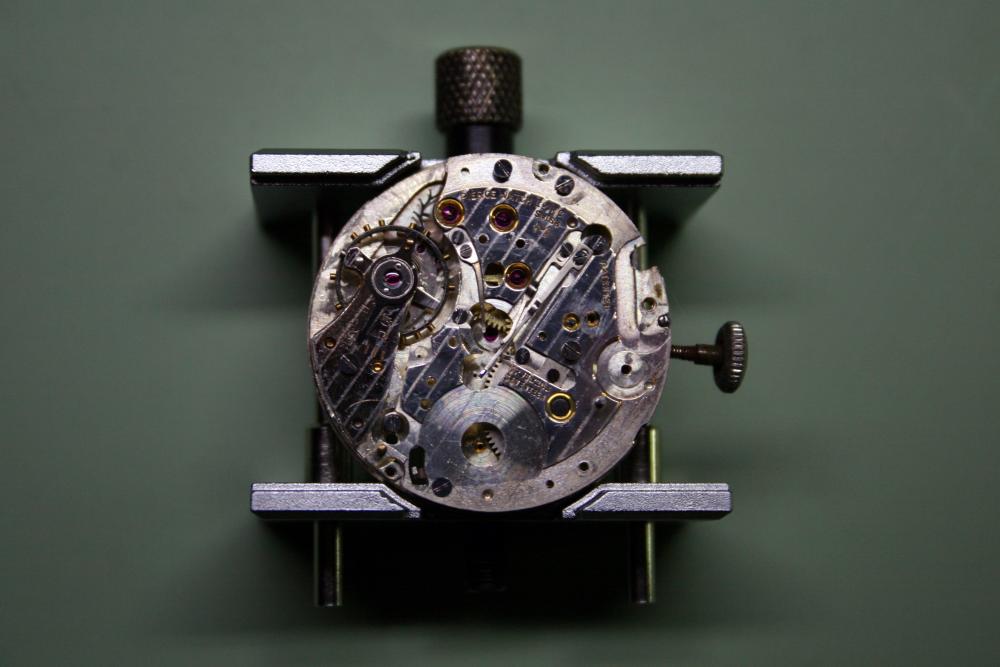
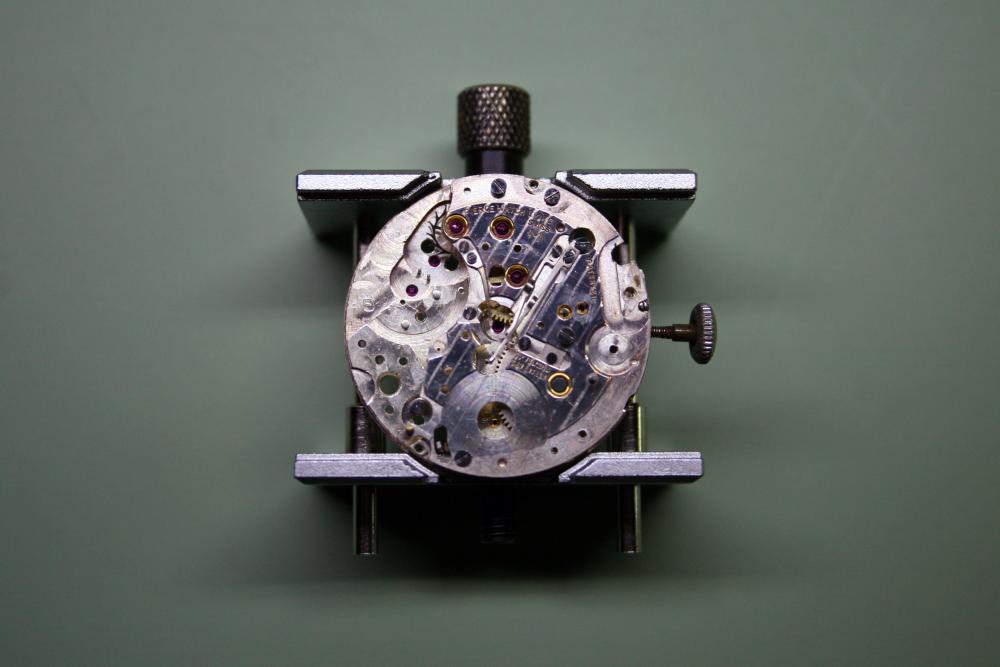
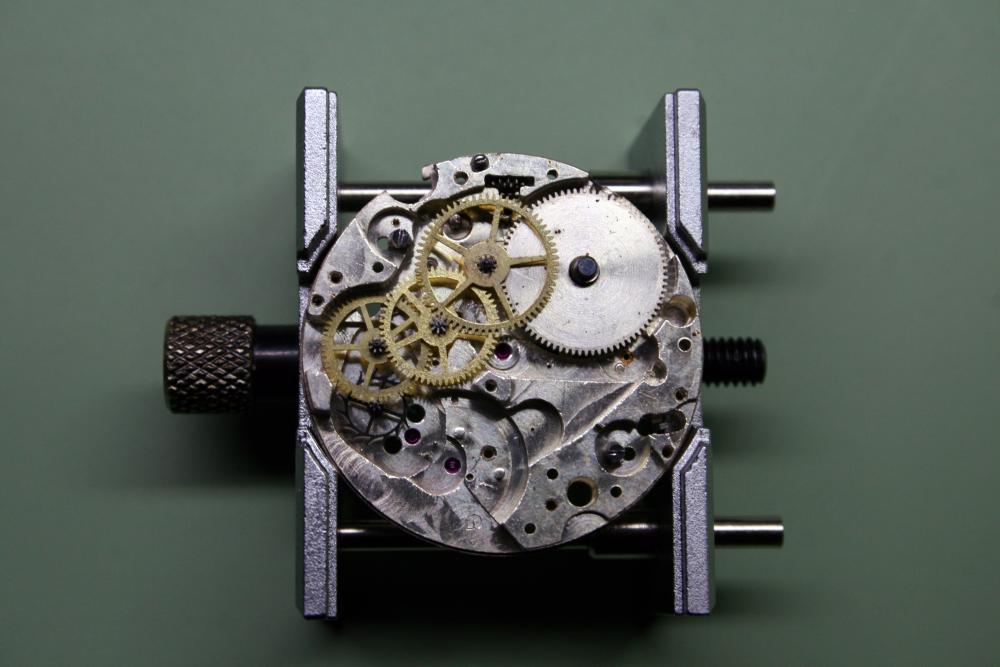
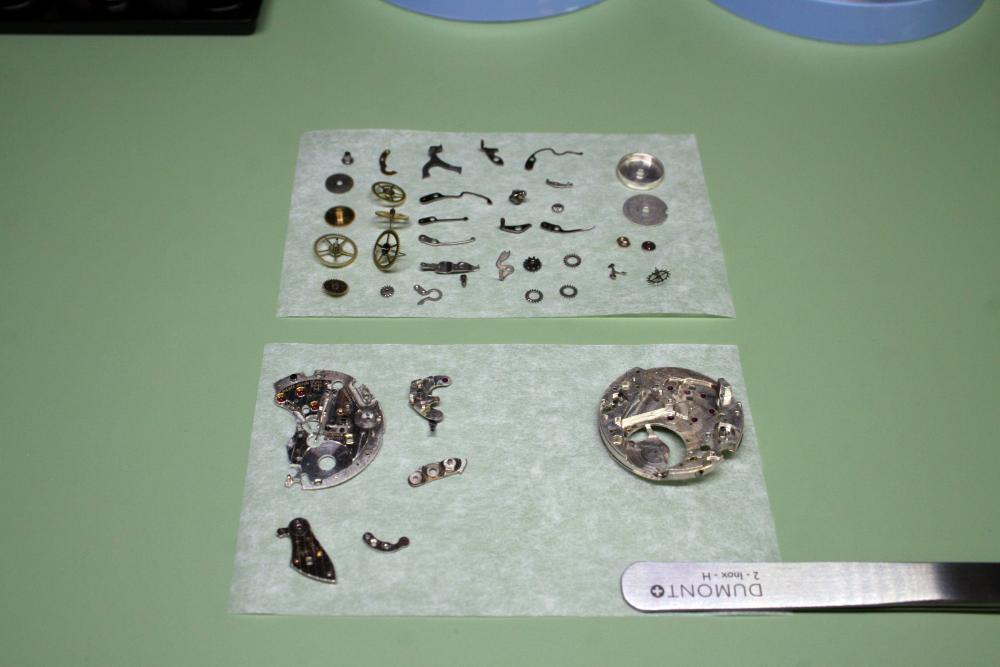
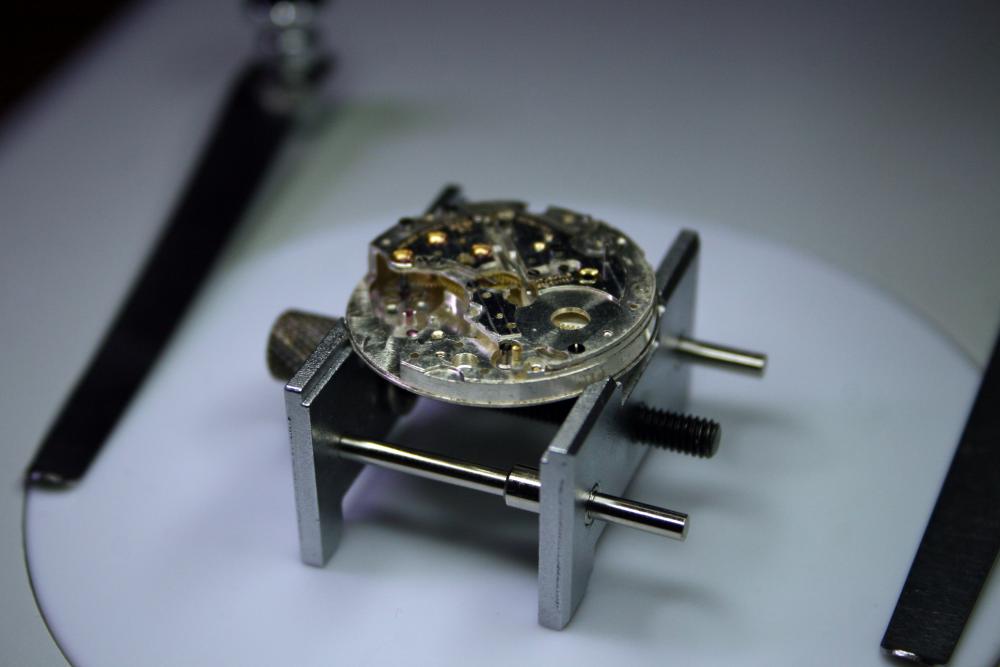
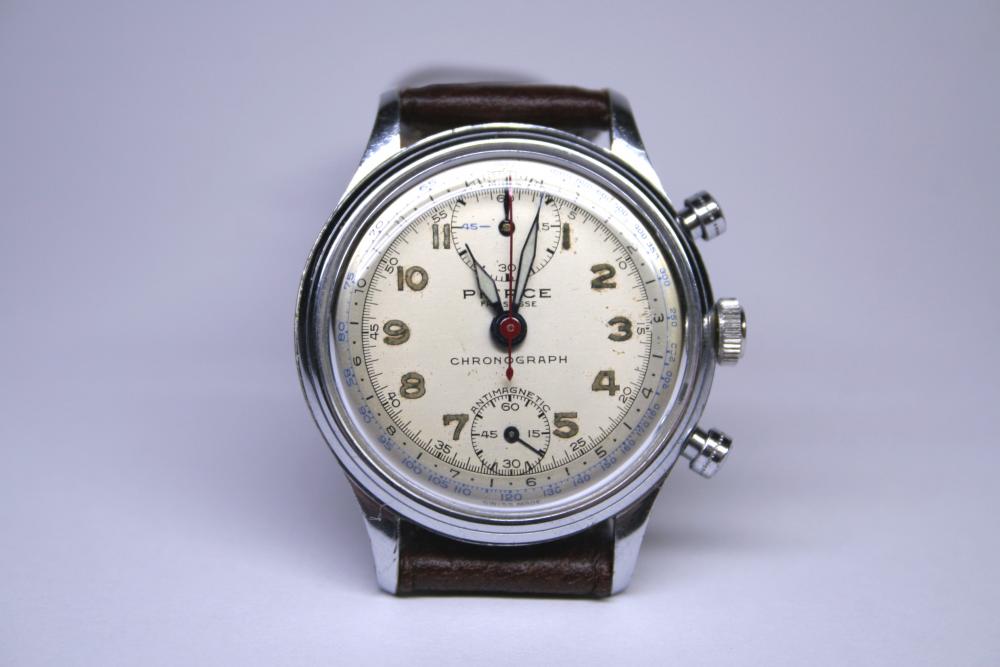
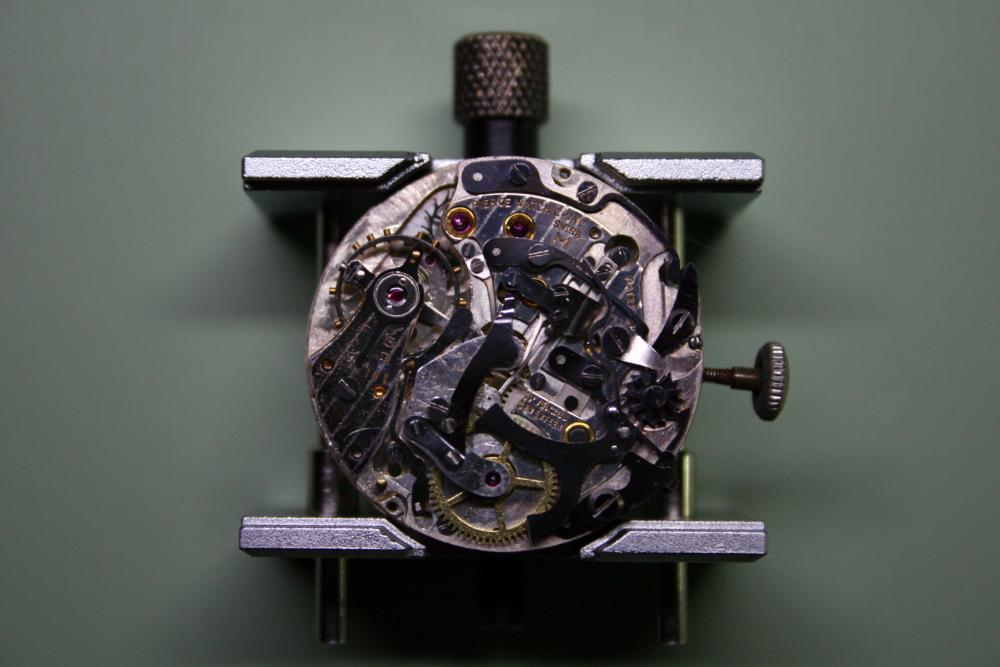
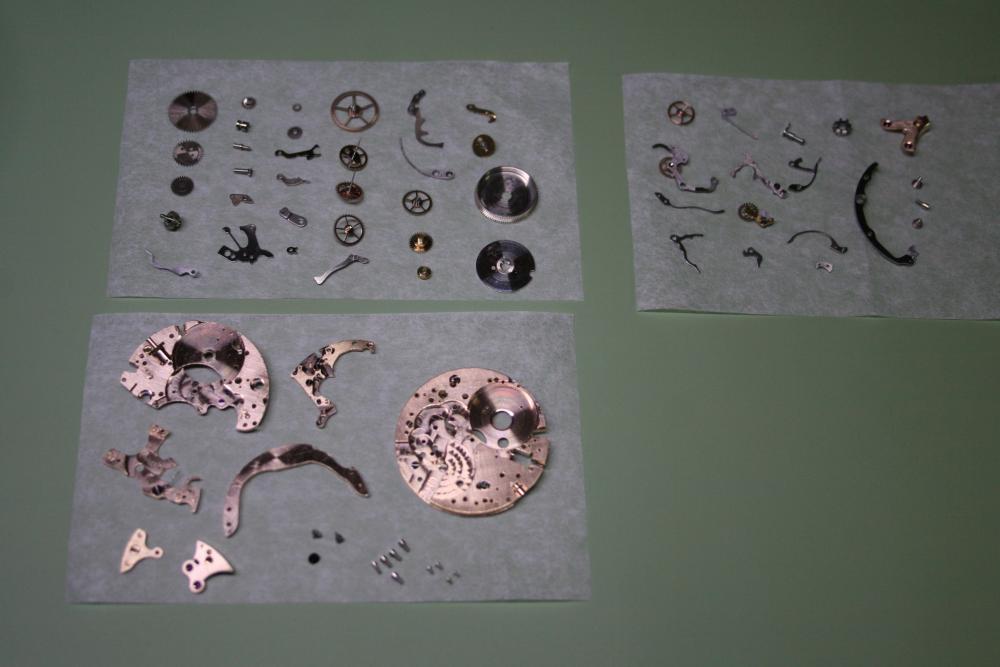
I've done a lot of Pierce Navigator repairs in the last year but this one was a bit special as it was the first I completed for someone other than myself. The watch is an heirloom and as such was received in much better condition than the those I've purchased off the bay. The bracelet was broken and would eventually be replaced and right off the bat I noticed that the sweep second hand was missing. The crown was also stuck in the setting position and therefore it was impossible to wind the watch. With the caseback off I could see that the chronograph staff and pinion had actually been removed sometime back. Also missing was the intermediate wheel which activates the minute recording wheel when the chronograph is engaged. My guess is that the rubber clutch for the chronograph had failed sometime in the past and the watchmaker simply removed the other bits as opposed to attempting a fix. I also noted a chip in the upper balance cap jewel. I've never seen a defect such as this before. With the dial removed, the normal accumulation of dirt and debris came to light. The setting lever snapped back into place smartly and with that I was able to check the timing. With the movement out I turned my attention to the case and pushers. The spacers for the pushers often become jammed inside the pusher button as the result of an accumulation of grime beneath the button cap. The springs, which sit between the spacer and the button, are made of stainless steel and generally hold up well over the years. I've discovered that a good soak in vinegar will usually free the spacers and springs from the buttons. With the pushers soaking I turned my attention back to the movement. As I said before, this Pierce 134 is in much better condition than those I've restored in the past. It's clear the owner has taken good care of the watch over the years. Generally I'll follow the Esembl-O-Graf (volume 15) in reverse order when disassembling a Pierce movement. I've done a few now and am getting used to the process. Looking the parts over I didn't find any that required immediate replacement so the only order placed was for a mainspring and crystal (in addition to the missing chronograph staff, pinion, and intermediate wheel). The old crystal was in fair shape but a little loose in the bezel so I opted for a new one. The damaged cap jew was chipped only on the topside and therefore I opted not to replace it. The parts were whisked off to the L&R cleaner and I turned my attention back to the pushers. The vinegar bath succeeded in freeing the spacers and springs from the buttons. I set the parts out for cataloging after cleaning and drying. At this point I'll also do any rust remediation. This movement was in fine shape but the levers for the chronograph did suffer from a bit of oxidation. The rusted bits were placed in a bath of vinegar for a good soak, then any pitting was smoothed using the Dremel tool or a rub on the Arkansas stone. The replacement chronograph staff, pinion, and intermediate wheel arrived in time for assembly. The staff needed a new clutch plate. In the past I've cut these out of nylon and although this is an adequate solution, it makes the final adjustment a lot more difficult since the nylon has so much less give than rubber. A while ago I began experimenting with rubber o-rings as a substitute. I use a rubber o-ring which had a thickness of 2mm. By sharpening an Exacto knife and lubricating it with a bit of watch oil I can cut through the o-ring with very little compression. This results in a disk that is thin enough and flat enough to use as a clutch plate for the chronograph. A punch I made on the lathe is used to place the center hole. Unfortunately since I made the o-rings before I began this service, I didn't have any images of the procedure. Assembly is straightforward provided all the gremlins have been discovered beforehand. The pallet, escape wheel, and cap jewels receive epilame treatment. The balance wheel is cleaned separately with One Dip. Put back together I noted a funky reading not the timegrapher. The culprit was a slightly bent pivot on the pallet. I replaced the pallet with one from my own stock and this resolved the problem straight away. I let the watch run overnight before beginning on the chronograph layer. It comes together a little slower as there are many more parts to lubricate and adjust. A missing sweep second hand can be a real problem with Pierce watches as the center post is 0.35mm (which is large). Fortunately I had a hand in my stock from a parts movement that would do- once I attached a post to it! I have some brass tubing that has an inside diameter of 0.35mm so I just needed to turn the outside diameter down on the lathe and rivet the post to the hand. Here I test the fit of the hand prior to painting. Once that was settled I discovered the post on the minute hand was loose also. A new post was turned on the lathe for it as well. Problems with the chronograph became apparent after fitting the hands. The culprit in this case turned out to be a damaged center jewel. This must have occurred during assembly as the jewel checked out after cleaning. Bad luck. The jewel is pressed in from the topside and so it must be removed by pressing from the bottom side (dial side). Unfortunately the jewel sits at the bottom of a long tube which required me to turn a special adaptor piece on the lathe for my Seitz tool. A replacement jewel was sourced from a donor movement and I was back in business. The owner decided on a replacement crown and a new strap and the watch finally came together. I have a bit of a thing for Pierce watches but at the same time I don't think it's much of a coincidence that the watches housing a Pierce 134 movement only seem to exist from the late 40's and early 50's as they can be a bear to get running right. In the end I was really pleased with this service though.


 1 point
 -
I think that we are both right. Arrow A points to the auto bridge screw, arrow B points to a hole that goes through the auto bridge to provide clearance for and access to the crown wheel screw, which is definitely not there. The good news is that it doesn't look as if the screw has been sheared off which is not uncommon as it is a left hand thread so unless you know, there is a risk of ringing it off by trying to undo it the wrong way. My guess is that once you have the auto bridge out of the way you'll find the little sucker jamming the train wheels.
 1 point
 -
I don't know if it is the right place... To the moderators, just move this topic at the right place please but all is in the title . TM9-1575.pdf1 point
-
@rogart63: I think you may be right! I've looked at a library shot of the 2416b and it does show a screw there, which is conspicuously absent from mine. What's more it looks as though it has a washer under it. Good observation, thanks. @DouglasSkinner: Excellent advice, thank you. Tomorrow I'll start disassembly and I will remove the auto works as a unit if I can. @Marc: It's a green Scuba Dude actually, just my poor photography. Thanks for the advice but I think rogart63 might be right. It definitely looks like there's a screw missing from just under the rotor. Good link for the walk through, thanks for that. Cheers guys, I'll let you know how it goes tomorrow.1 point
-
First question: make sure the impulse jewel is in the pallet fork (between the two tines). Last question: try and remove the automatic works as a unit i.e., try not to disassemble it, you'll have a lot more work if you do.1 point
-
No idea where the washers should be? But you are missing the screw next to the rotor screw? Probably is there inside somewhere?1 point
-
Great work, simplistic, yet very functional. I've recently completed my workshop remodel, but won't post photos here as they are posted elsewhere in the forums.1 point
-
That's a very nice bench indeed. You could stop any lateral movement with as @chrisdt says a full diagonal across the back but also a couple of knee braces would work one in either corner at the top about halfway down the leg at 45 degrees that should stop any movement.1 point
-
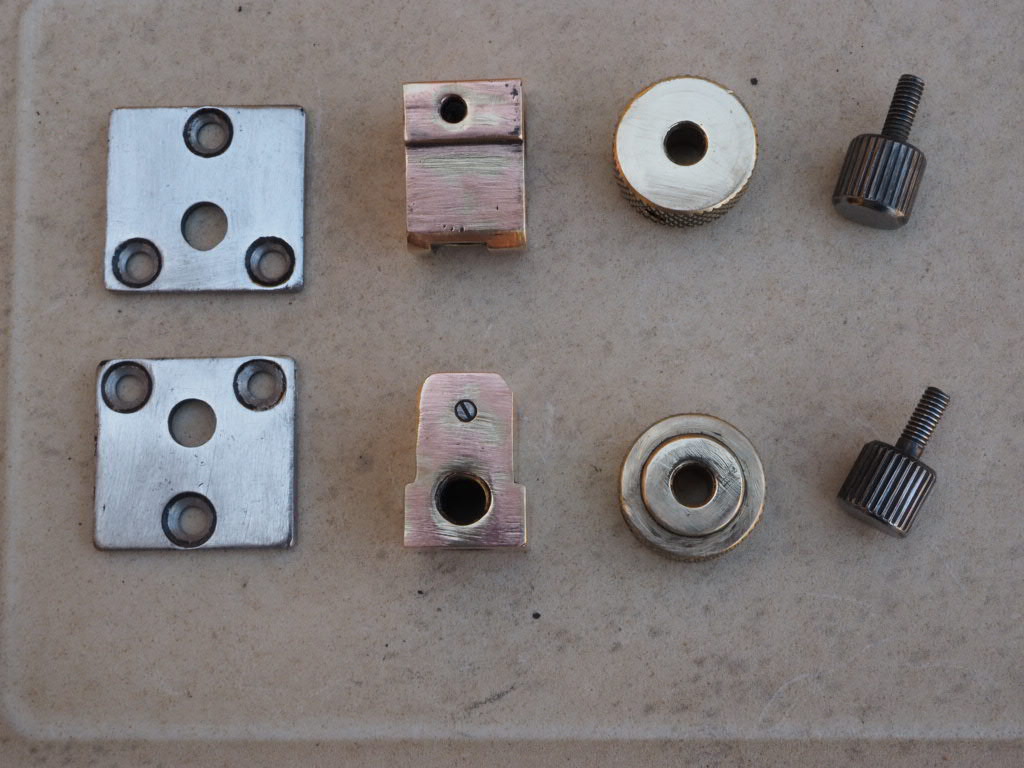
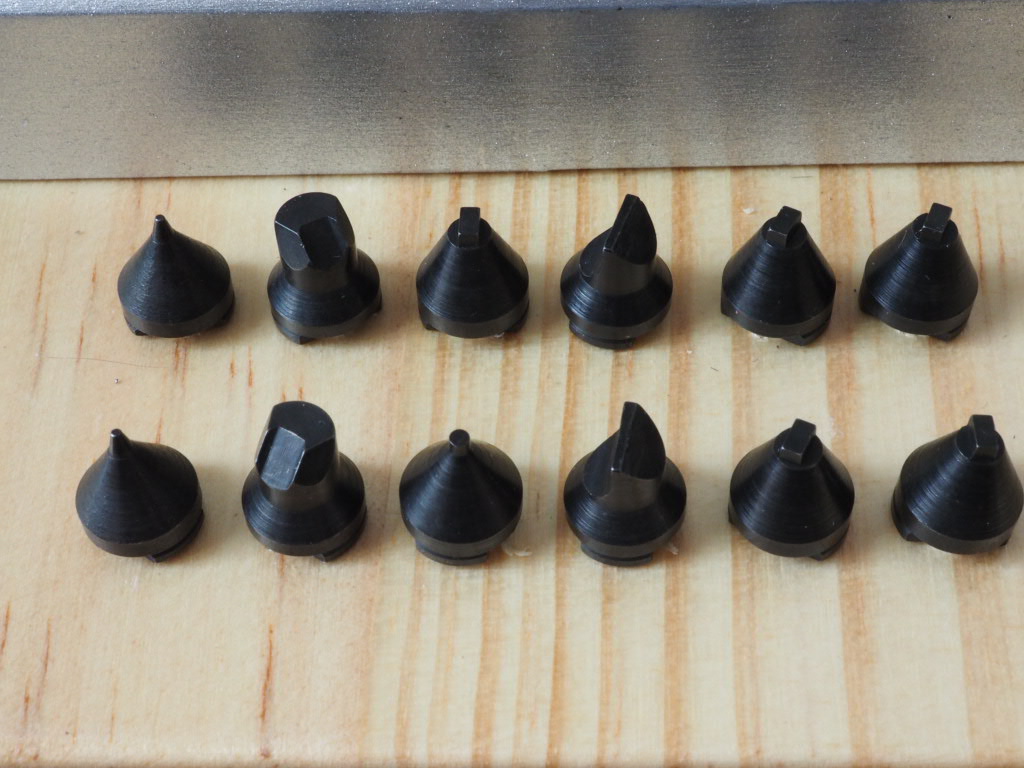
Arrived very quickly from HK, with low custom charges due to the seller's cooperation. There are just two minor issues, first the bits set is incorrect, one round tip is missing, and in place of it and another pair (square ?) there are extra rectangular bits. No big deal for now since these are the most used, anyway I'll ask the seller to set that right. And the second is that all the parts below were painted black in attempt to conceal their mismatching colors. Of course the paint started peeling already, so i gave these a quick clean. Construction is good enough, there are minor details which could be improved e.g. all the shafts where a grub screw or knob bites aren't milled flat, nevertheless works fine. Finally I was able to crack open a very sturdy diver case back!
 1 point
 -
Another old, fashion watch. This hasn't missed a beat in over 10 years. Just 3 batteries in all that time too. Next change should be this year. Guess WaterPro Steel Chronograph Sent from my Honor 5c1 point
-
Think i have some parts if you need anything? pdf you have here? Same movement? http://docs.google.com/viewer?a=v&pid=sites&srcid=Z2xlYXZlYW5kY28uY29tfHRlY2huaWNhbHxneDoxNTZiMTgyM2U5MzY3NWQ1 See in the pdf that someone has written wheel on stem1 point
-
Great job, well done.....1 point
-
A good job there and its nice to see a good selection of jewels.1 point
-
As mentioned above, an household drill with variable speed and a support works wonder. This is the holder which I use: https://www.aliexpress.com/item/The-universal-drill-bracket-360-degree-rotating-table-vise-clamp/32615385814.html it was cheaper when I bought it. Or jury rig something to the same effect.1 point
-
Just finished this Avia Daytyme today. Liking it a lot.
 1 point
 -
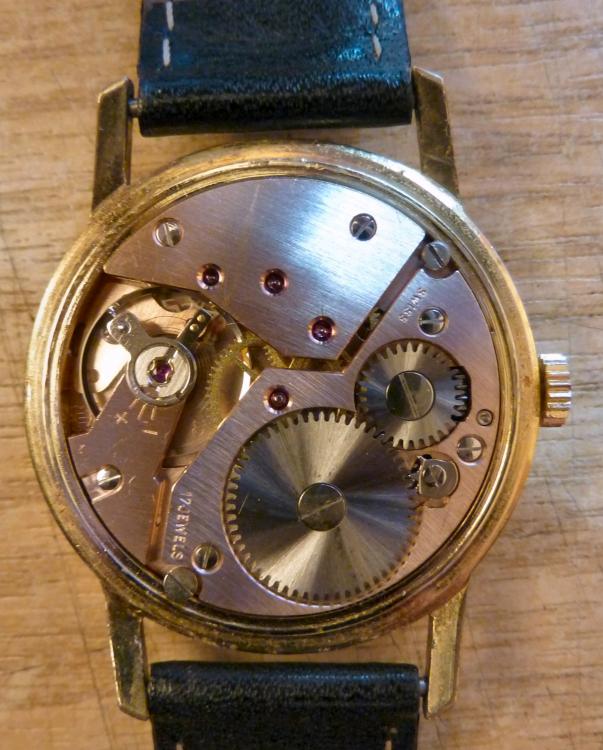
Don't believe it's ever been serviced, it was sitting since the 70's, (no marks in back case). You're correct with the tilting of movement for replacement of gear, stem will still not engage even with detent pushed in, just frustrating! The cleaning and demag should end fast running as I recall the mainspring stayed pretty tight with a manual wind and it ran for over 24 hrs. I'll remove winding bridge and check underneath. Thanks for your response. Dave1 point
-
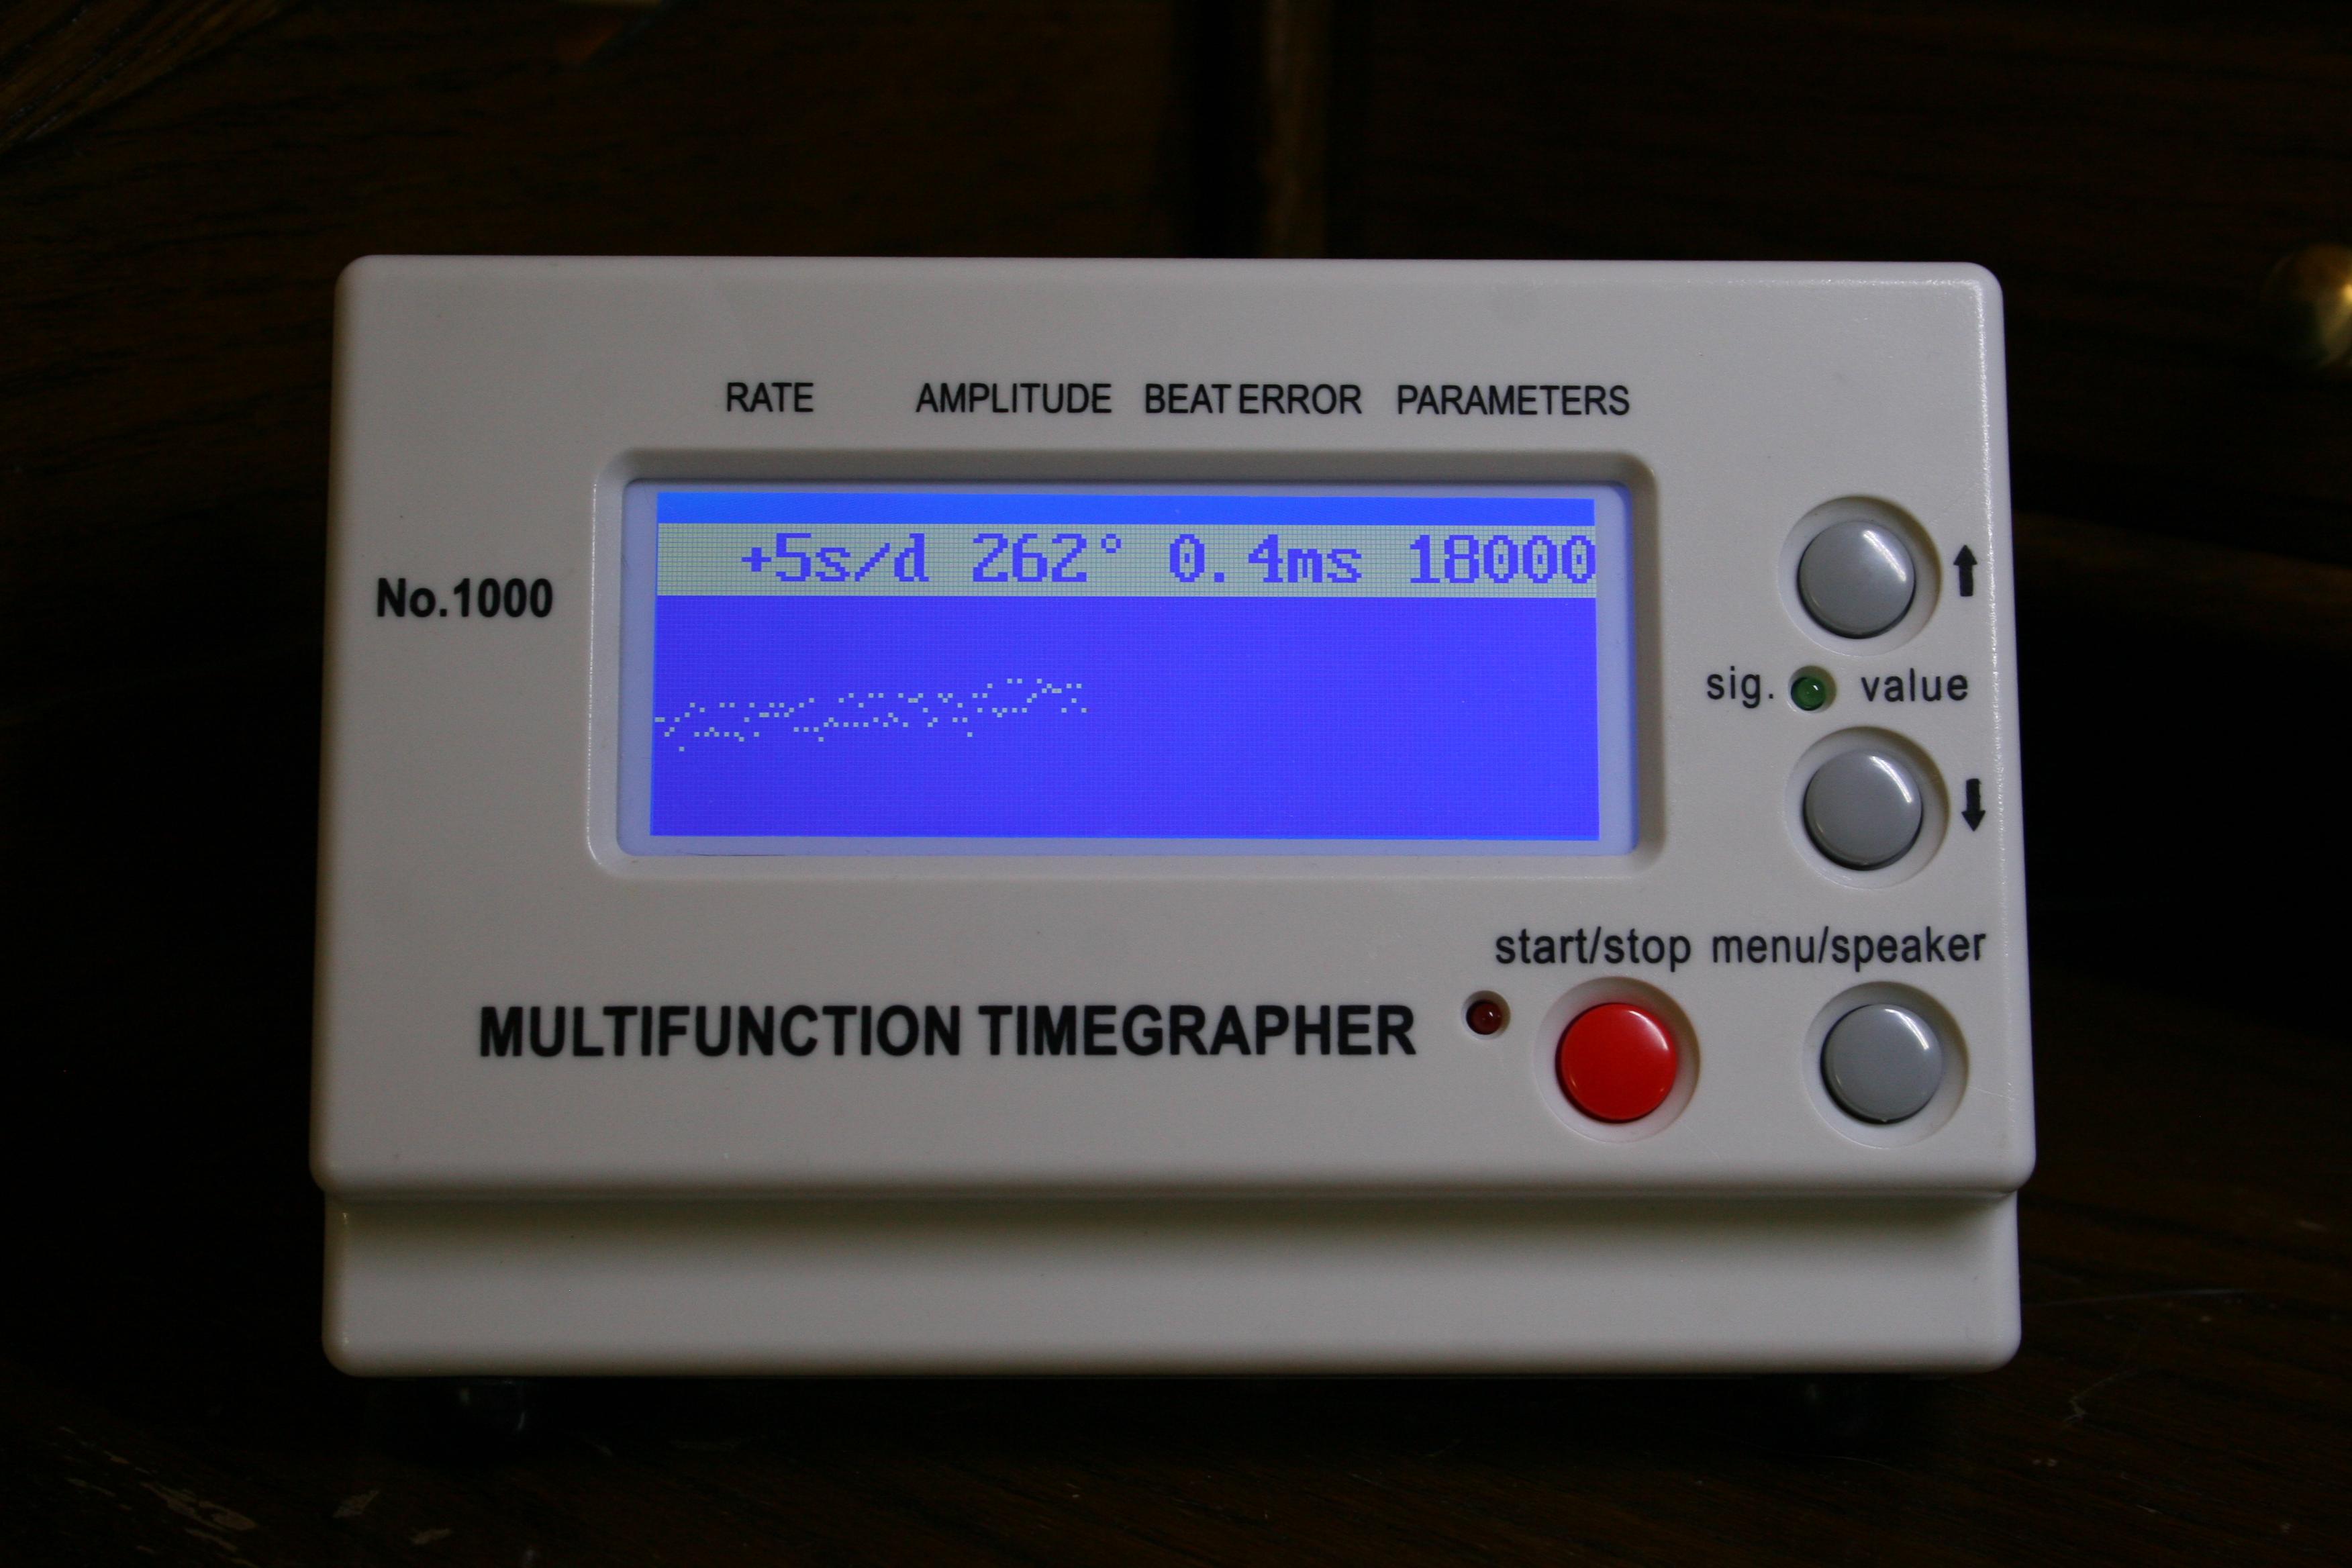
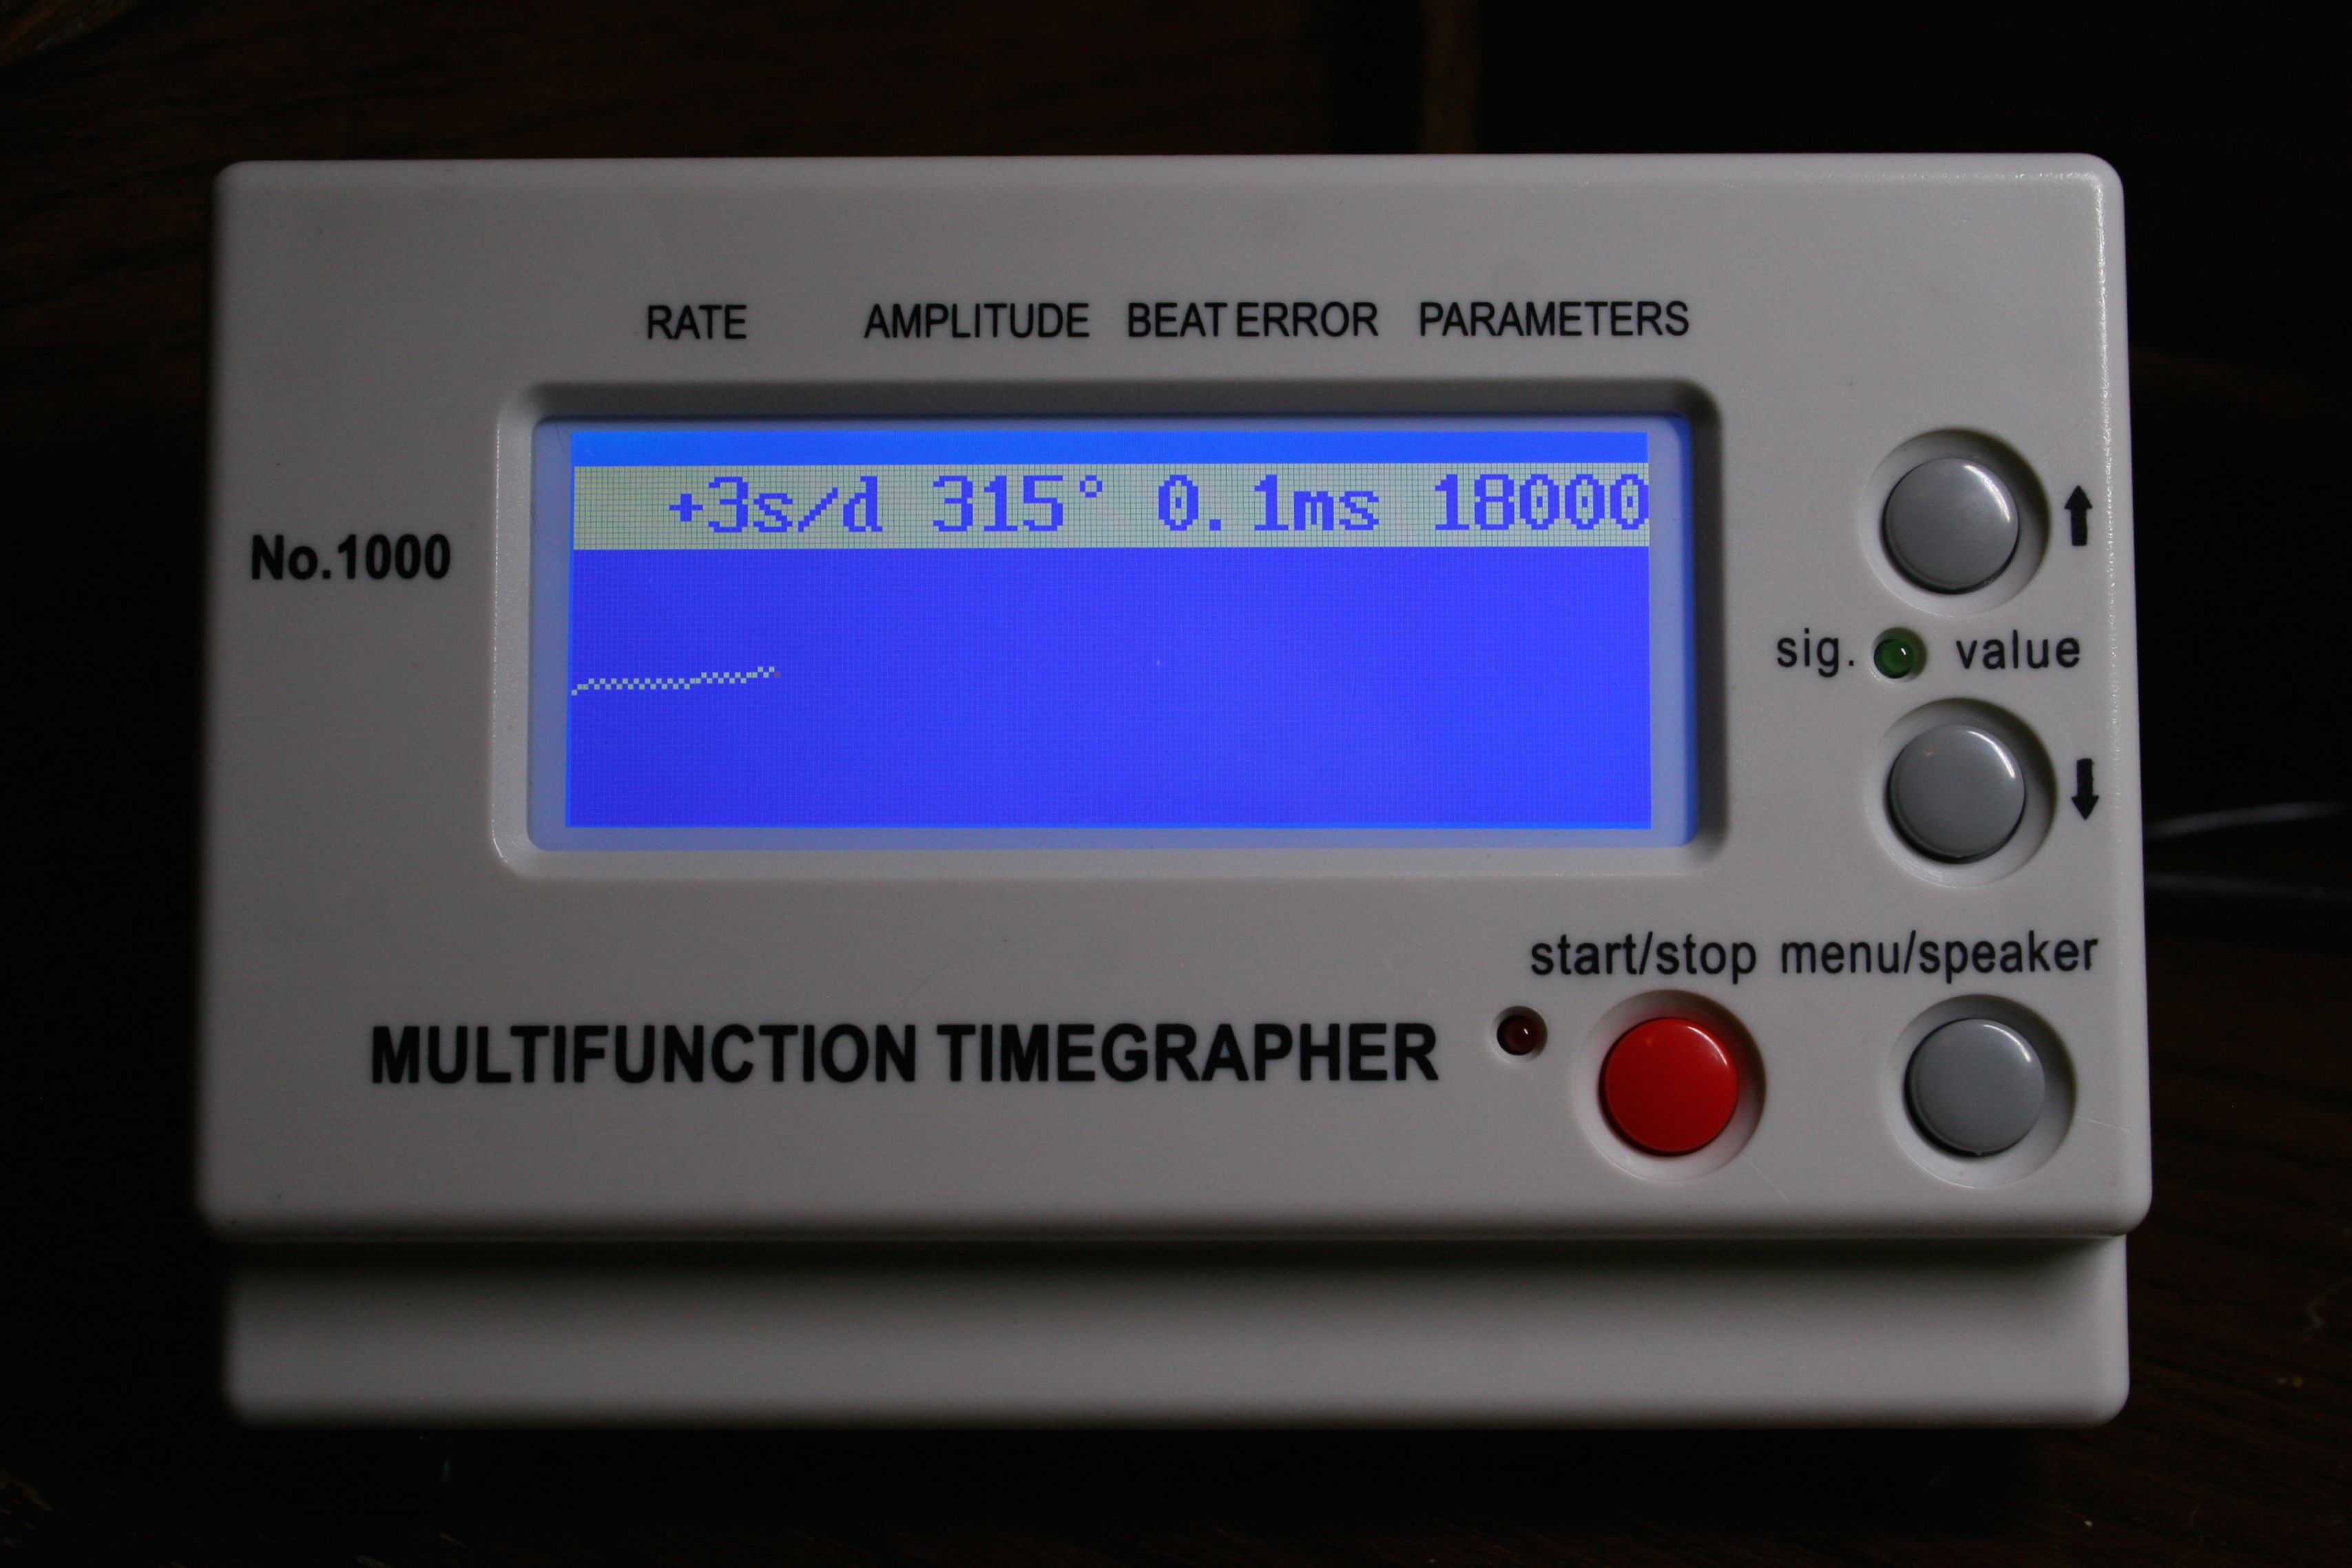
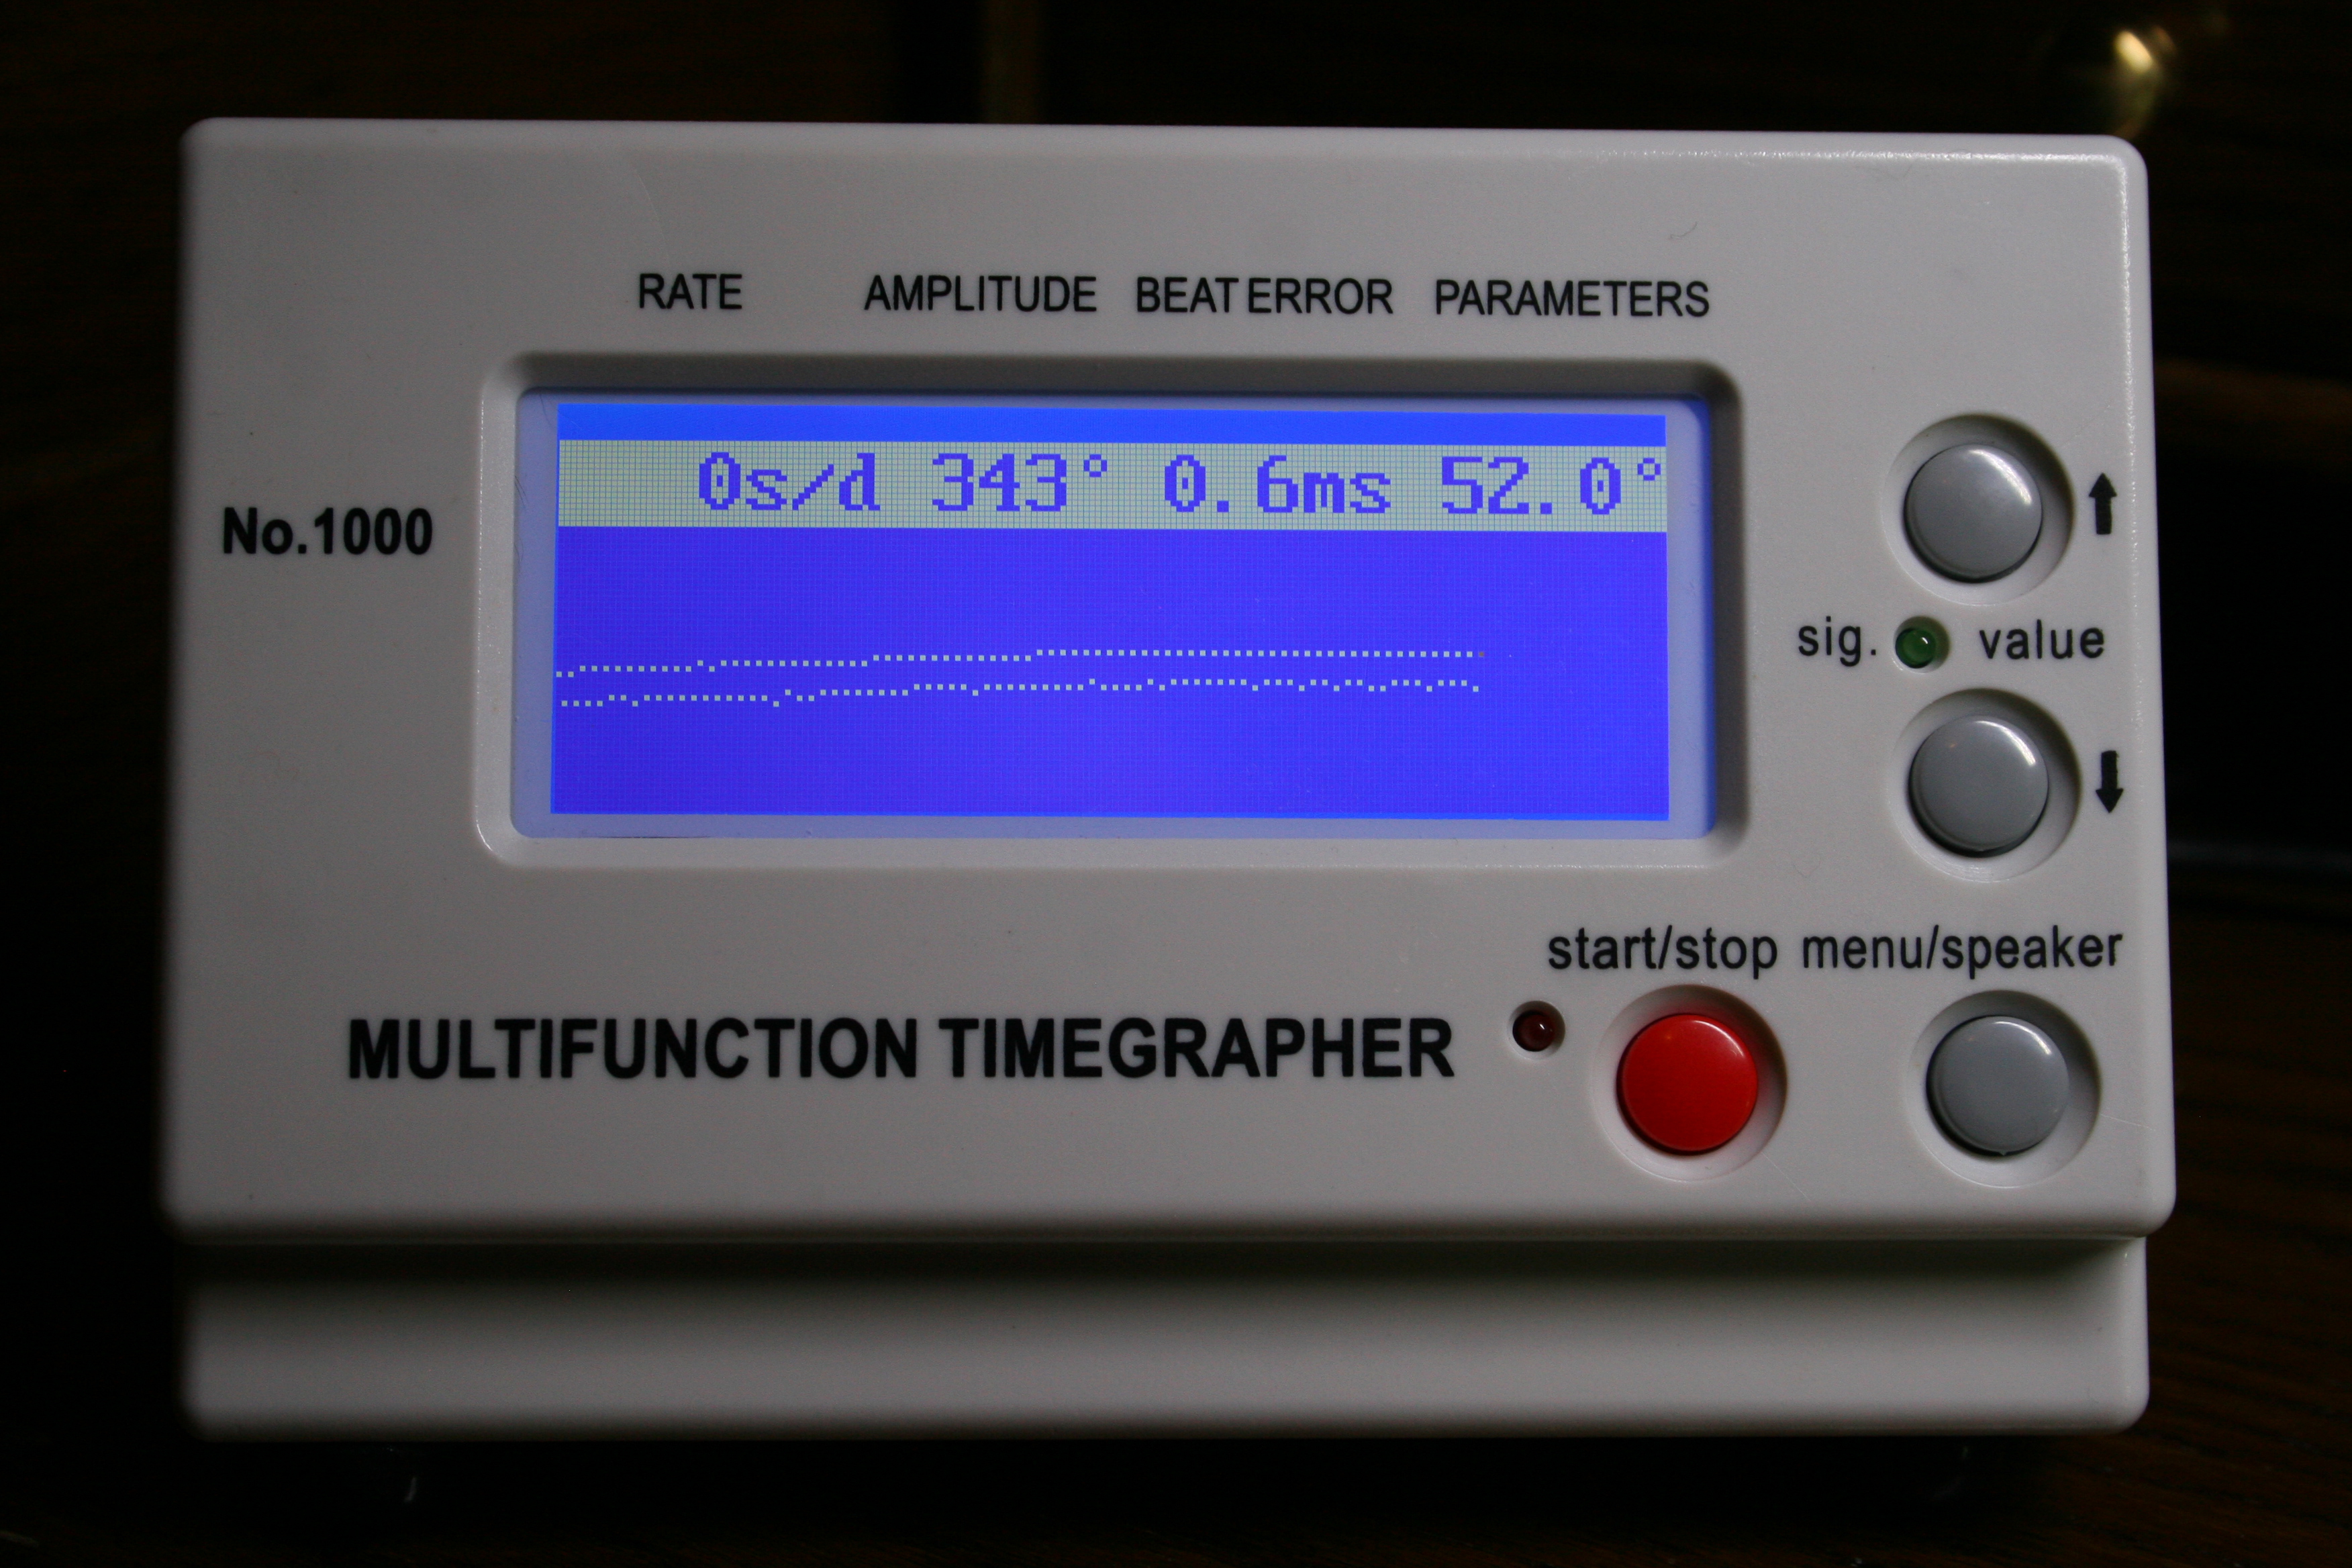
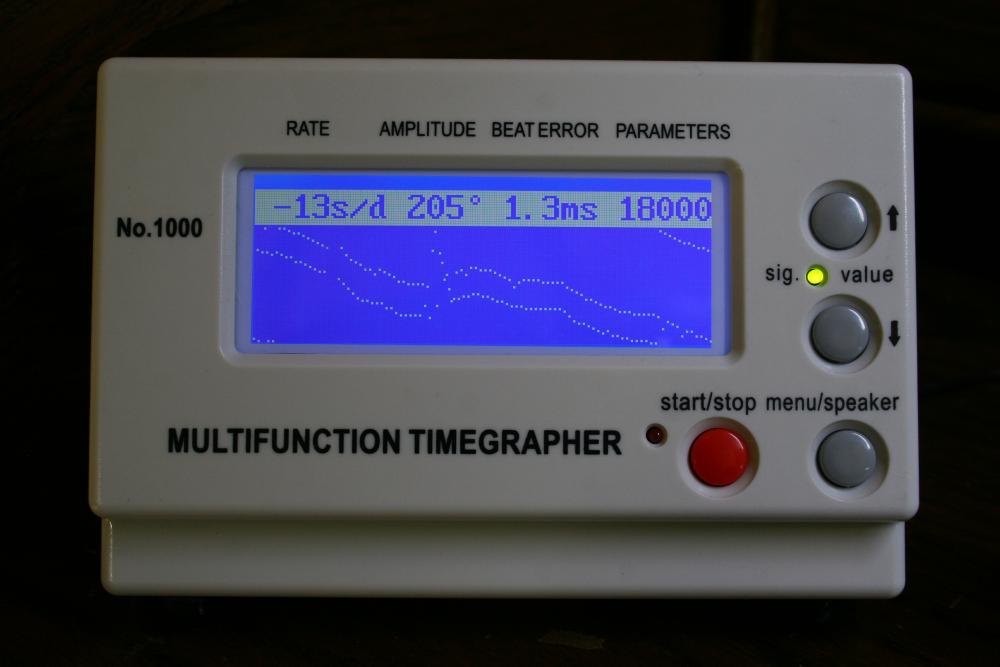
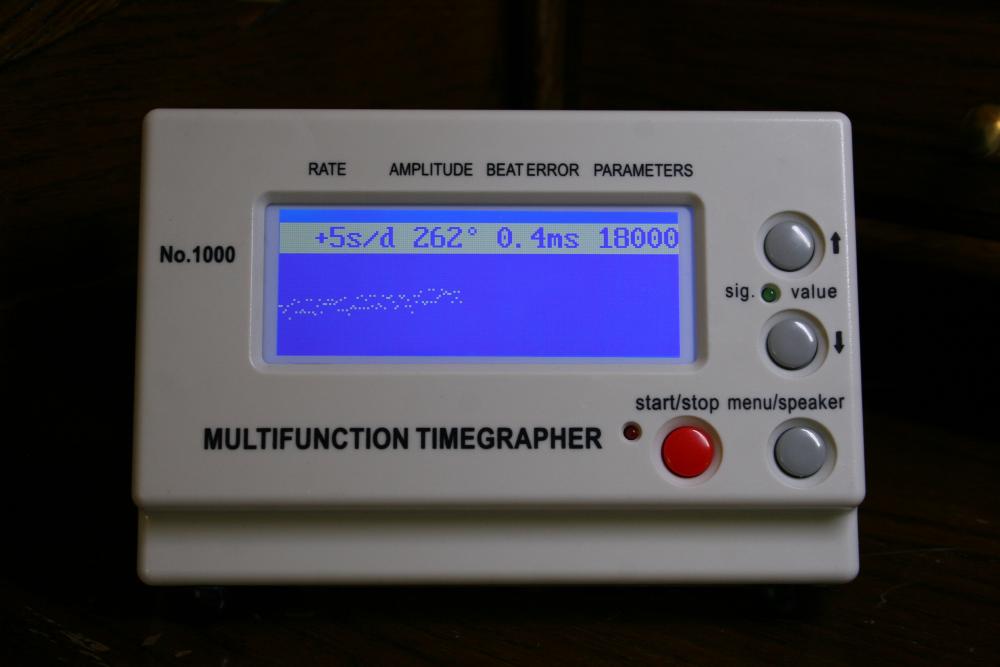
As I have a timing machine obsession I've accumulated quite a few manuals. So attached is interpretations of the timing machine display. Fortunately whether it's paper electronic etc. interpreting the display is basically the same. There are though some examples where paper tape is nice because you can run along print out like in the PDF number 14. On the other hand with modern timing machines some of them and some of the software you can run a time plot and do the same thing better. Then you have to be careful when interpreting the waveform does as it can almost become like crystal ball reading subject to interpretation. Conveniently are not finding a manual lurking around here which has all sorts of bizarre display's that all start to look the same but have different descriptions of what the problem may or may not be. So the timing machine will point you in a direction but you still have to use good watchmaking skills To figure out what the problem is. Timing-Machine-Charts.PDF1 point
-
As Wiley Dave suggests , take photos as you dissemble your watches . You can never take too many . On more then one occasion I was glad I took photos and have used them for reference as needed , or when someone else comes up with a question about the same movement or procedure it's good to have them handy to share . Also as a suggestion , I sometimes use ice cube trays to place the part along with their particular screws . And then it's easy to see the order that I disassembled the watch . I will even take a photo of the parts and screws in the trays so I know which parts go with which screws after I clean them .1 point
-
My Flightmaster today, soon to have a new crystal. Sent from my Honor 5c1 point
-
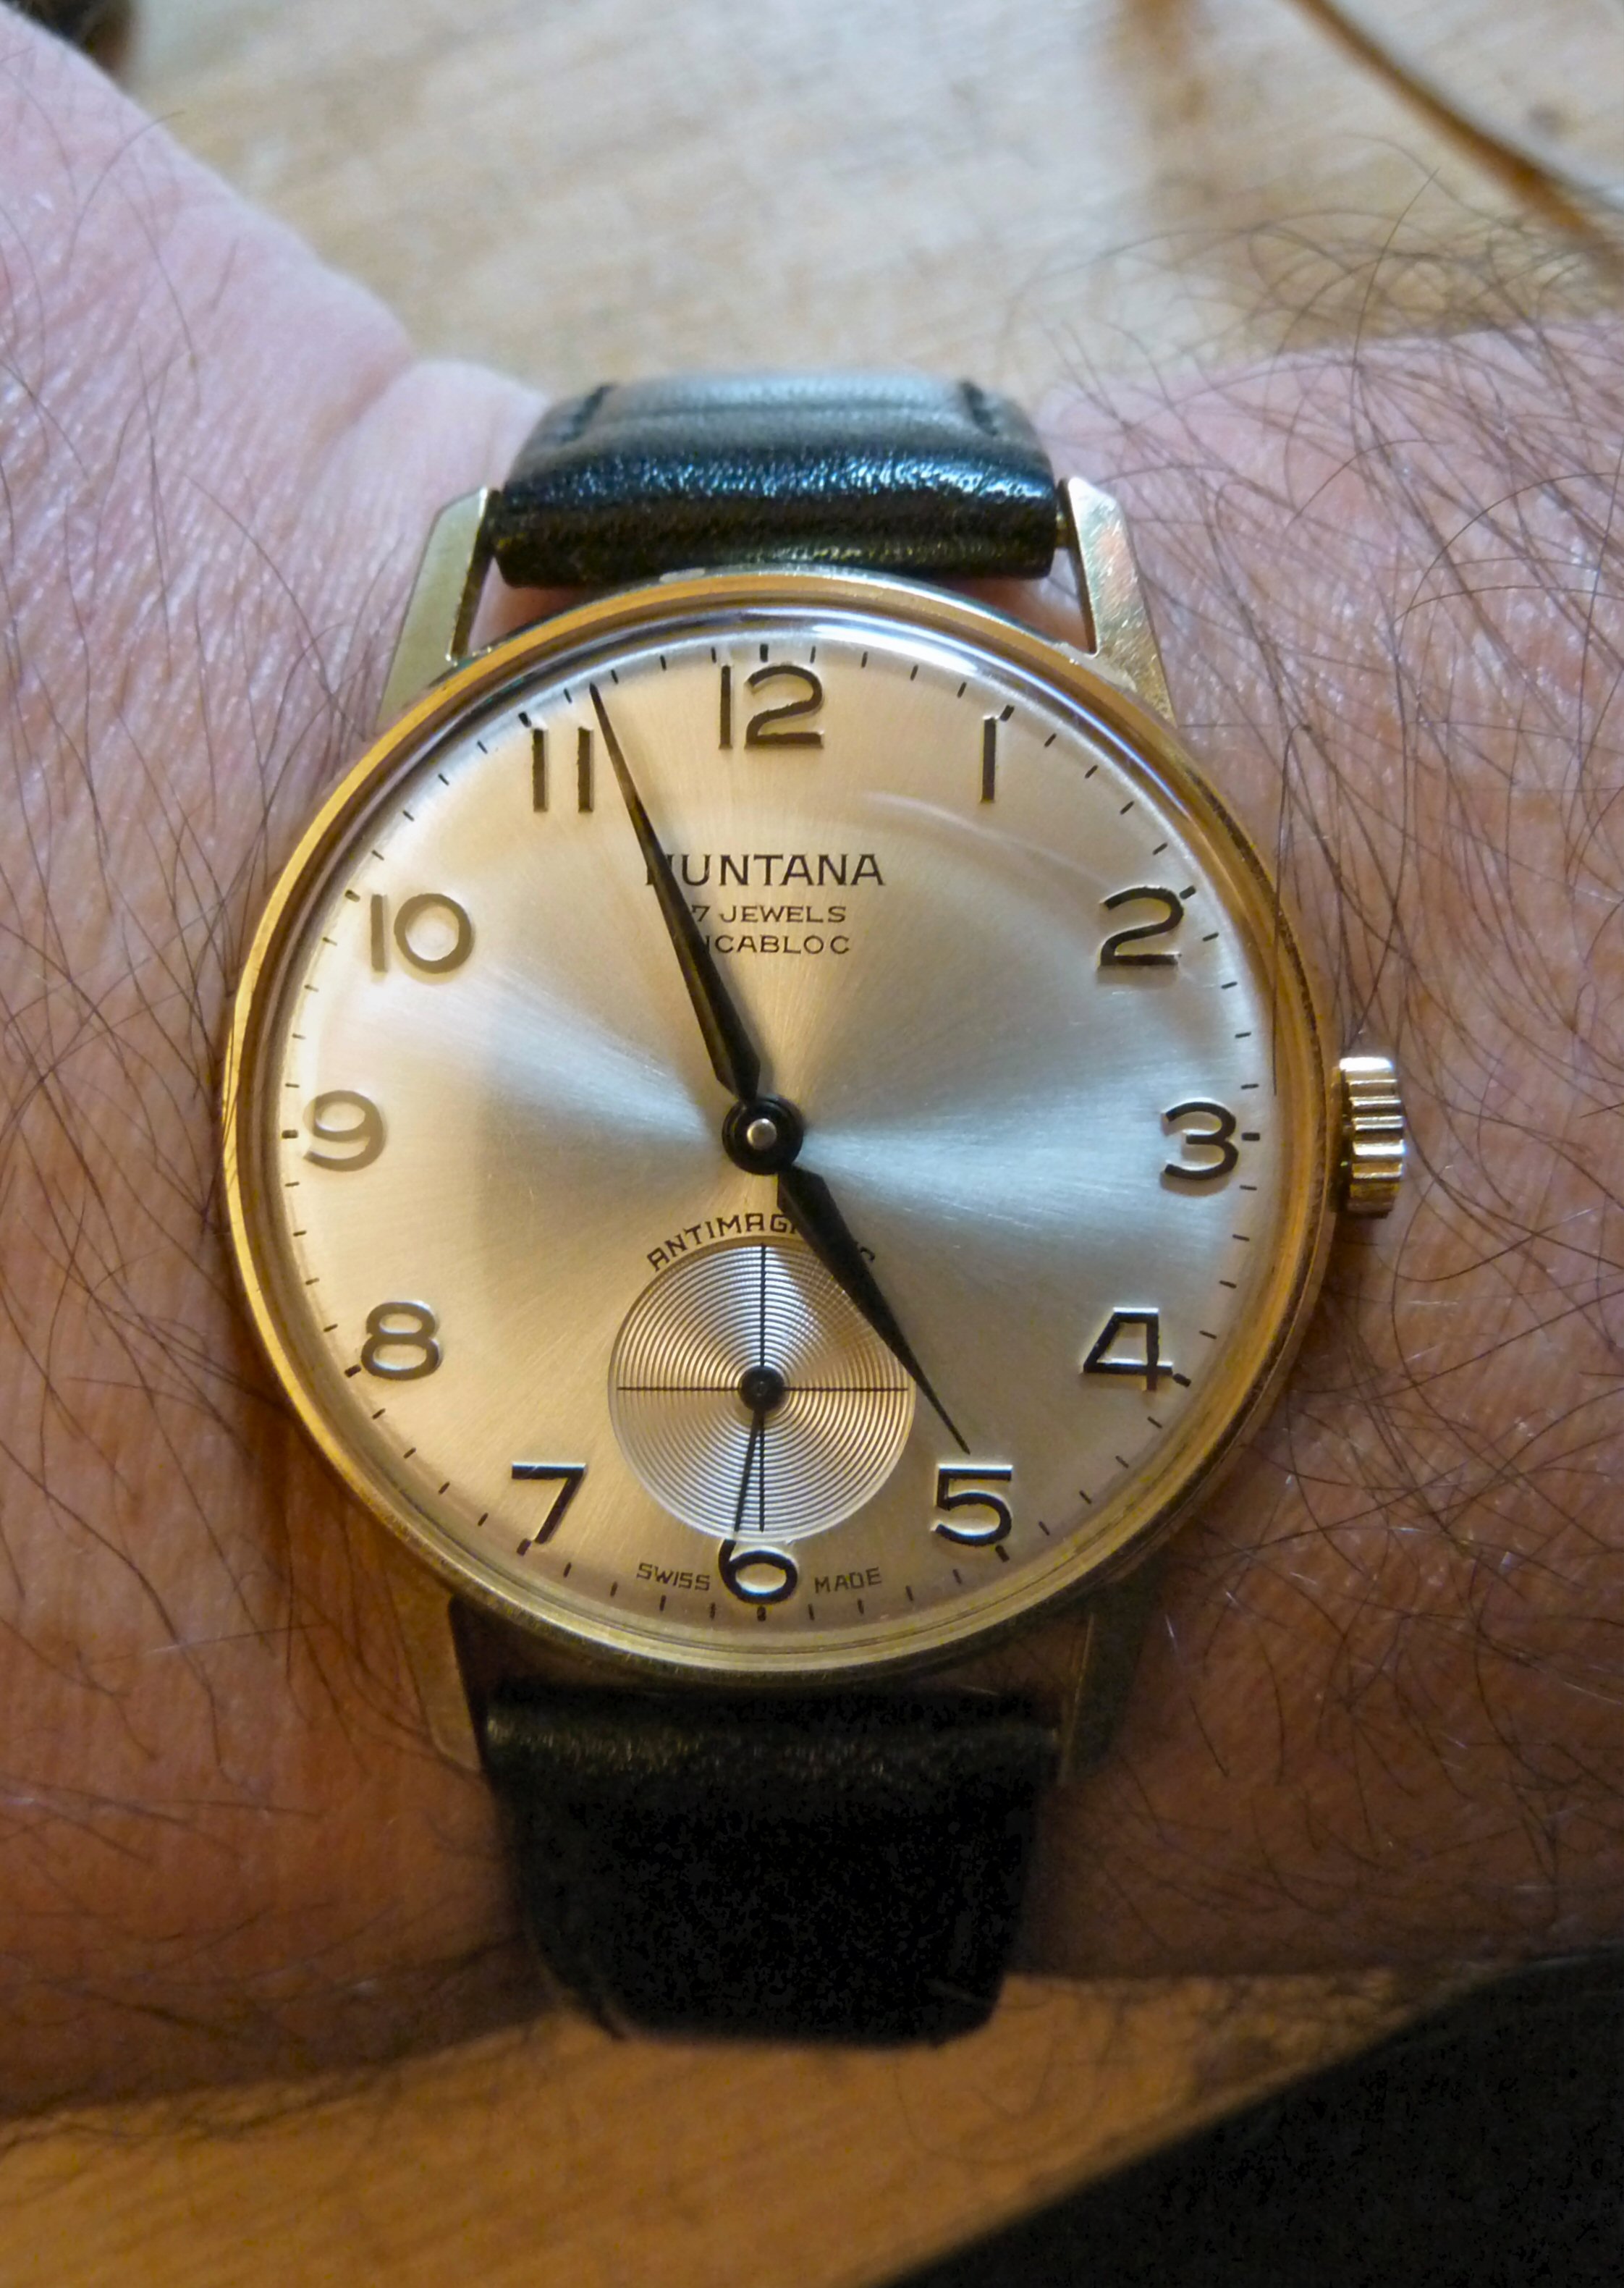
Got my Huntana on today It's been getting quite a lot of wrist time lately. At 34mm diameter and just 8mm thick it is just such a comfortable watch. The thin bezel makes it wear bigger than it is and the design and layout is so easy to read. It has a Unitas 6325 inside which is a lovely movement. A nice easy size to work on, simple, bullet proof, consistent, and reliable. This particular one is also the loudest ticker I have.

 1 point
 -
Sent from my Honor 5c1 point
-
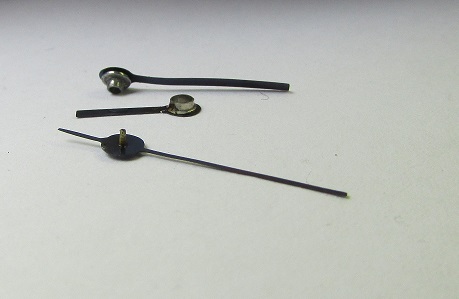
Hands completed and date viewer / hour markers made. Also did a layout to start seeing things coming together

 1 point
 -
Hi Watchtime, yes it is heating polished steel. It is not permanent so not really suitable for a watch case, but this is playing. Towards the end of the project I will spray with laquer to see how that improves the durability, and also it will help seal the brass1 point
-
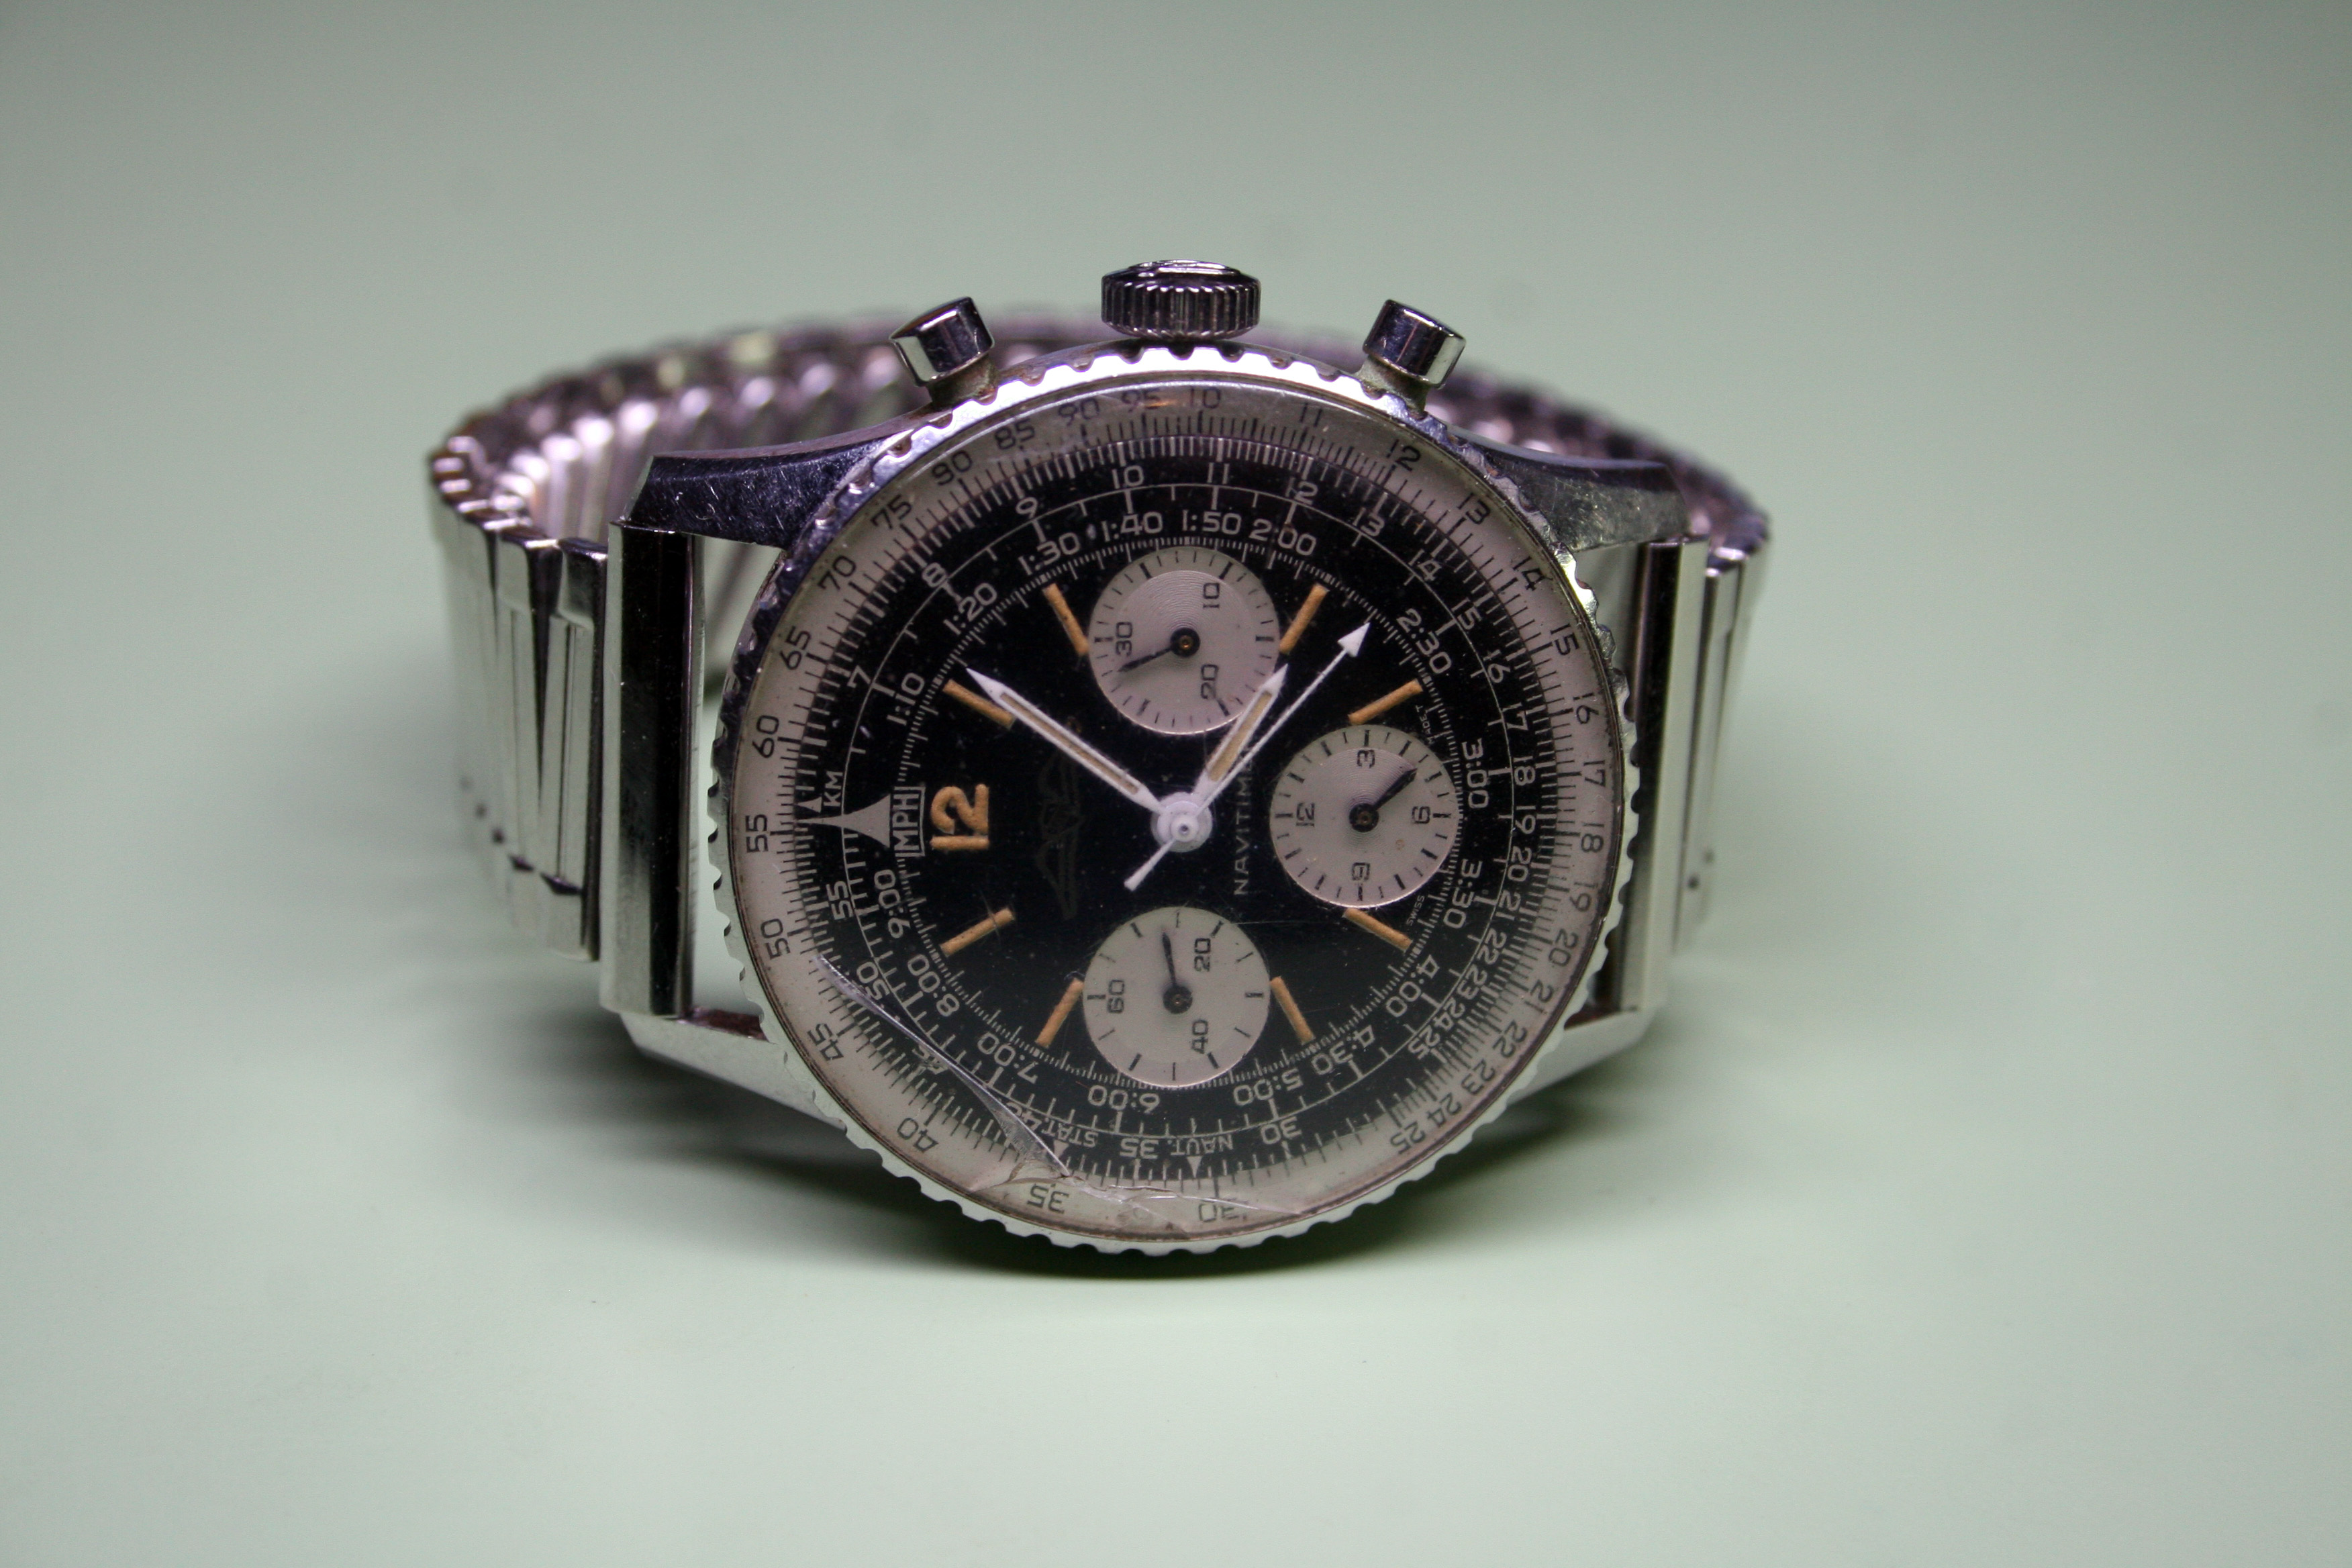
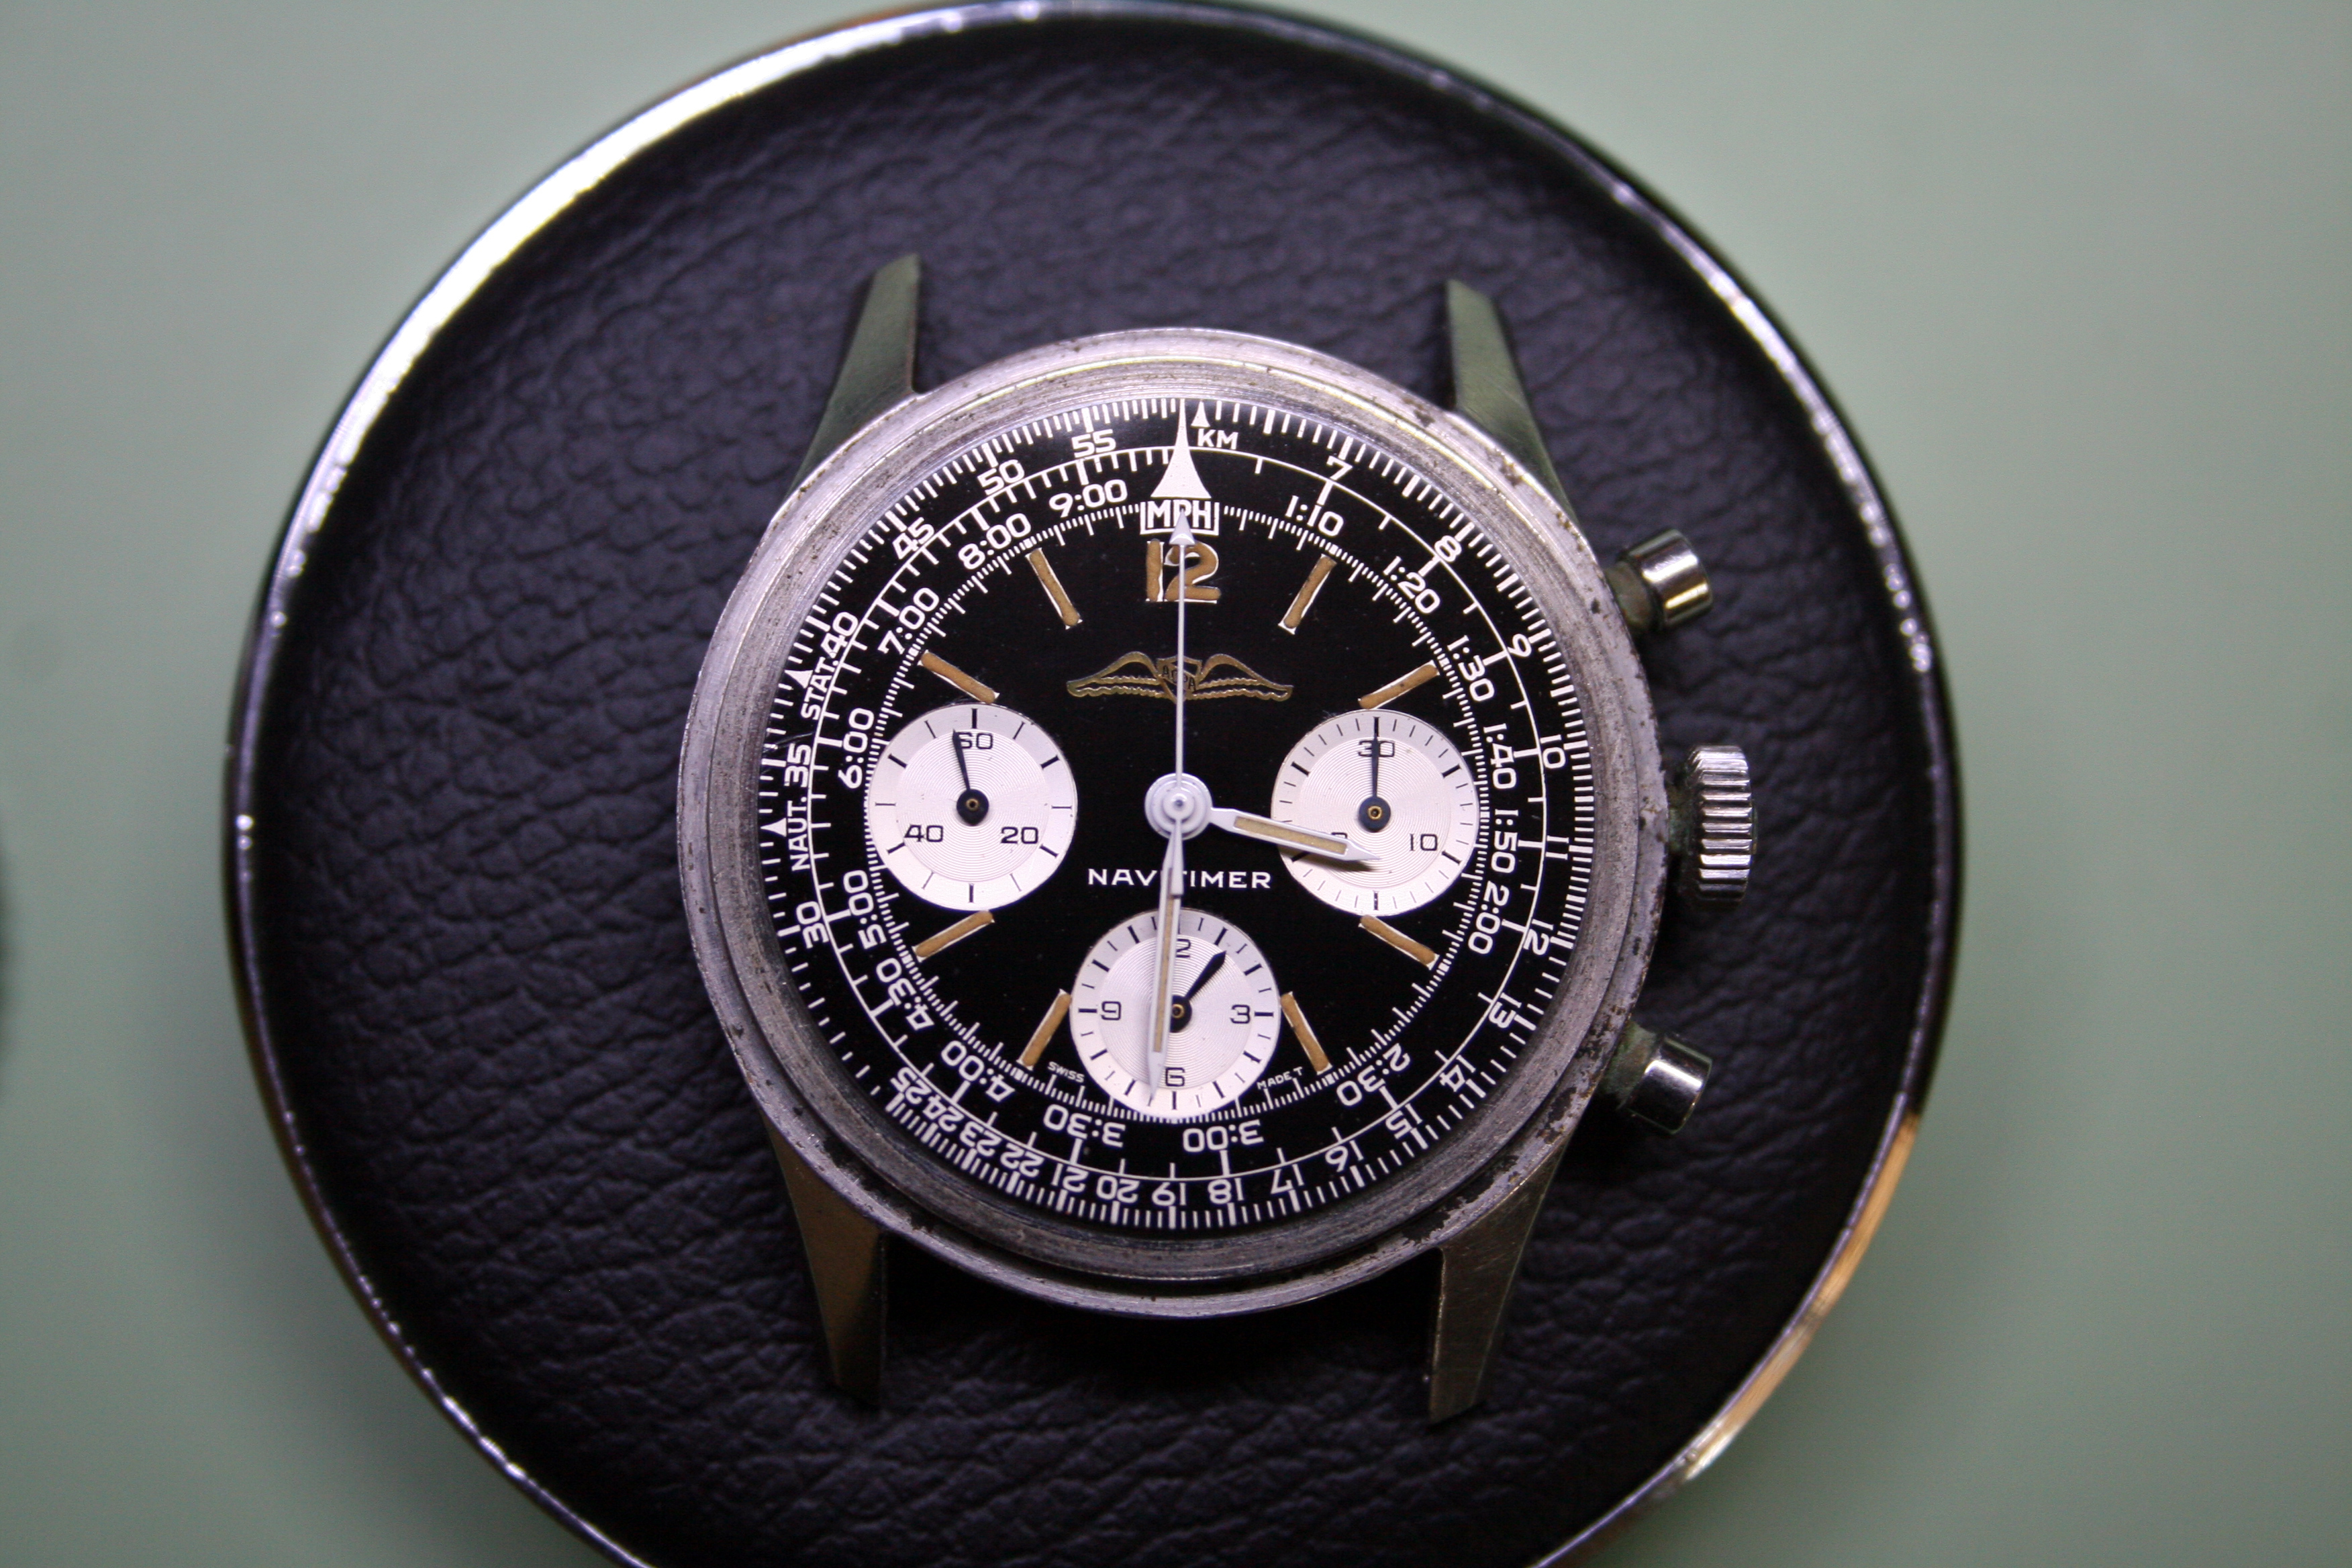
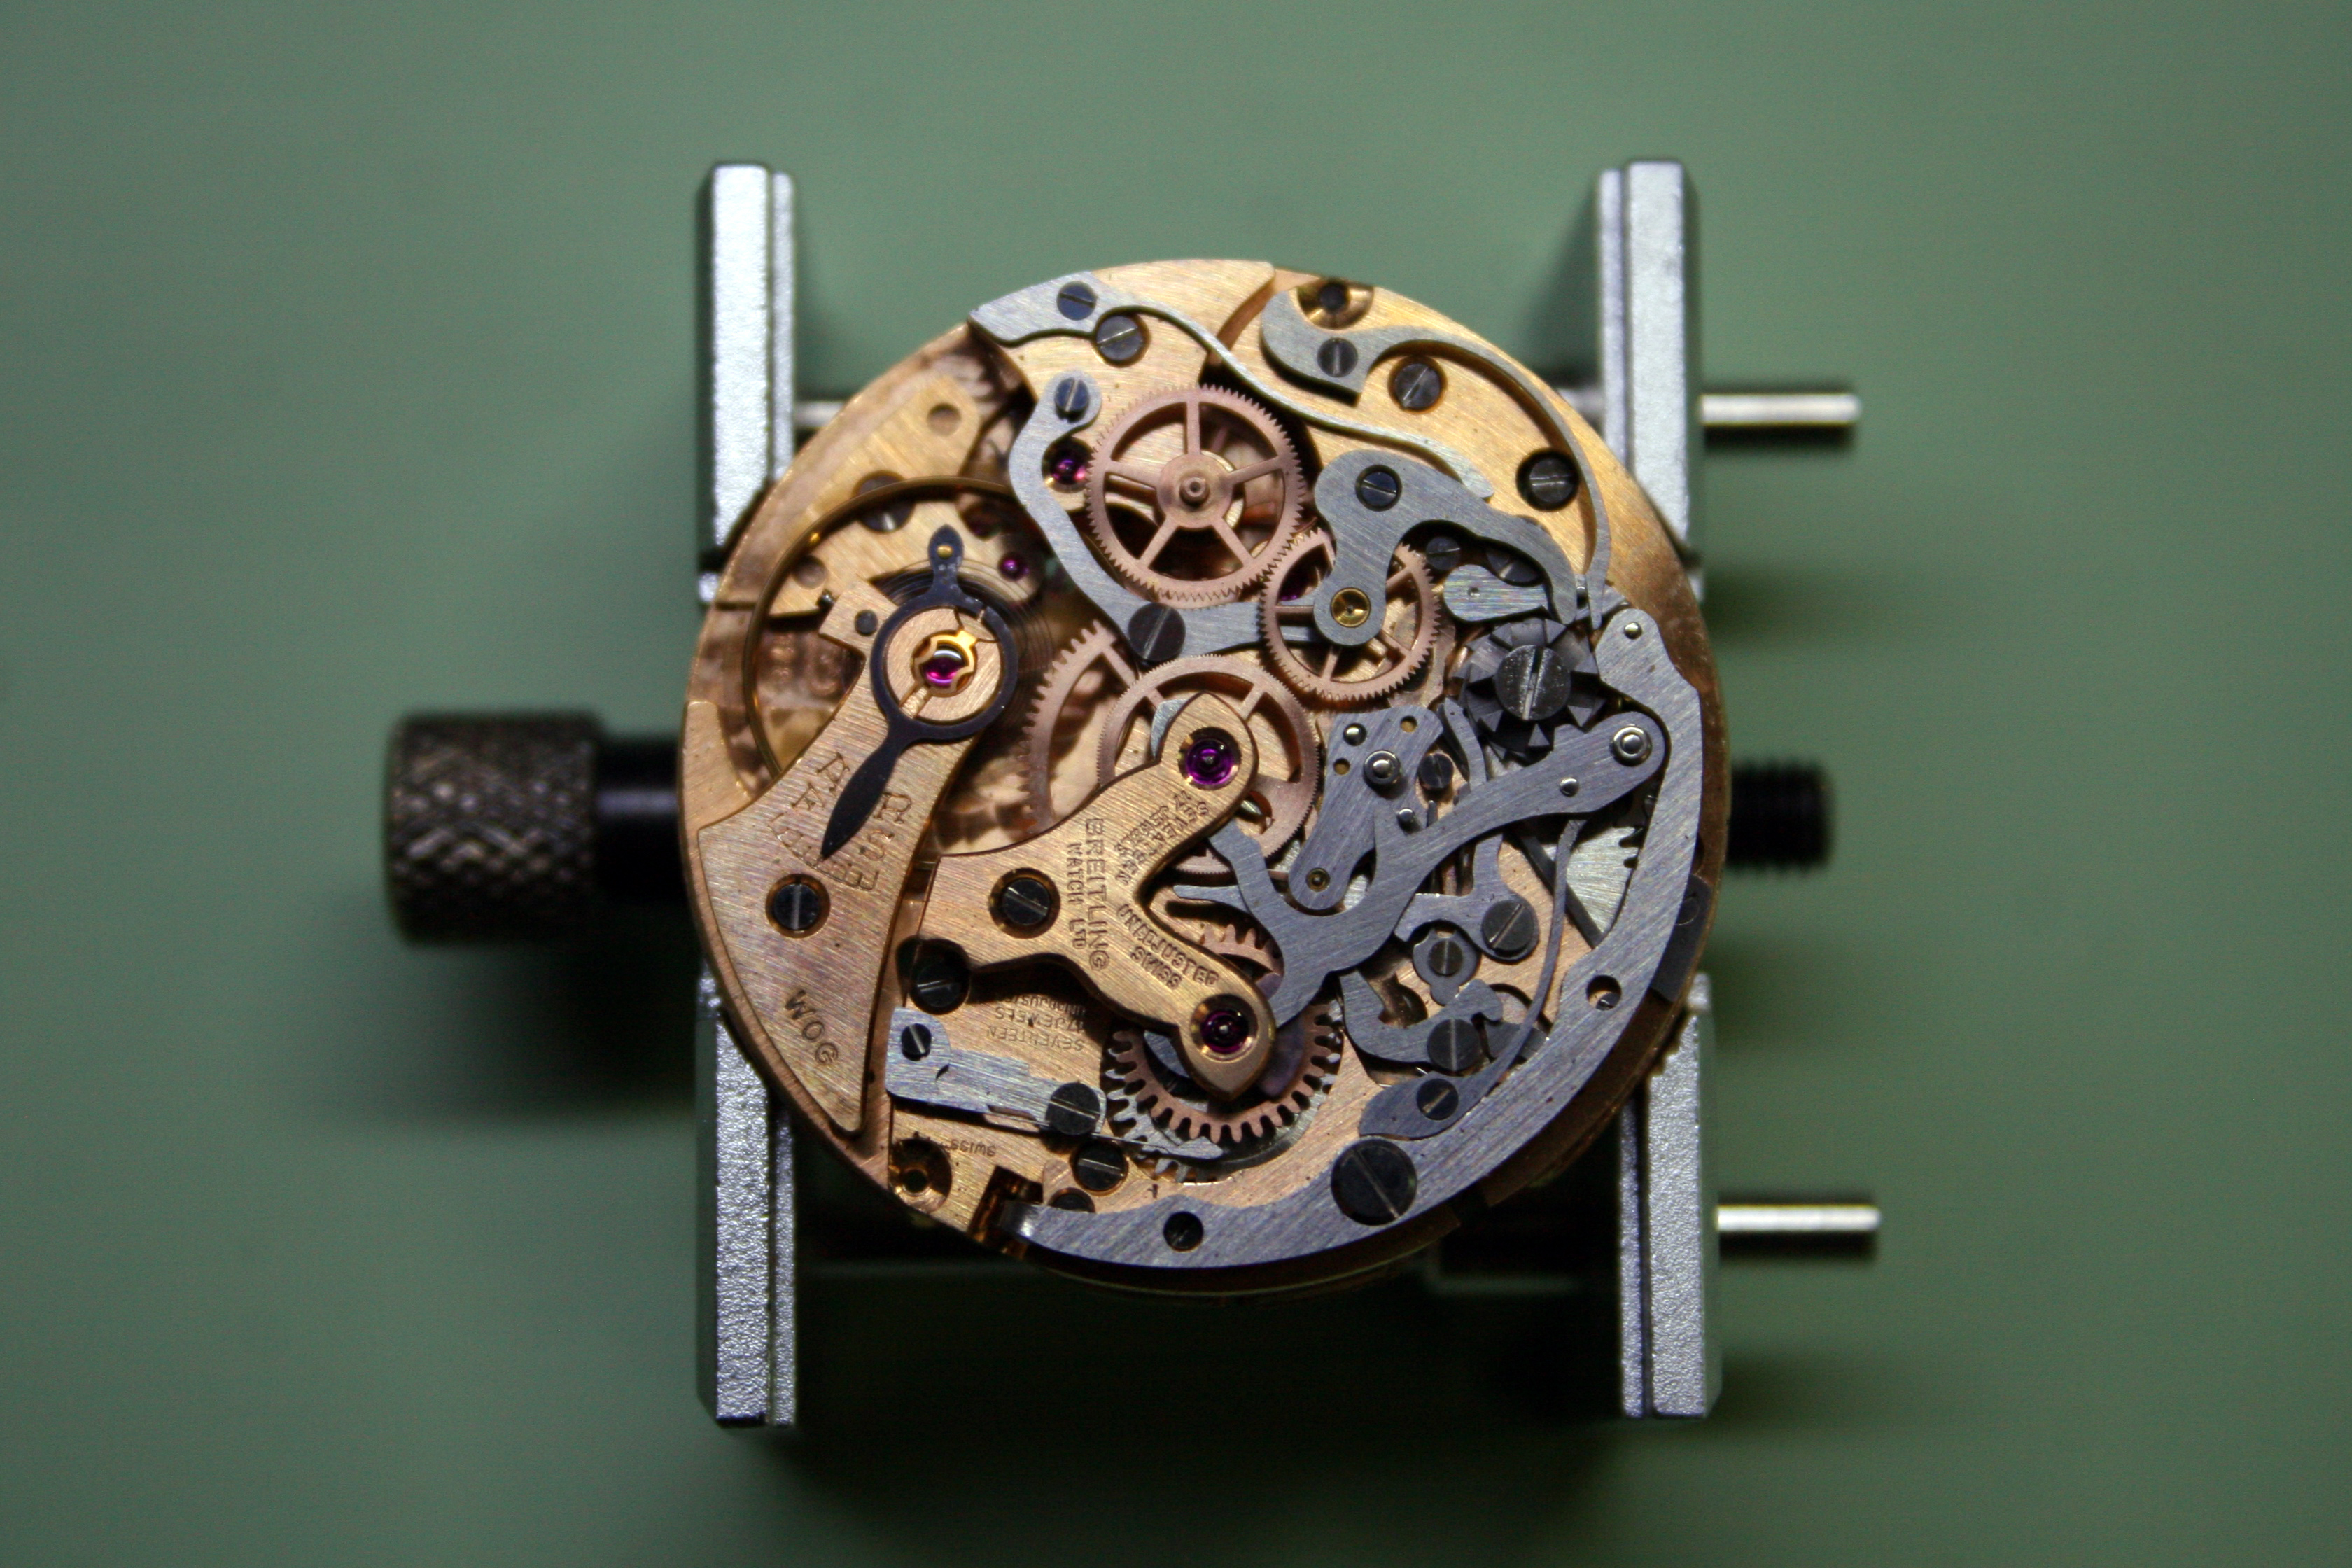
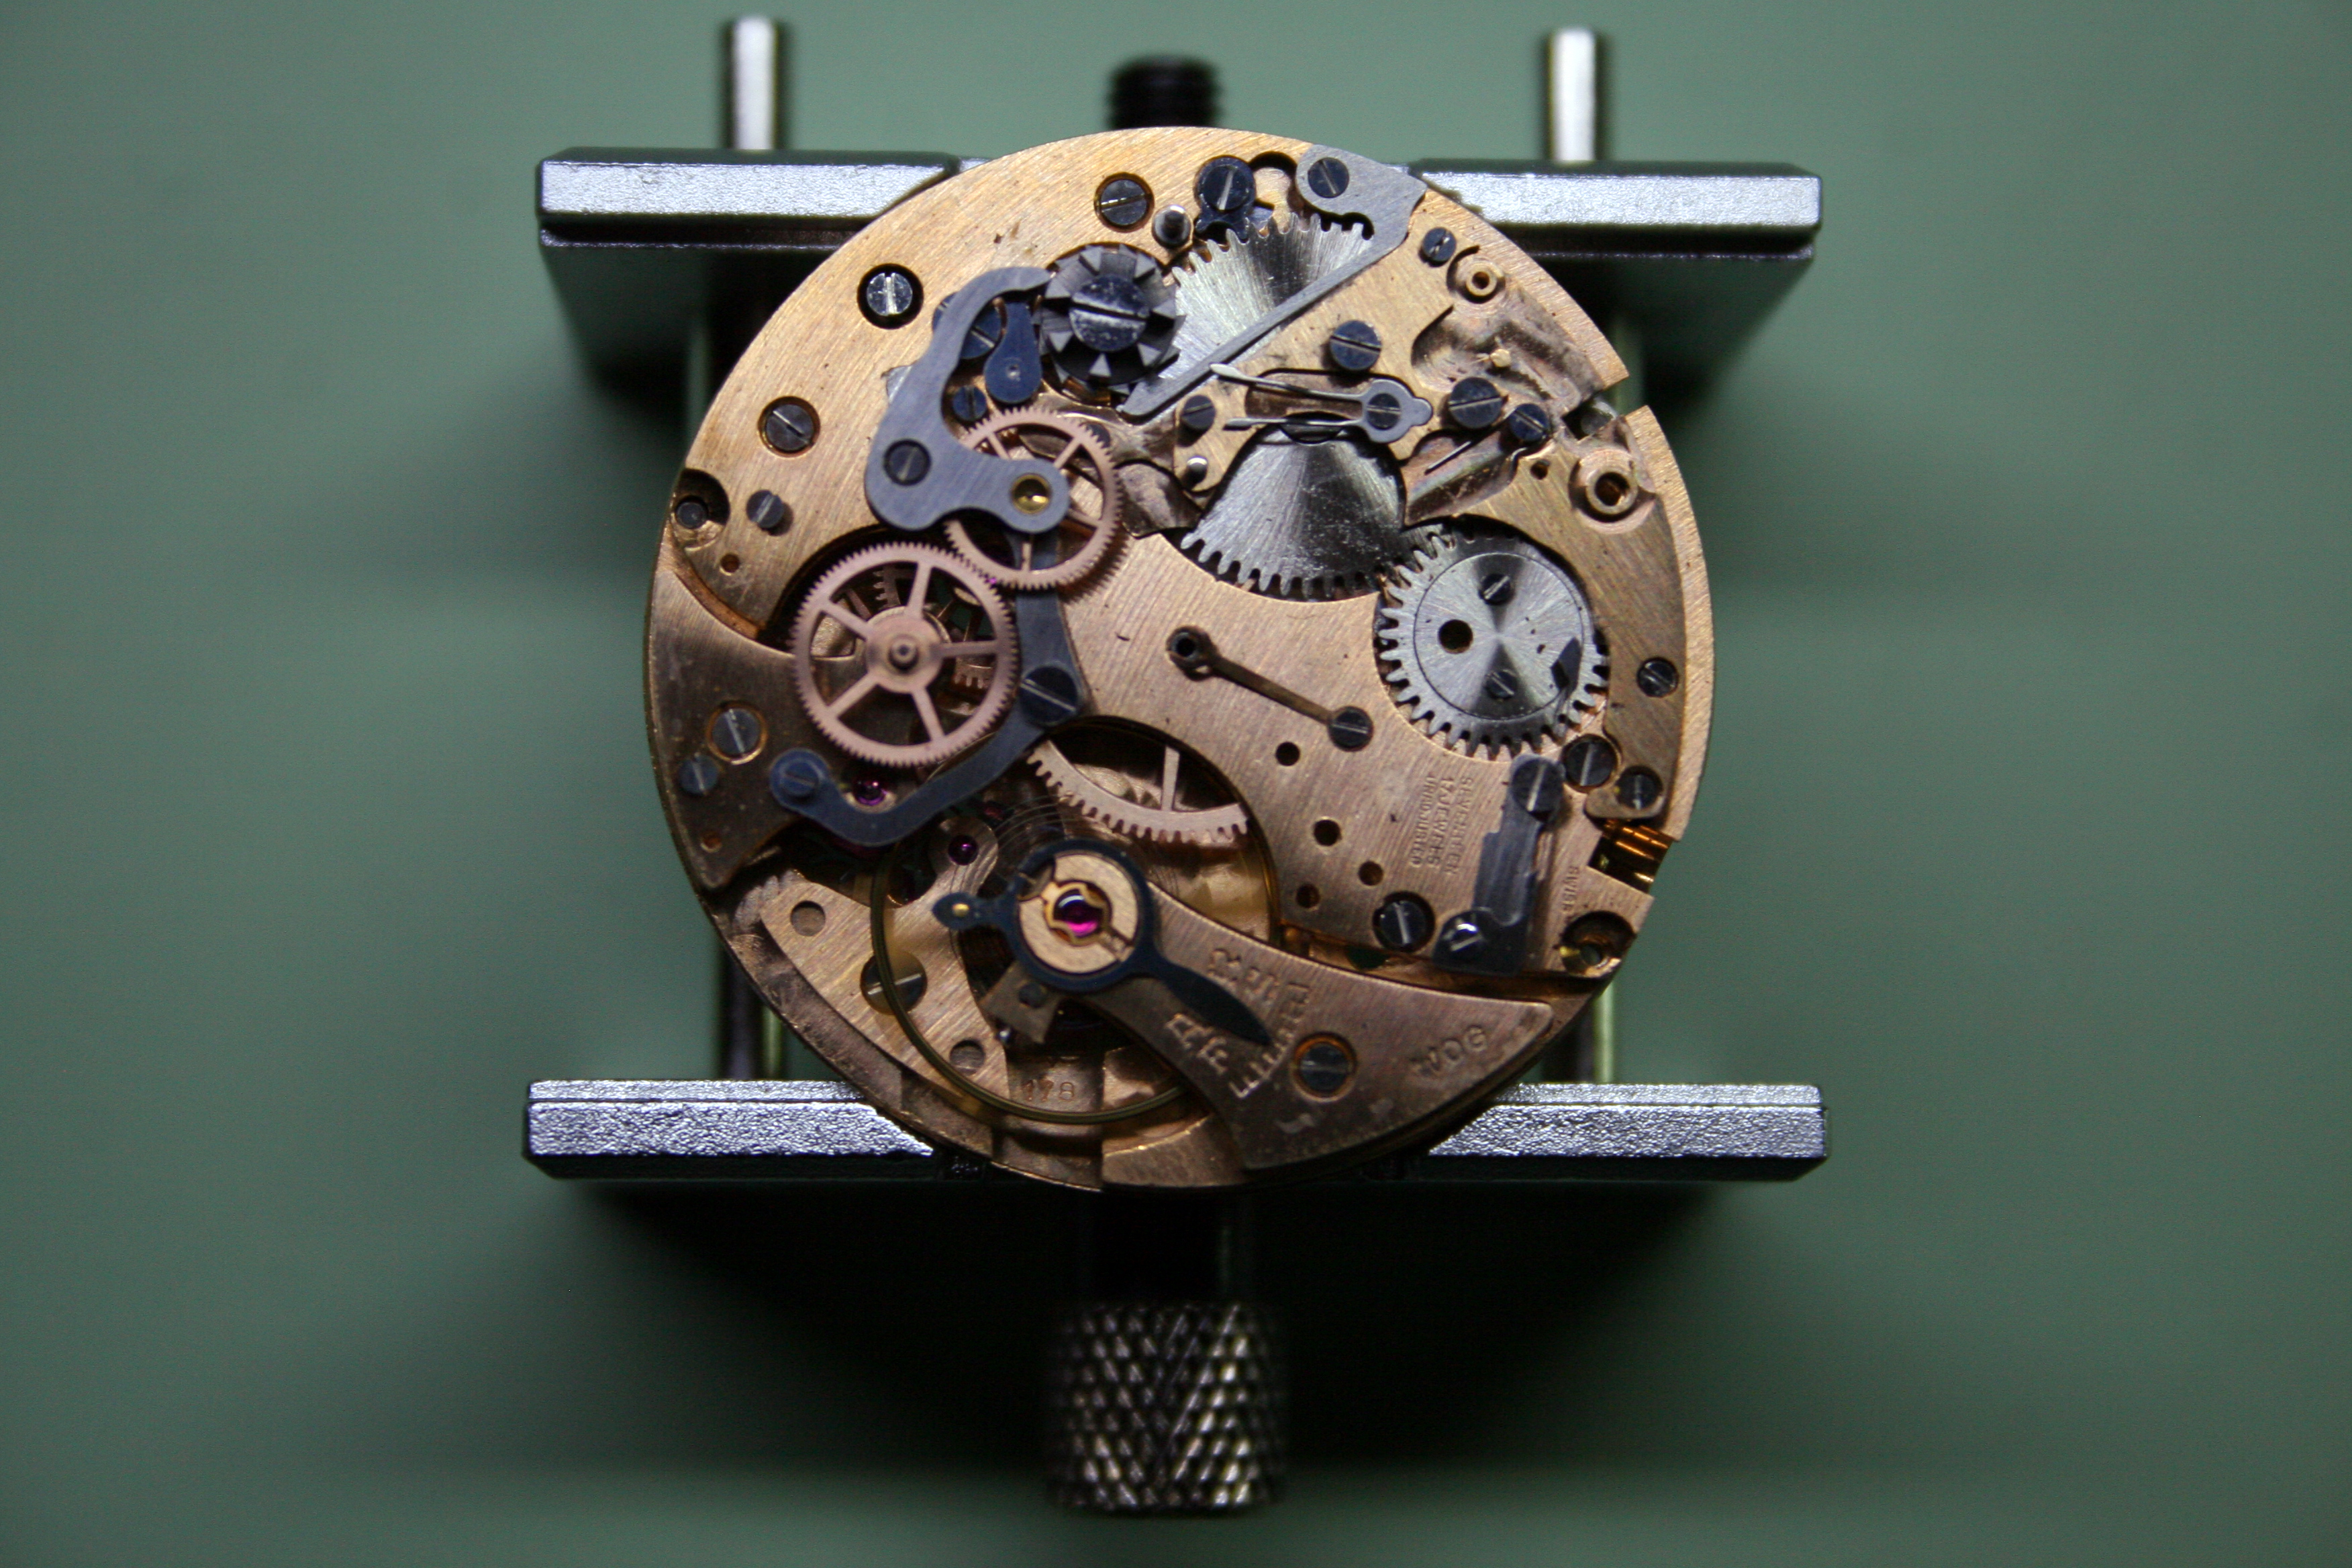
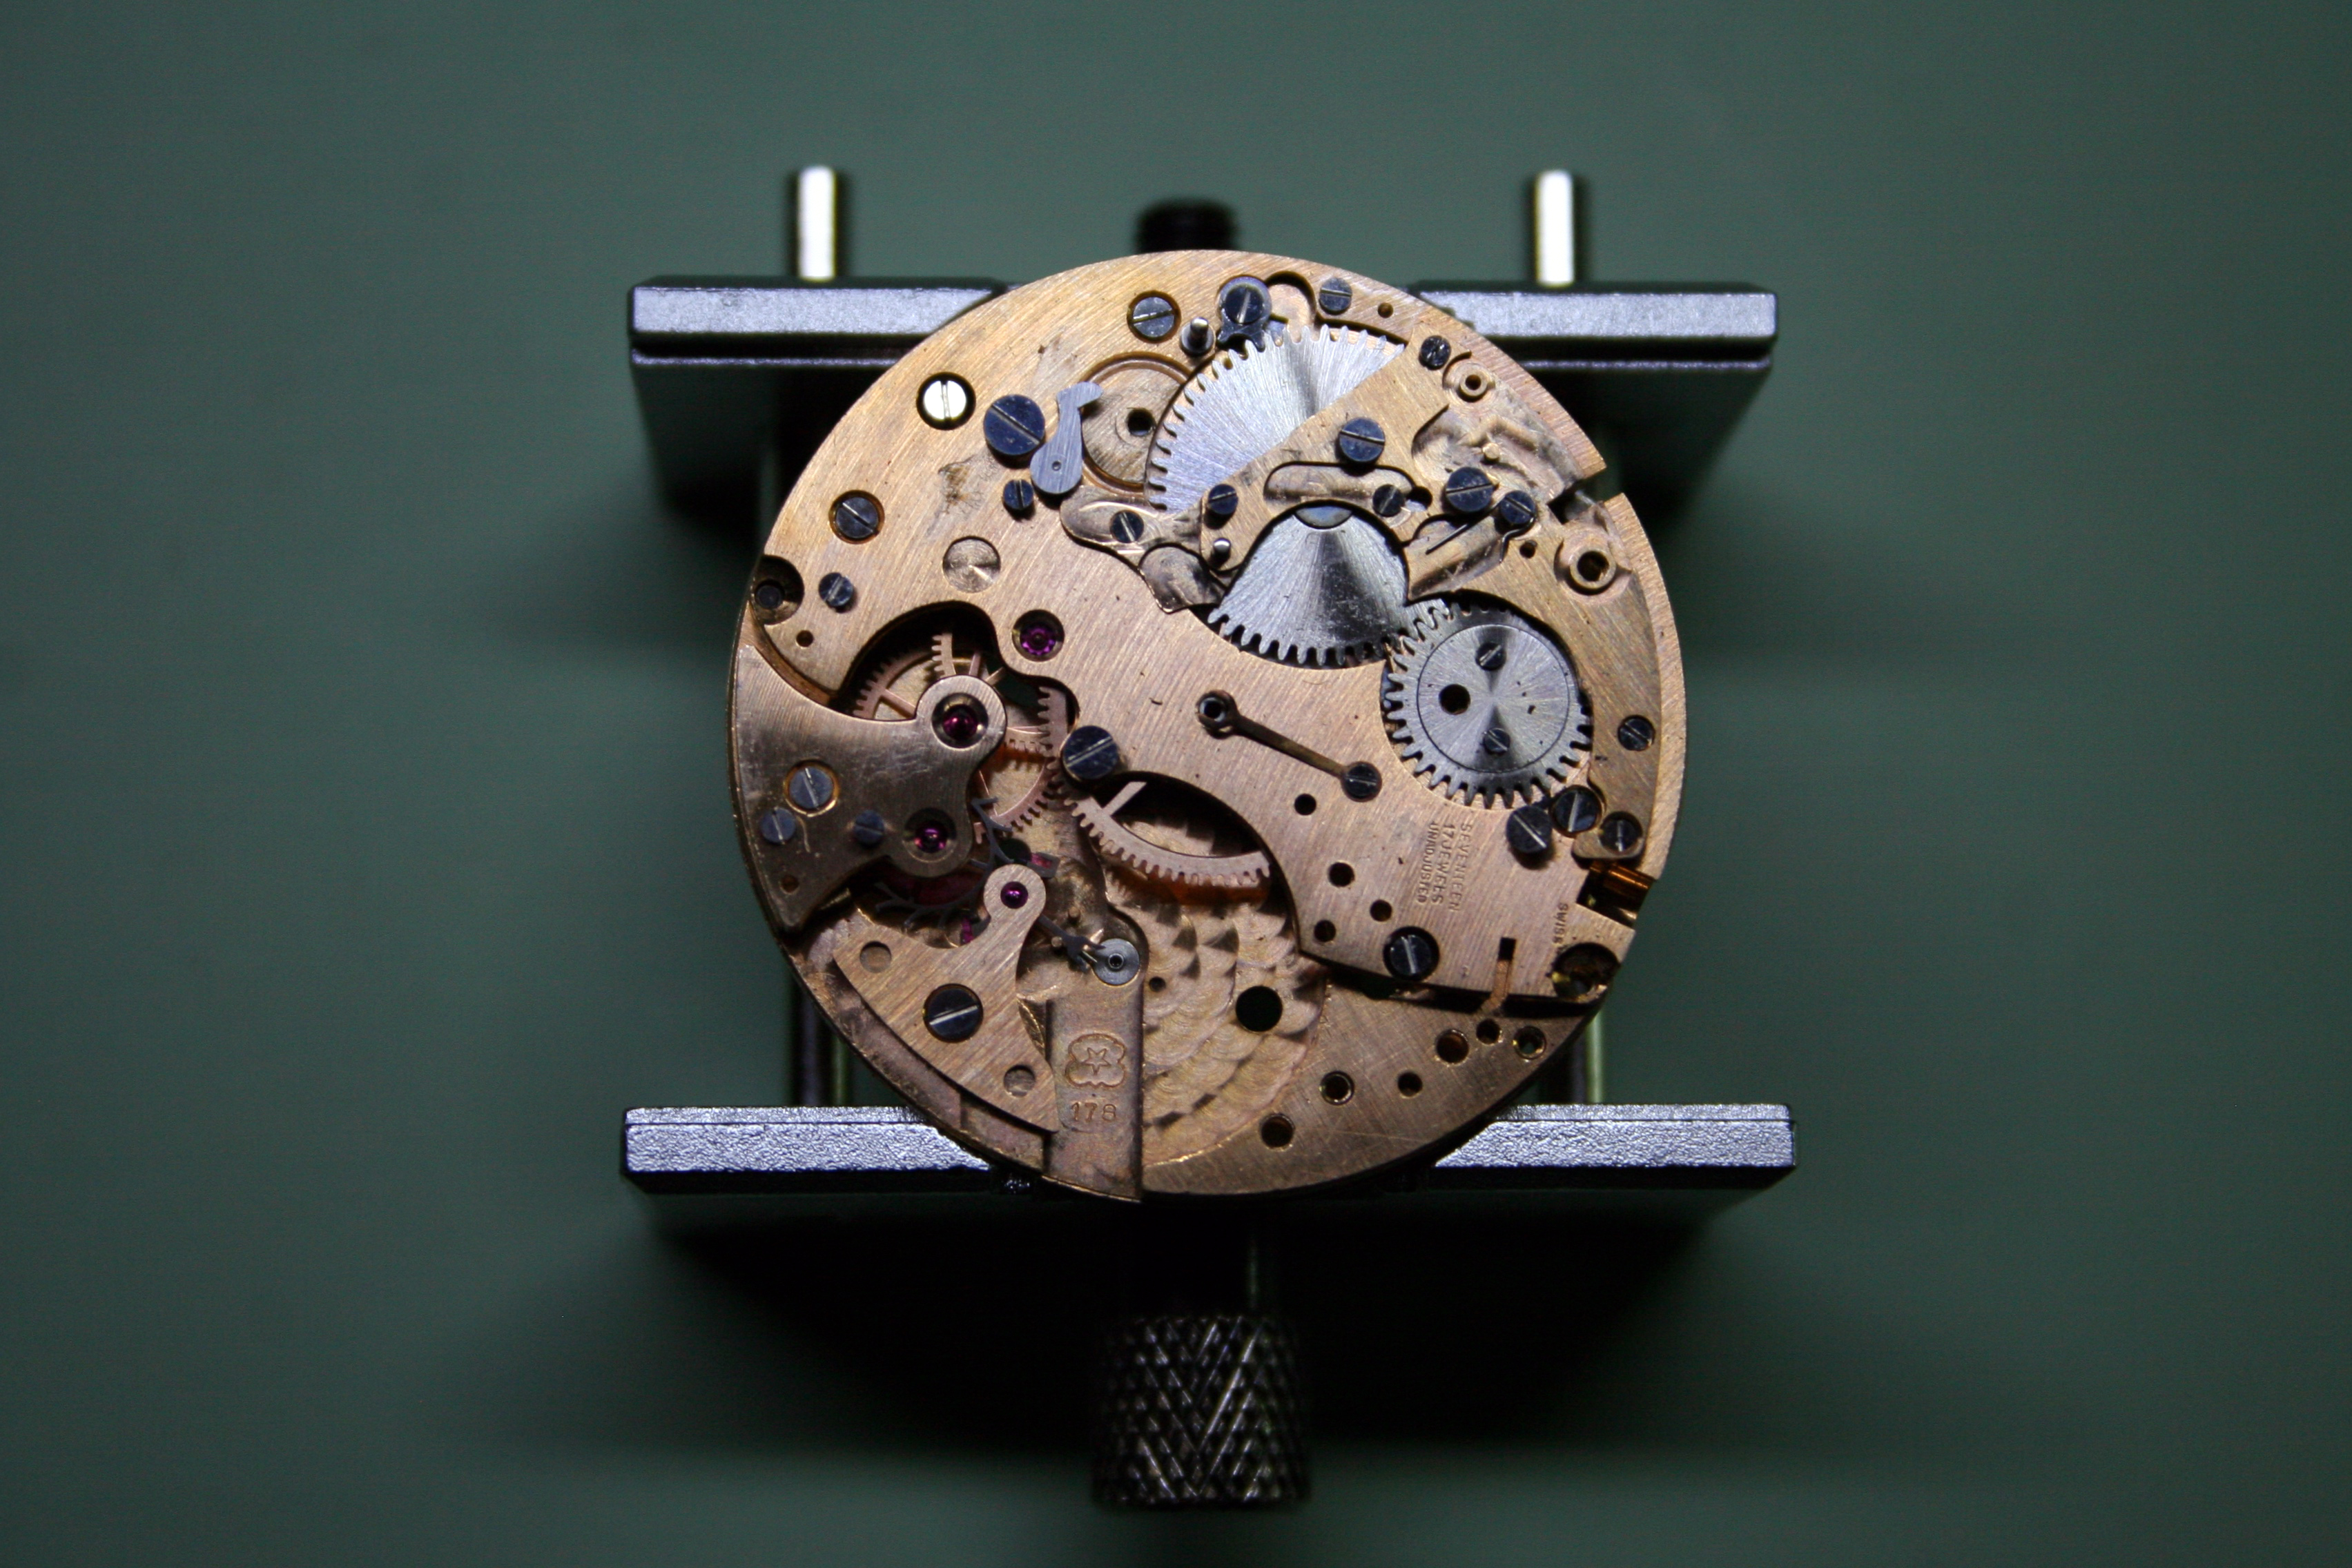
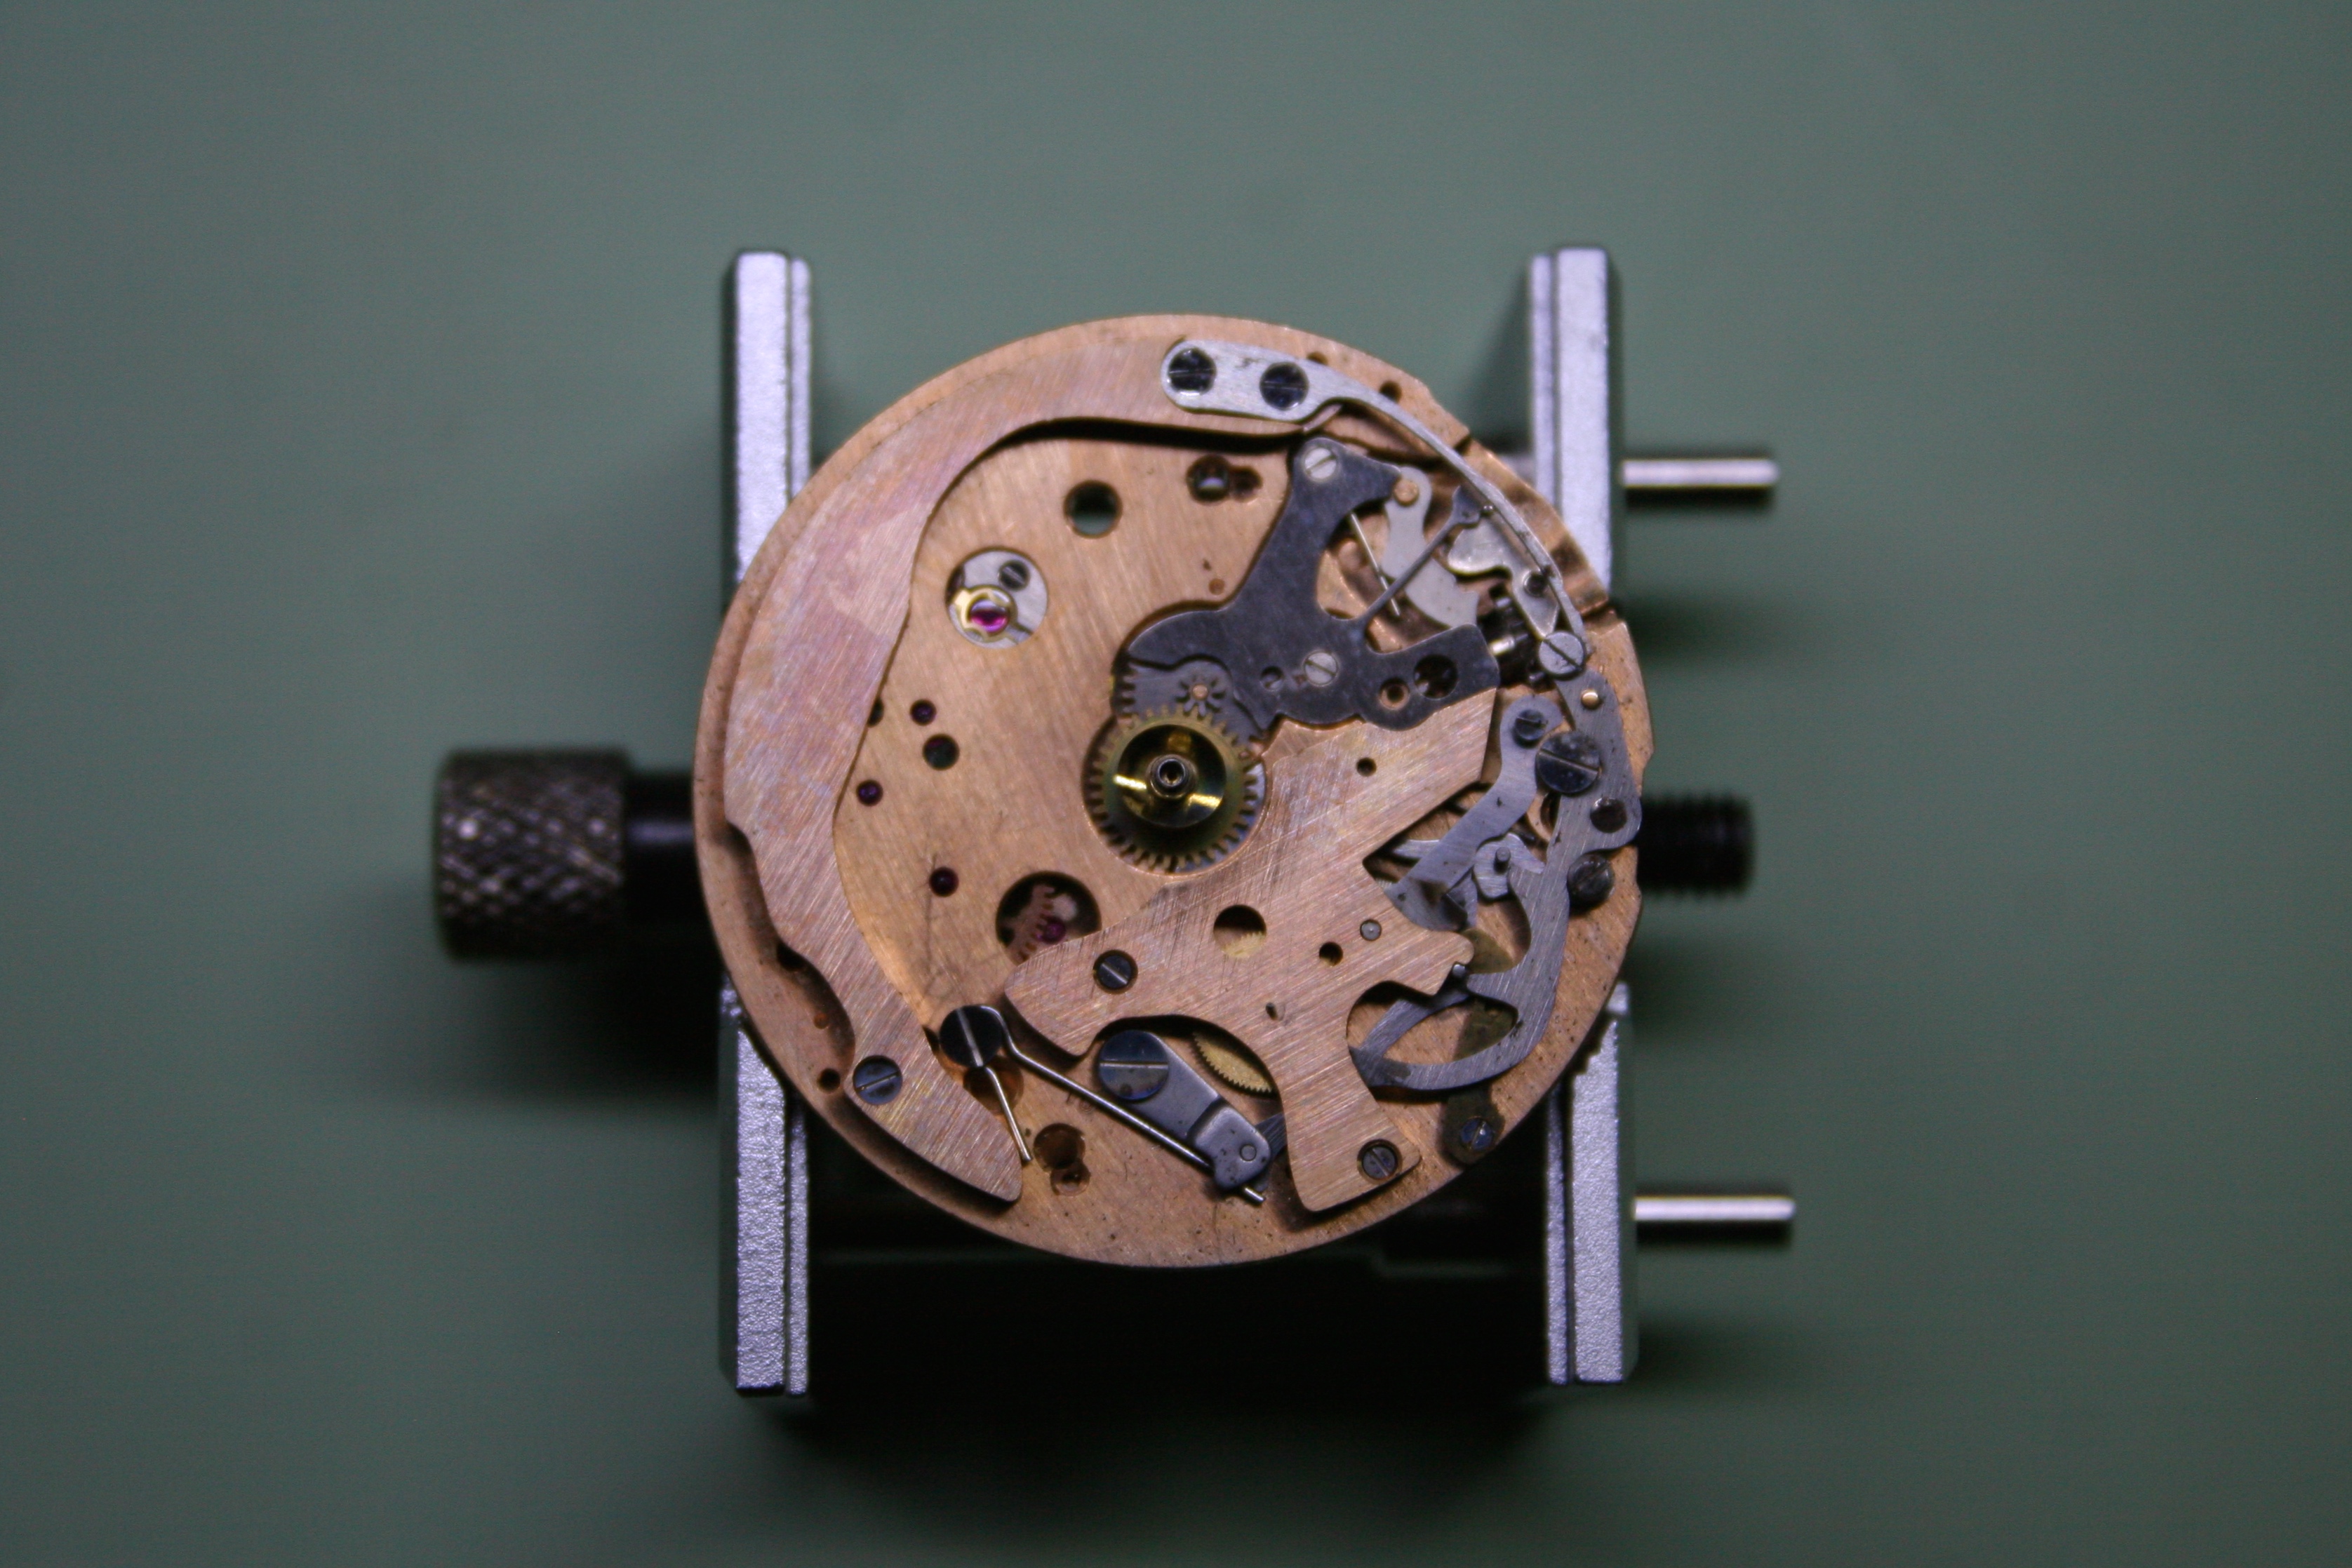
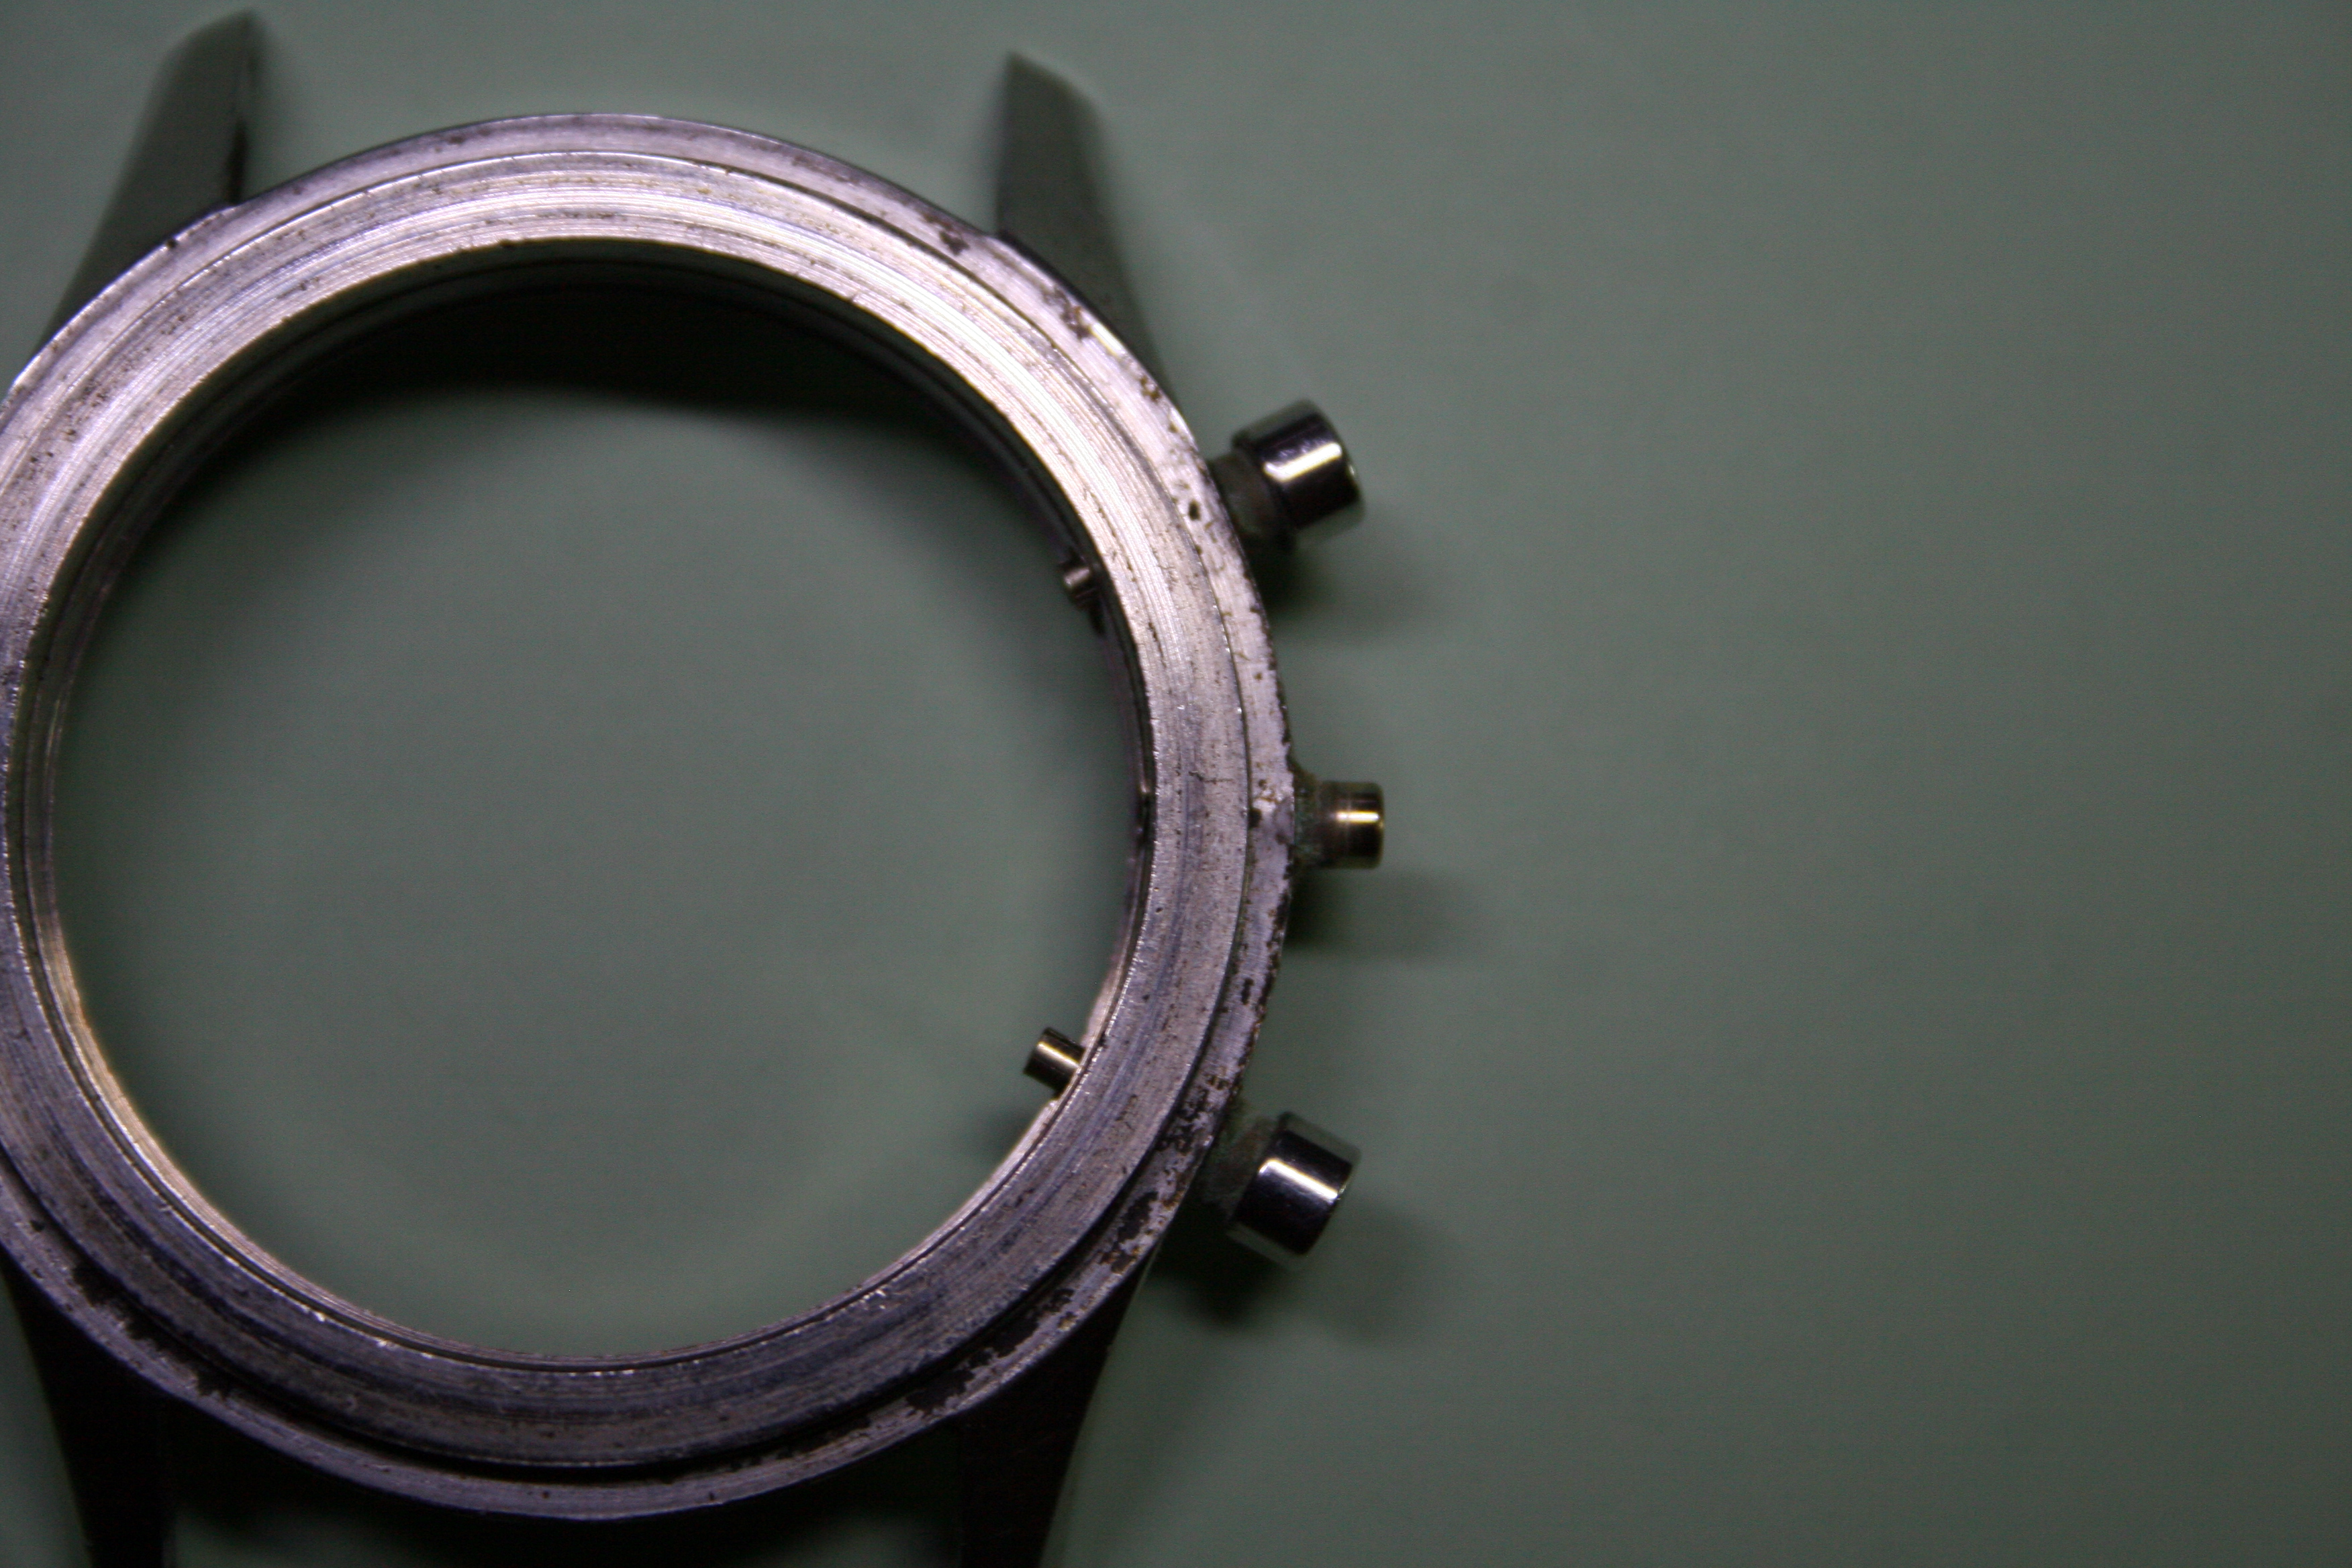
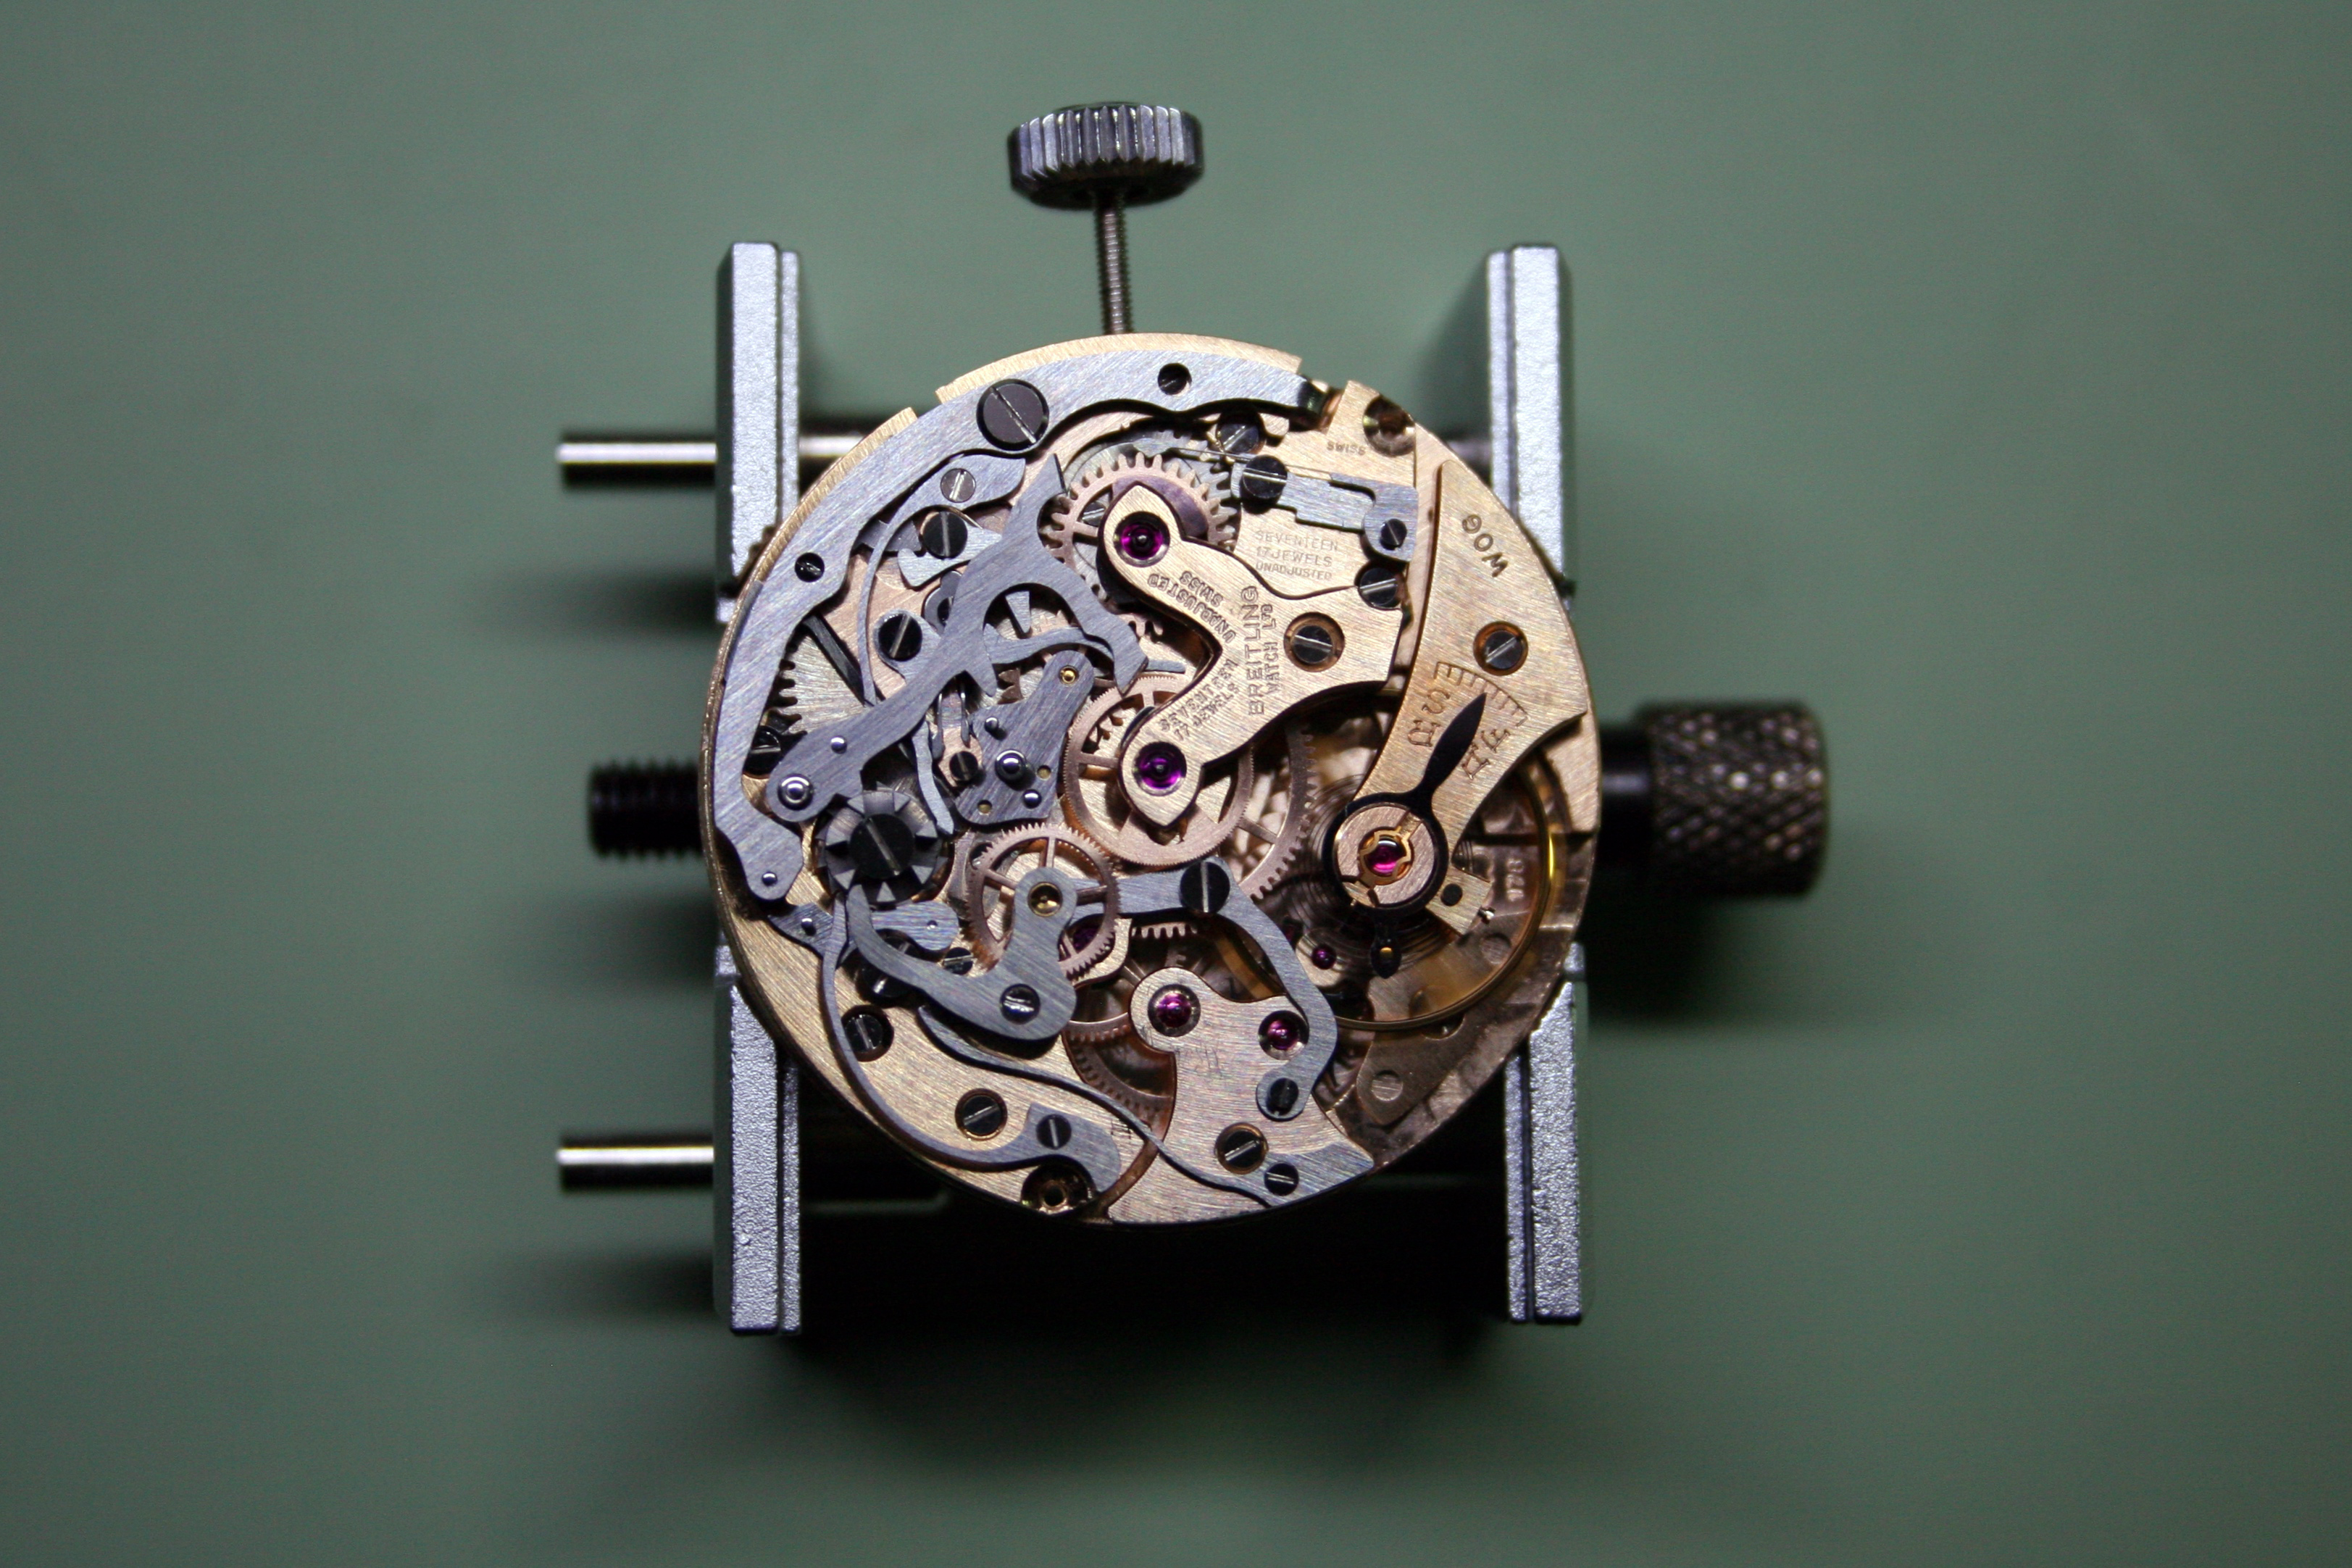
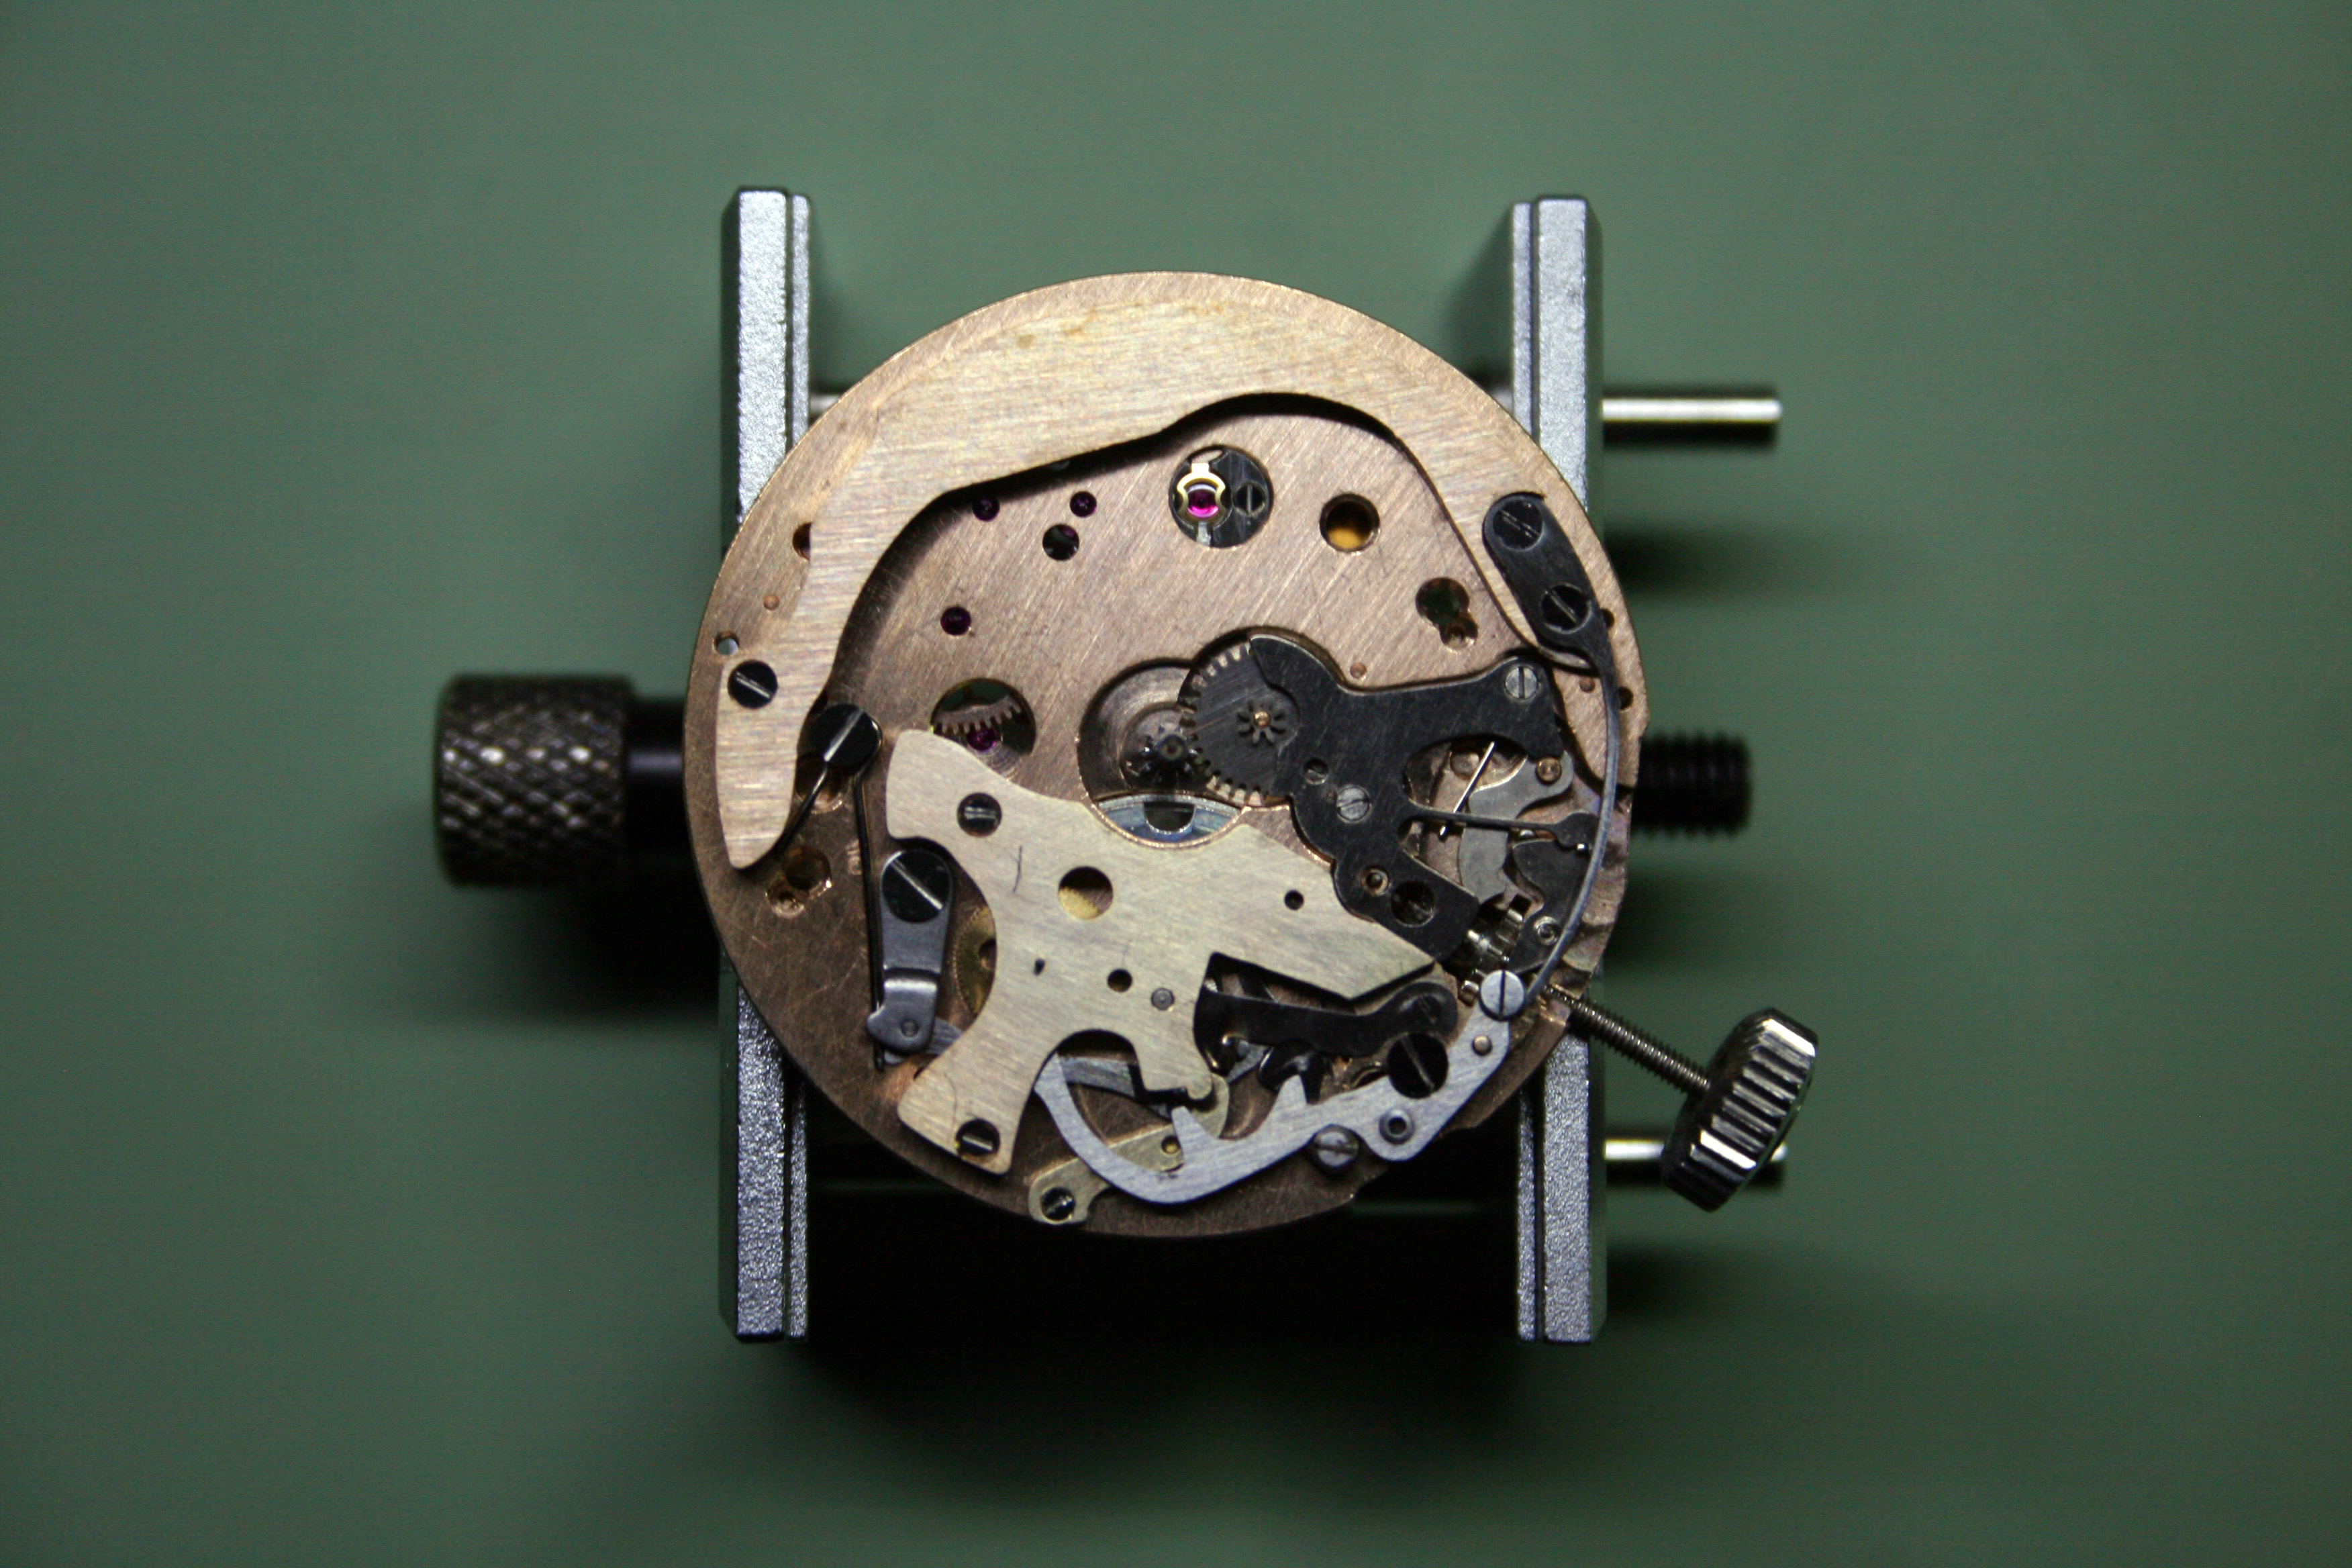
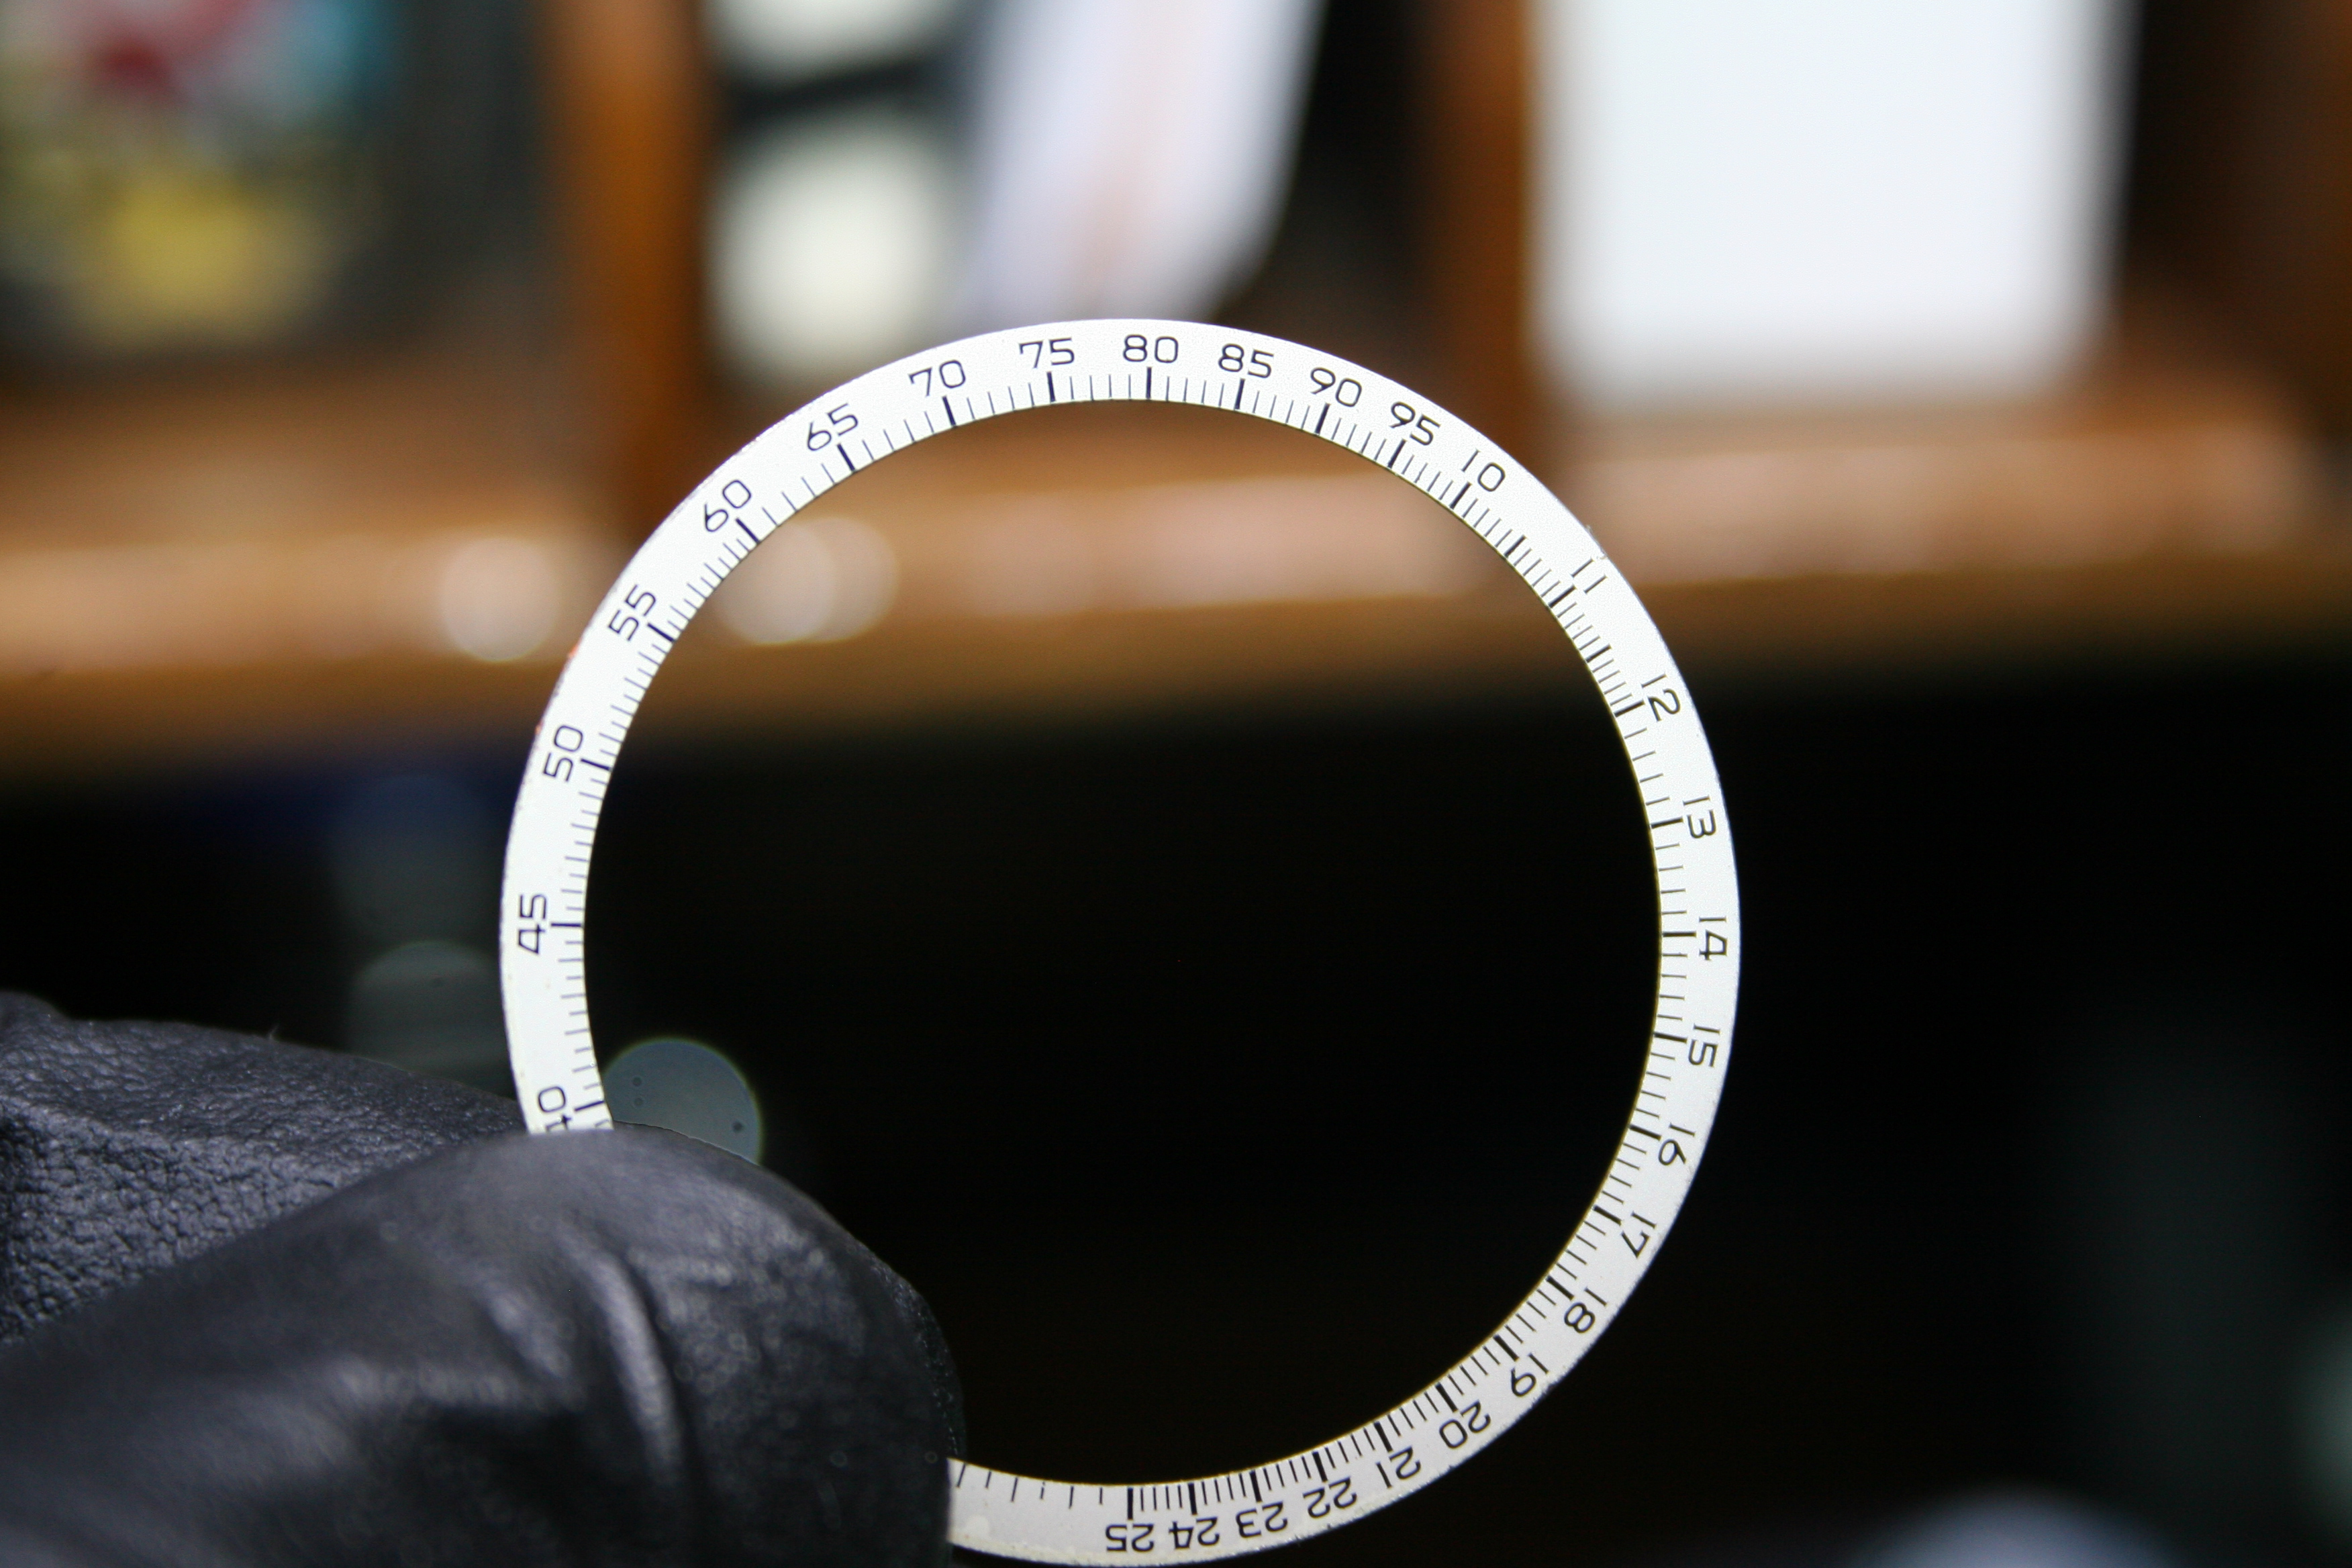
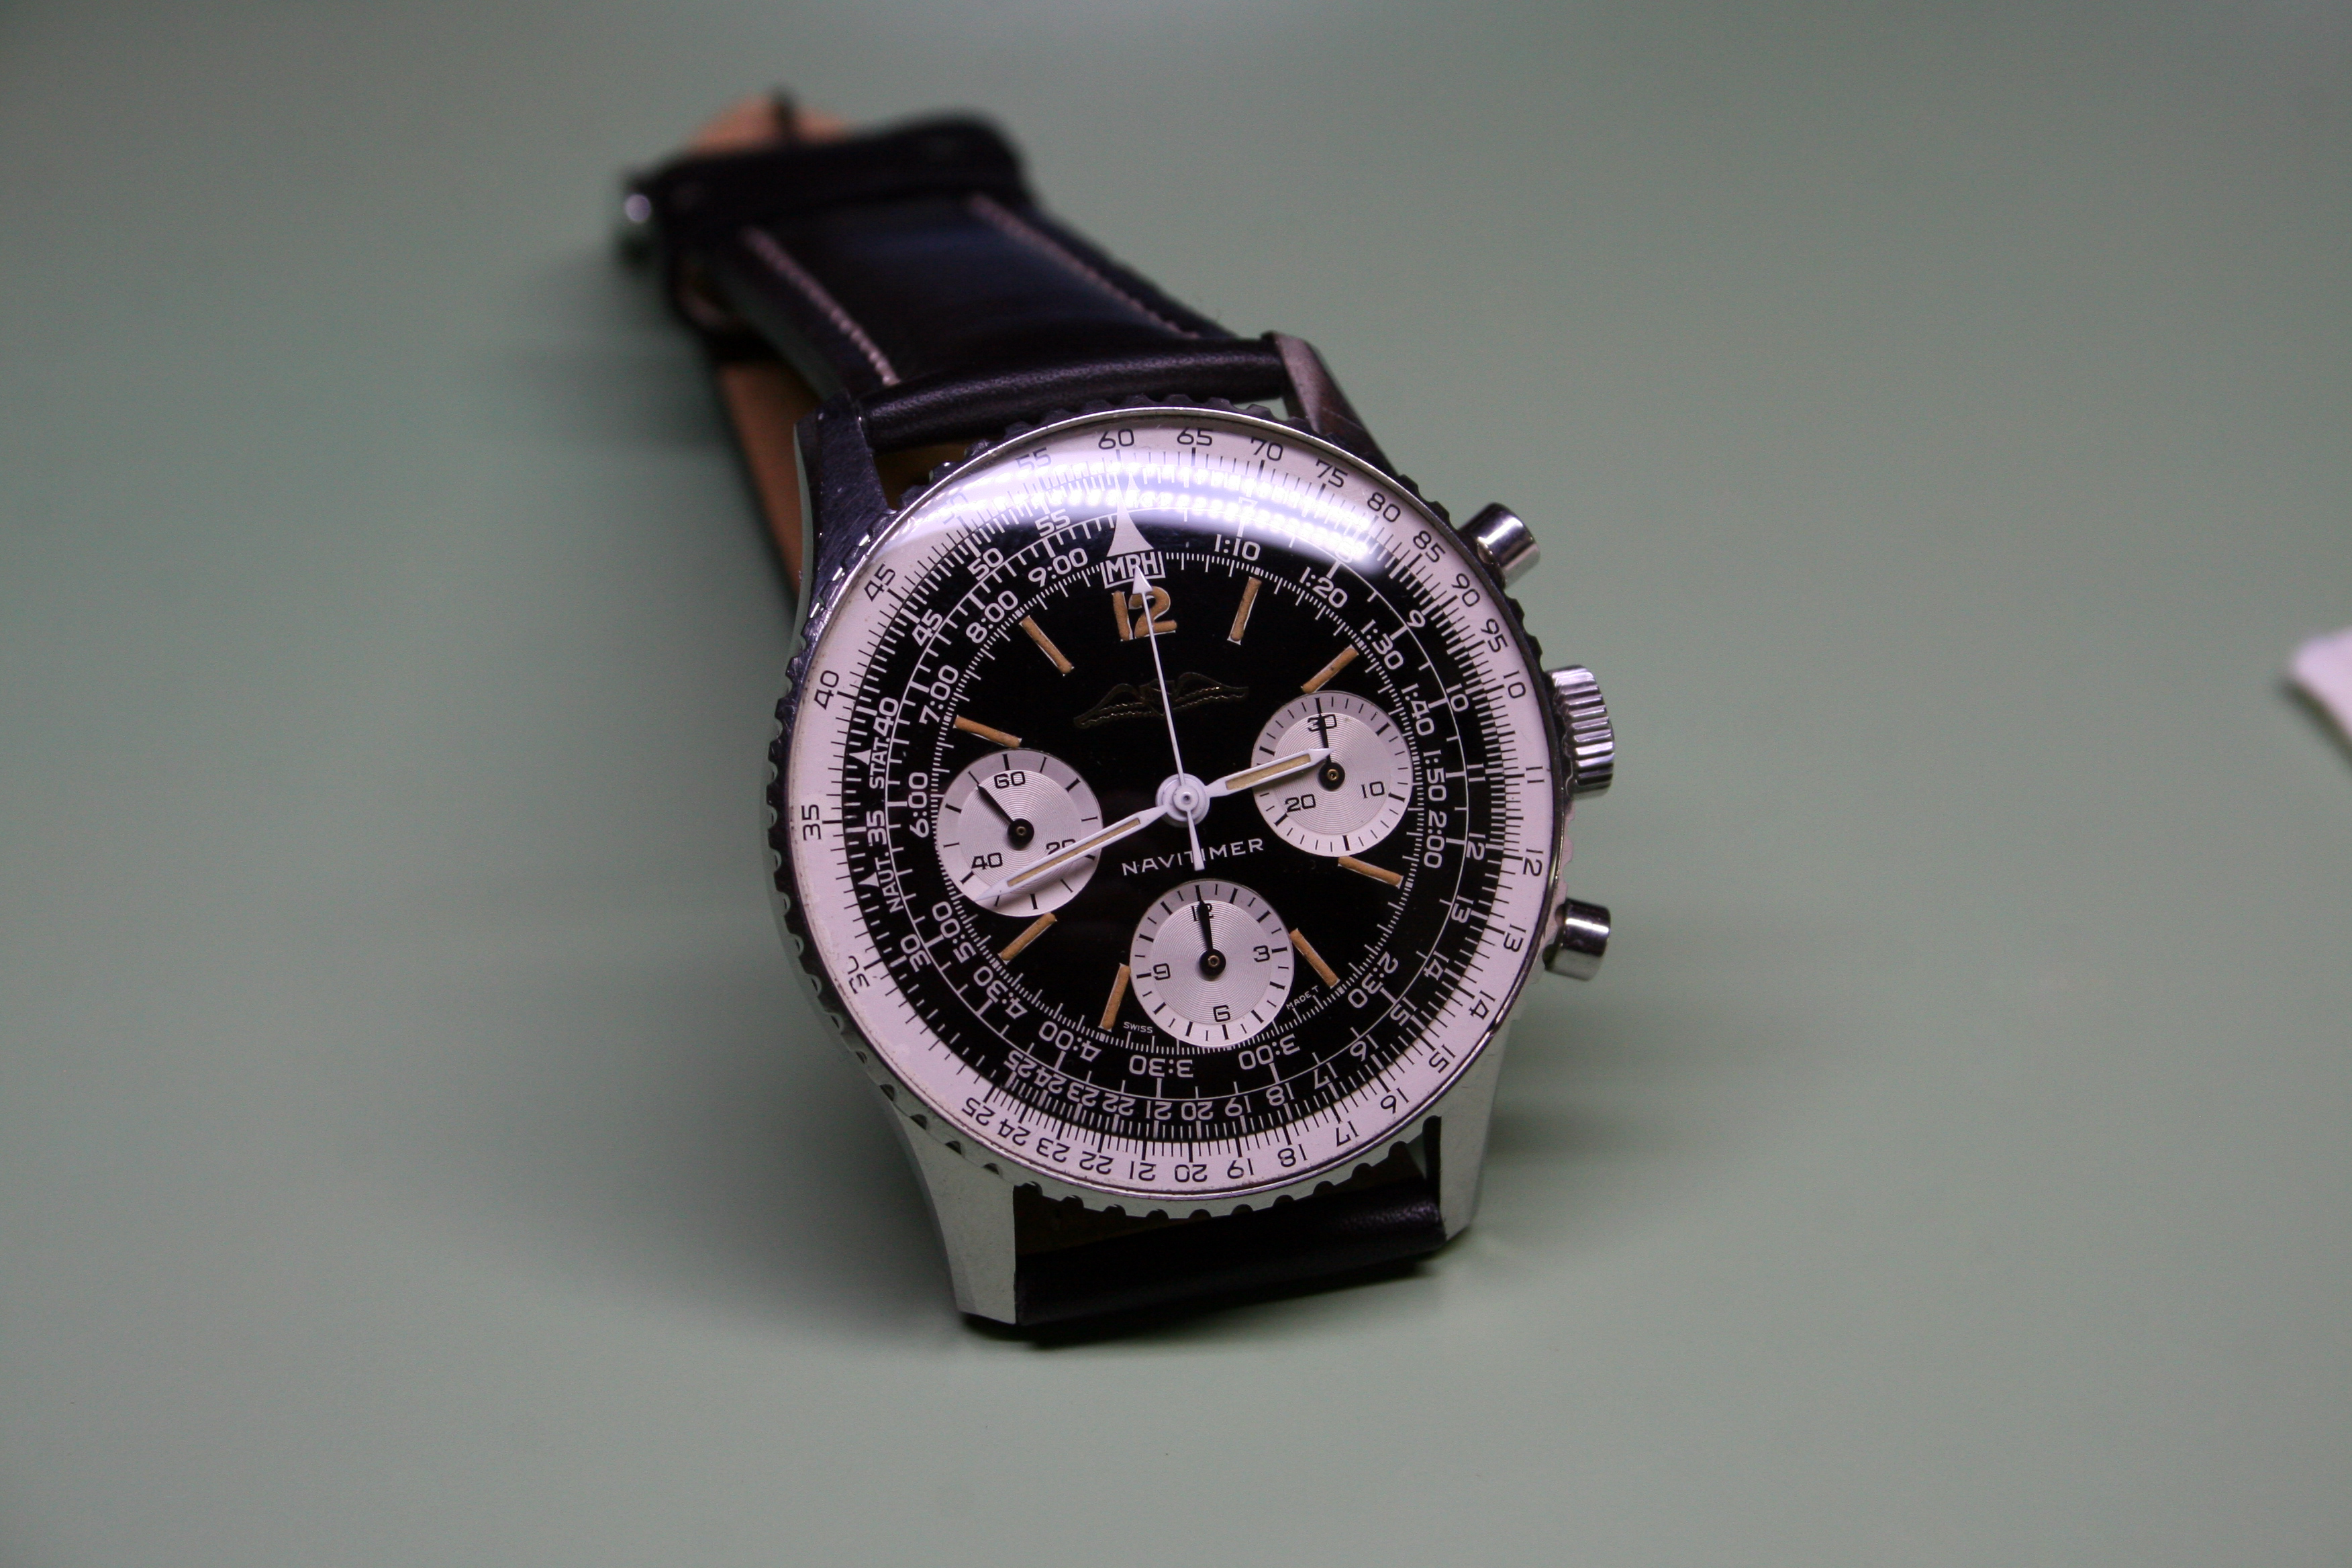
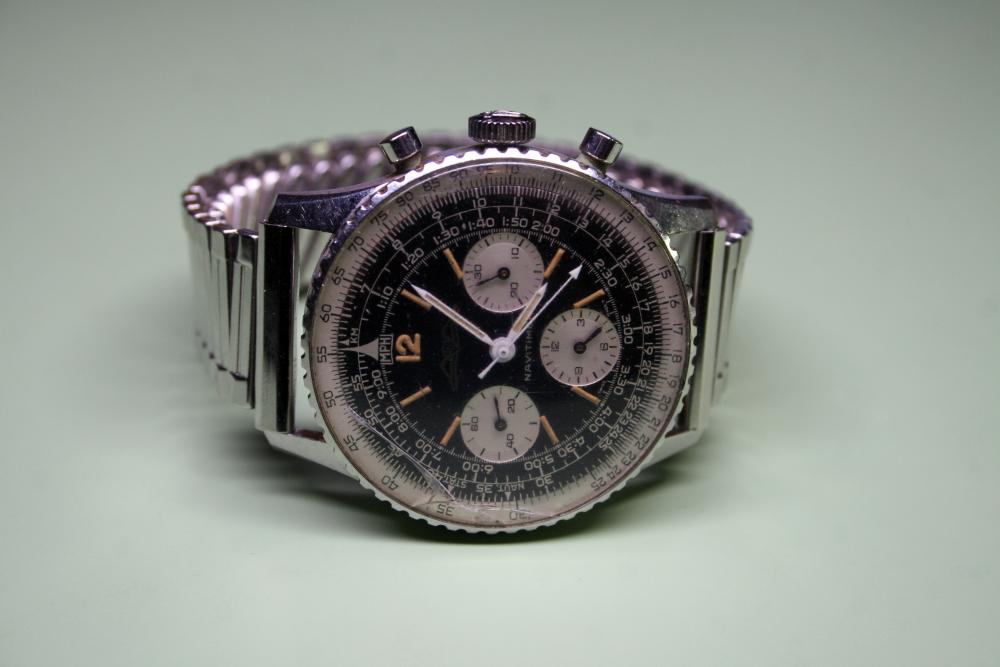
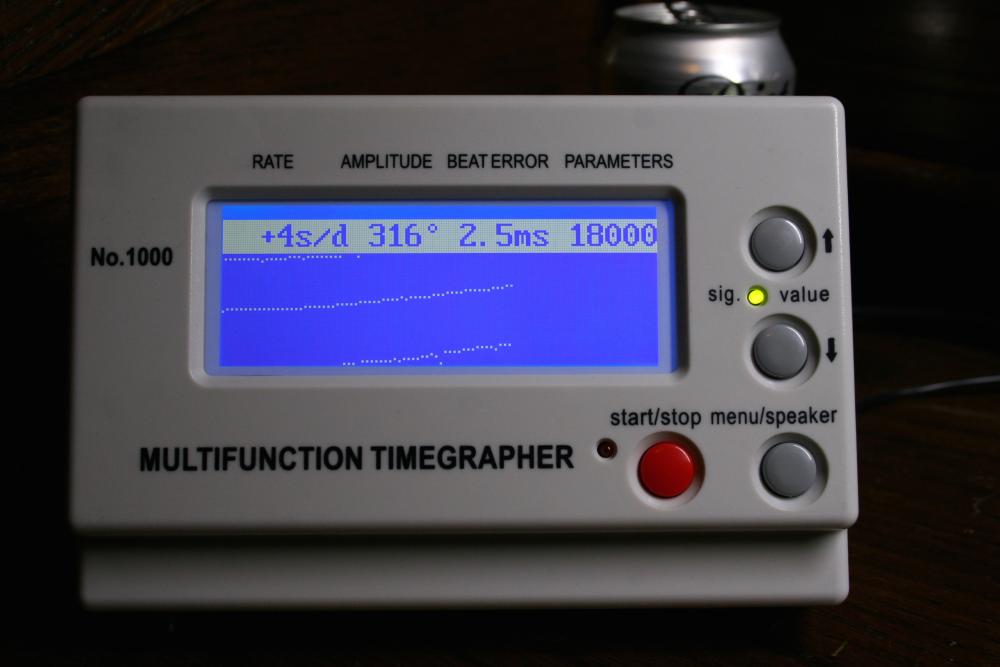
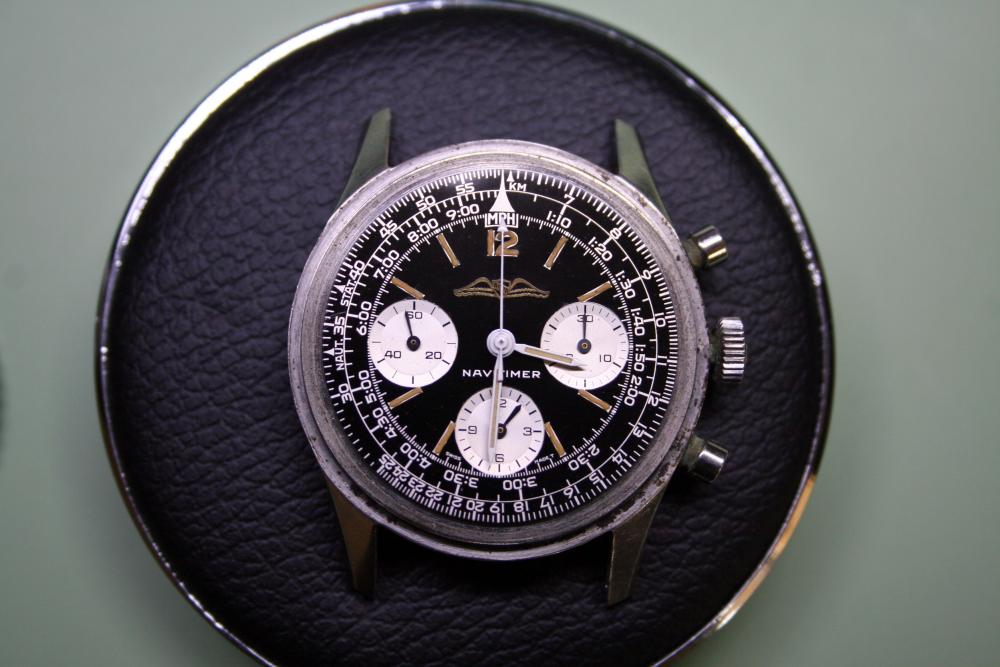
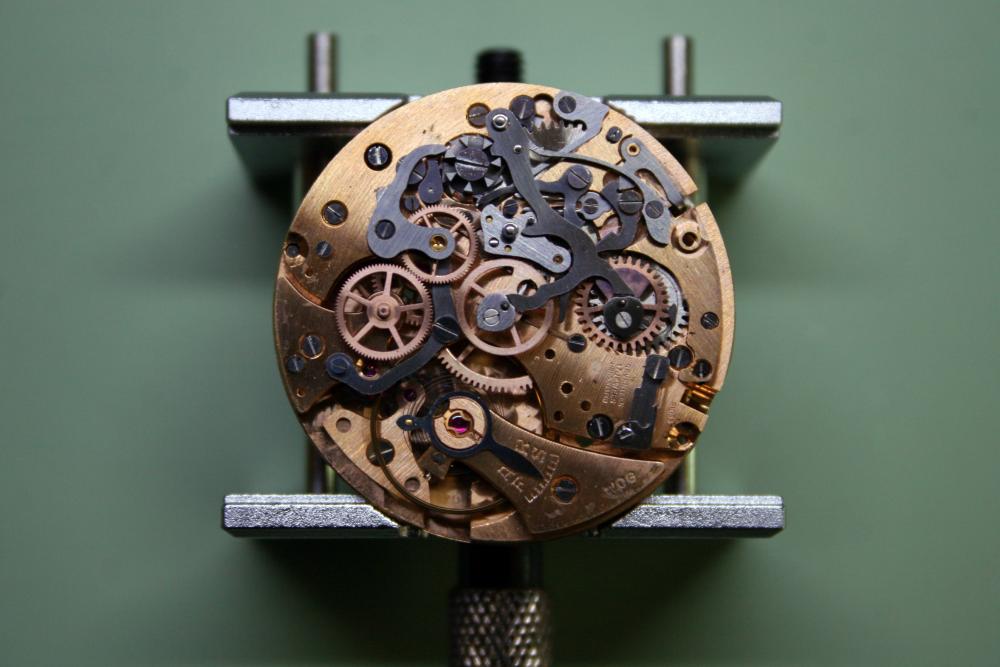
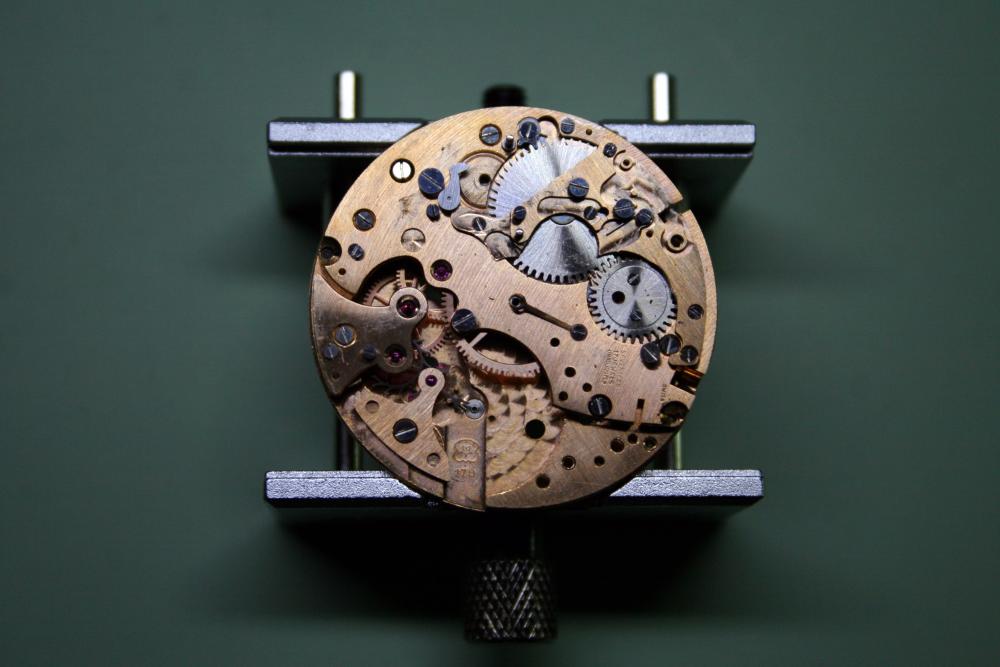
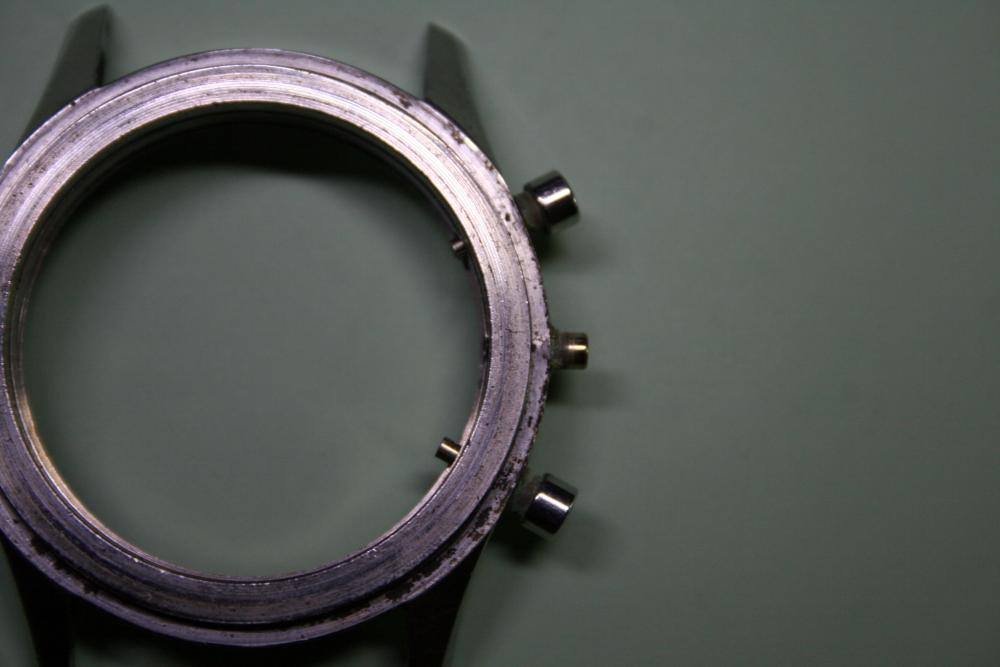
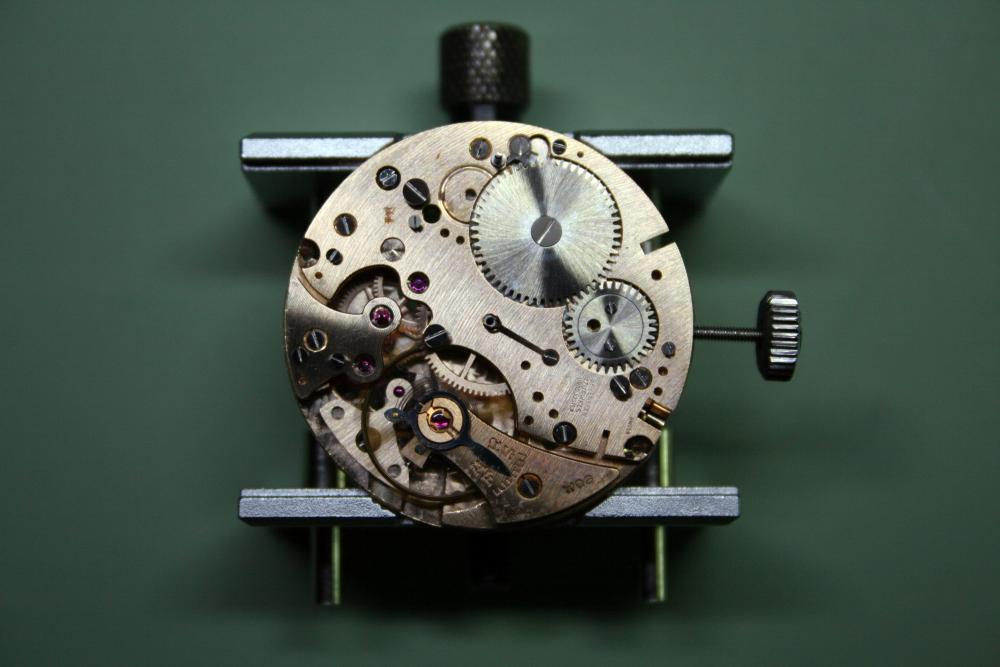
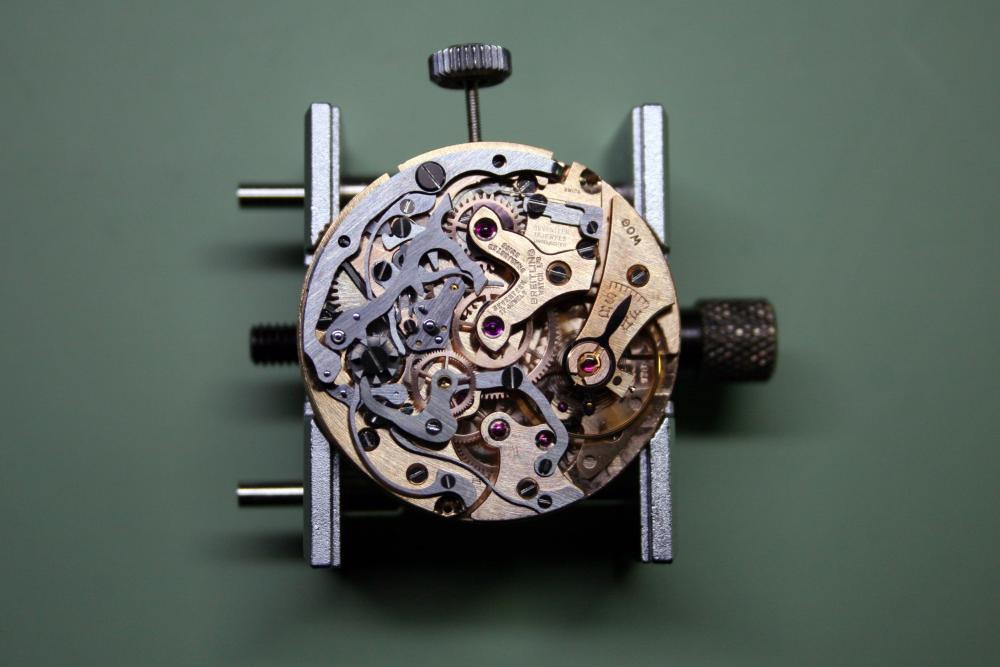
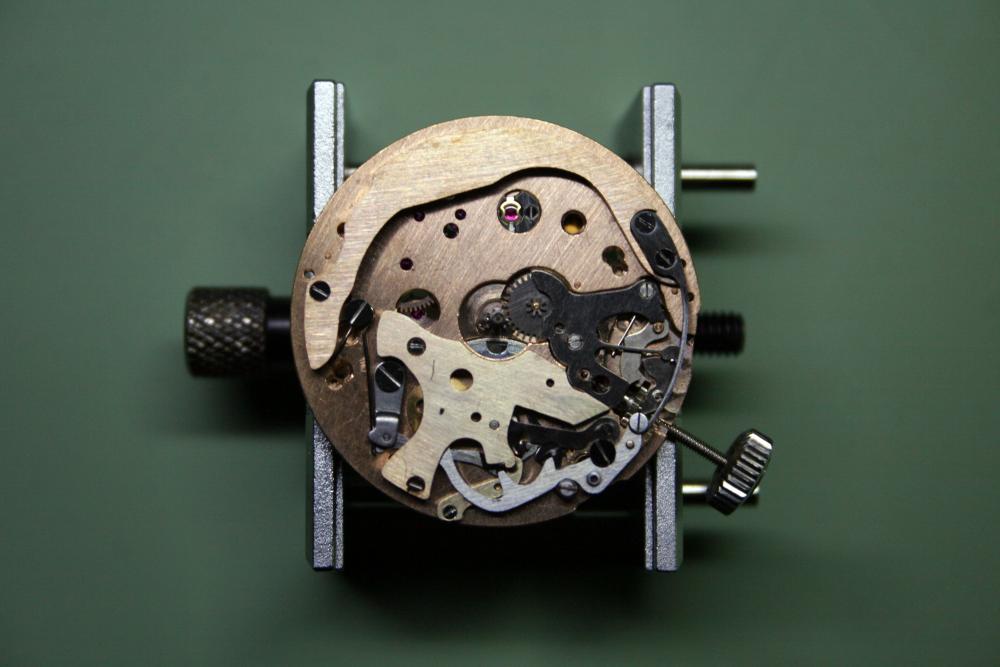
A few months back, I purchased online this Breitling Navitimer for a fair price despite the fact that the watch was non-functioning at the time. I did this without seeing the movement which was a bit of a risk as there was the possibility the insides were rusted out, but the price was right and the I figured I could resell the case and dial if the rest turned out to be a disaster. Things looked bad when I received the watch as it wouldn't run at all and the pushers were jammed. I noted on inspection that the dial didn't sit flush either which caused me quite a bit of concern. Removing the caseback revealed one of the case screws had broken off and gummed up the works. Extracting the screw head brought the watch back to life and allowed the chronograph to function properly as well. Knowing I would need to extract the remains of the broken screw from the plate in order to properly secure the movement and seeing that the watch clearly had not been serviced in a while, I added it to my queue. It would be a few months before I would have time to work on it, but I must admit to being anxious. I don't often work with watches of this vintage that aren't terribly weathered but the dial and hands here were in quite good condition. Removing these gave my heart palpitations but with a bit of patience and caution I was able to get to the engine without damaging any of the paint. The video Mark posted earlier of a Navitimer service was a quite a help also as I was a bit stumped when it came to removing the bezel. The watch movement is a Venus 178 which is a fine manual wind chronograph movement that was produced in the 1950's and 1960's. Contemporary chronographs movements would be the Valjoux 72 and Lemania CH27. Disassembly was pretty straight forward. The chronograph mechanism is bolted piecemeal to the barrel plate so each lever needed to be removed separately. I would remove each spring first to release tension then proceed with the removal of the accompanying lever. Each screw was then returned to its hole so that I wouldn't mix them up later. Pictures were taken throughout the process for reference. The dial side received the same treatment for the hour recorder and keyless works. I had assumed I would need to dissolve the broken screw in a bath of alum in order to remove it from the plate but found this not to be the case. Once the barrel plate was removed, enough threads poked above the main plate to allow me to grab it with my tweezers and slowly unscrew the remainder. I have an old L & R machine for cleaning movements, so the parts were separated and packed in small baskets before undergoing a cleaning in the appropriate solvent and rinse. The case, caseback, and pushers were cleaned separately in small ultrasonic cleaner. Since the shafts of the pushers are not the same length I snapped a pic before disassembly for later reference. Following cleaning, each piece was inspected under the loupe before reassembly. I can't stress the importance of this step! Reassembly was the reverse of disassembly. I referred heavily to the images taken during the disassembly process and also used the published technical sheets and representative Esemble-O-Graf. Before reassembling the chronograph the base movement was completed and properly adjusted. Despite having already procured a replacement, I reused the original mainspring as it seemed to have quite a bit of life still in it. My assessment turned out to be correct when I placed the base movement on the timegrapher and discovered the amplitude was fairly high. This is not a problem I've had before but since the watch had a full wind I felt there wasn't much need to replace the spring with a weaker one. The beat error was initially on the high side (3.1ms) but a bit of adjustment brought that down. I suppose I would be remiss if I didn't point out that adjusting the beat error was difficult as there is no beat corrector and the Breguet hairspring sits so low that it's difficult to see the position of the roller jewel. Assembly of the chronograph mechanism is laborious as each piece needs to be checked for movement and properly lubricated before moving on to the next. I had inadvertently mixed up a few screws on the dial said which added another hour of labor to the job as well. The toughest bit was the actuating lever for the hour recorder- it passes from one side of the plate to the other and likes to fall out when you try to thread the screw to secure it. Otherwise reassembly went as I hoped- no parts lost or left over! I cleaned the dial and slide rule with a bit of Rodico. The slide rule is set in the bezel before the crystal is dropped in. A new crystal was needed as well since the original was damaged beyond repair. Lastly, a replacement case screw was procured to reset the movement and a crystal press was used to reset the crystal and caseback. I added a black leather band as the expanding bracelet wasn't really my taste. For my next chronograph project I'm hoping for a Valjoux 72 movement or perhaps an Excelsior Park EP40. We'll see what comes along though.


 1 point

.jpg.2e97a9e543a5faf900914523fa4ee8f2.jpg)