Leaderboard


Popular Content
Showing content with the highest reputation on 05/19/15 in all areas
-
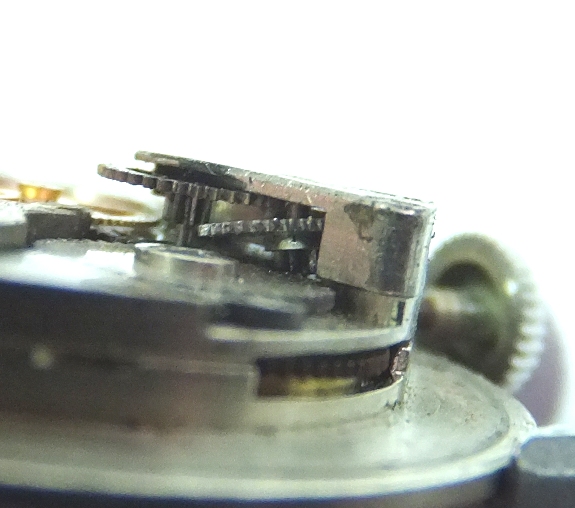
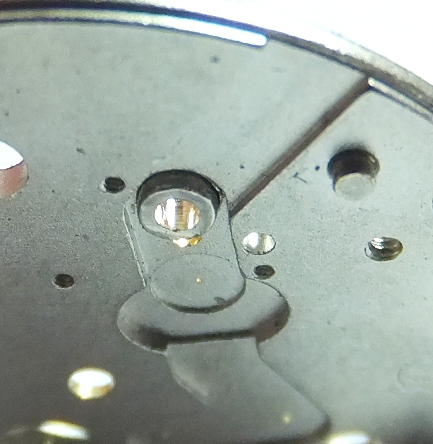
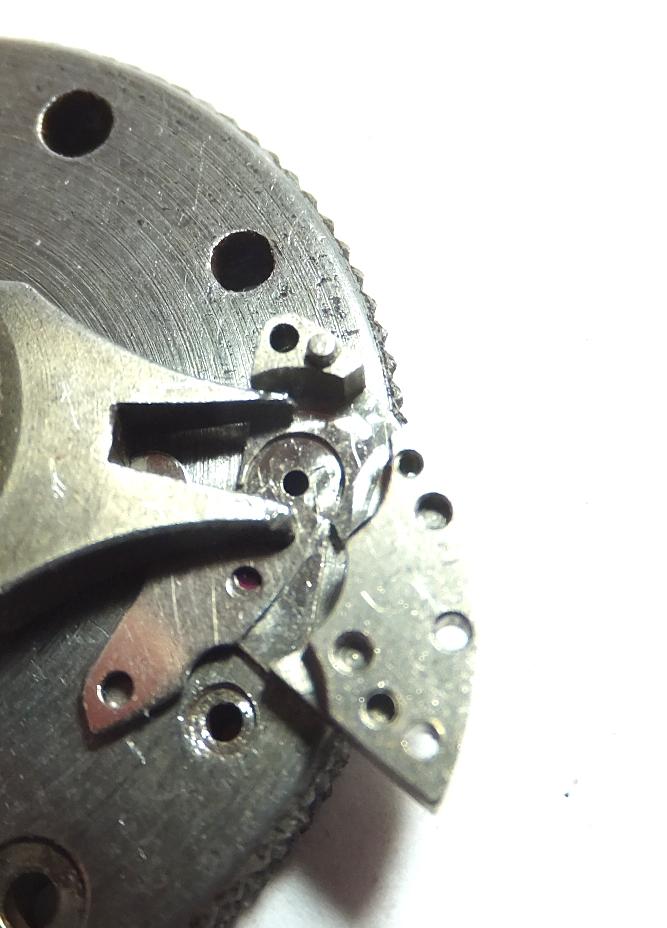
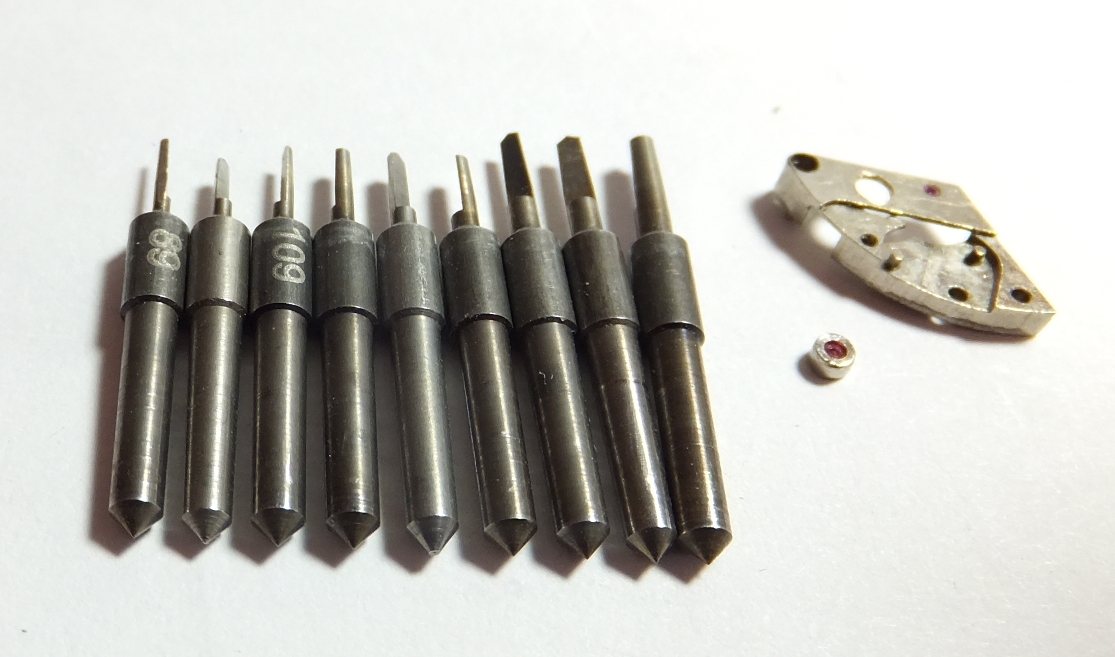
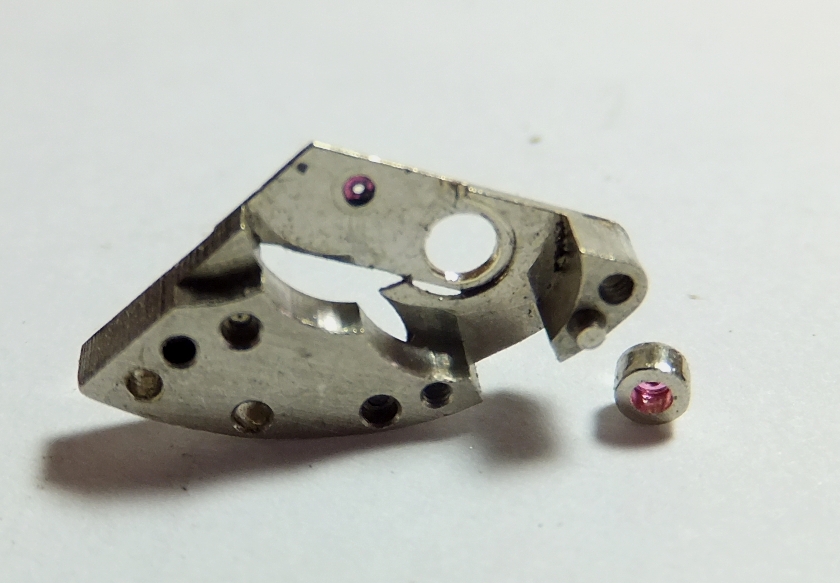
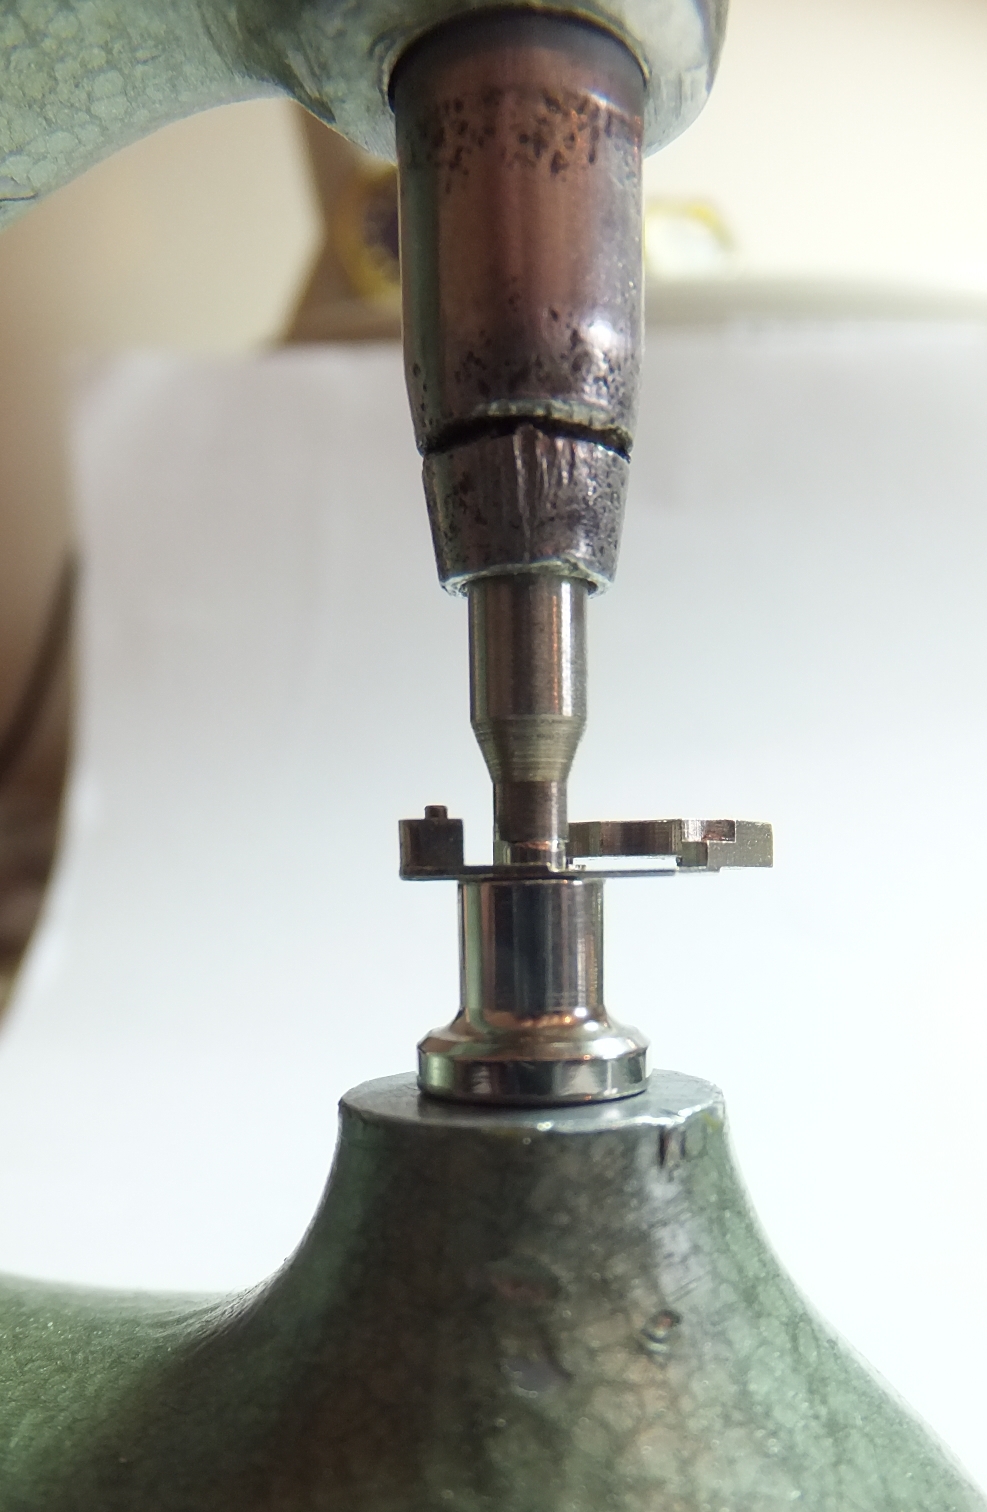
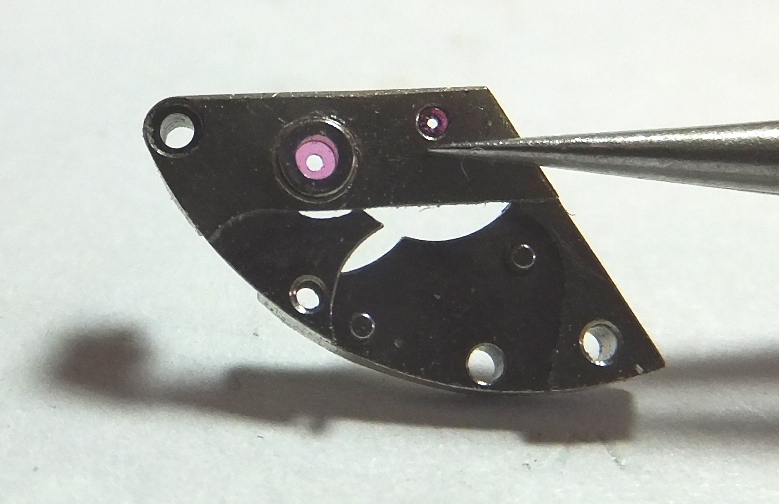
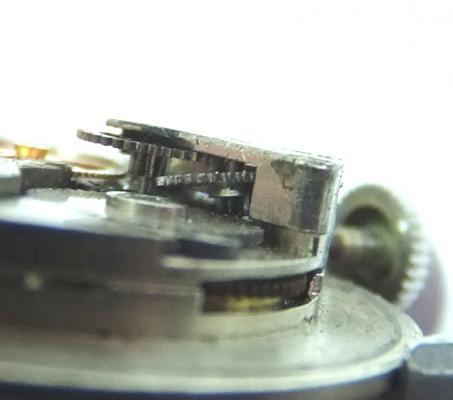
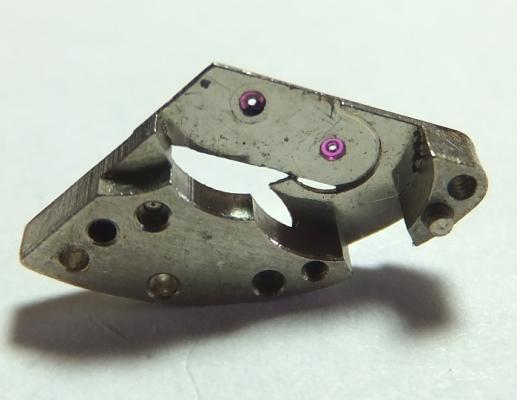
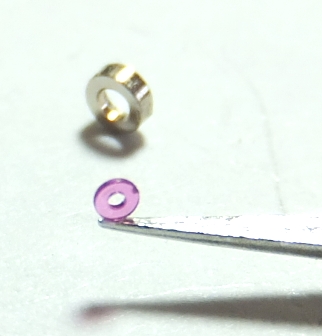
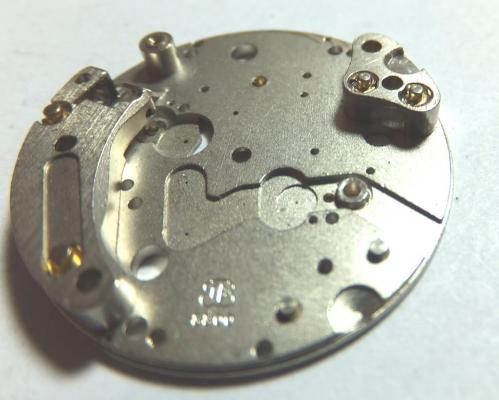
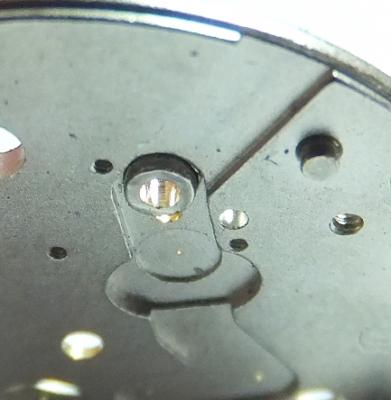
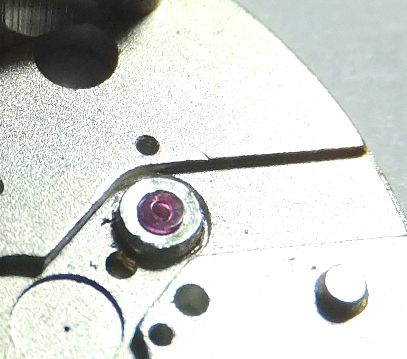
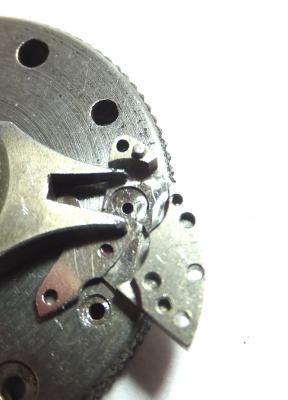
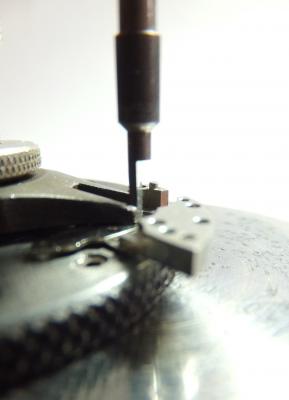
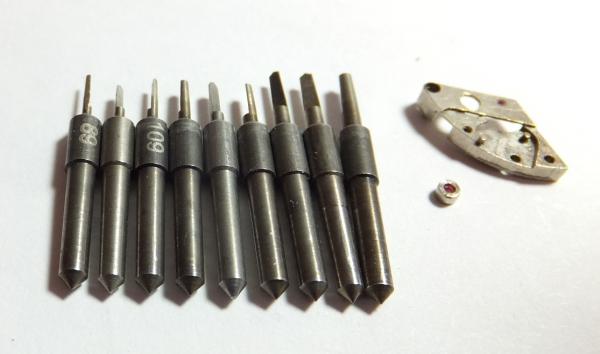
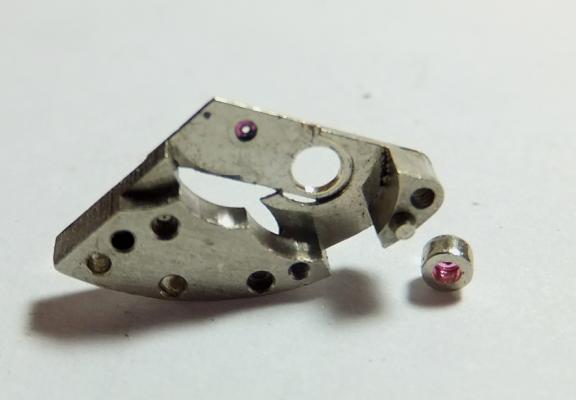
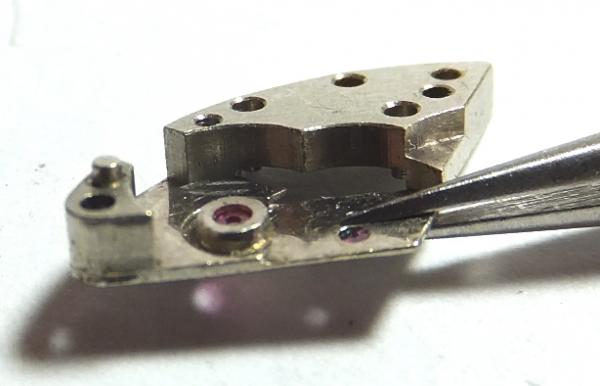
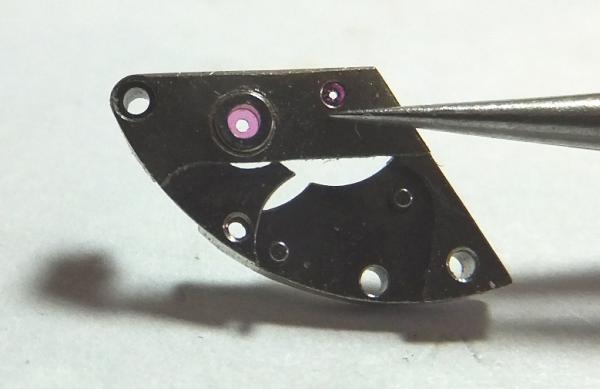
Hi, this was my method. Be it right or wrong, it worked. Took absolutely ages. Just to lower a jewel 0.3mm. Jeez This was the problem. Top pivot totally gone. Tried everywhere for one ..... even India, Philipines etc. This is the Jewel I am going to install...... Had to make a hole to take the new bush to allow reaming as the bush is 1.9 mm...... this is an old Gash plate Let the reaming begin............ Jewel in new bush.... Inserting Jewel into Bush Removing Bush from Plate Jewel in Bush Now the Bridge...... Preparing to Ream.... Used reamers in steps of 0.1mm to increase aperture for Bush..... Bridge & Jewel in Bush....... Insert Bush into Bridge....... Bush in Bridge....... Phew, all done and back on watch............ Laborious, but saves another watch. Overall, the finished works look no worse than the patina on the watch already


 3 points
 -
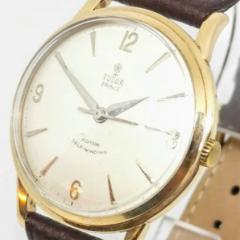
Greeting folks :) Now i know you've seen me in the advice section a few times ( too many times lol ), but i figured that i should share some of my recent repairs that are a success rather than a mess. I do manage to succeed 90% of the time with my restorations but no harm in asking for help when i know im stuck ;) So today i finished two watches that i had been working on, one being a nice automatic and the other a more classical manual. I can't quite put my finger on why these simple watches are such fun to work on but i do enjoy some of the more basic pieces. Both had a few issues but nothing that a good tinker would not put right. Both movements were crammed up with old oil and gunk and few small parts had seen better days, luckily i have a draw full of spares that brought new life to this pair. Casings have had a light polishing with scratches removed from case backs, new glass and a restored glass, new crown for the auto, and a nice but simple pair of straps to finish. Tissot Seastar Automatic GP ( Cal 784-2 ) & Rotary 21 Jewel Incabloc ( Cal AS 1702 ) Tissot - Has nice new gaskets, new AT Glass, and a nice new gold crown to match, the old crown was Tissot but silver ? Lord knows ? Rotary - Simple but effective timekeeper :) The poor Rotary was swimming in oil and dirt from where someone had previously tried to murder it by drowning, luckily i have two very good cleaning machines ;) I forgot entirely to take photos of the Tissot engine but im sure most of you know what an automatic looks like by now ha ha :) Anyway i figured it was time to share some success rather than my stumblings. Enjoy :D2 points
-
earlier post got stuck halfway and I cant edit?..anyway... Check the pivot holes in your truing caliper, the holes should be deep enough so that when you tighten them up they sit against the shoulders..this will give the staff some additional support as the pressure is taken by the shoulder. The tool part should be a bit concave before the holes start. Before removing the balance from the old staff, you should eyeball the balance assembly to ensure no gross misalignment is present. Any such misalignment can be corrected before removing the balance from the staff. When removing the balance from the staff, use the correct tool!. It is tempting to 'short-cut' the process and push/pull the balance off the old staff once the rivet has been ground off but remember that the balance arms are very thin and weak, pushing on the edge applies a lot of stress on the arms and it will bend. Before installing the balance, inspect for any metal or burrs which will get in the way of the balance seating correctly. Once balance installed on staff, check alignment before riveting. If something is not correct, remove, correct the balance, re-install, re-check. repeat until alignment is perfect. When riveting,the first strike should be firm and square. You're staking set is important.. make sure your stake tips are correct for the job and even. hope this helps! Anil2 points
-
Recently been working on a Seiko 4205. And while being ever so careful, or so I thought, the date jumper spring just disappeared from my sight like a flea jumping. It is about the size of a nose hair. I spent the next hour crawling around on my knees in the vain hope I might find it. I decided to try again next morning in the daylight and once again covered every inch of the carpeted floor with a magnet this time, then dismantled bit by bit my desk and surrounding workspace. Almost 1.5 hours later and not a sign. Oh well I thought, it happens. So I was pondering over what to do with the dismantled watch and happened cast my eye around the parts tray. Couldn't believe what I was seeing, there in the parts tray was the blasted spring. Not only that, it had landed in the same segment as the other parts for the date setting mechanism. Got to be honest I did have a cursory look in there when the spring shot off but not really expecting such a thing possible I missed it. Dead lucky really, at least I can carry on with the job. But I just keep looking at the thing and shaking my head in disbelief.1 point
-
I drove up to Derbyshire today and, by prior arrangement, met up with forum member GarethS - and a great pleasure it was. We chatted for an hour and compared watches - I'd brought up some RR pocket watches to show, and I was mightily impressed with a lovely Longines of Gareths. Nice place - Buxton; good bloke - Gareth; great watches - both of us! Must do it more often! Will1 point
-
Now that's a first for this forum! B)1 point
-
As a brief addendum to the last post, I have an update on the Rotopower. As said, I have it sitting face up in a jam jar lid with lighter fluid in it up to just below the stem tube. I've put a bit of cling film over the top to stop the fluid evaporating and have swilled it about a bit to try and get the fluid to penetrate the cack between frame and case. I just went to the kitchen to make a cuppa and gave it another swill. Blow me, it's running! Sitting there, paddling in lighter fluid, has oviously cheered it up. If the fluid has seeped into the movement it'll be like a little washing machine in there. Cool huh?1 point
-
Excellent Will. Hopefully more of us will get a chance to do that sometime. :)1 point
-
Hiya I am just as green as you are and I am also building up to it :pulling-hair-out:1 point
-
Very, very well done. :) Just yesterday, I had to reduce the seating level in an old no name movement to take a donor end stone setting. It had to be done and another watch is saved from watch heaven. If nothing else is available, it's perfectly acceptable to make modifications to enhance/save a watch - that is the nature of the job, and what keeps the job interesting to be fair.1 point
-
Anil, I tend to short my responses thinking common sense or skill level would know. I like your response very much as it goes into deep detail and answers a lot of areas that may be over looked. Thank you for your participation and effort. :)1 point
-
Welcome Henrigue, I believe you insert a pin or small screwdriver in the hole of the outer post and turn it to free the hairspring. At least that is what I have done in the past.1 point
-
Excellent job Kieth, and very well illustrated. :)1 point
-
Ro63rto. Think its designed to sit on a desk or table, its only 11" high. Keep us updated Don, been thinking of something similar myself.1 point
-
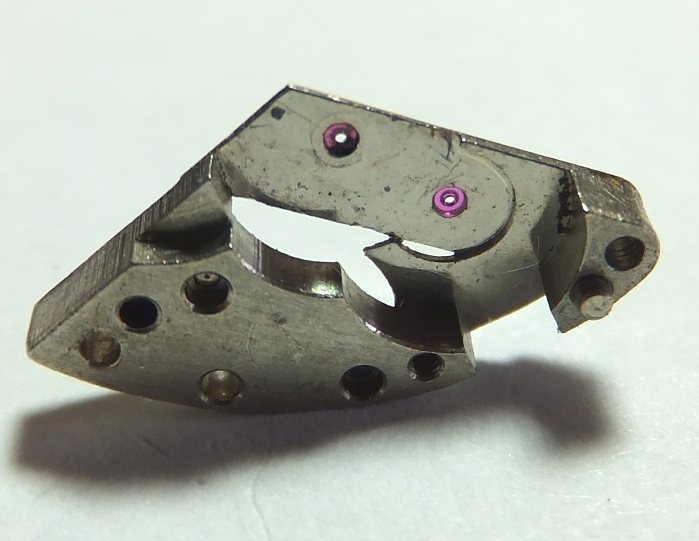
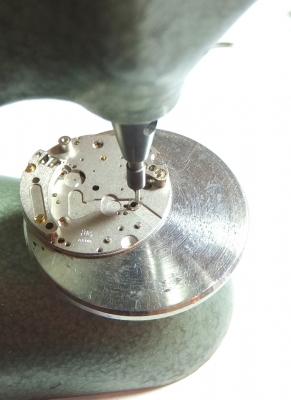
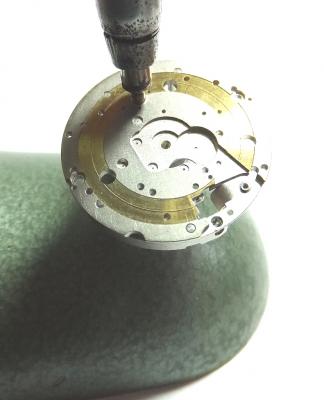
Patek pocket watch repair – Part 2, making and replacing the balance staff, new stem fabrication In Part 1 of this repair I had to make a new arbor for the escape wheel (see my earlier post if you haven't read it). Unfortunately the bottom balance staff pivot was bent and when I tried to straighten it out with my Seitz pivot straightner it snapped. Obviously it was much harder than normal as the pivot straightner should have been able to do it's job. So with no access to any spare staff, I had to make one. Here is the old staff being pressed out of the balance after I cut away the rivet. Someone had previously replaced the staff as there was a slight bit of material removed around the balance arm hole. With the staff removed I was able to take the dimensions and make a new one from round silver steel stock. Luckily the staff is quite large and measures just over 5.00mm long making it easy to work with. The pivots measure 0.10mm. The new staff was riveted to the balance and the roller table installed before it was poised. Poising is checking and adjusting the balance wheel to make sure that it doesn't have any heavy spot. In other words “balancing” the balance wheel so that all the mass is centered on the pivots. Poising is mandatory and always required after a new staff is installed. If the poise is off and the balance is heavier on one side the vertical rate will not be accurate. The original stem was in very poor condition and did not fit the hole in the mainplate, being somewhat too small which was causing all sorts of problems. Here's the new stem I made In this view you can see that the new stem fills completely the mainplate hole, no side play anymore1 point