Leaderboard


Popular Content
Showing content with the highest reputation on 05/06/17 in all areas
-
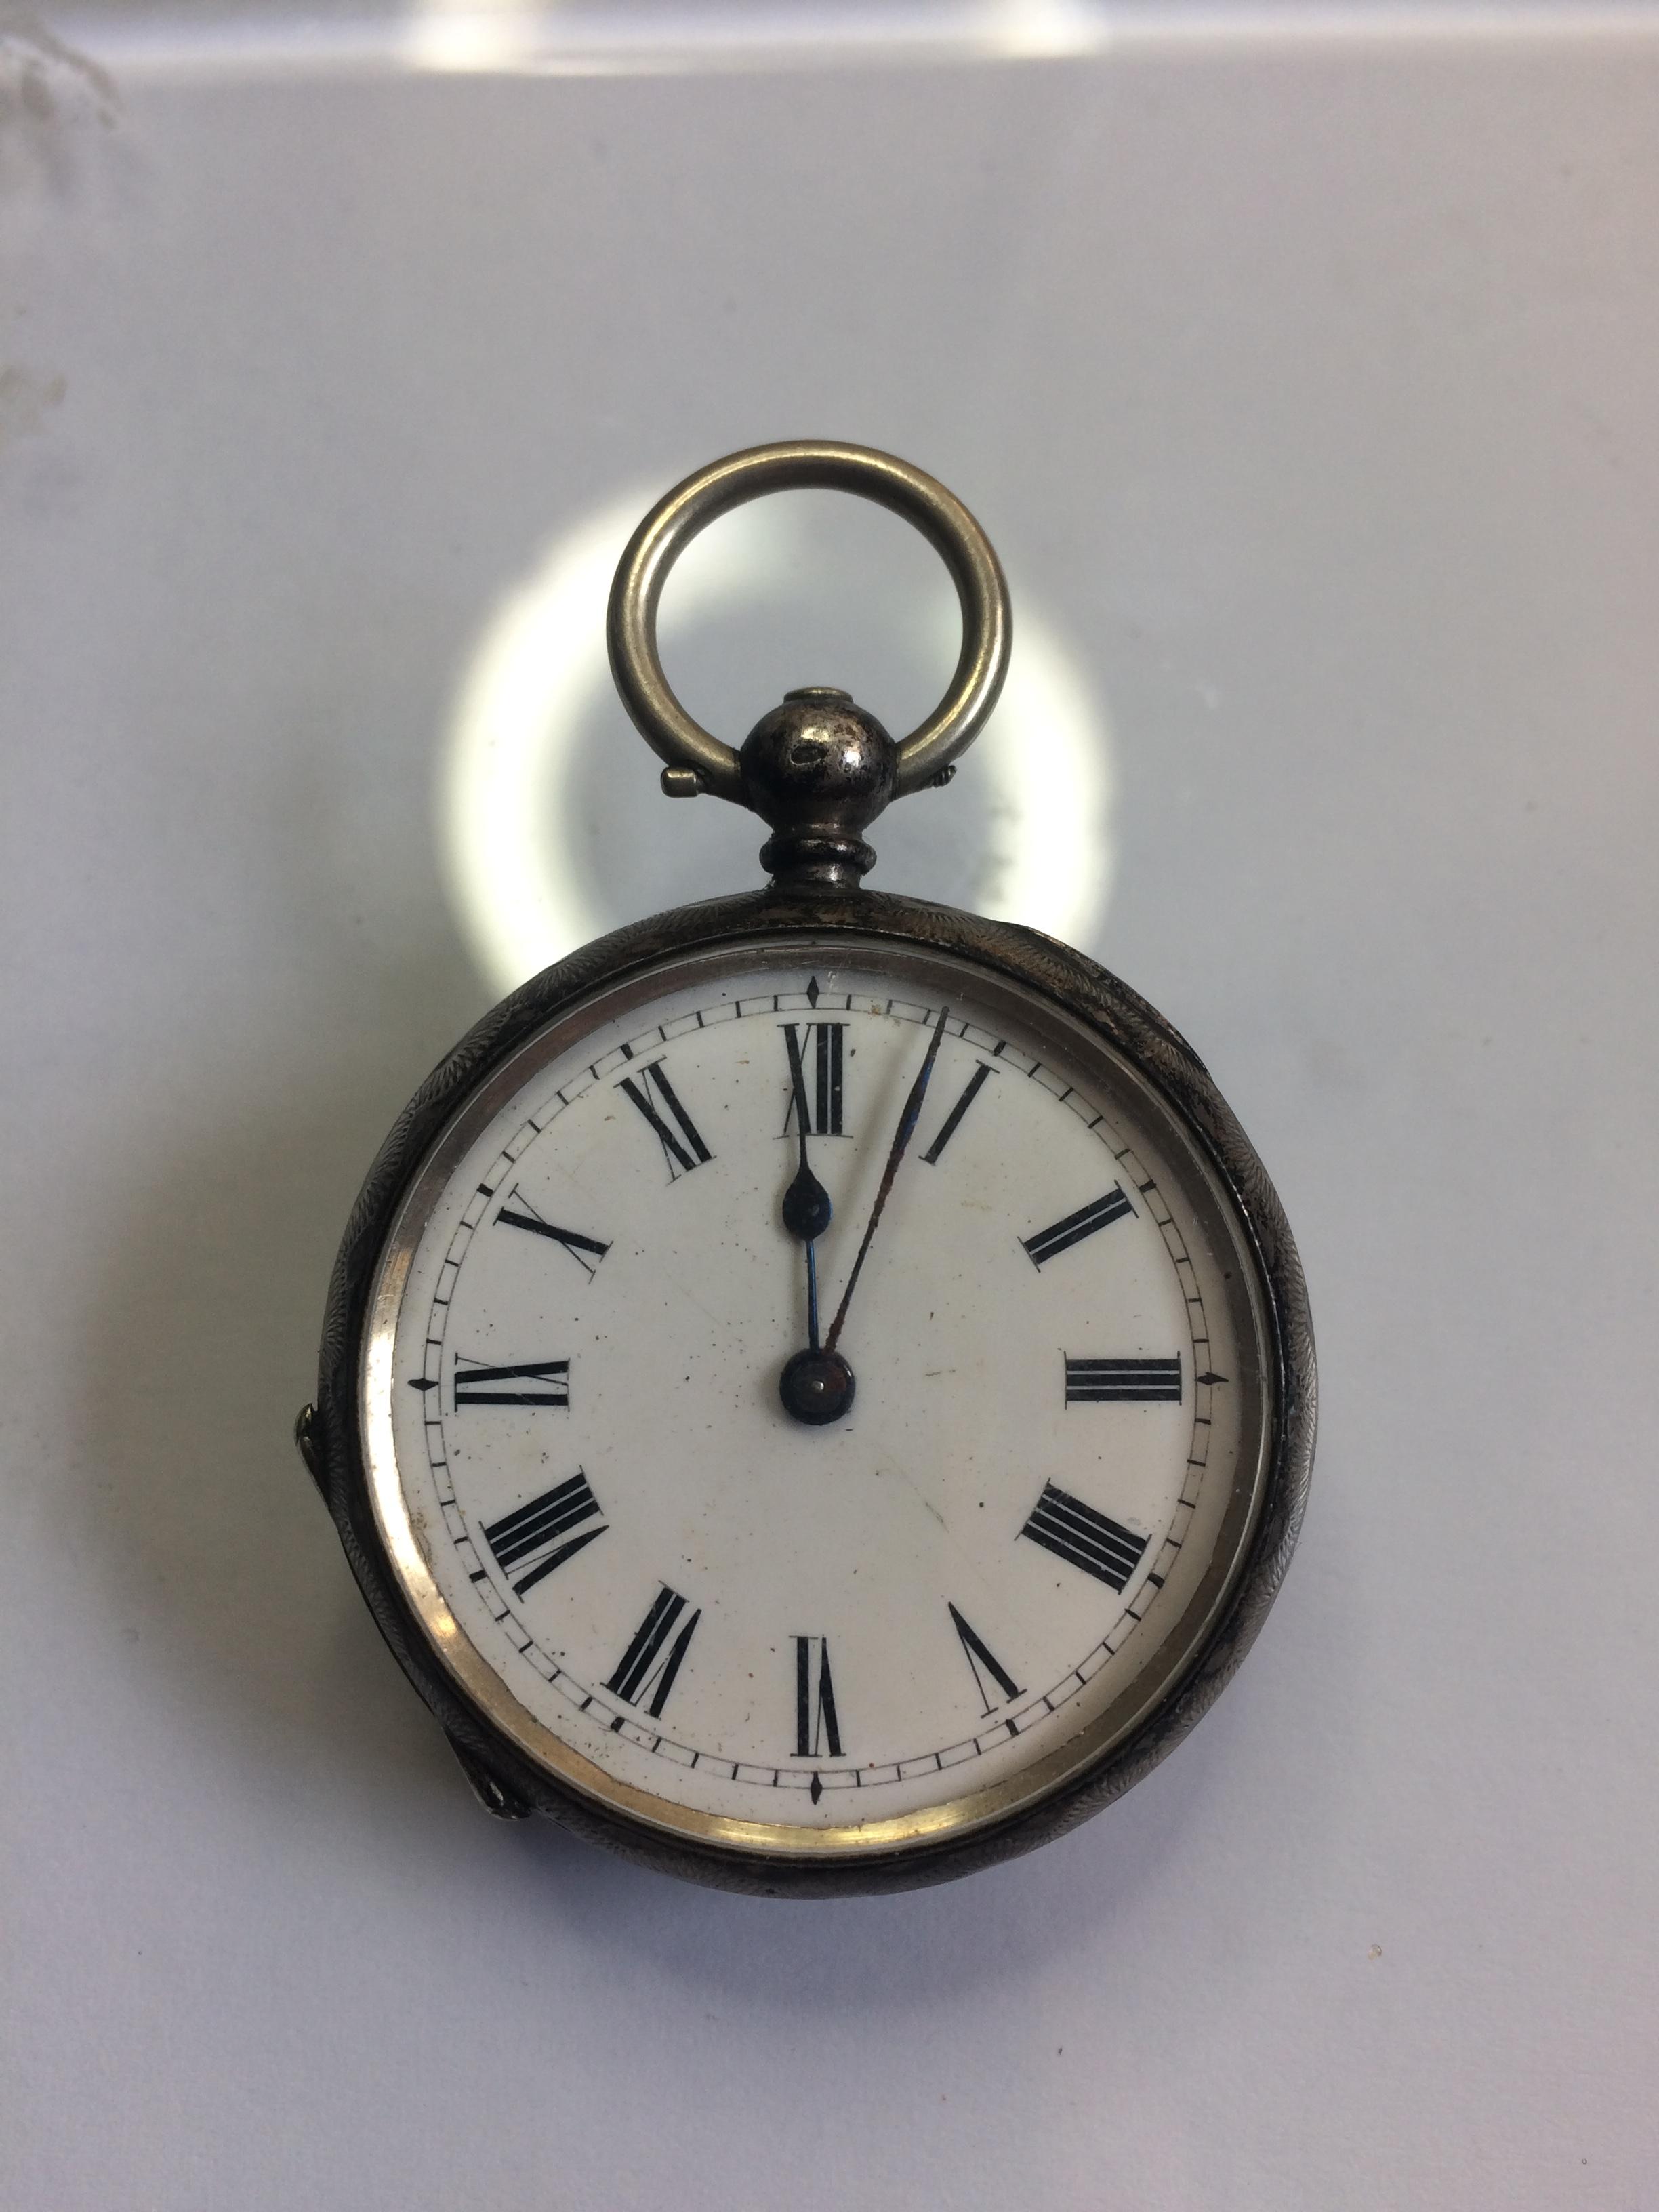
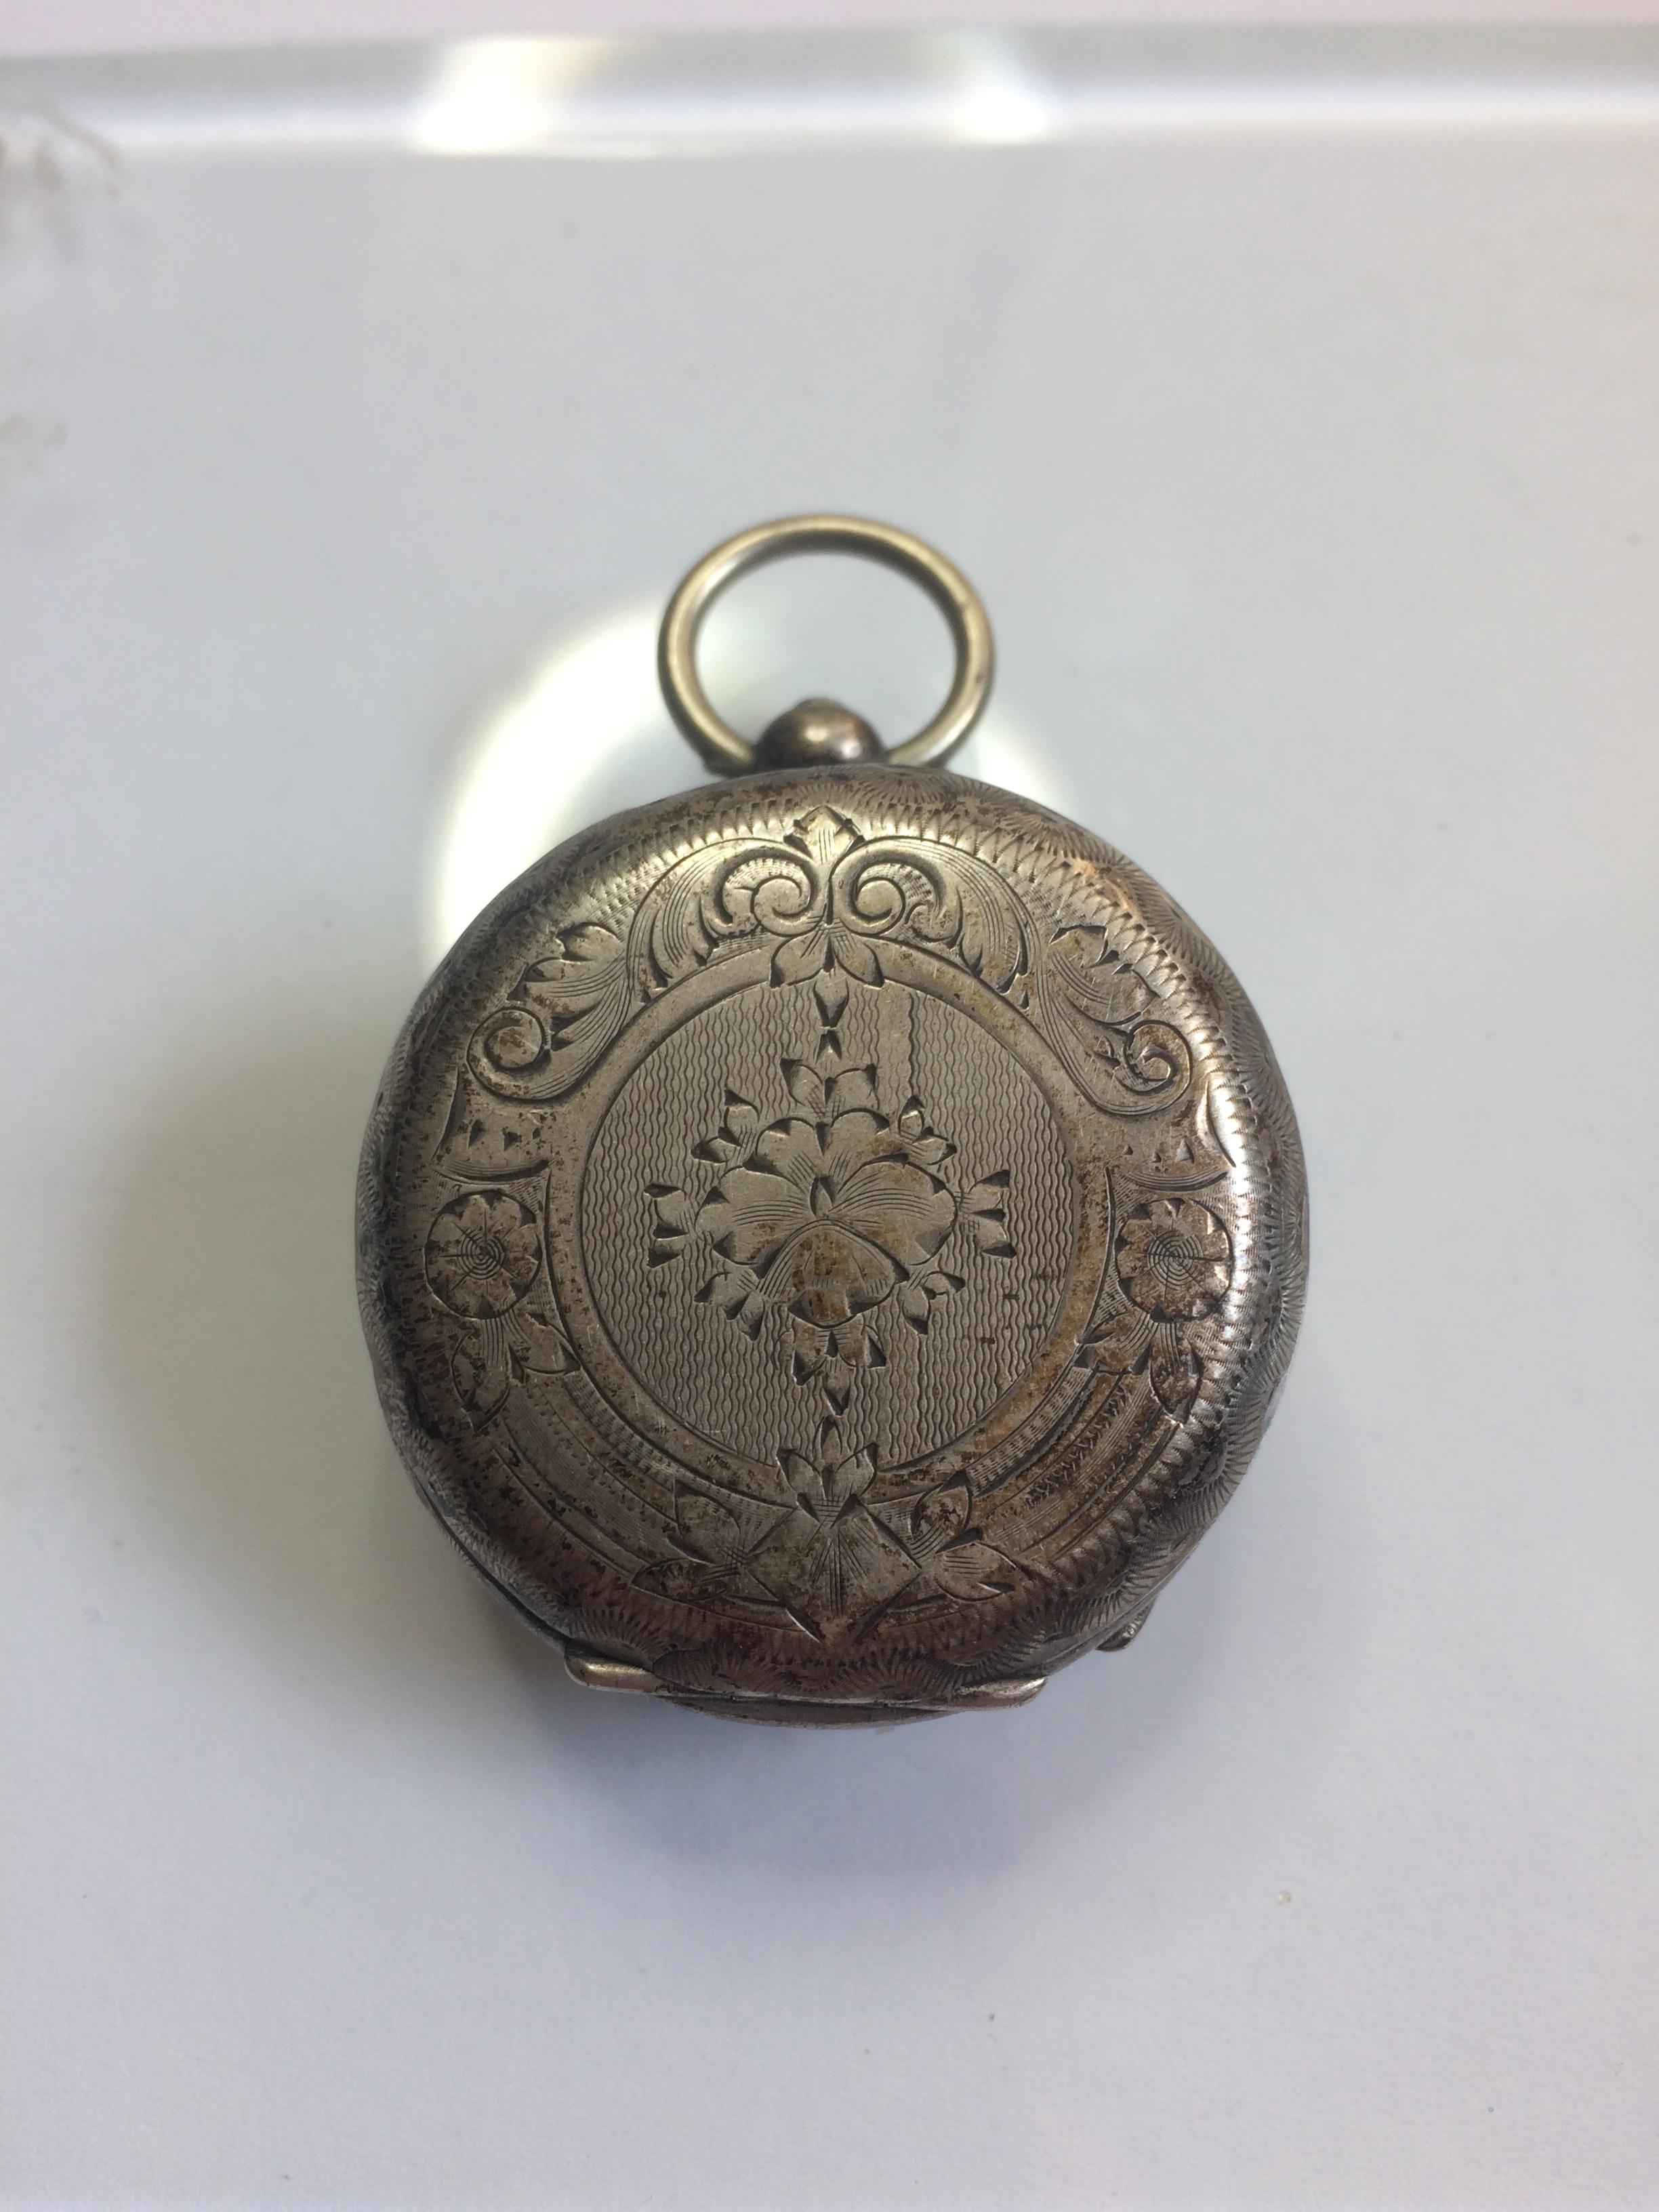
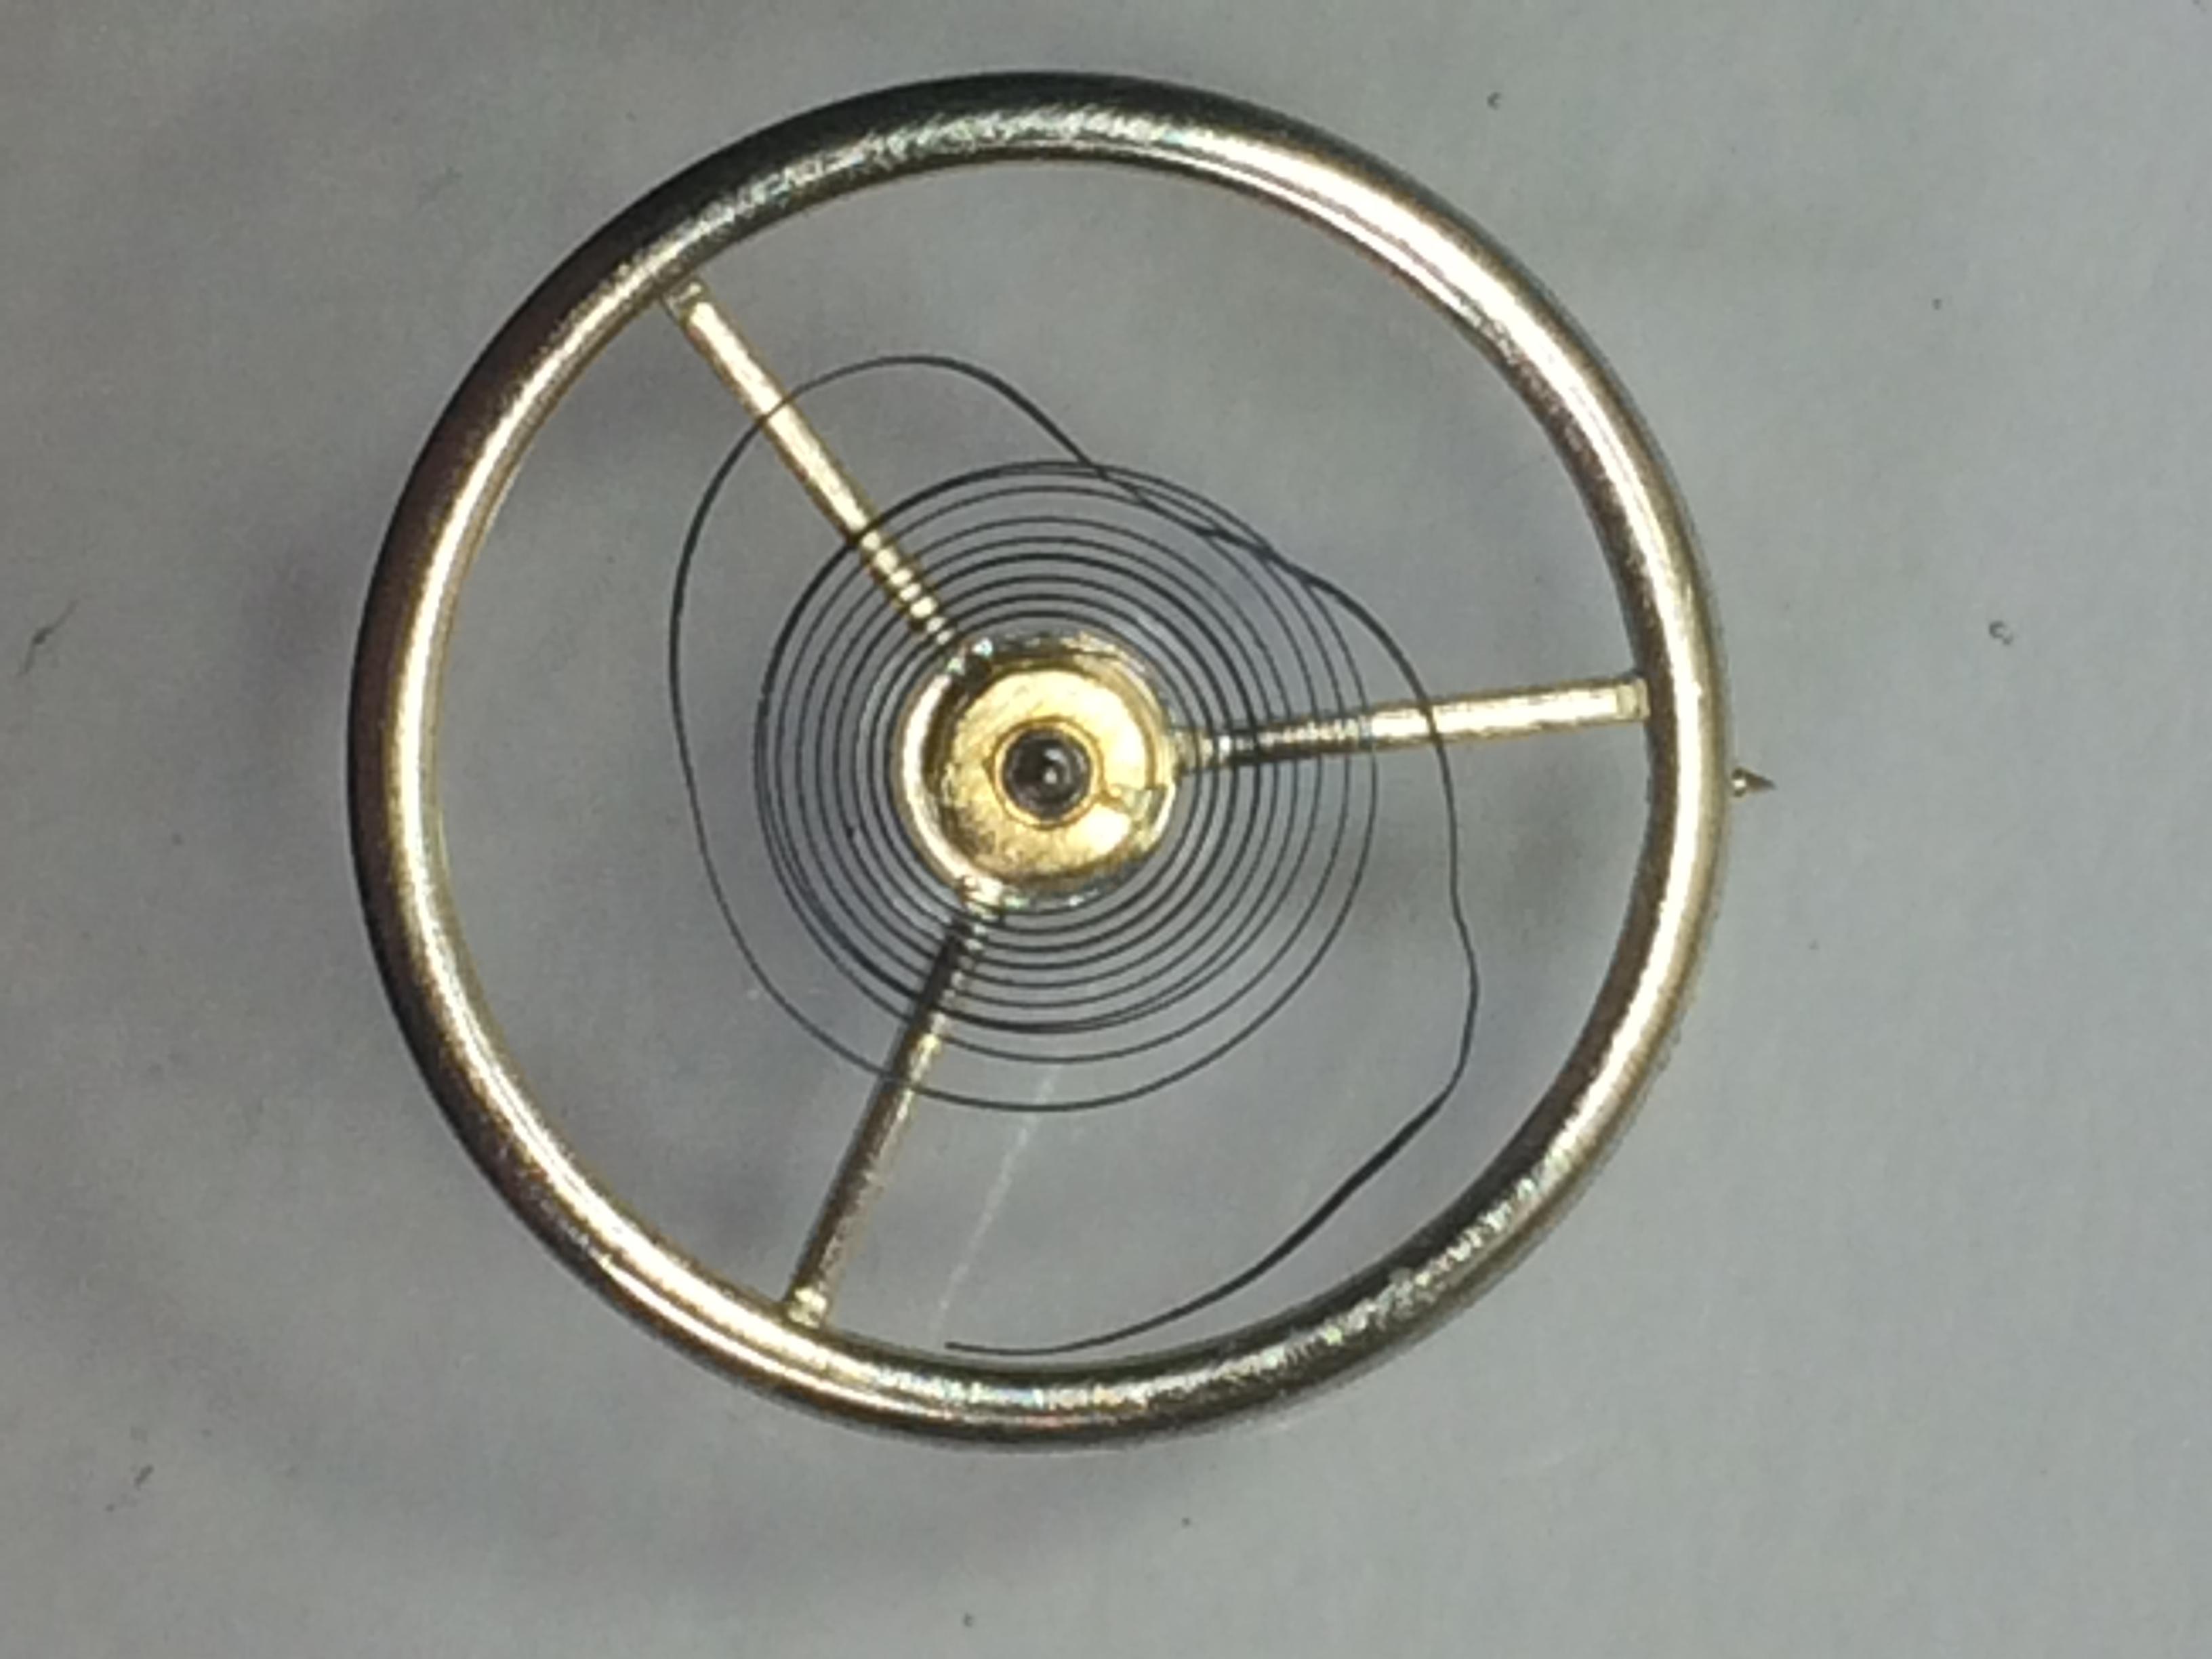
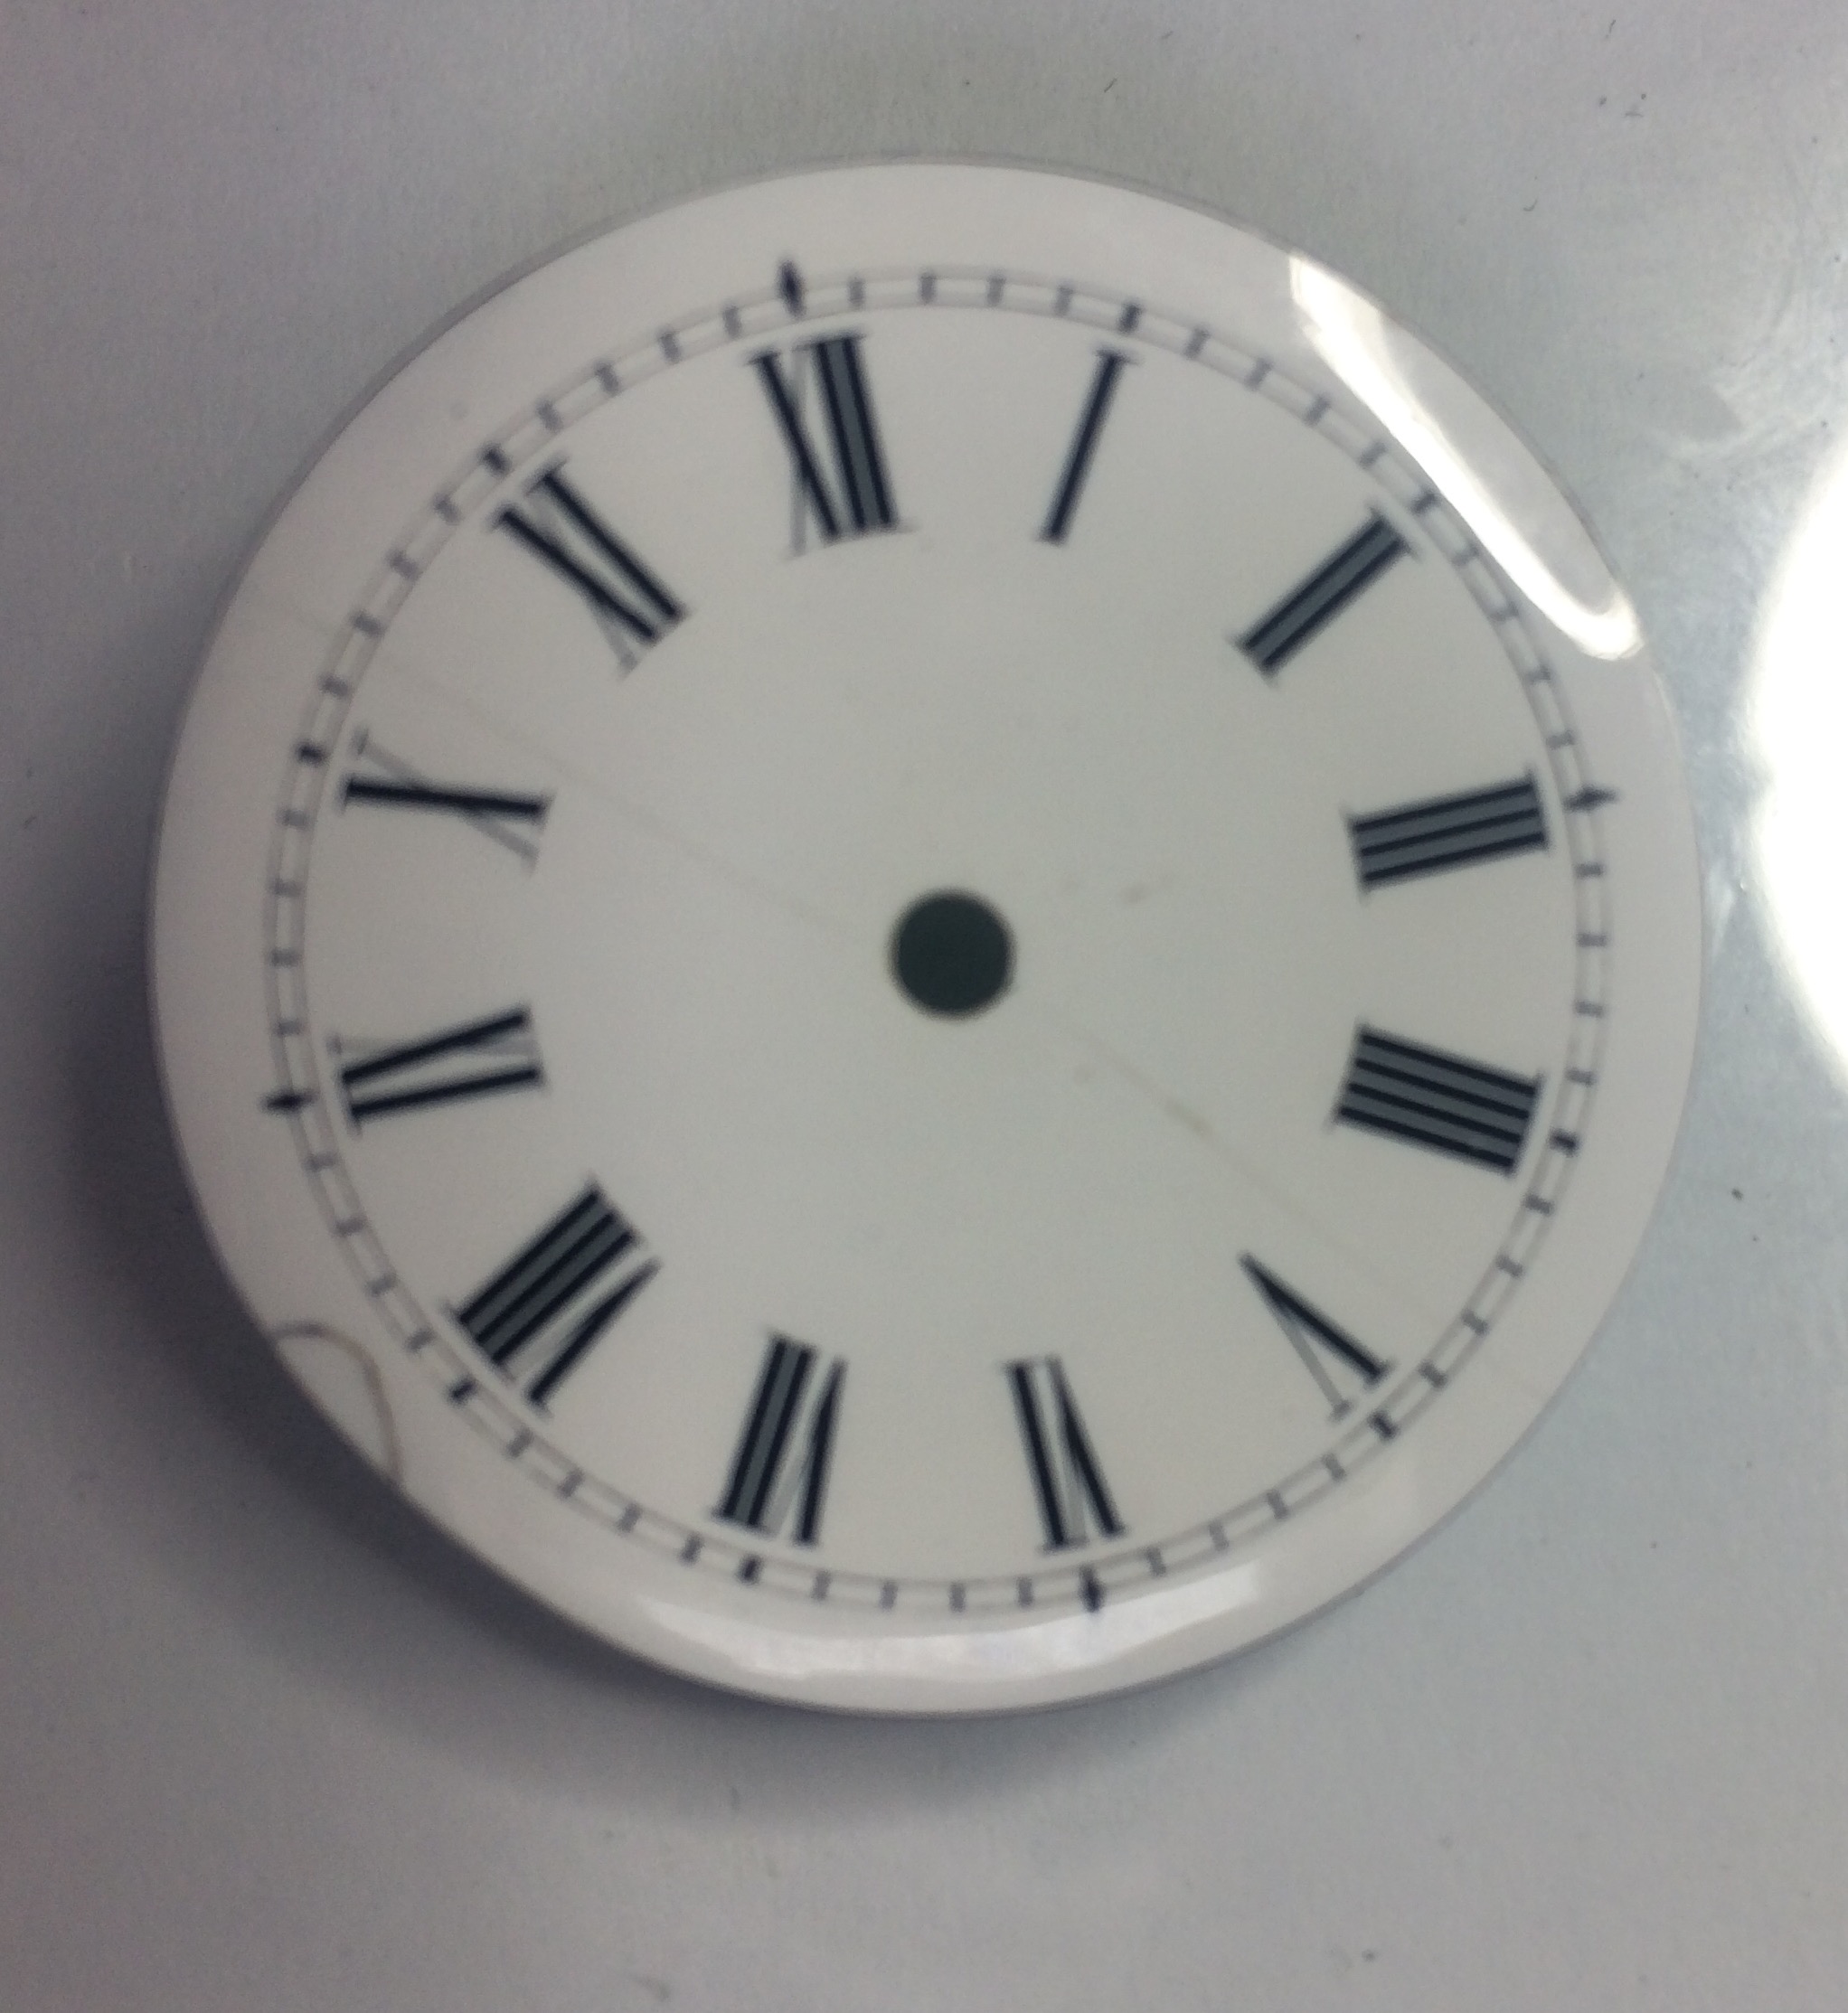
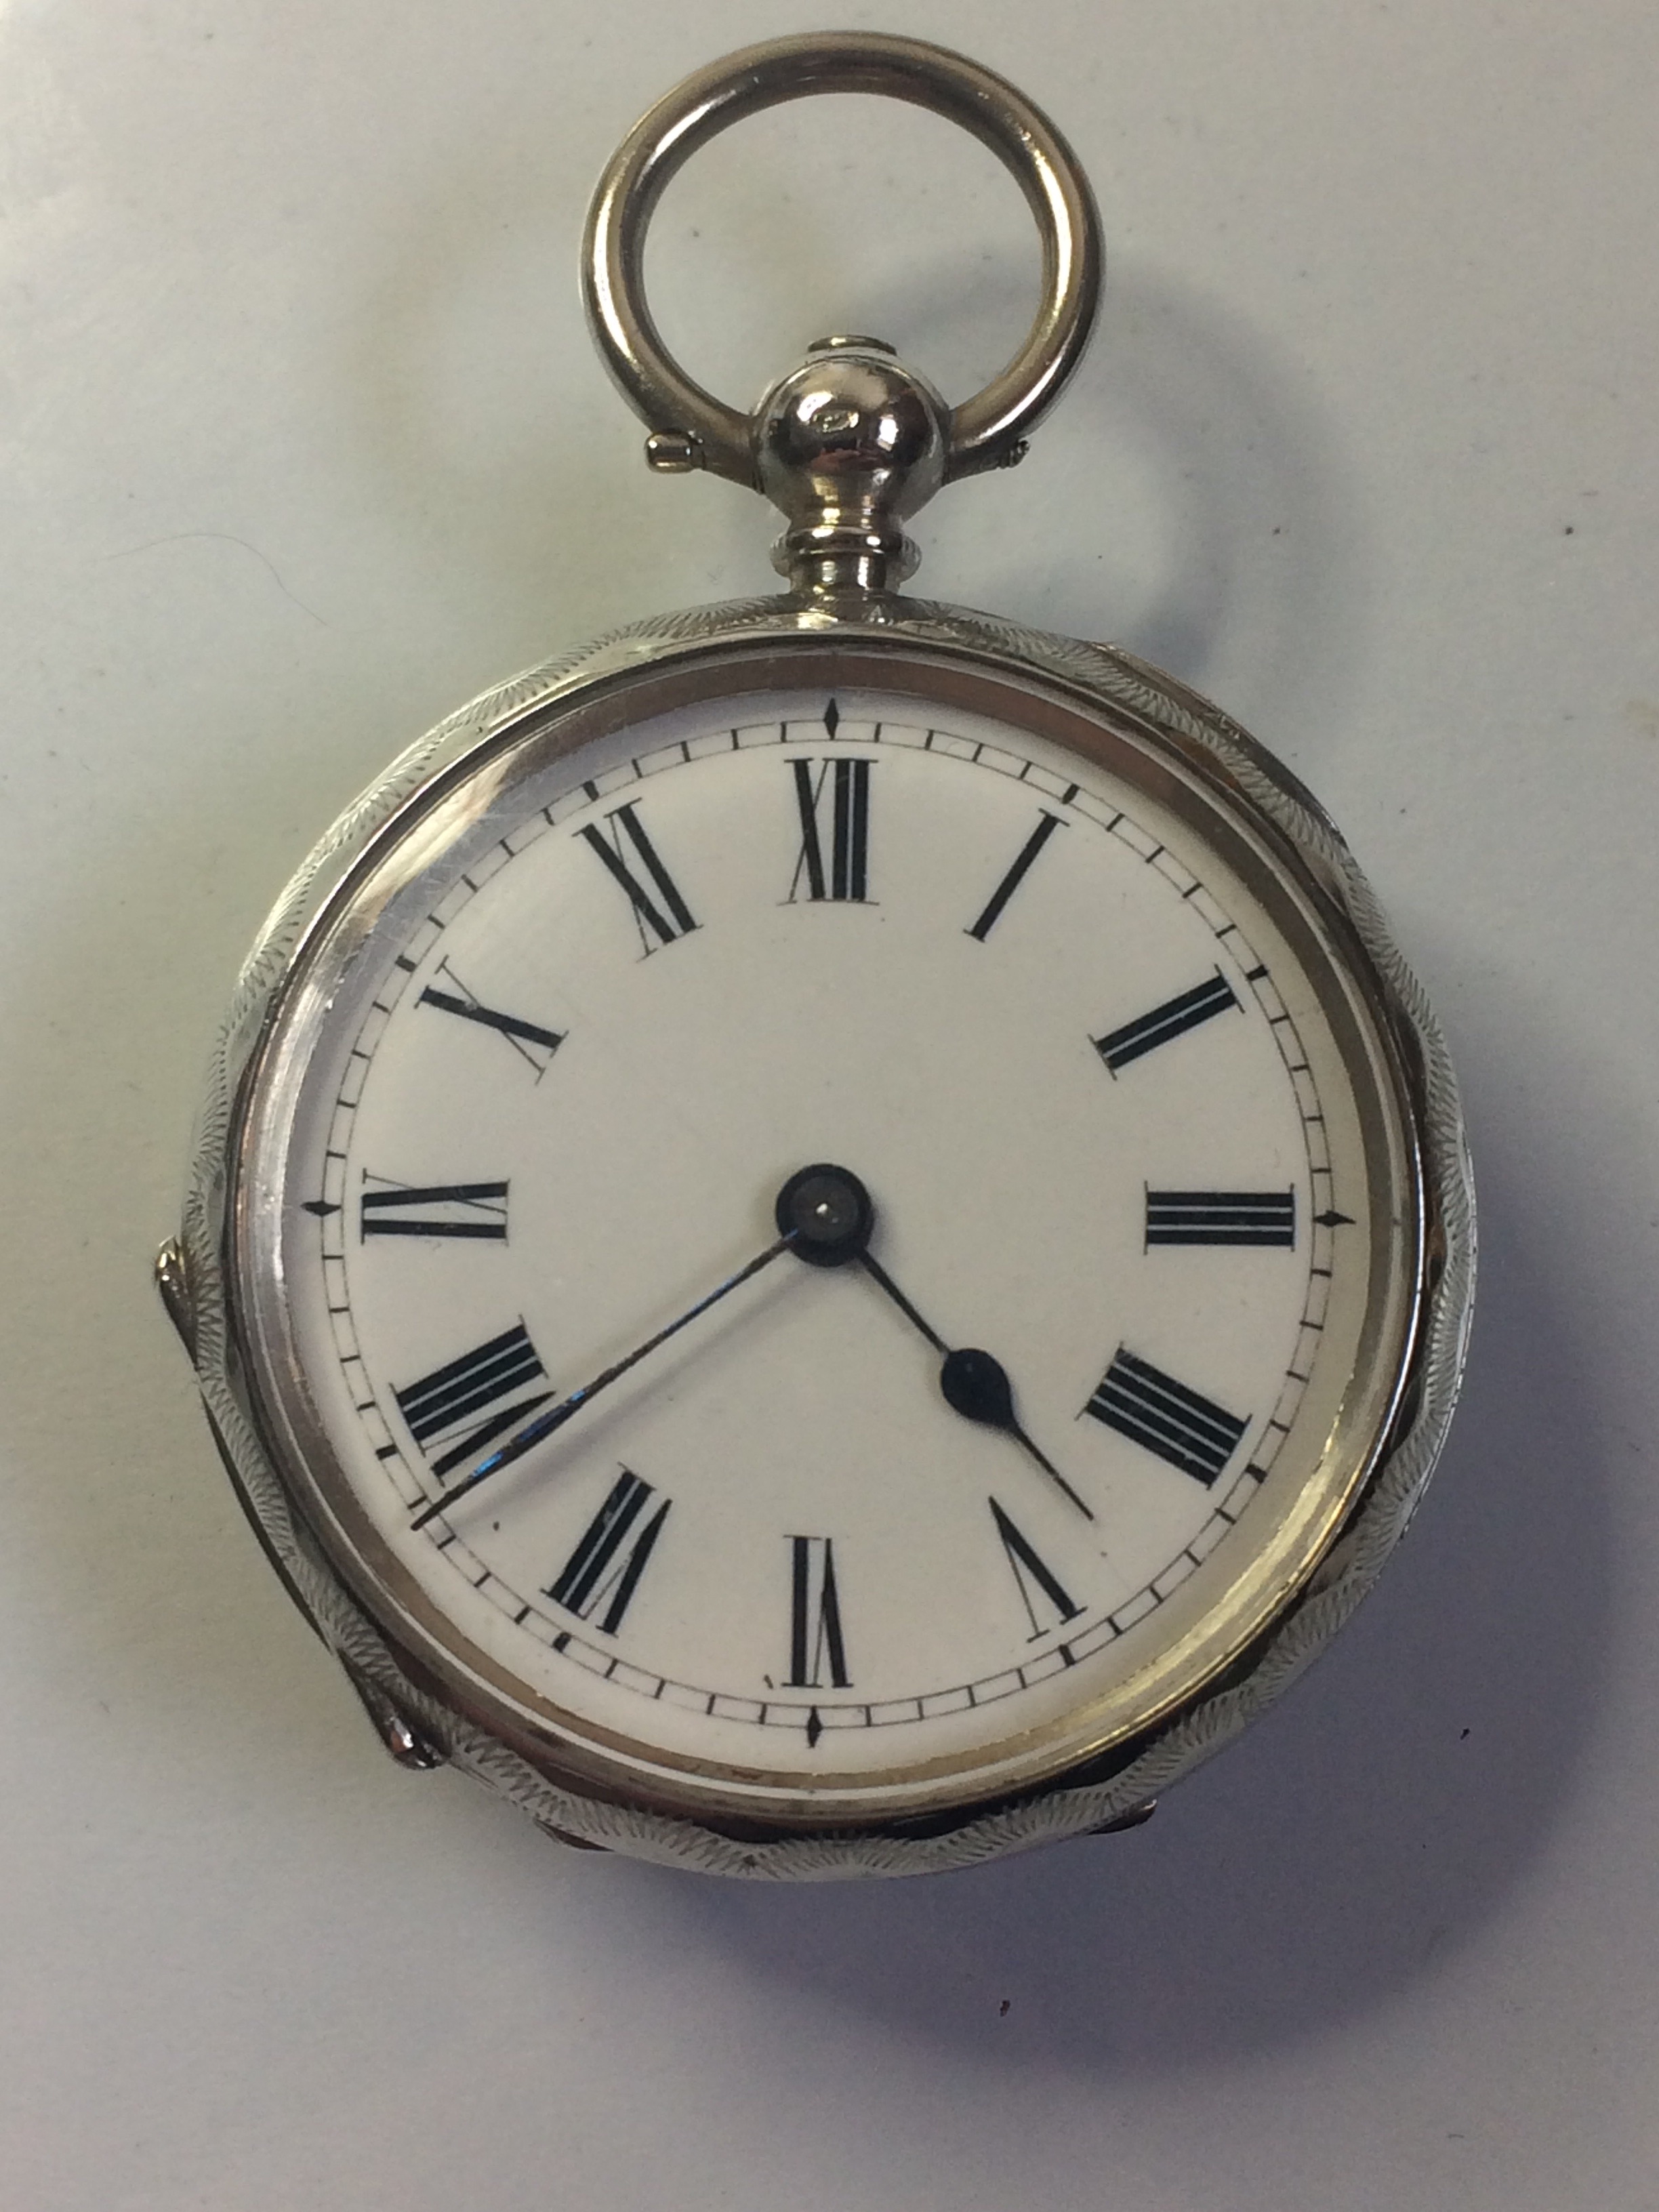
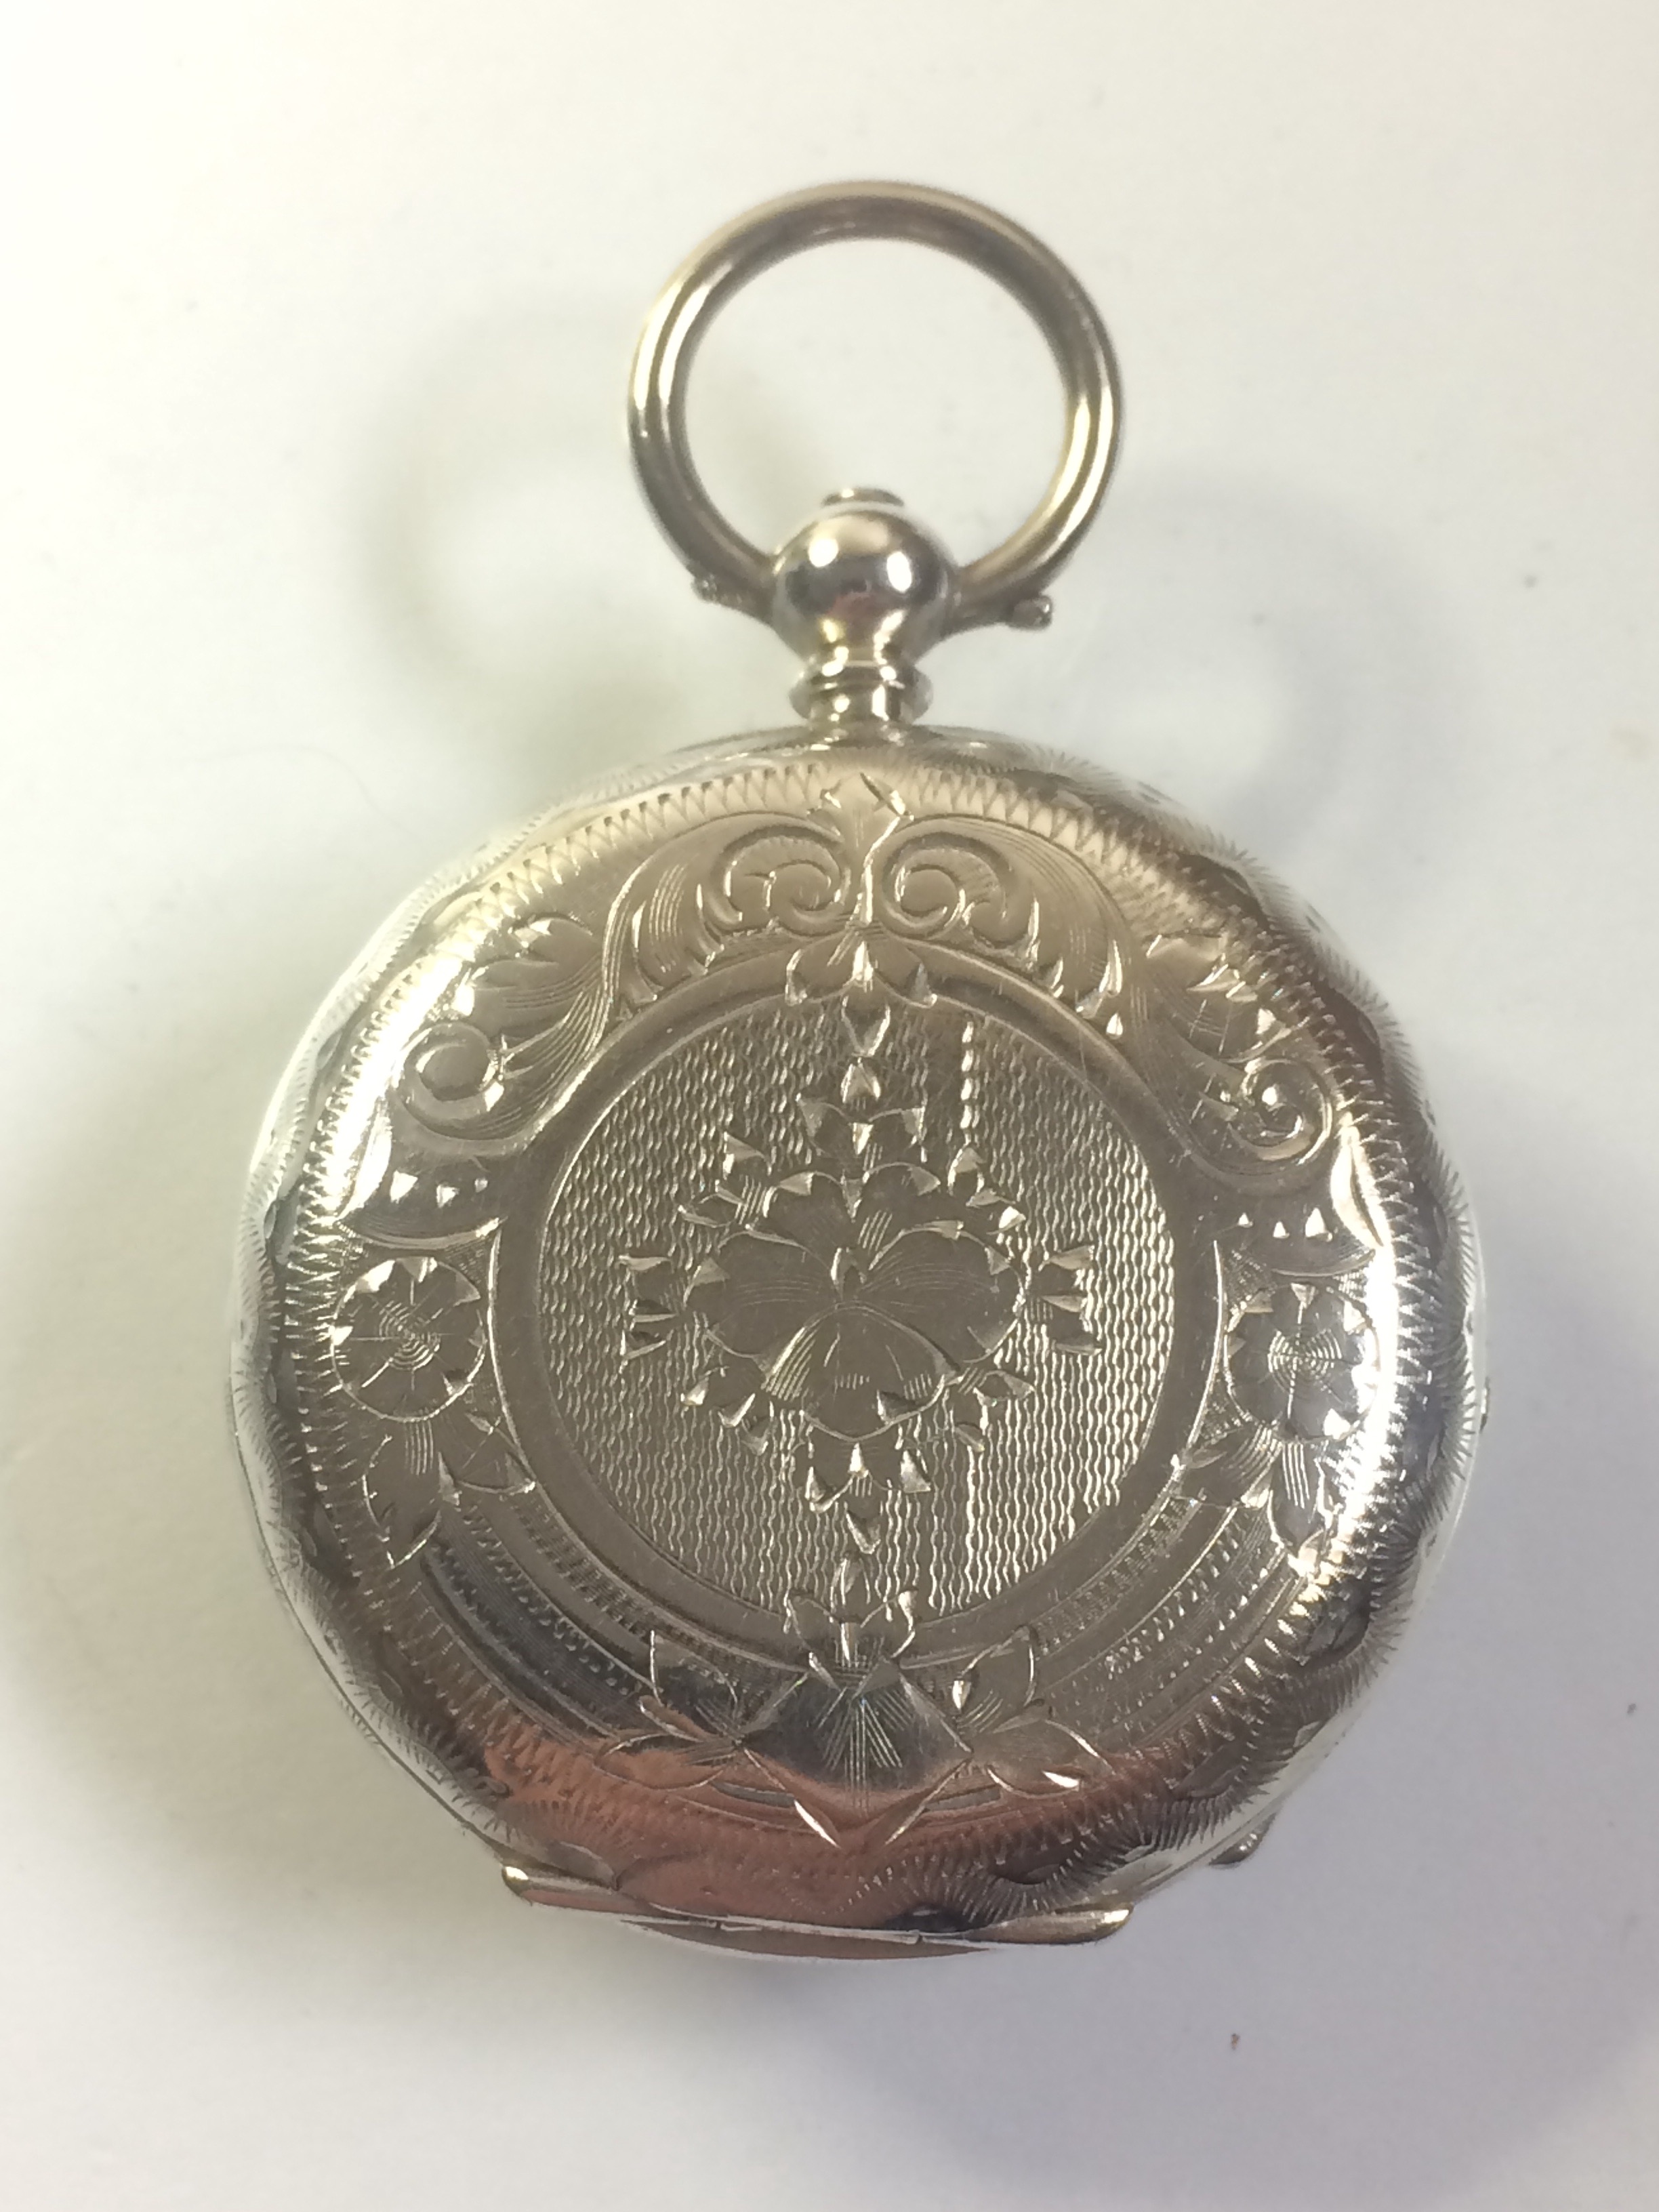
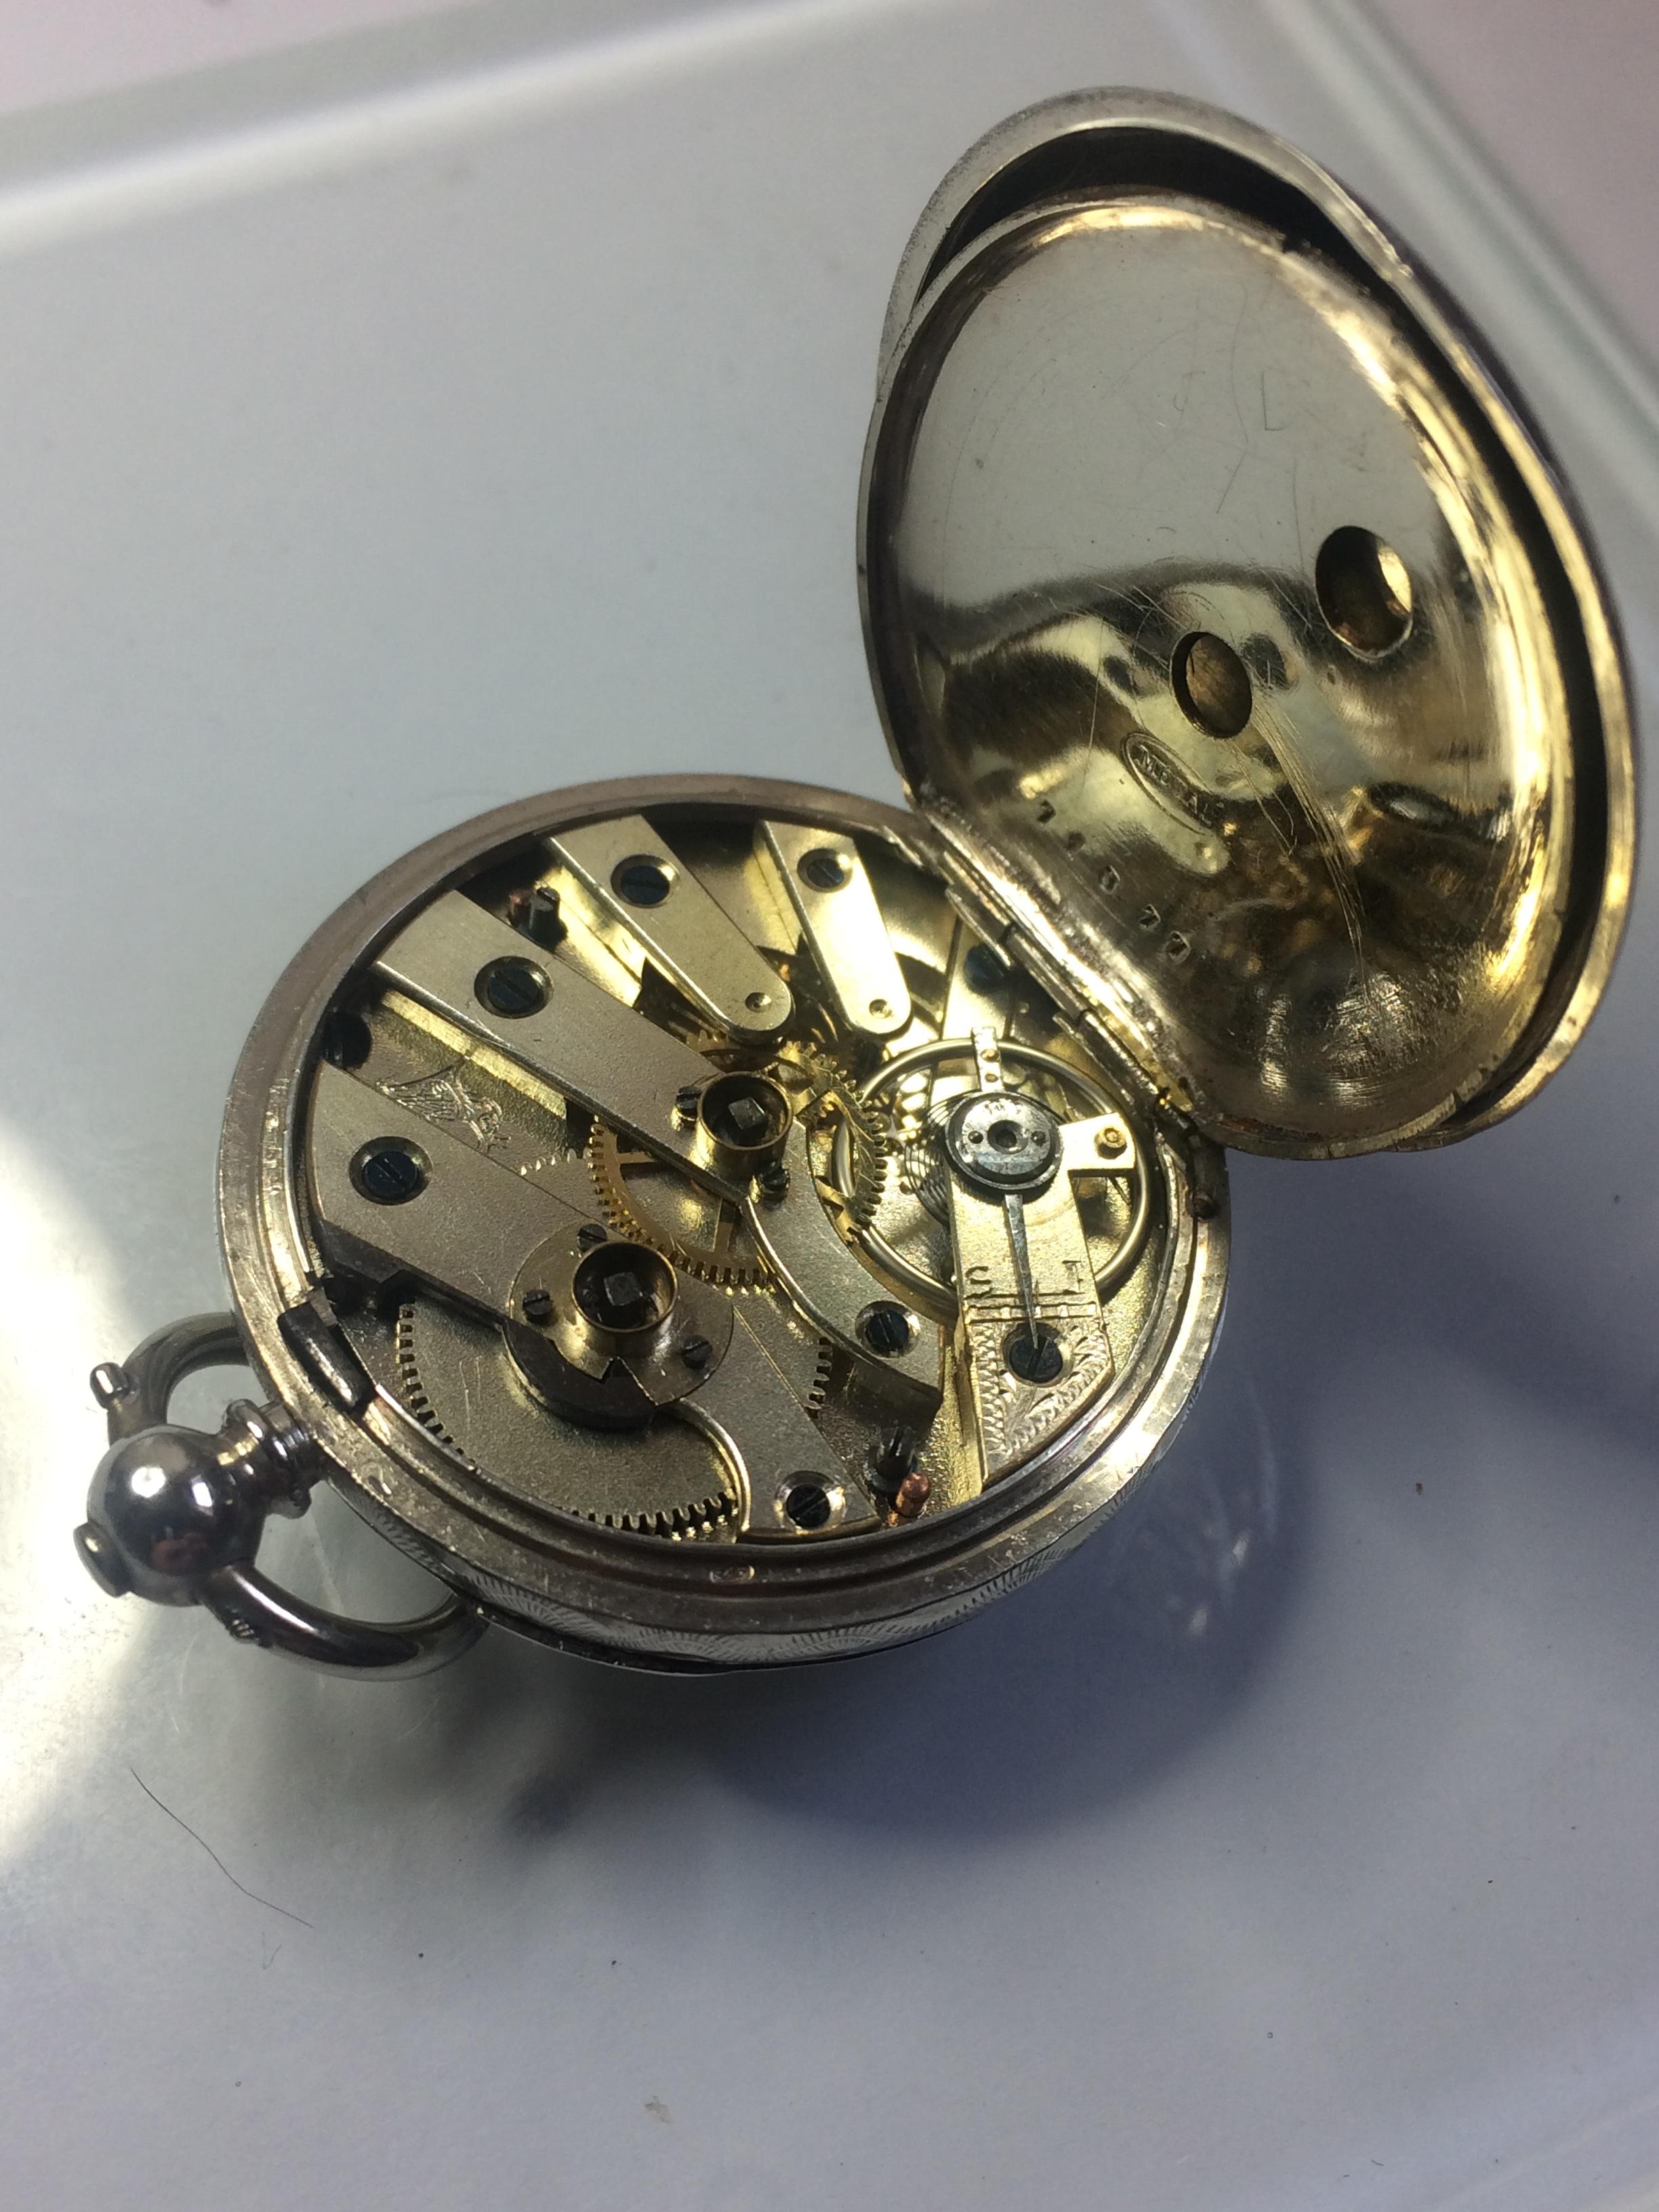
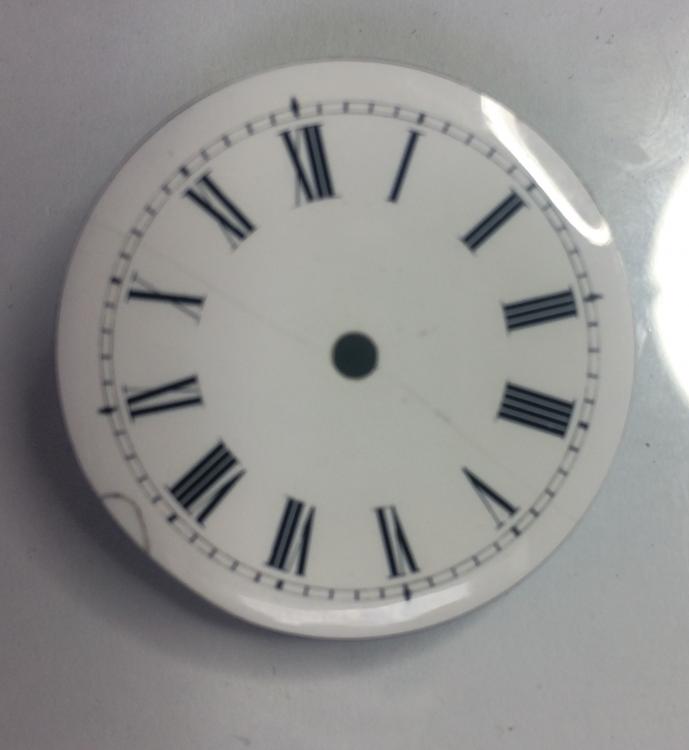
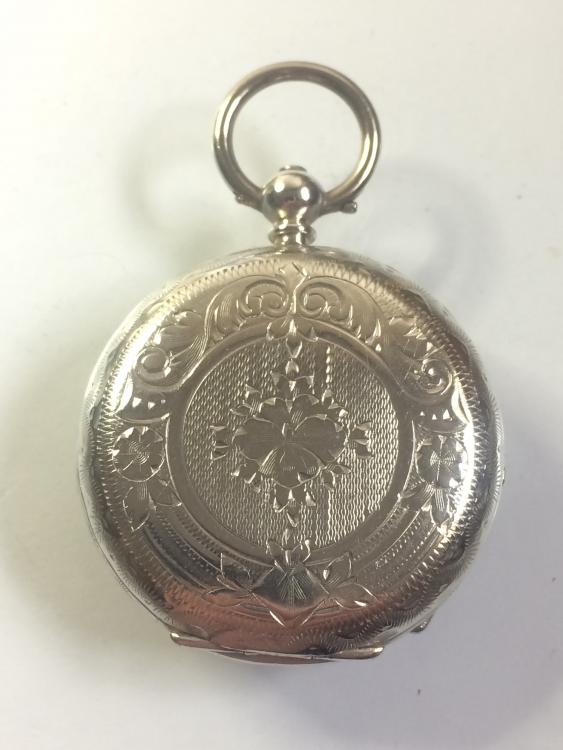
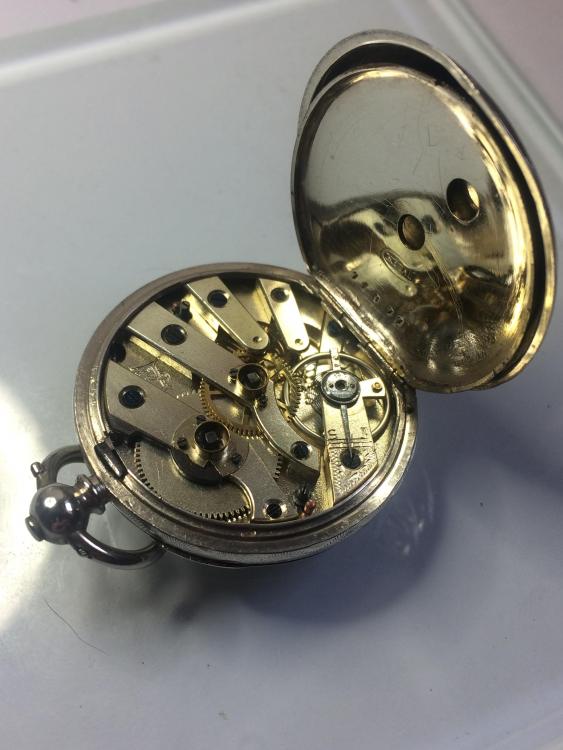
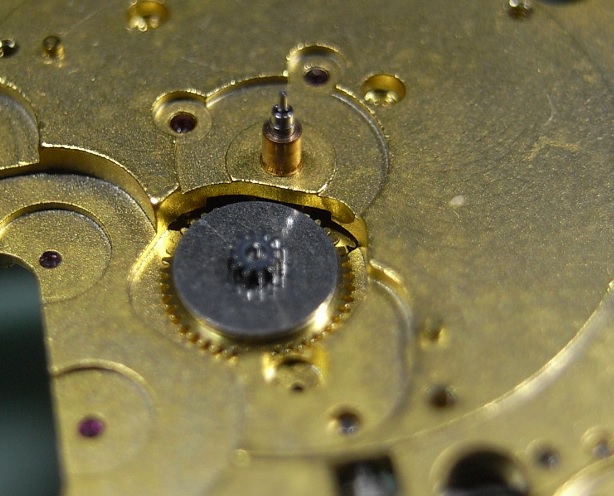
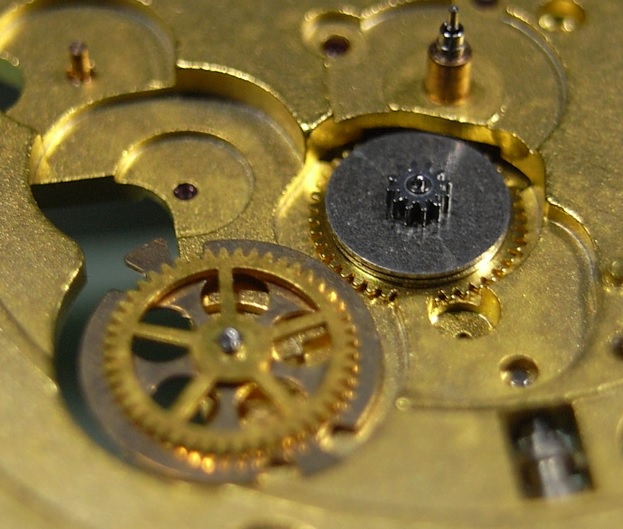
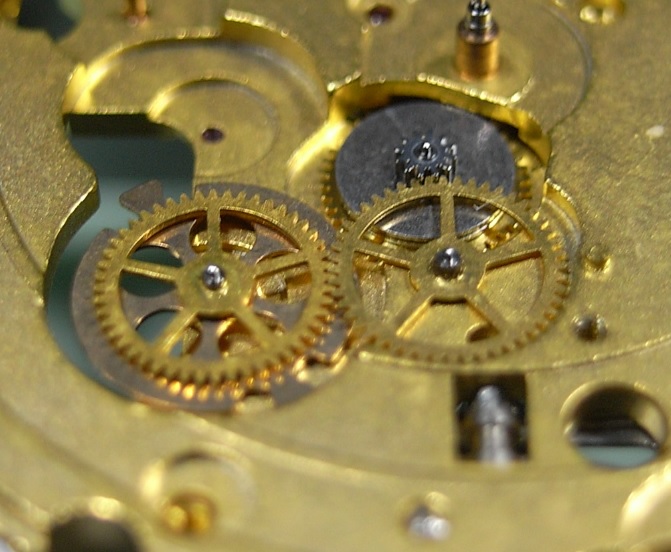
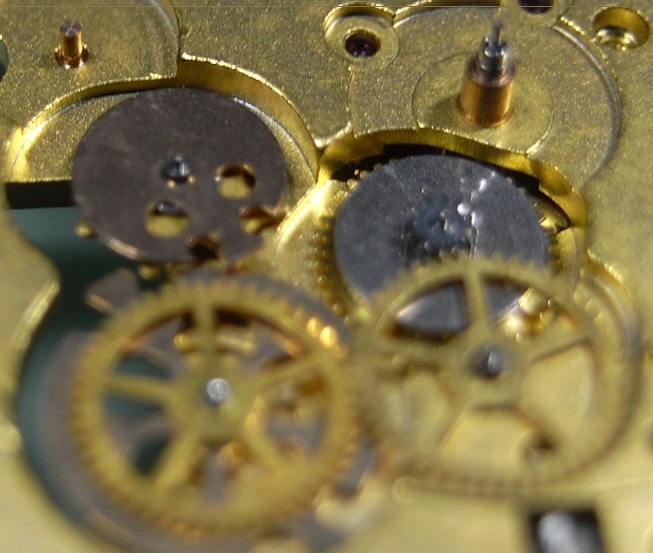
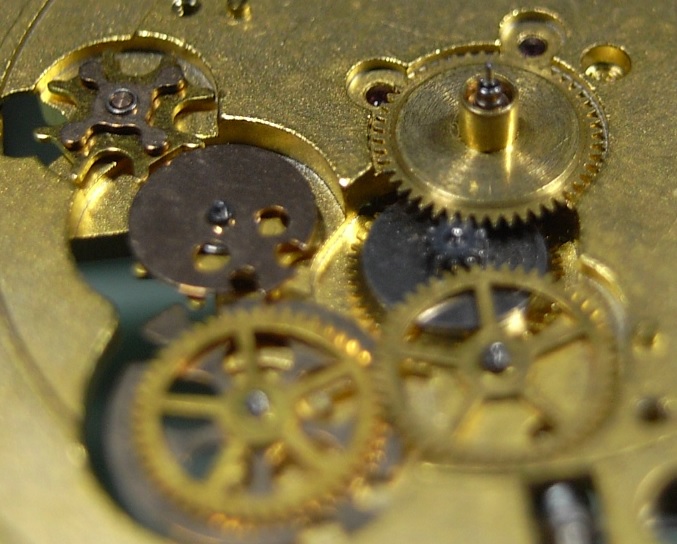
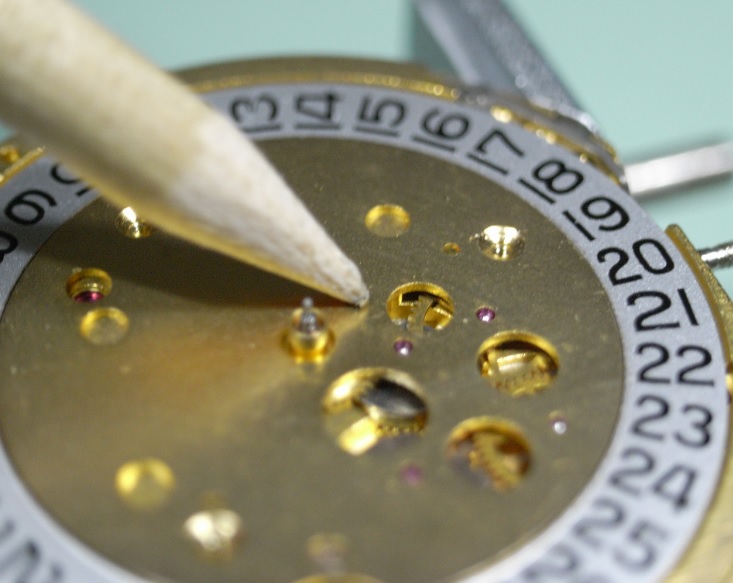
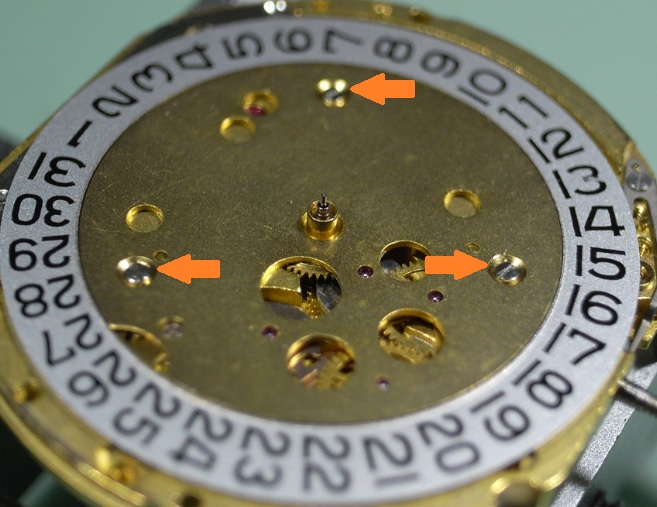
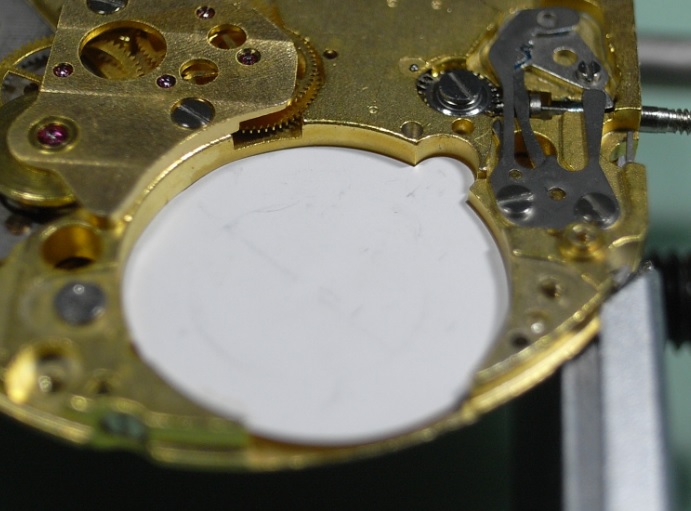
Well I've finished another project, and my first cylinder escapement movement. As can be seen from my previous thread " movement ID" you can see what i was up against, some very helpful members, Stuart and oldhippy huge thanks for the knowledge you guys shared. i still have no idea who made the movement or how old it is, all I know is that it's now ticking nicely and has kept perfect time with my phone (dial up) for the last 45mins. I shall over the weekend change its position to see how it keeps time. I tried it on the timegrapher but the machine didn't like it, don't know wether my Chinese one is programmed for cylinder escapements, but if it keeps time as it is now I'm not fussed. I tagged L&R ultra fine as members have been asking what it's like, well the last photo shows how well it cleans movement parts, also the picture of the dial is before I tried out some steradent denture tablets, Wow they really work, 3 mins on warm water and no cracks visible( they are still there but all the dirt has been removed making it nearly impossible to see them) I can highly recommend these as a way of cleaning enamel dials. Now some before and after photos......


 2 points
 -
Had an interview today and wore this for luck. I had this overhauled over the Summer and it is a handsome piece indeed. Month, day, weekday are set..the moon phase...maybe I can count the clicks? Sent from my SM-G920V using Tapatalk1 point
-
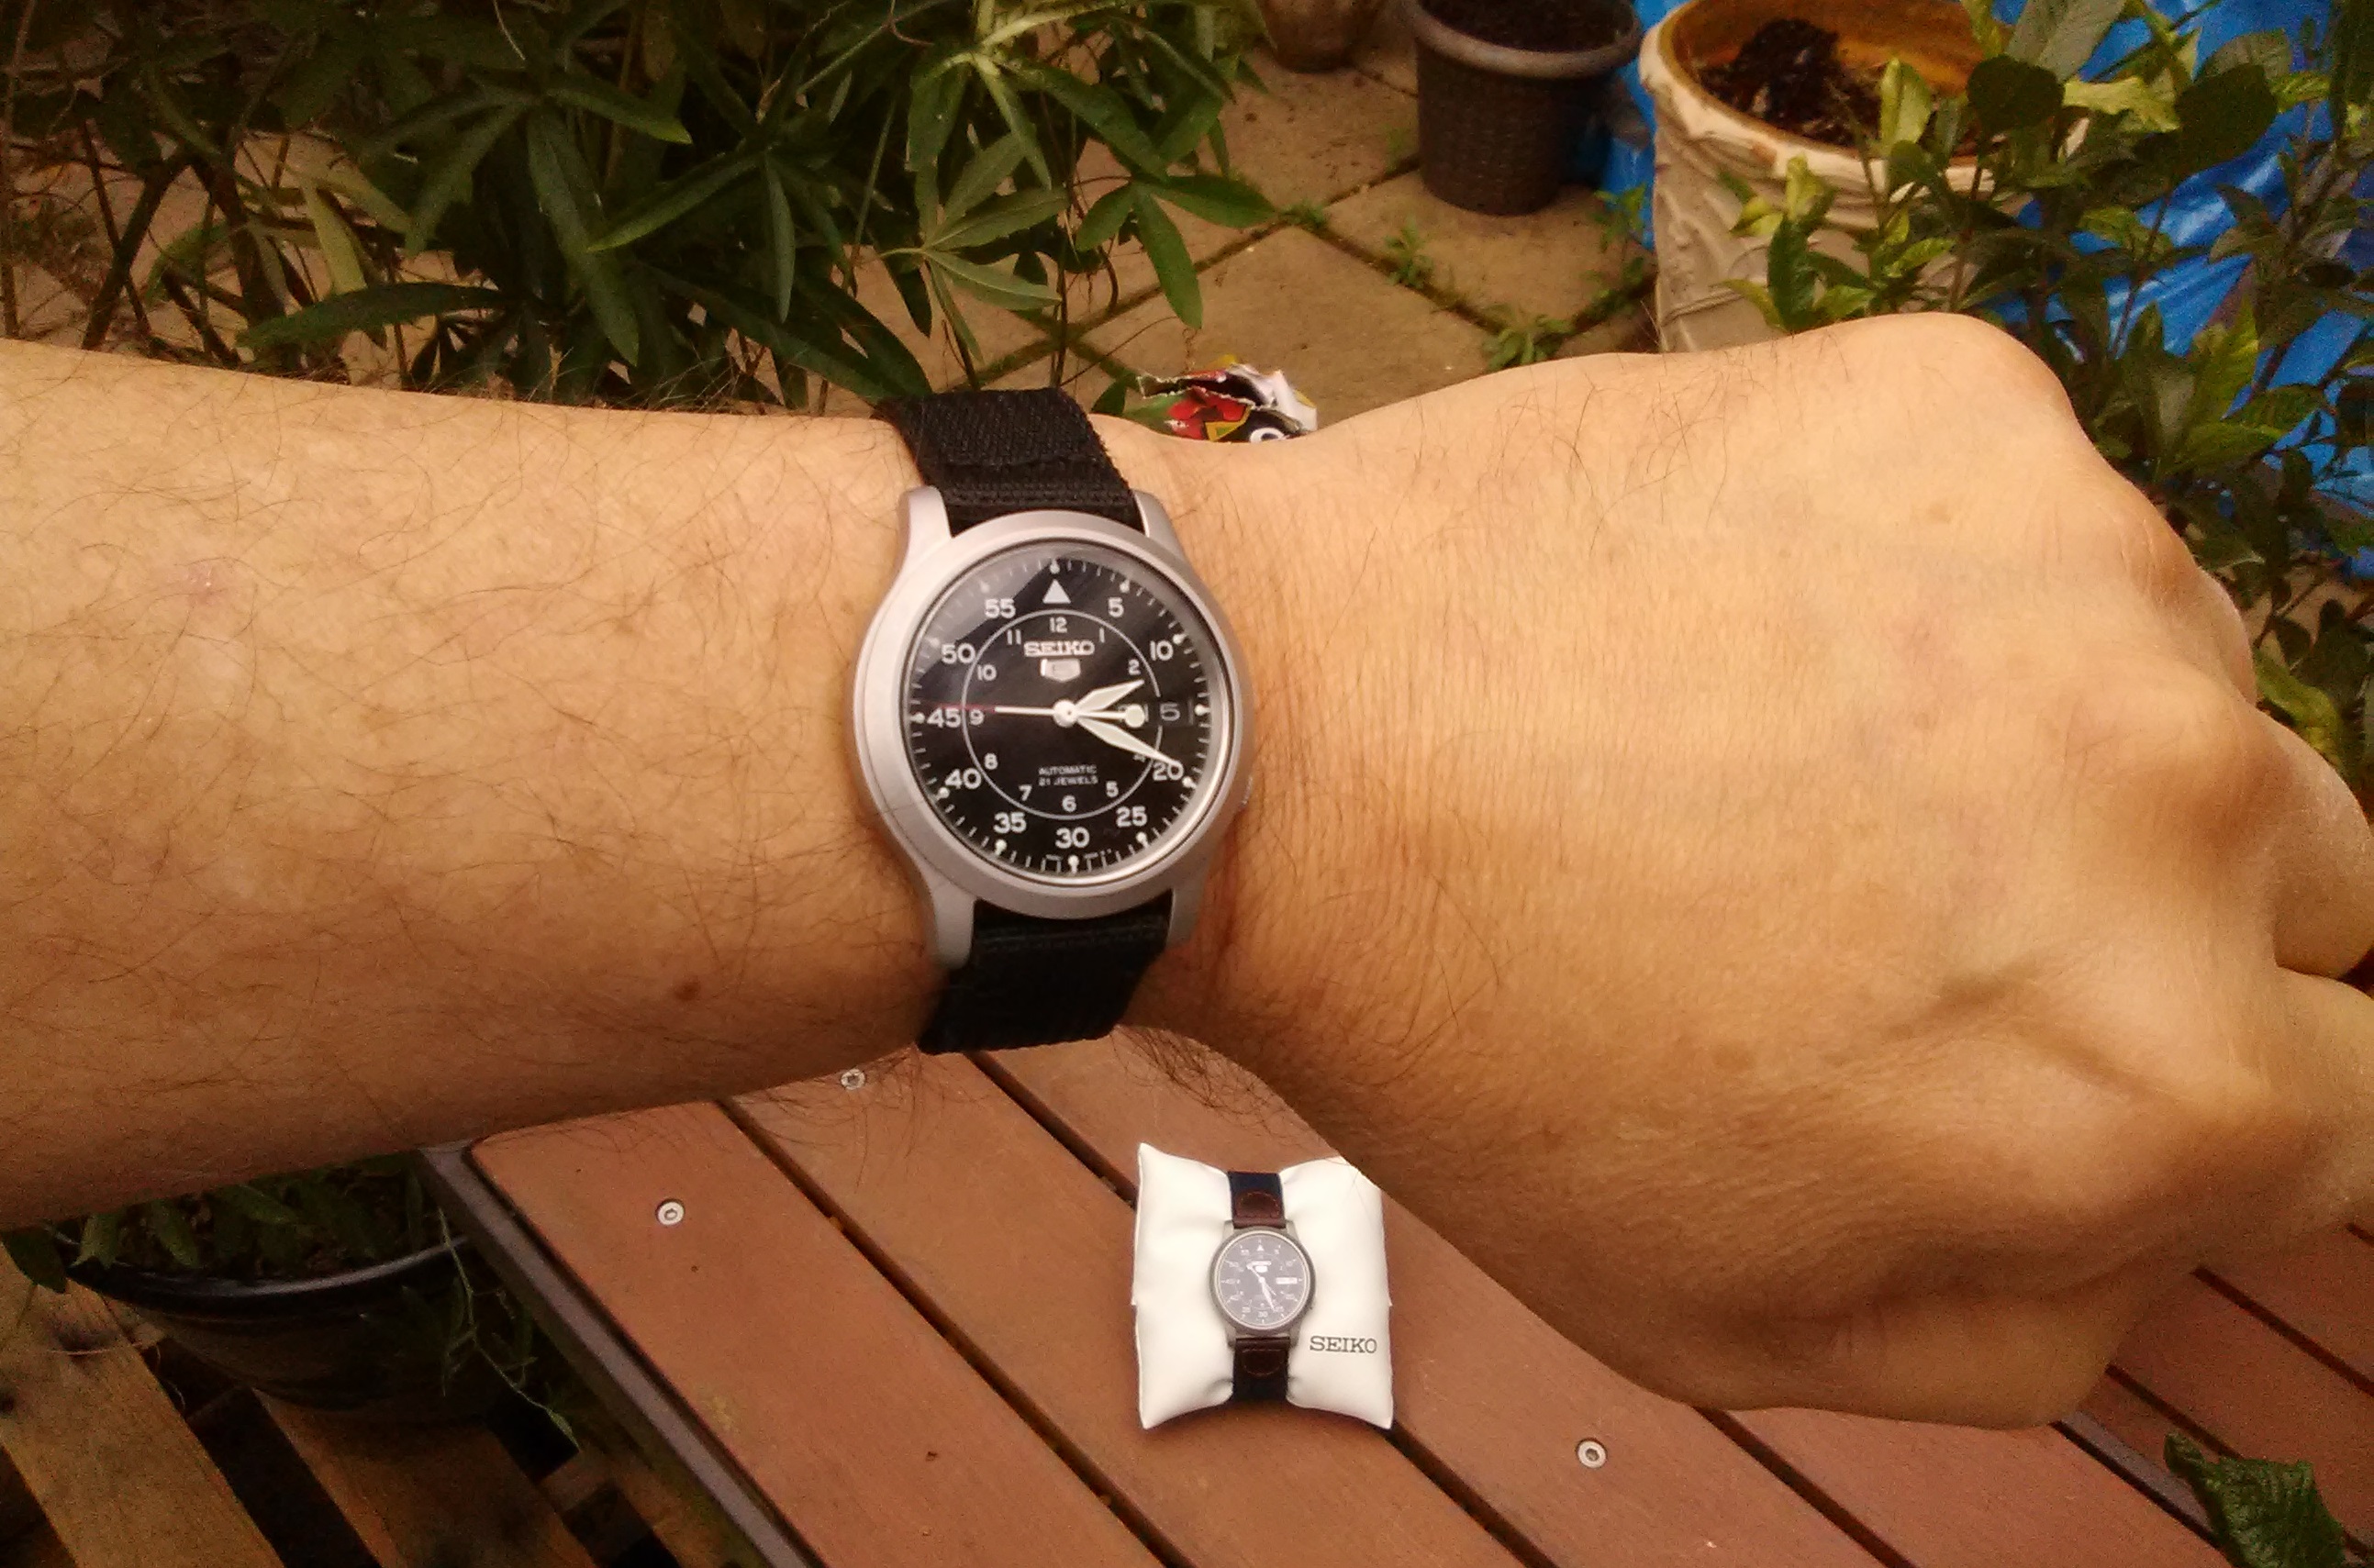
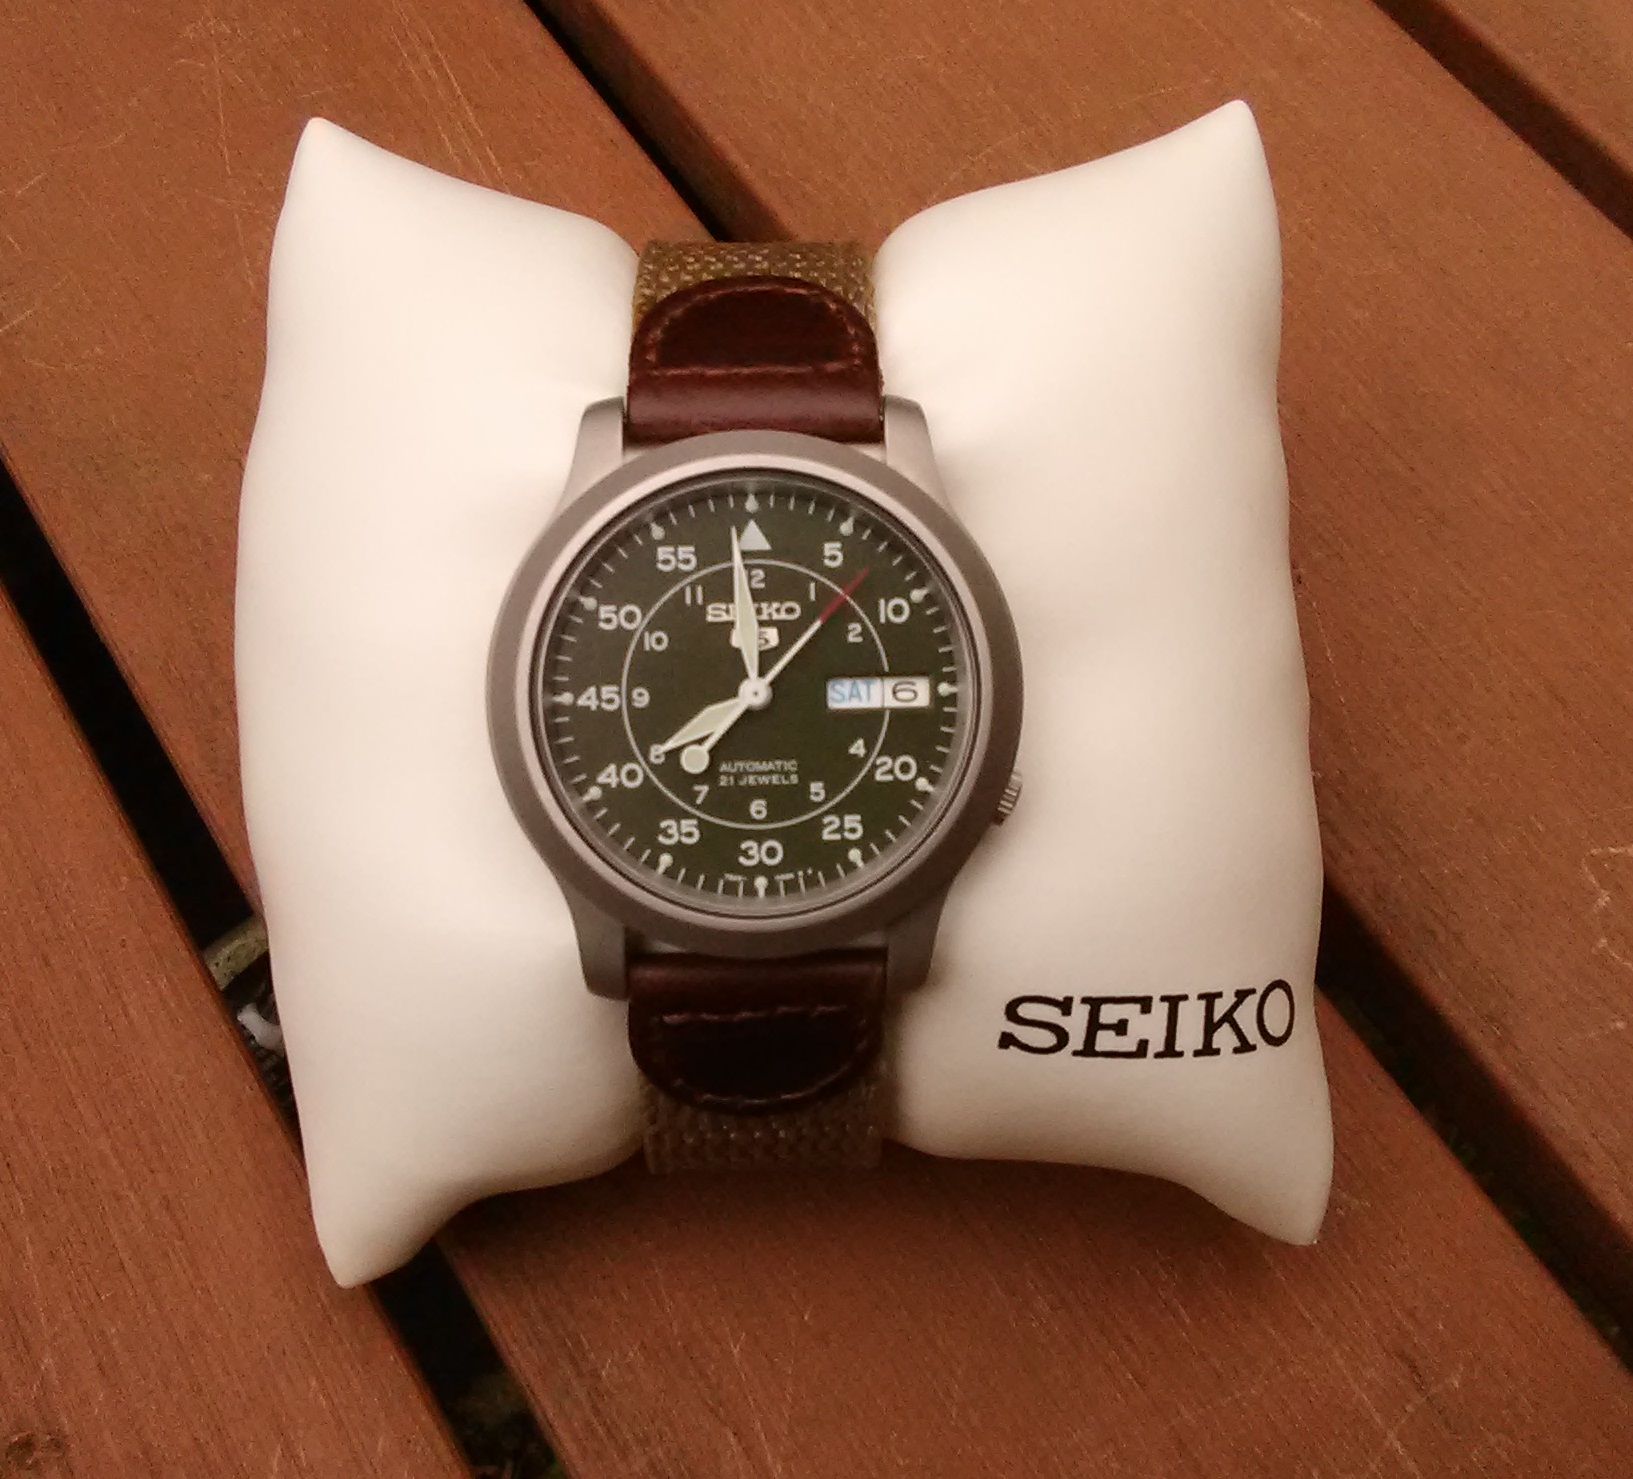
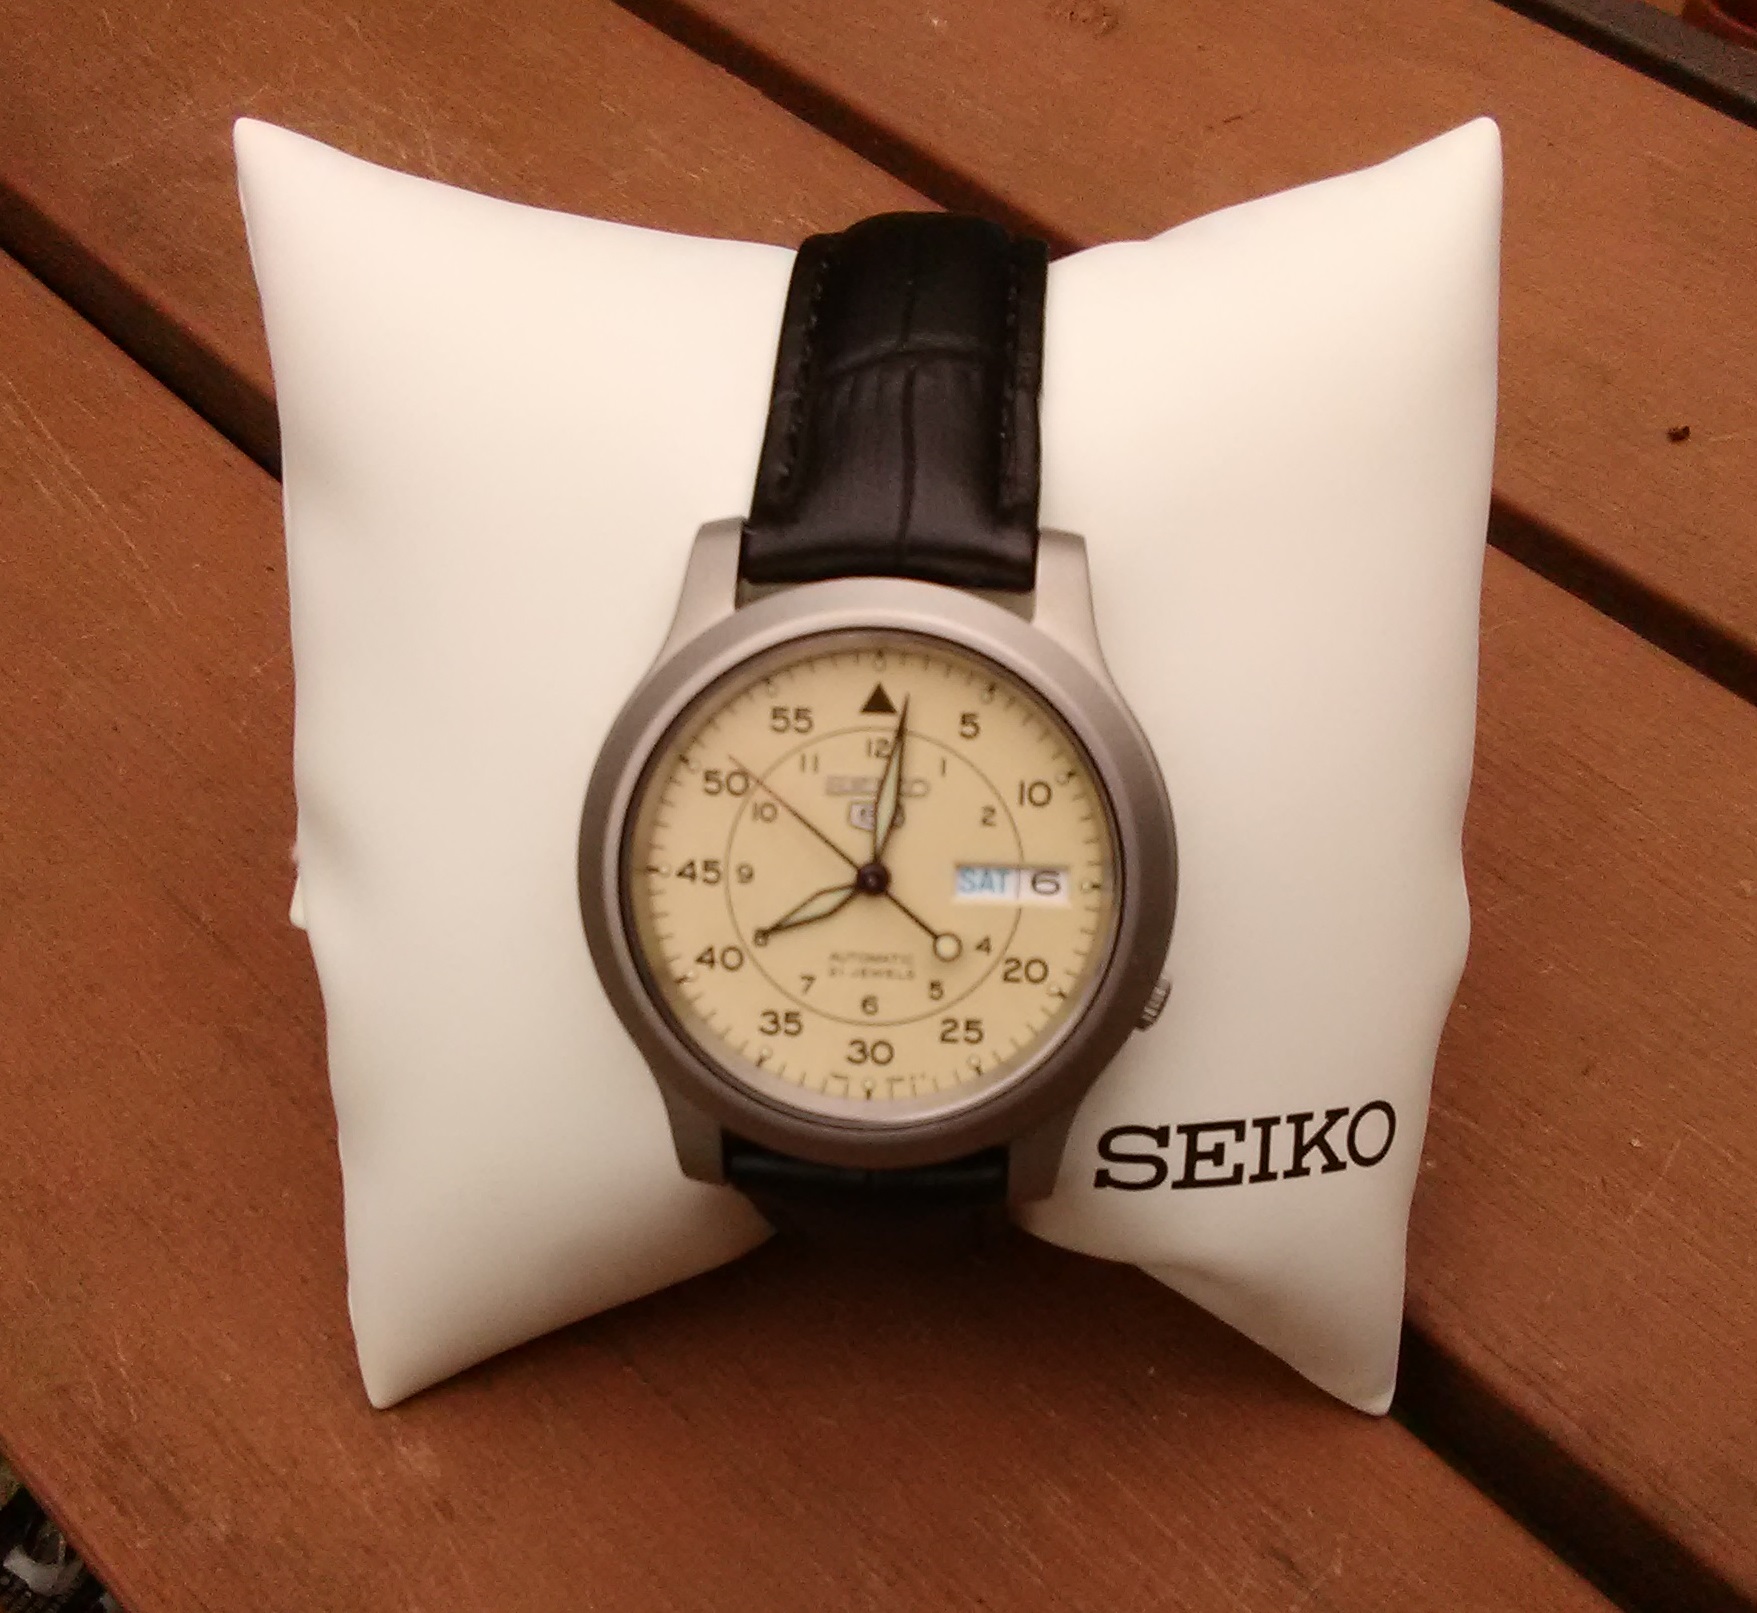
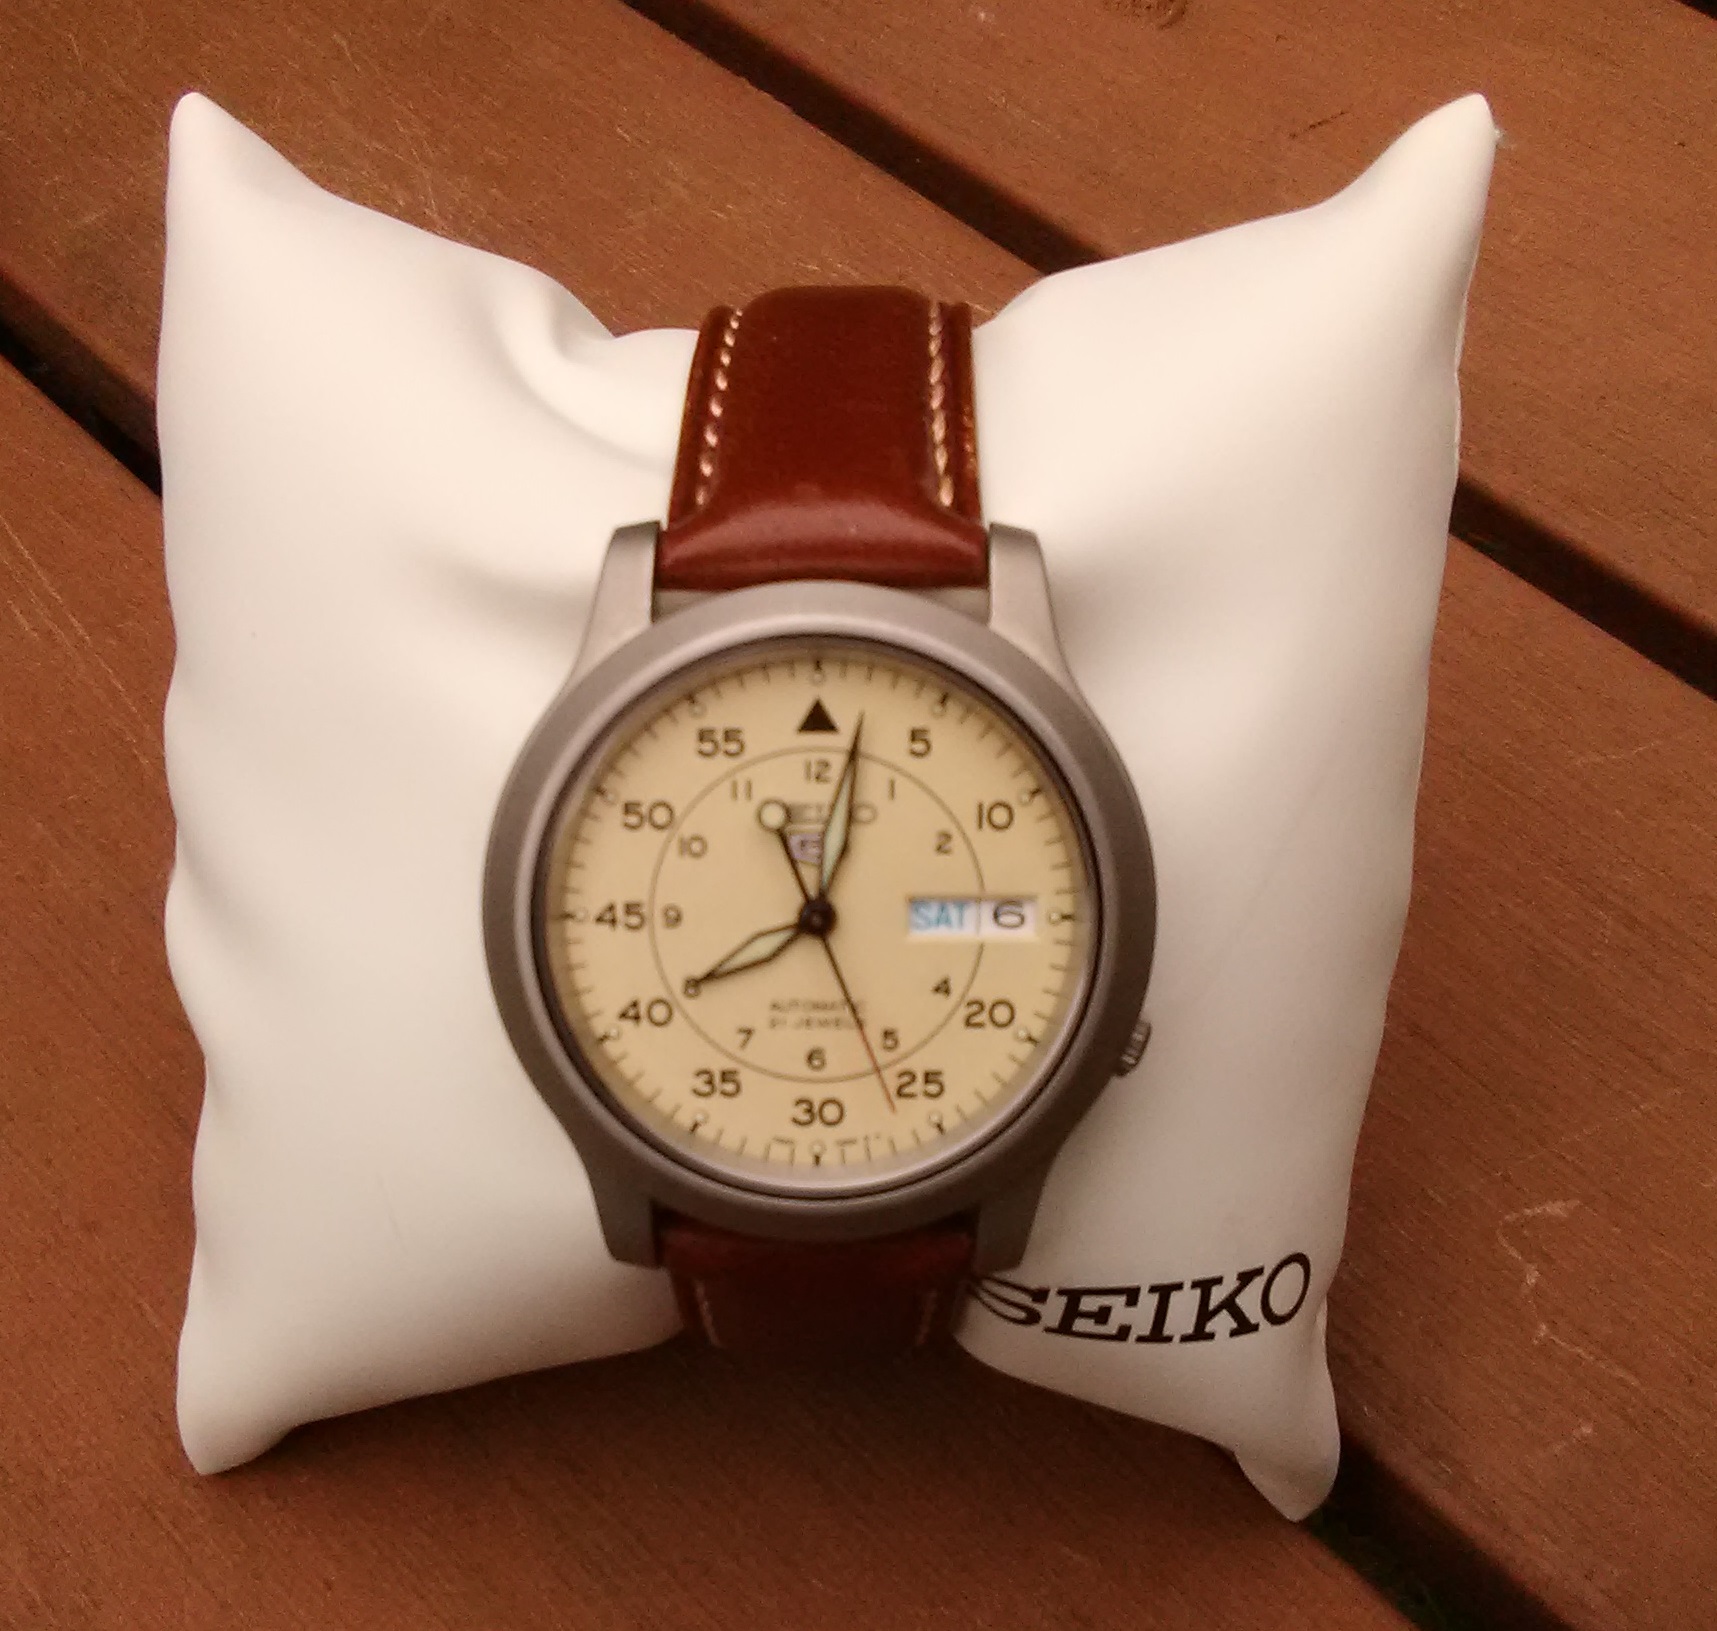
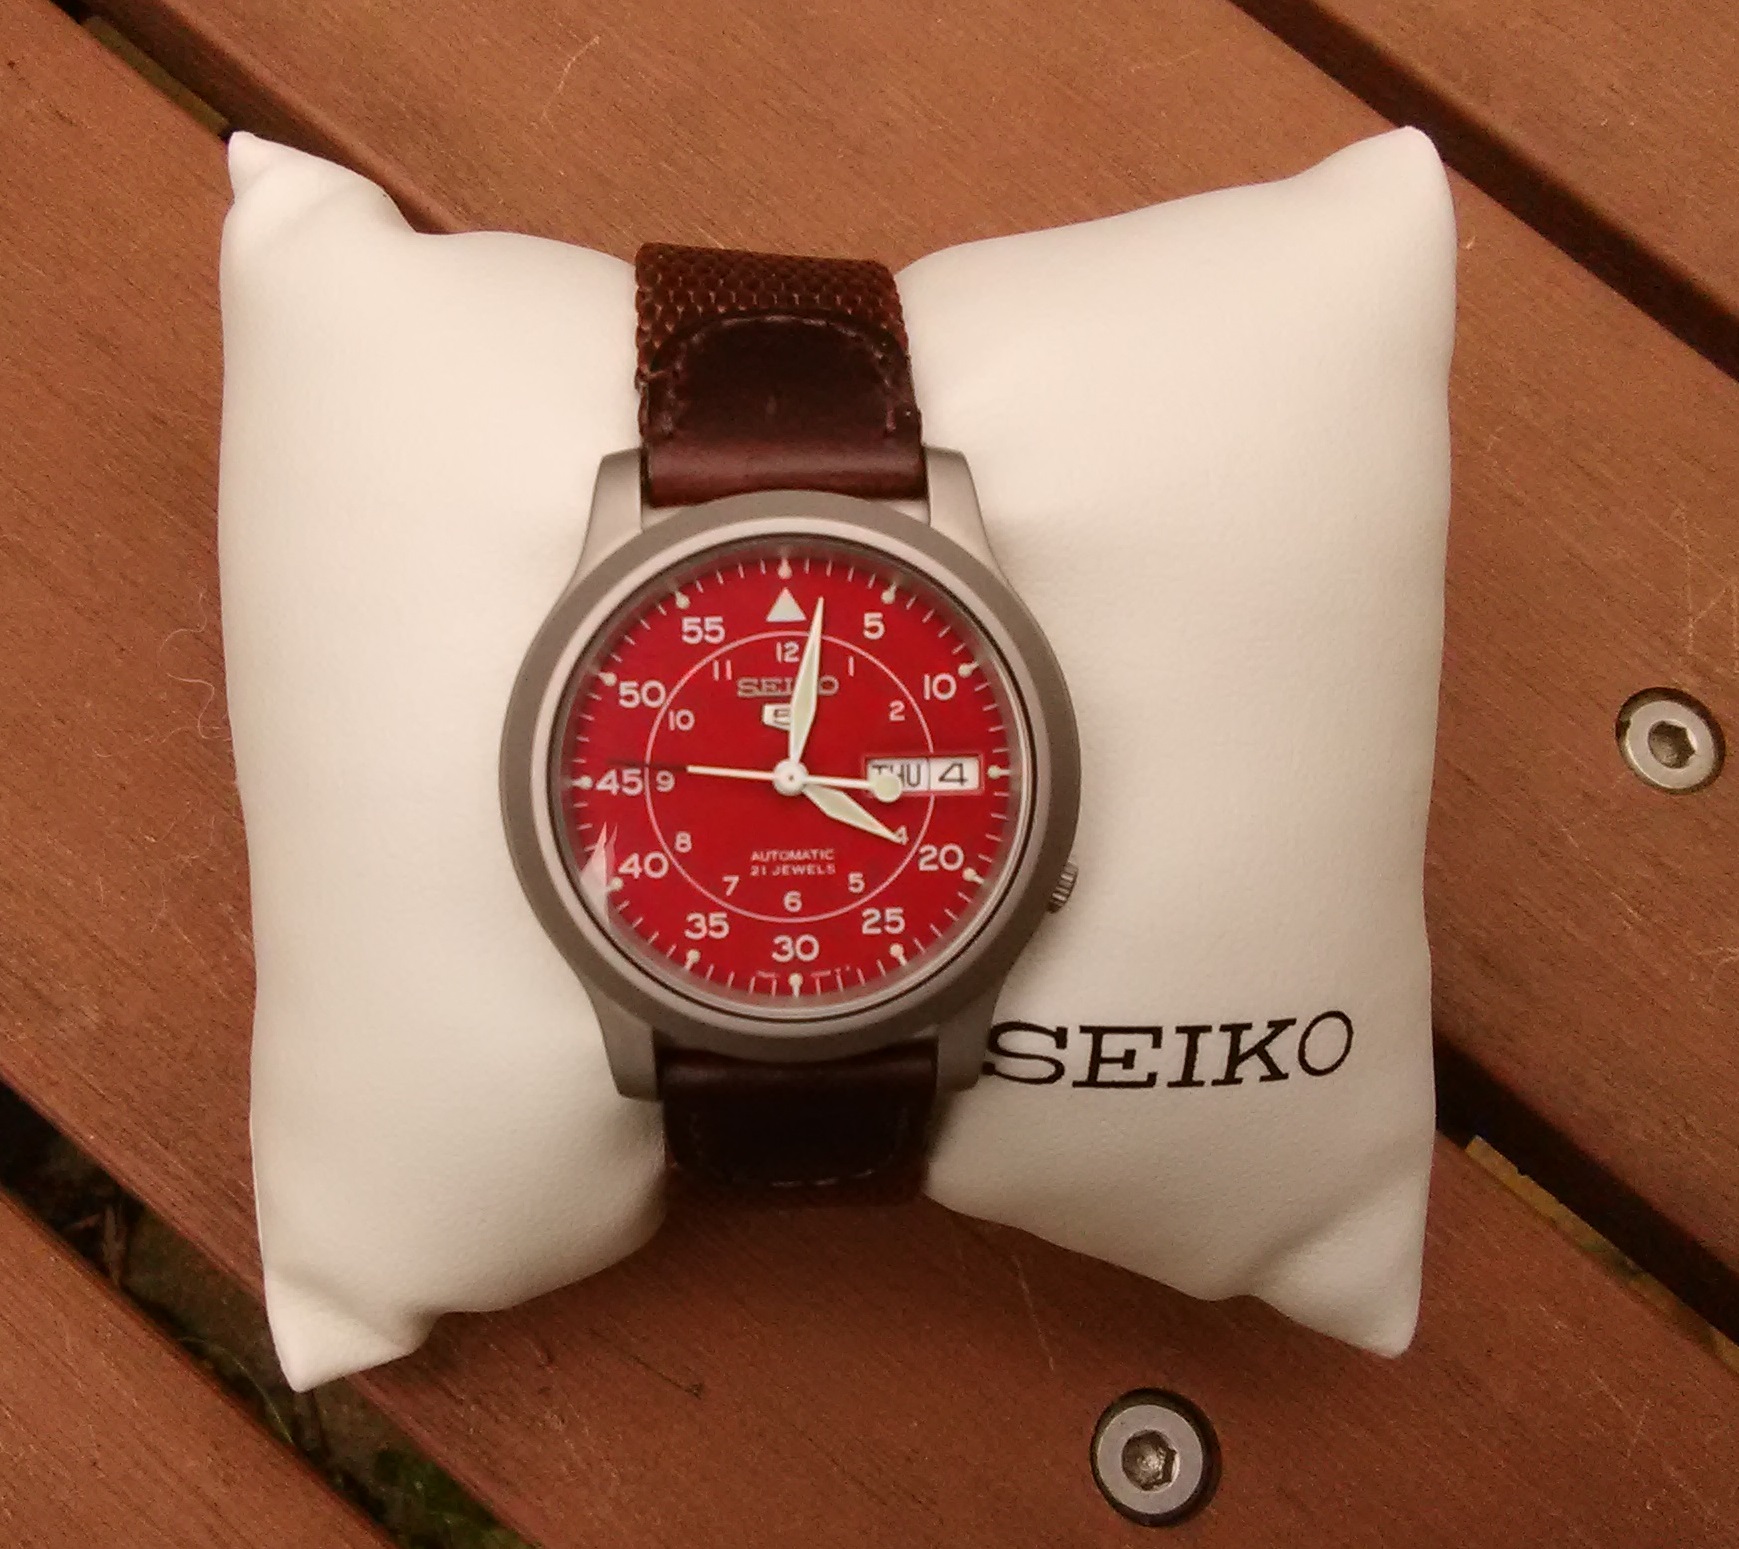
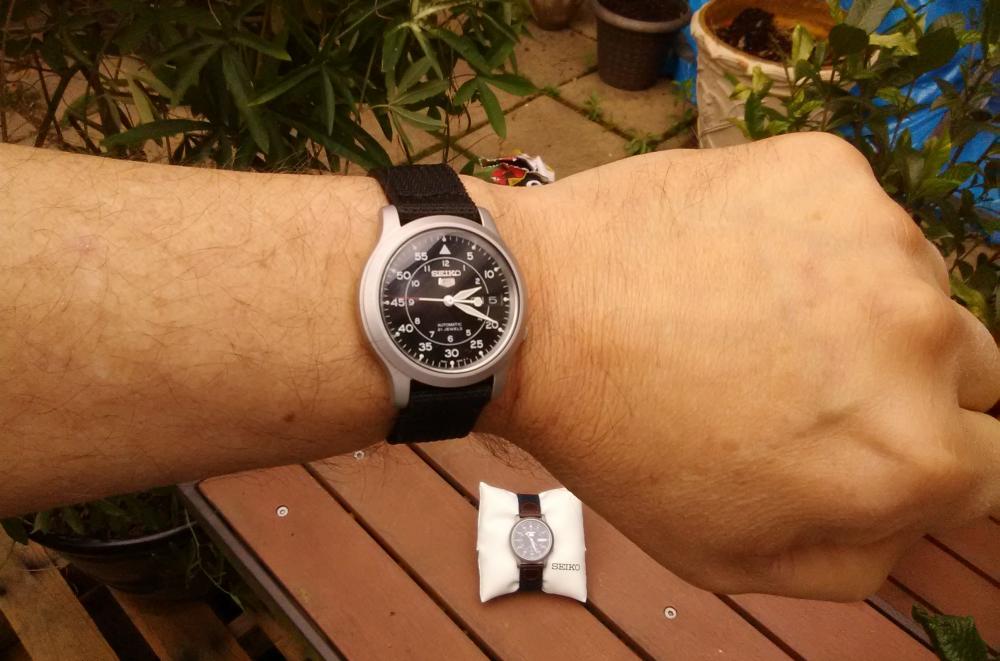
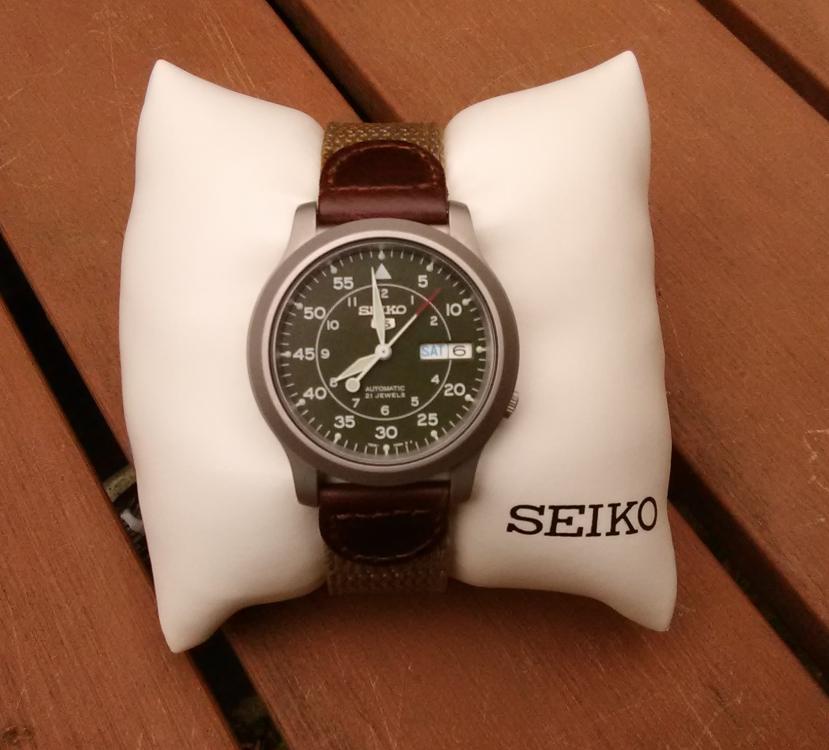
Yes, I know... These are not the fanciest timepieces in the world but, I'm very happy with them. Every day, I select the one that best matches my work attire. I tend to wear the black one in the evenings and on weekends. They are all the same model of Seiko 5 (7S26C movement) in different colors. They are dressed up just a bit with different bands obtained on Amazon from Hadley Roma (cloth leather) or iStrap (cowhide). The iStrap versions have a nice deployment clasp. Perhaps you've seen from one of my other posts, I purchased a timegrapher and regulated these. They are all keeping time to a few seconds per day -well within 10s. Two of them are essentially dead-on within 1-2 s/day. Just about each one needed a slightly different method of regulation. I've done a good bit of metal-work over the years but nothing artistic or related to jewelry. My goal is to remove the ring around the crystal on some of these and modify it somehow... -perhaps bright-polish them or hand engrave a simple pattern. Another thought is to machine a ring groove and insert a corresponding bronze fitting. I have sufficient equipment to modify these any way I wish -or make an entirely new case if I wanted to. The real problem is that the artistic part of my brain insists that I hold my crayons with a closed fist. We shall see... It's just a thought for now. Ray


 1 point
 -
Demand gets the price up. Unfortunately a lot of this wheels are broken and they are therefore hard to find. That is why the price is high. As for the question if the wheel need to be replaced? Could be that it needs a clean? And that all it needs is to be proberly adjusted. Check the spec how you adjust the chronograph function. Is it an A or B movement? The A chronograph is more prone to bad wheels? Nice watch btw https://docs.google.com/viewer?a=v&pid=sites&srcid=Z2xlYXZlYW5kY28uY29tfHRlY2huaWNhbHxneDo1MjlmNzBlMThlMzQwYTUx1 point
-
I would like to see what you are refering to in what you say is a ring groove and bronze insert . That takes some skills and tools that I don't have . I like dadistic's idea of the domed sapphire crystal . I have several seiko divers I have fitted withe the double domed , blue tint crystals from Crystal Times and I like the look , and get compliments on them as well as install them on other peoples watches . I think that Crystal times has a gallery displaying customers watches including some of mine .1 point
-
Go for it! One thing I've wanted to do with my SNK809 is replace the flat mineral crystal with a CT063 domed sapphire one from Crystal TImes. I think it would give it a more vintage look. And hey, if you can pull off engraving, you can always find inspiration in the engraving styes found on vintage watch bezels!1 point
-
Welcome! I envy the fact that you have lots of tools to begin with! Best wishes to you.1 point
-
I have 3 Movado watches that I replaced the movement , The ETA 902-002 and each one of my customers come back in days or weeks later and say it is gaining, losing or not working at all yet when we have the watch it runs fine each time after the third time the watch came back to us I took all three into NYC to our Watch Maker we do business with and he had for two weeks and found nothing wrong with them. Now I have one customer coming back in our store with watch saying it ran fine for 2 weeks than in 1 night it gained 20 min. Have anyone else have this experience?1 point
-
Here's a couple and then for something a little more affordable (Ingersoll) Sent from my SM-T585 using Tapatalk1 point
-
I think that the point is not starting with pocket watches or anything else, but strip and put back together some junk movements first. Like a small lor of Seiko from eBay. That way one develops the manuality and the approach needed to increase the chanches that when working with something of interest which was working before, it will still work later.1 point
-
Just a standard drinking glass of warm water and 1 tablet for 3 mins, I think you should be safe with the numbers as the cleaning is very gentle1 point
-
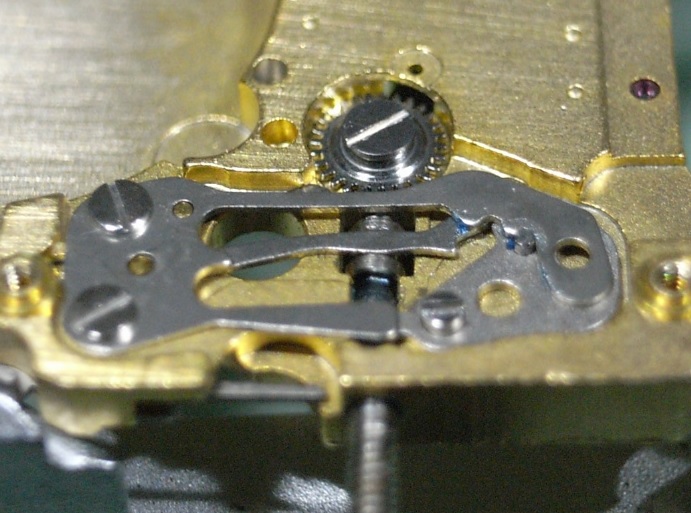
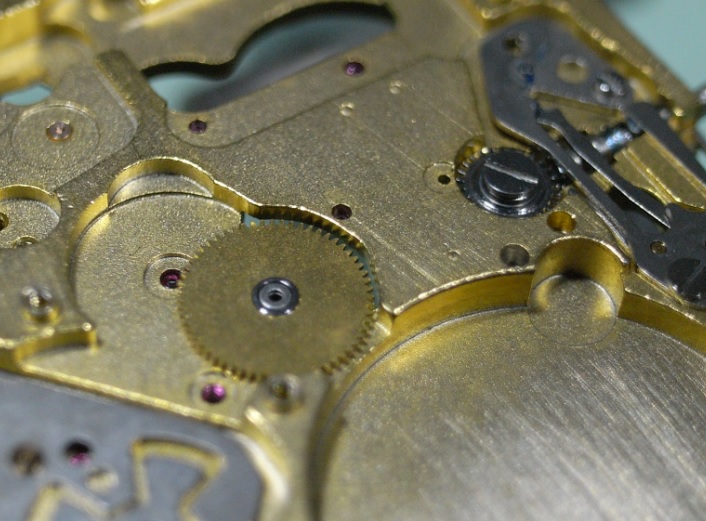
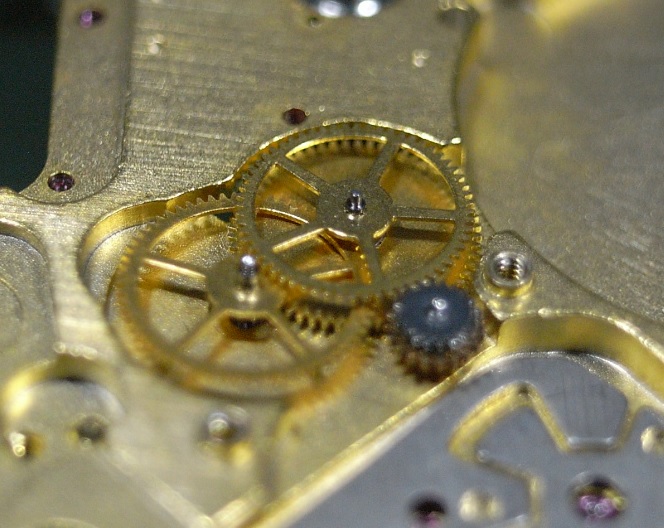
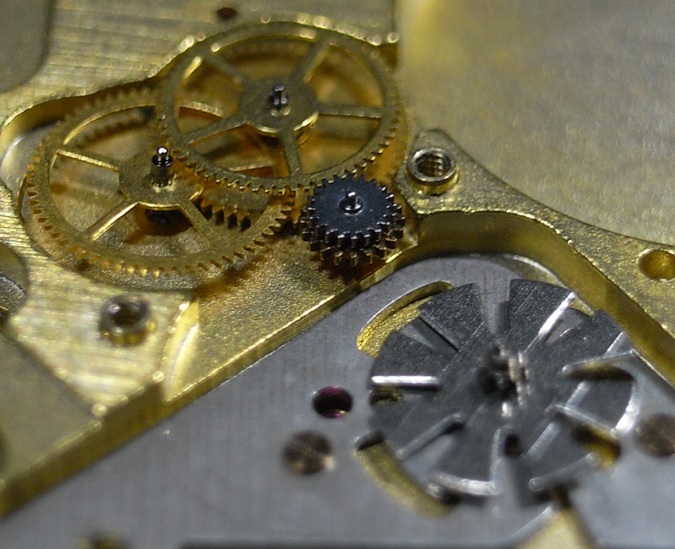
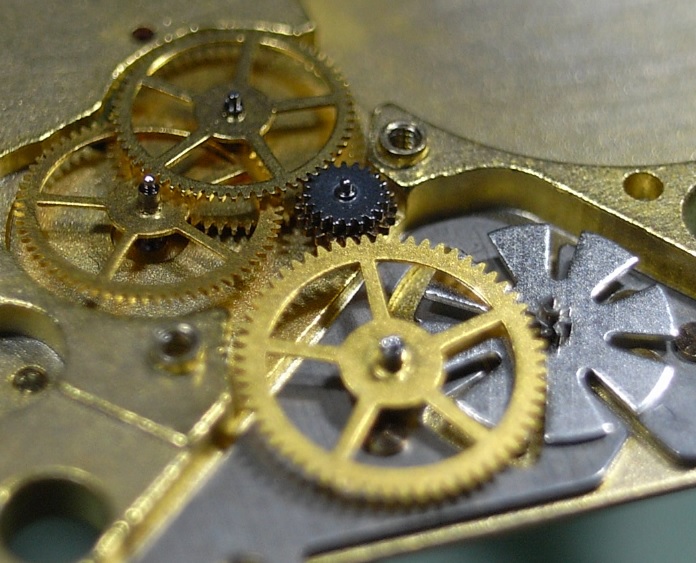
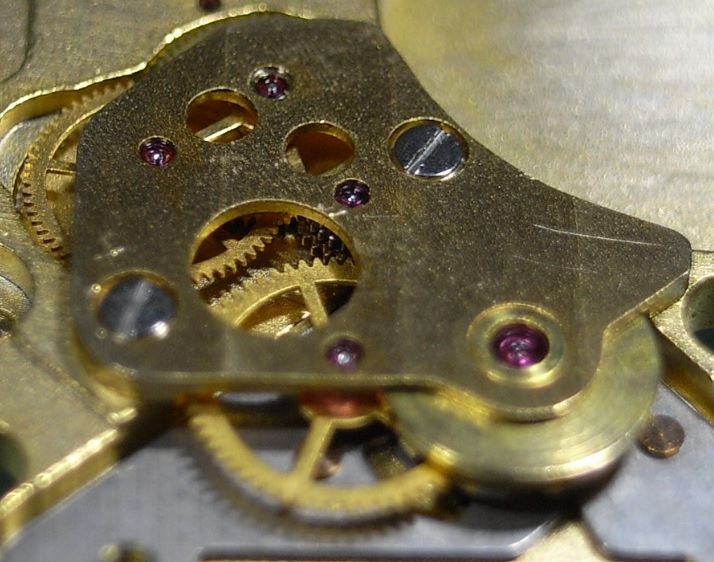
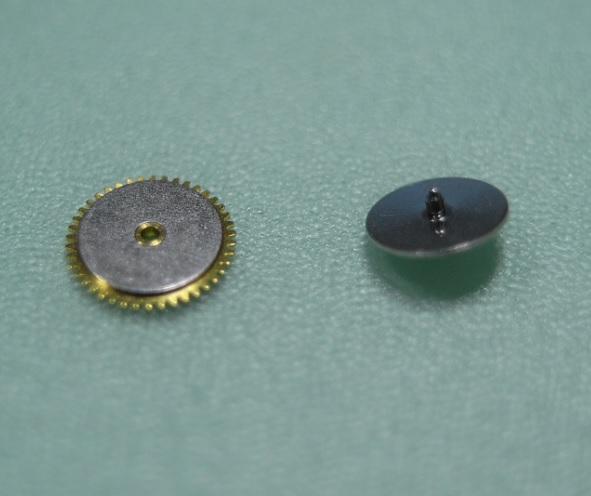
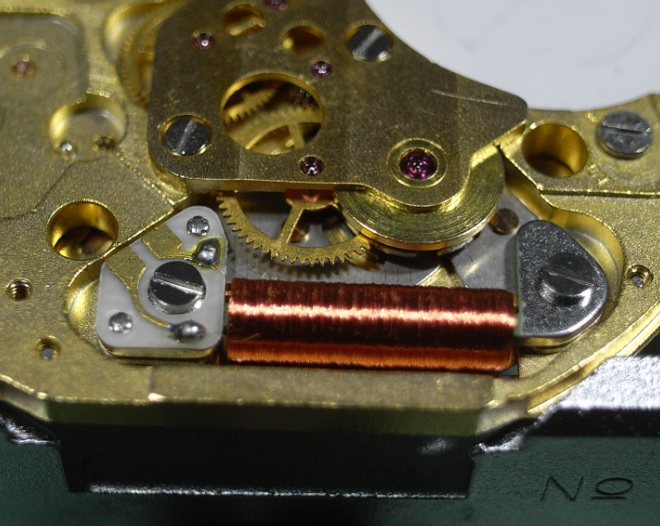
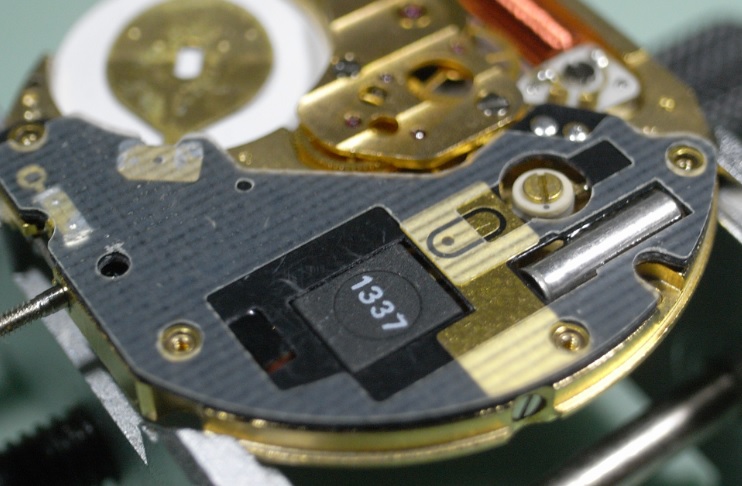
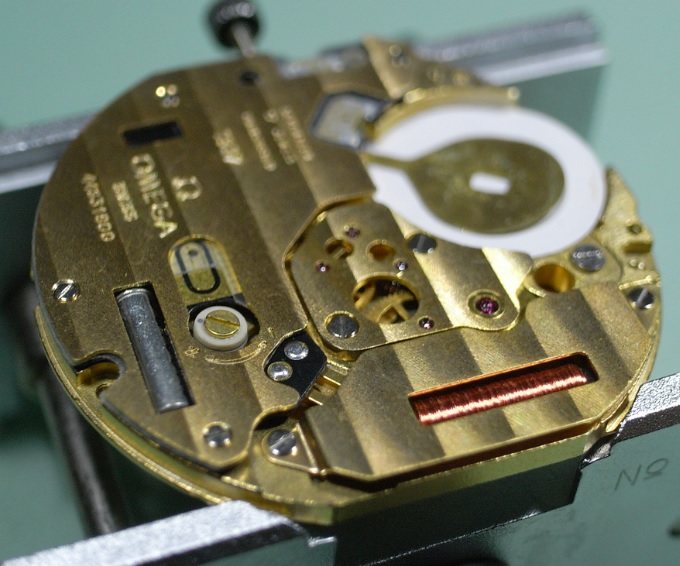
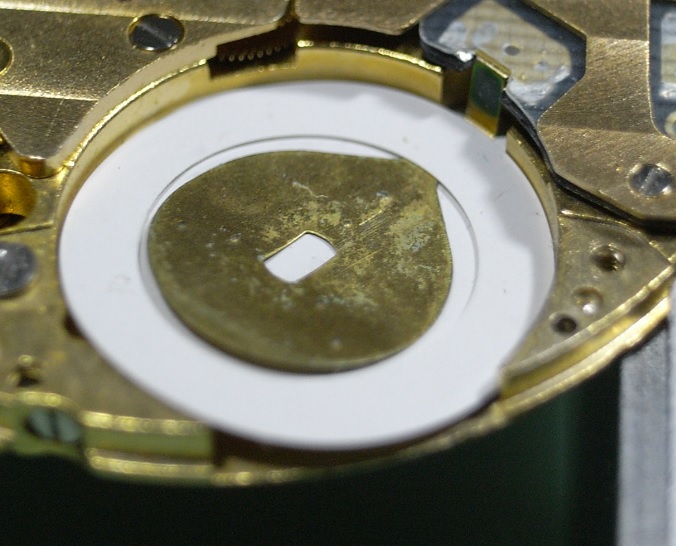
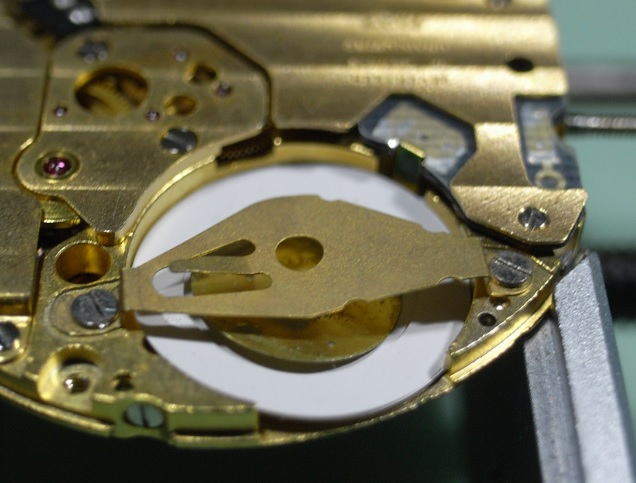
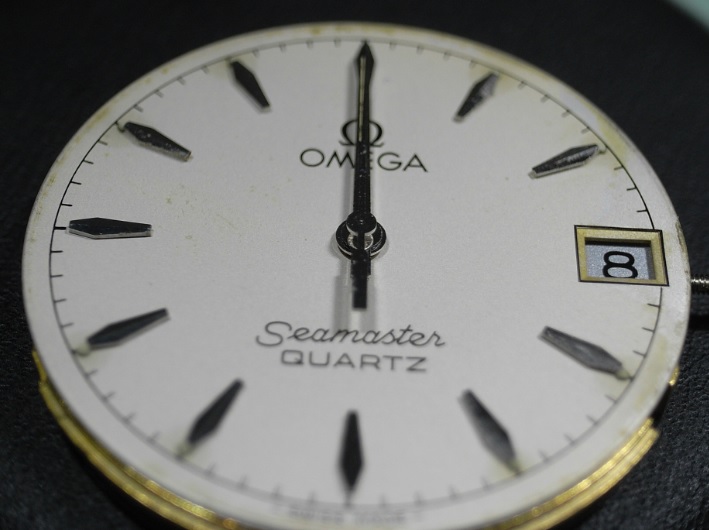
Unfortunately I do not have an exploded diagram of this movement, with the correct terminology for the parts or the factory oiling procedures. The following is my own procedure for assembly, and I will leave the oiling to your own discretion. Personally I used Moebius Quartz Oil and Moebius 9501 for the Keyless Work. If anyone has a copy of the 1337 Technical Document please upload it to assist others. Assembly I started with the Keyless Work... Lubricate the Stem and install the Sliding Pinion and Stem. Also screw in the Setting Lever Screw. Install the Yoke and place the arm into the slot in the Sliding Pinion, and replace the Setting Lever. Install the Setting Wheel and fasten down. The last part of the Keyless Work to be installed is the Setting Lever Spring. Next install the train... Install the Minute Wheel, being sure to replace the small washer. Install the Intermediate Wheel and the Second Wheel Driving Pinion. Next install the Second Wheel. The lower jewel for Rotor is a blind pivot point, this needs to be lubricated BEFORE installing the Rotor. Install the Rotor. And lastly install the Third Wheel. Carefully install the Train Bridge, be careful to check the free running of the train before tightening fully. Next flip the movement over and proceed to install the Motion and Calendar Work. Firstly make sure the Magnetic Friction Wheels (Cannon Pinion) are very clean. Especially the flat plates between the wheels. Install the Magnetic Friction Wheels (Cannon Pinion) Then install the Calendar Setting Wheel. Next install the Motion Work Setting Wheel. Install the Intermediate Date Wheel. Lastly is the Date Indicator Driving Wheel and the Hour Wheel. Now all the wheels are installed you have to time the Calendar Setting Wheel, Intermediate Date Wheel, and Date Indicator Driving Wheel. This will take some study to setup correctly without the documentation; but take your time and you'll find it will become obvious how these wheels interact with each other. Once you have set the timing up, replace the Calendar Ring and Date Indicator Maintaining Plate. Then gently hold the plate down with a piece of Pegwood, and with the Crown in the second position, work the wheels and test that the pivots are located in their jewels and the timing of the Calendar Work is correct. Once you are completely satisfied that everything is working as intended, screw down the plate. Flip the movement over again and replace the Battery Insulator. Install the Coil. Install the Circuit and Circuit Insulator. Replace the Electronic Module Cover. Next replace the Coil Protector. Install the Battery Insulating Ring. Install the Battery Clamp. Please Note: The Battery for this movement is the 391/381. Lastly install the Dial and Hands. This completes the assembly of the Omega 1337 Movement. I hope this walkthrough gives you the confidence, steps and reference photos to tackle this movement yourself.


 1 point